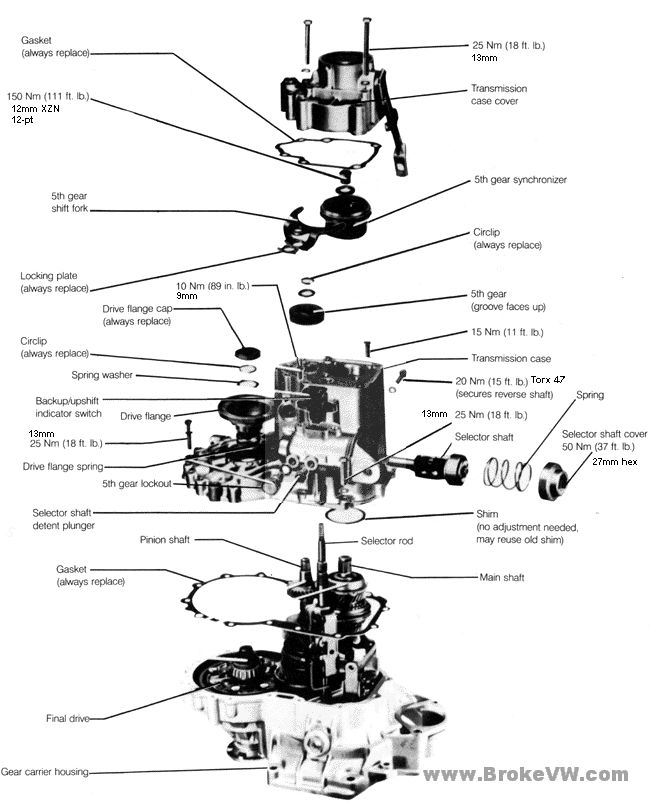
020 Flange Removal
Need to install a shim kit, replace a leaking flange seal, or just swap in a different size flange? These pics will hopefully help out!
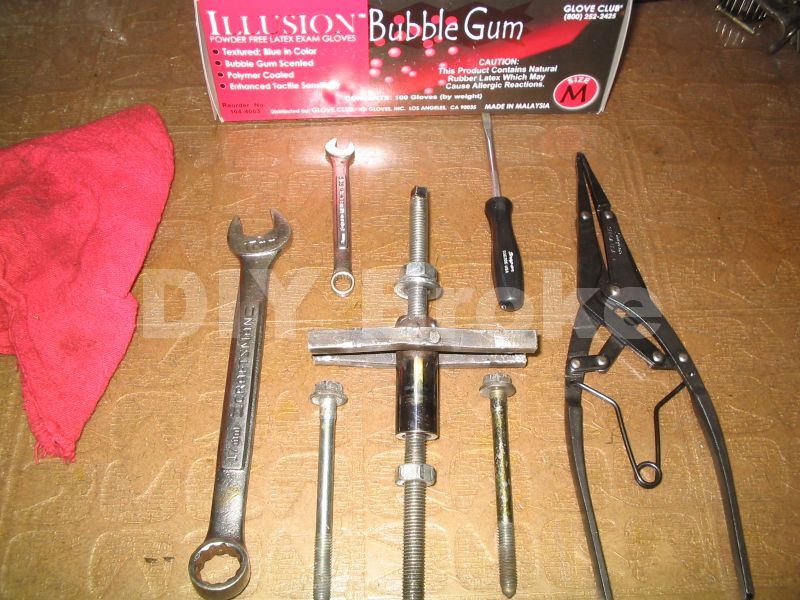
First, a pic of the tools I'll be using to change the flange. Circlip pliers, screw driver, home made flange tool, 17mm wrench, 8mm wrench, and some bubblegum scented gloves.
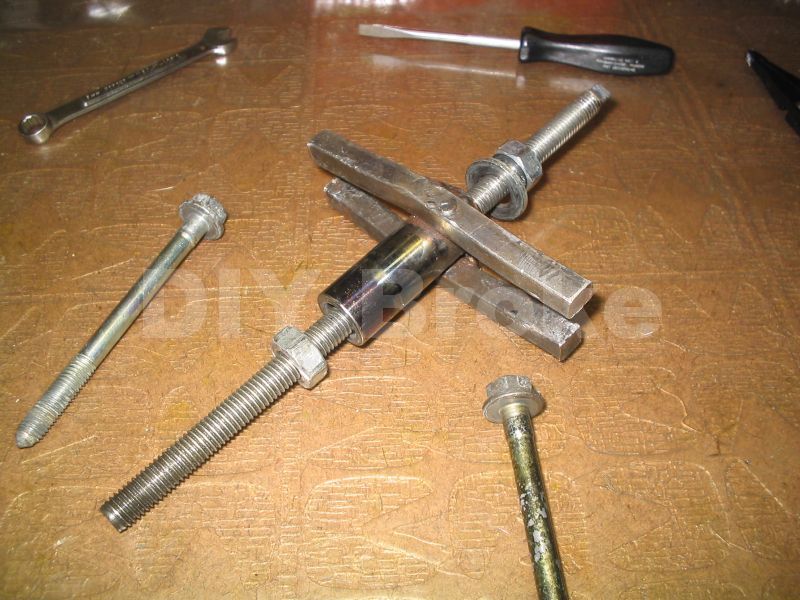
Here is a better pic of the homemade tool. As you will see in other pics, a welder I am not! It is good enough for my needs however blobby it may be.
It is a M10 x 1.50 piece of threaded rod, a couple M8 x 1.25 bolts, a couple M10 nuts, and a tube with a couple of bars welded on. The tube is a piston wrist-pin from a 1.8 8V. I spaced the bars out so they can sit on the head of the M8 bolts when assembled on the flange.
The old tool doubles as a flange puller, but you can accomplish this by threading in 2 of the M8x1.25 bolts through the flange until they hit the trans case, then tighten them evenly to walk the flange off.
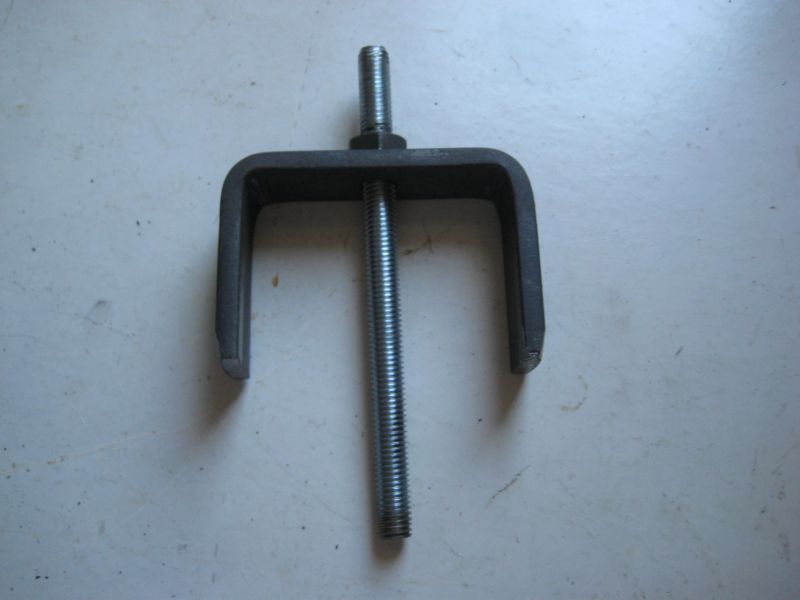
Here is a pic of a homemade flange compression tool I am now making, I have a jig built to fold the steel and make the tool.... actually, that is an older pic, I'm now making them out of 8mm (5/16") thick steel so they are stronger. If you are interested in buying one, I sell them for $30 shipped, just Email Me to purchase one.
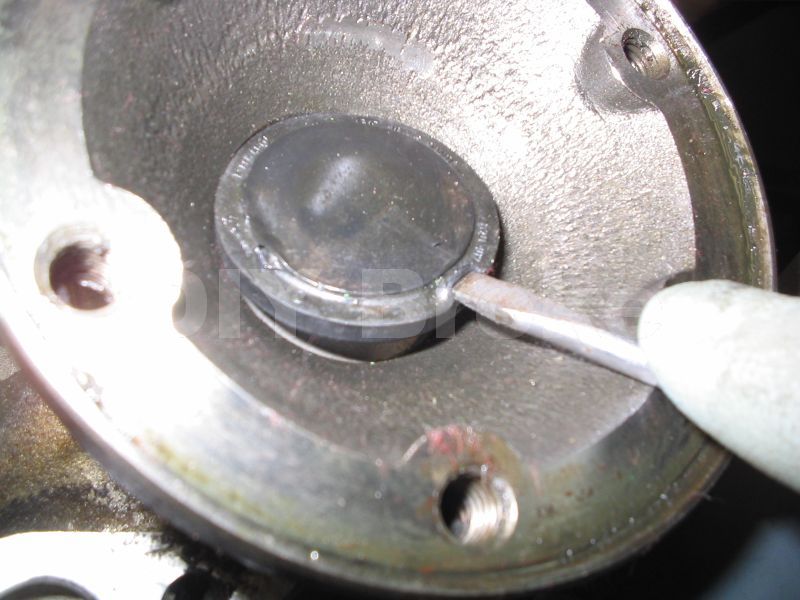
The first thing you will need to do is to remove the center cap seal in the middle of the flange. There are 2 kinds of seals, one with a rubber center, and one that is all steel. On the rubber version seals, you can stab a screwdriver through it and pry the seal out, but on the steel seals, you might find it easier to lever the seal out from the edge.
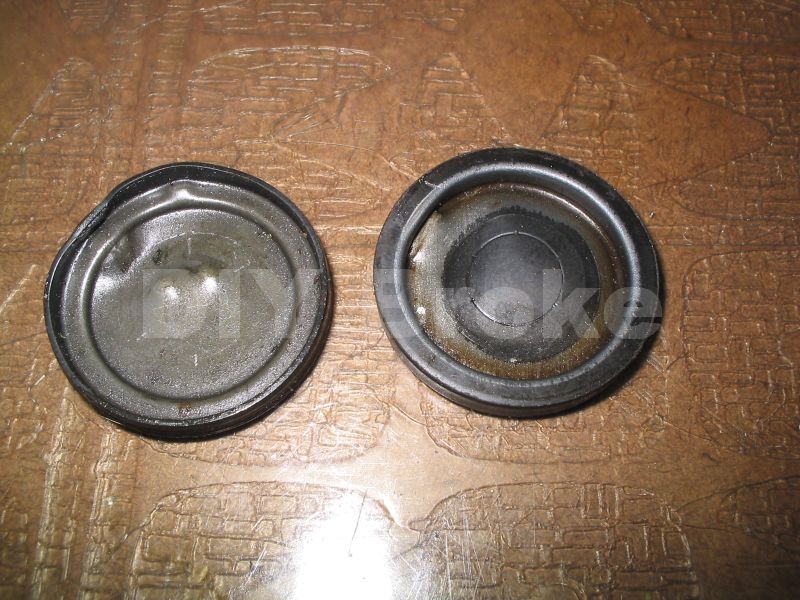
The front of the seals look the same, but poke the center and you'll know if it is rubber or not.
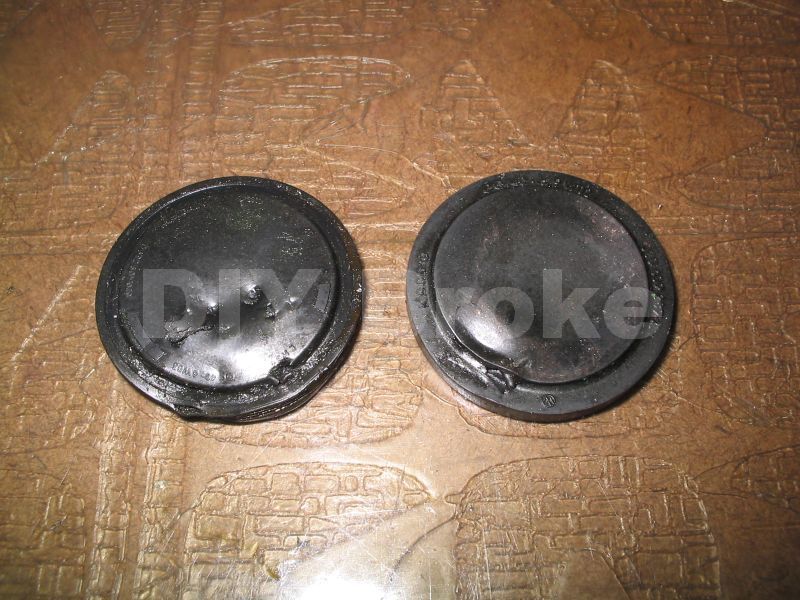
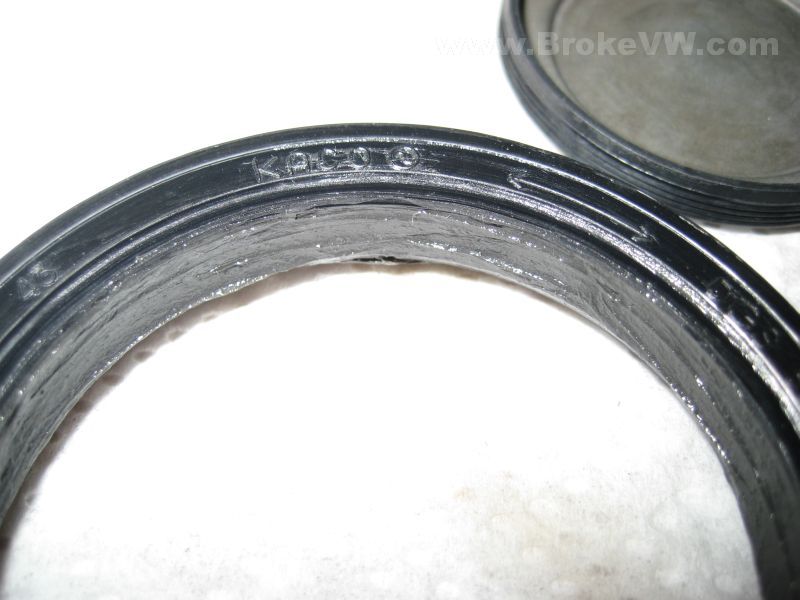
Here is the backside of the above seals, the one on the left is all steel, the one on the right is rubber in the center. You can see where the steel seal has been hit before, and wasn't punctured.
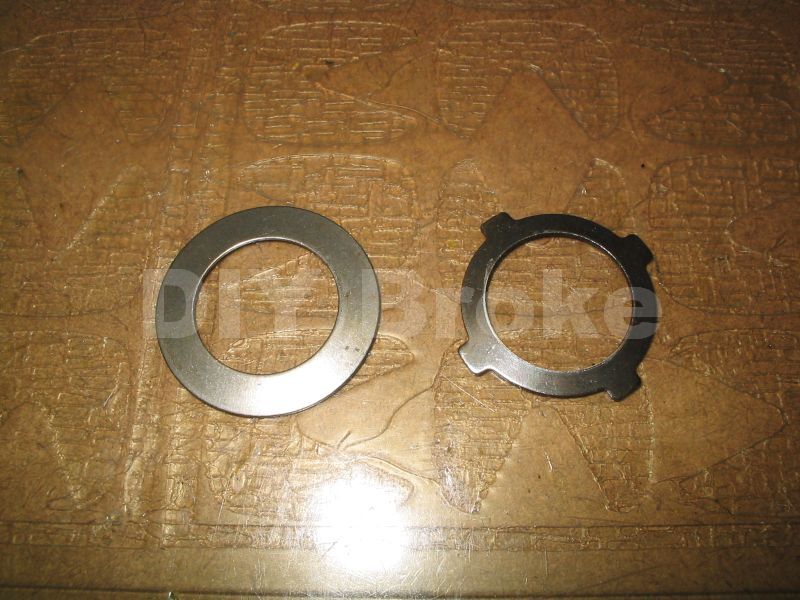
While on the topic of various parts you might find, here is a pic of the 2 types of concave washers that VW used under the circlip that holds the flange. I am not aware of what exactly the difference is, or why the design changed just yet, if you know, let me know:)
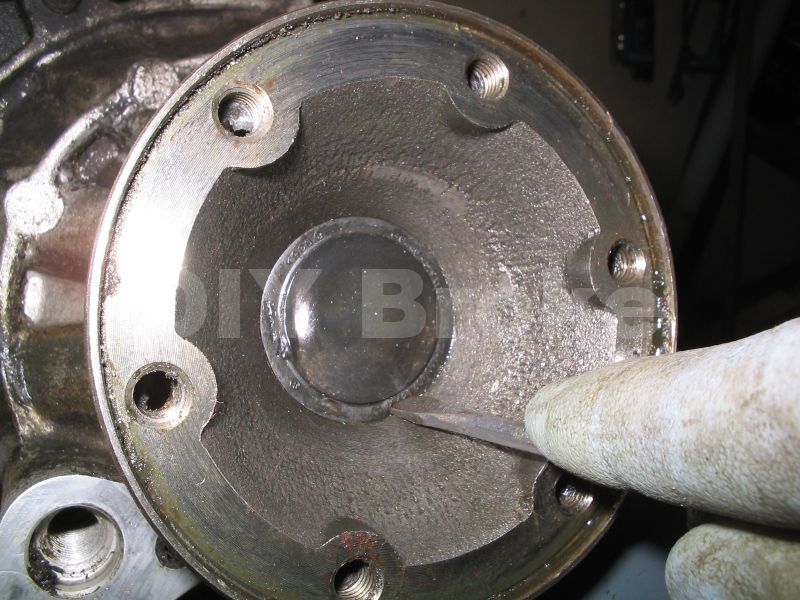
OK, lets dig that center seal out, and for the pics, I used the steel version, and how to pry it out from the side. Be careful not to dig into the flange as you lever it out. Pressing the tip of the screwdriver into the soft rubber and levering will usually pop the seals out.
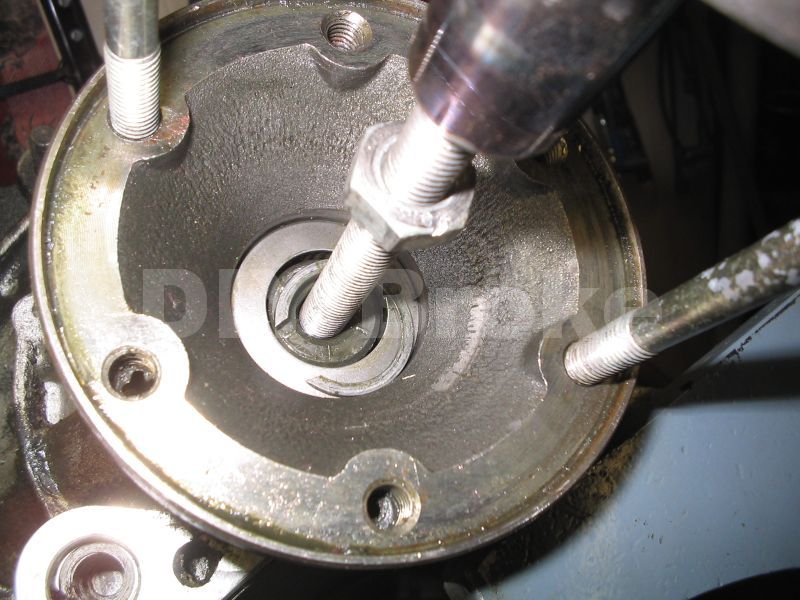
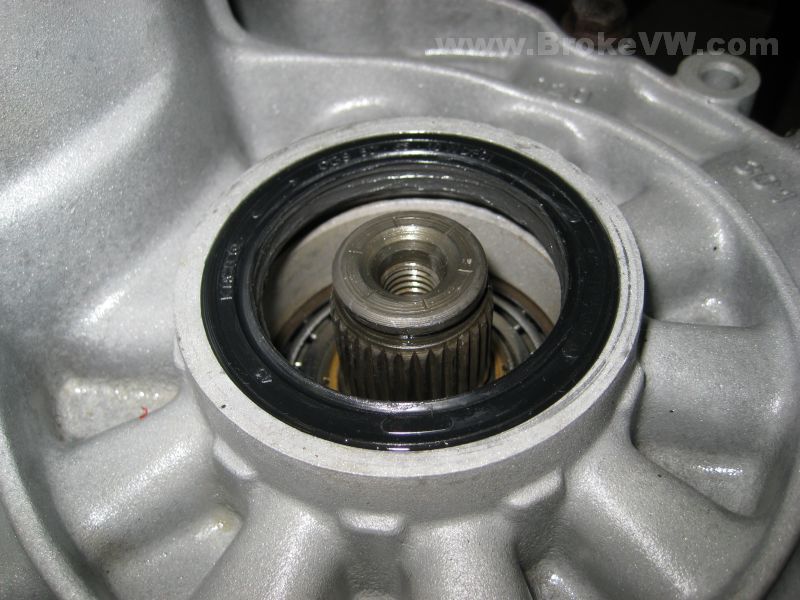
OK, the seal is out, the circlip is exposed, and it is time to remove it. At this point, you can just knock the circlip out of the groove with a screwdriver, yank it out, and the flange should just pop up off the shaft.
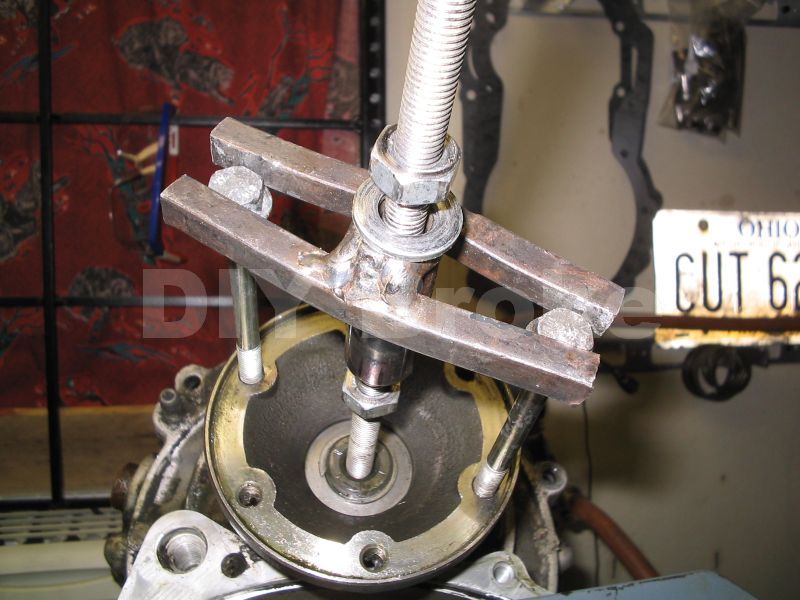
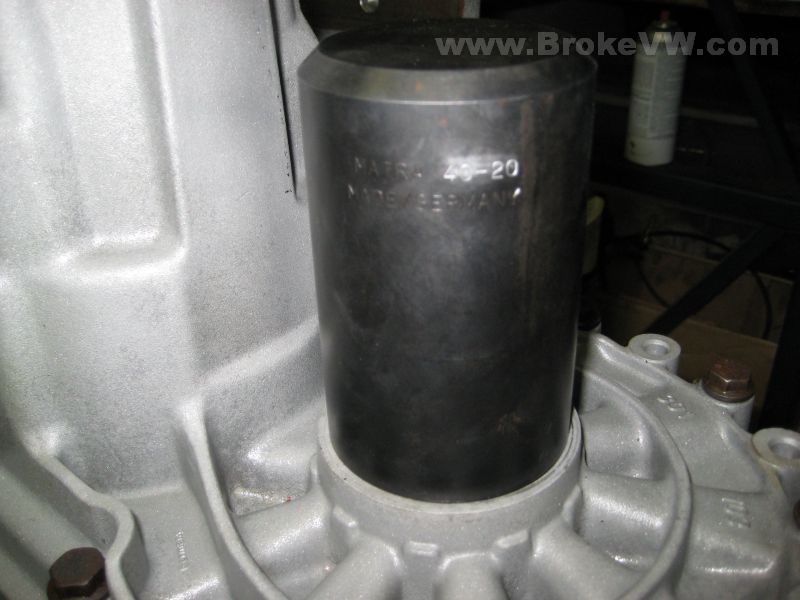
For the pics, I will show the tool being used to compress the spring behind the flange to make the circlip easier to remove.
Thread the M8 bolts into the flange and thread the M10 rod into the center of the stub axle in the middle of the flange. Bottom the M10 bolt and snug it up. Place the bars of the tool over the tops of the M8 bolts, and now tighten the top 17mm nut to force the tube/bolts/flange down, and release the spring tension on the circlip.
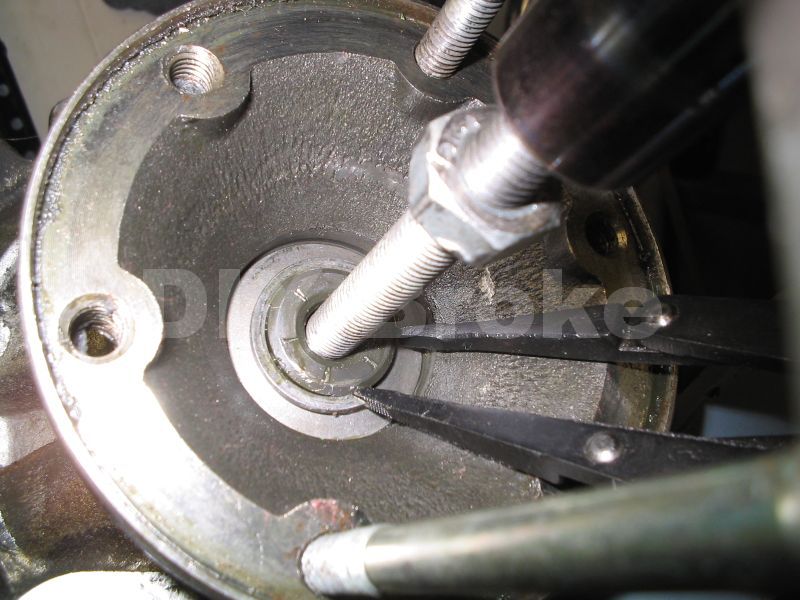
Reach in with your handy-dandy circlip pliers, a good set of these are priceless when fighting a circlip in a confined area such as with the flange. These are Snap-On SRP5A pliers, and they work pretty well.
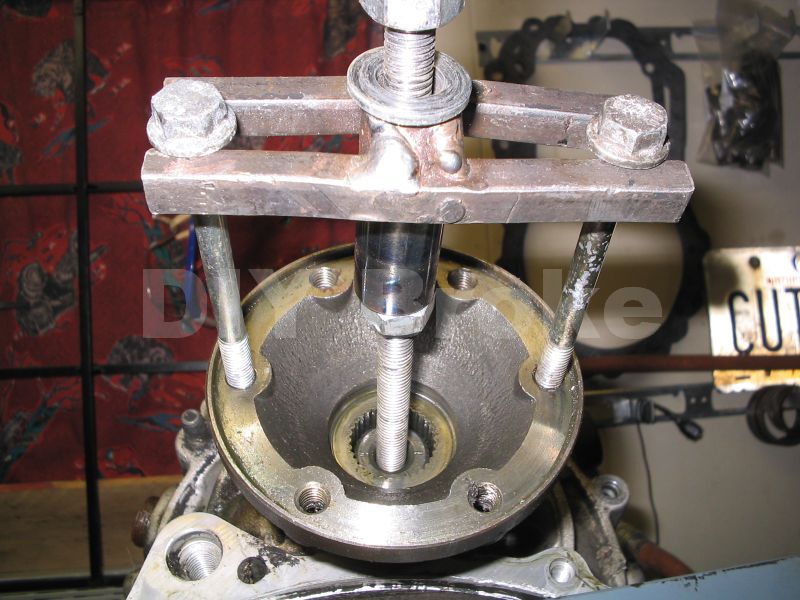
Once the circlip is removed, release the tension by backing the flange tool off
The flange most likely will pop off under the spring pressure and remove itself from the stub axle, but if it doesn't you can either thread in a couple M8 bolts into something solid behind the flange, and drive the flange off by evenly walking the bolts in....or you can reverse the use of the home made flange tool, and place the bars under the M8 bolts, and unscrew the bottom 17mm nut, and it will lift the flange off the axle stubs.
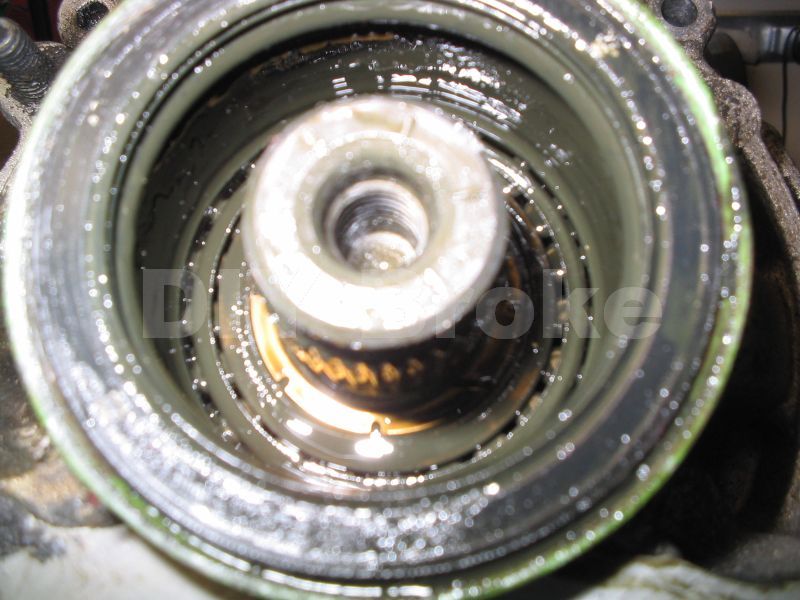
Once the flange is off, you'll be able to see the diff carrier taper bearing, and the stub axle, and then the bronze conical thrust ring. It very well may be in more than one piece. Normally, they are not a complete ring, and they do have a gap which looks like the ring has broken, but it is supposed to be there. If the ring is broken, it will be in more than one piece.
If it is broken in, say, 2 or 3 clean pieces, then it can be re-used, because once assembled, the pieces cannot go anywhere, and they'll still do their job.
They were added in there, along with the springs, to stop the stub axles from making a noise because of slop in the parts. The rings and springs add a bit of tension to the stub axles, and make them quiet. This tension is what is increased by the 40% and 80% shim kits.
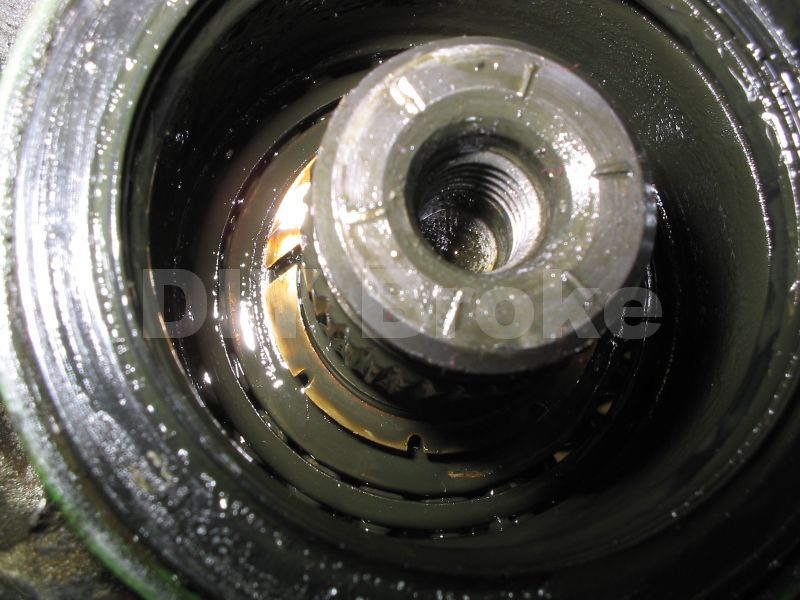
Here is a better pic of the split in the ring that looks like a crack. To get the ring out, use a small pick or screwdriver to spin the ring around, and this will break the surface tension of the oil, and allow it to be slid off of the shaft.
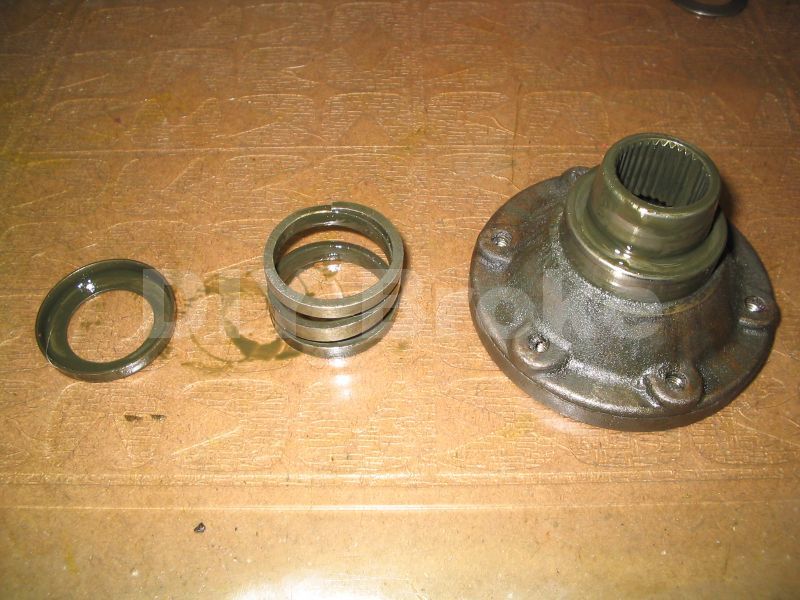
Here you can see the flange, the spring that fits onto the bottom of the flange, then the spring cap.
The install is pretty much the reverse of the removal, to remove the flange seal, simply lever it out once the flange is removed. Be sure to coat the new seal in trans fluid to allow the seal to be installed smoothly. Also pack the inside of the seal lips with grease.
Use a tube the right size to allow you to press the seal in fully...
There is a spring behind the dust lip of the seal, don't allow that lip to roll up or the spring could pop out, and result in a leak.
When installing the circlip, VW suggest the use of special tool 30-23 to help seat the circlip in the groove if needed. The special tool is just a tube with an ID of 26mm to fit over the stub axle, but still catch the circlip. Use it to knock the circlip in and seat it fully.
Instead of the special tool, you can simply walk around the circlip with a flatblade screwdriver, shoving it into the groove and seating it fully by tapping the screw driver with a hammer as you seat it. Start in the middle, and work your way to the each end of the clip until it is fully seated.
Pop in a new cap seal in the center of the flange, and the job is done.
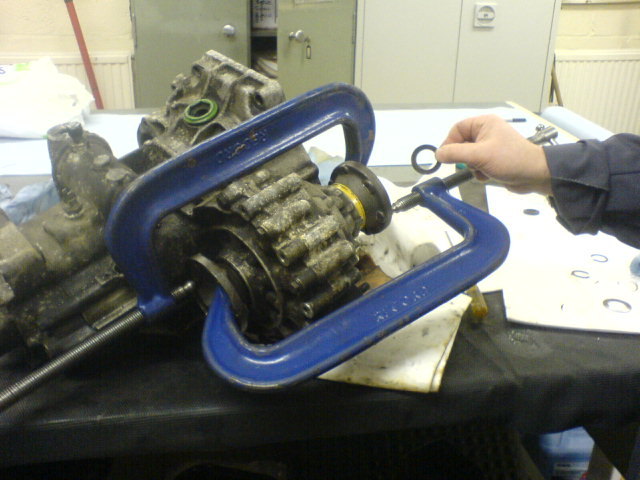
Here is a pic of how to use big clamps as the compression tool, thanks to 'nobber' for the use of the pic!
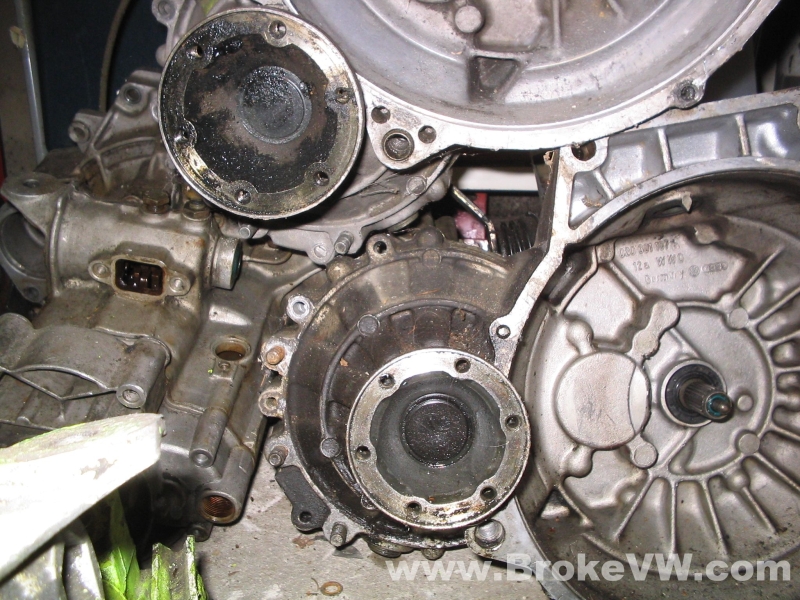
A pic showing the 100mm next to a 90mm flange on the trans, the 90mm is on the bottom trans.
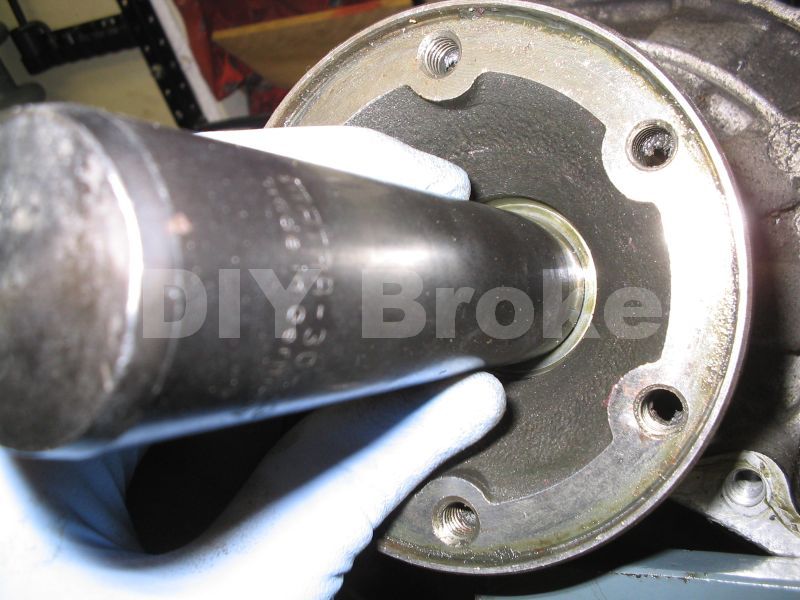
Where to measure across to get the 90mm or 100mm measurement.
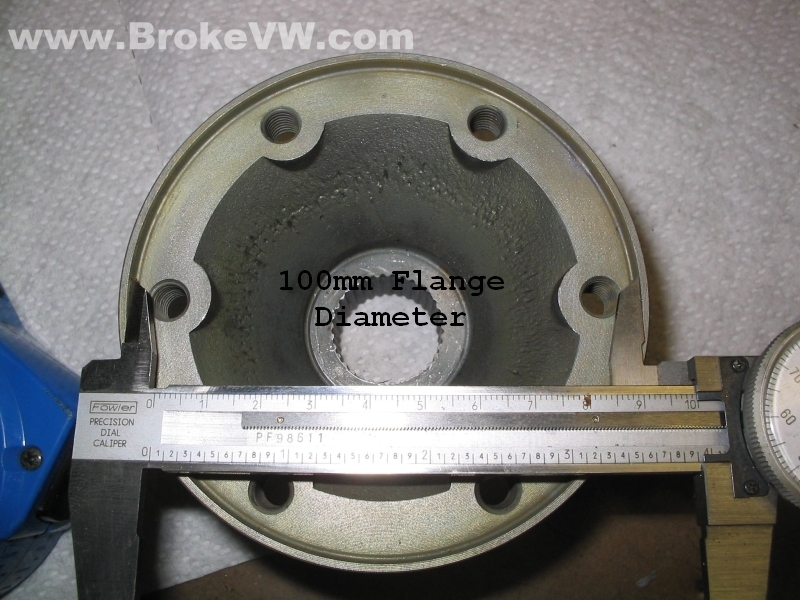
You can also measure the inner CV joint itself, and determine the size.
Take a piece of string and wrap it around the inner CV joint, right where it fits into the flange.... mark the string where it meets itself, so you know how far it is around the CV joint. Measure the string.
A bit over 11" (11.13) and it is a 90mm
CV/flange.
Just under 12.5" (12.36) and it is a 100mm CV/flange.
Flange Seal Info
There are 2 types of seal, the new types are 50x65x10 in size, while the older seals are 36x58x15 in size. The new seal is 7.5mm wide, and the old seal is 11mm wide, they're sometimes called 'fat' seals. The fat seals can be found on trans before 1983 and you can quick check to see if the trans has the old seals or the new seals... look for the green sleeve.
The green sleeve on just the passenger side means it has all new style parts (flanges, seals, springs, thrust cones, diff carrier), and this will be a 1983+ trans. The factory also released some I think that used 2 green sleeves, one on each side, and it was during the transition period I think between the 2 case designs for the new seals. These trans will have all new parts, but the case will be older.
A trans without any green sleeve is going to be an older unit, and it will use the old fat seals.
The seals being used will tell you about the flanges... there are old and new style 90mm flanges, and then there are 100mm flanges. The 100mm and the new style 90mm flanges use the new style seals, the 50x65x10 seals. The old style 90mm flanges use the old fat seals.
Converting a 100mm trans to 90mm
You can't put the old style 90mm flanges or seals into a new case, the hole machined into the aluminum is too large. You have to use new 90mm flanges in the new seals to make the trans 90mm. The new 90mm flanges will fit right into the existing seals and sleeve and will be able to use the springs and cones behind the flanges.
Converting a 90mm trans to 100mm
If the trans has a green sleeve in it, then it is new style, just find some 100mm flanges, and pop them in. If it has 2 green sleeves, it should be a direct fit, but if you find for some reason that there are no springs or cones behind the old flanges, then you can still use the new 100mm flanges, just without the springs and cones... the diff carrier inside would determine if the cones and springs can be used (basically, if you have a place for the cones in the carrier), but either way, the new 100mm flanges can be used if the trans has 1 or 2 green sleeves.
If the 90mm trans has no green sleeves at all, then it has old style 90mm flanges, and it is using the old style fat seals, and has no springs or cones behind it, and likely the diff carrier can't use them anyway. To make them 100mm, you need 2 green sleeves, 2 new flange seal kits, and obviously a pair of 100mm flanges. The green sleeves will convert the small holes into larger holes, and allow the new seals to fit, then the new flanges can be used, and the trans will be converted to 100mm. You can also choose to do this and then use new style 90mm flanges, to replace the old style 90mm flanges.
Some older trans will need grinding done on the side of the case for the drivers flange to clear, RonP has some info about the grinding, and also about converting the old trans to 100mm. Here is a link to Ron's page which has info on converting an older trans to use the new seals... http://scirocco.dyn.dhs.org/cheapassron/020tranny/flanges.htm