Adjusting the 5th Detent Bolt
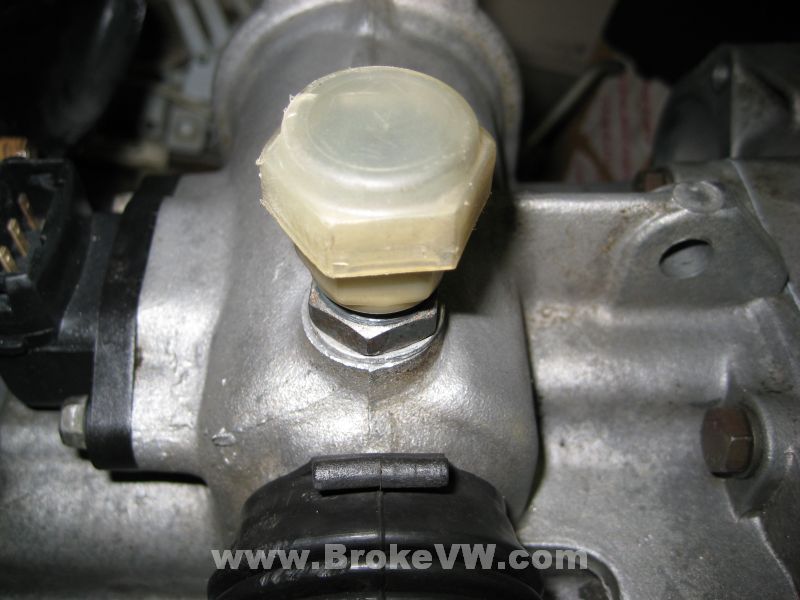
If your trans has one of the big white plastic capped detent bolts found on the older trans, that is the adjustable 5th gear catch. It is used to adjust the force needed to move the shifter in the car to the far right to line up to select 5th gear.
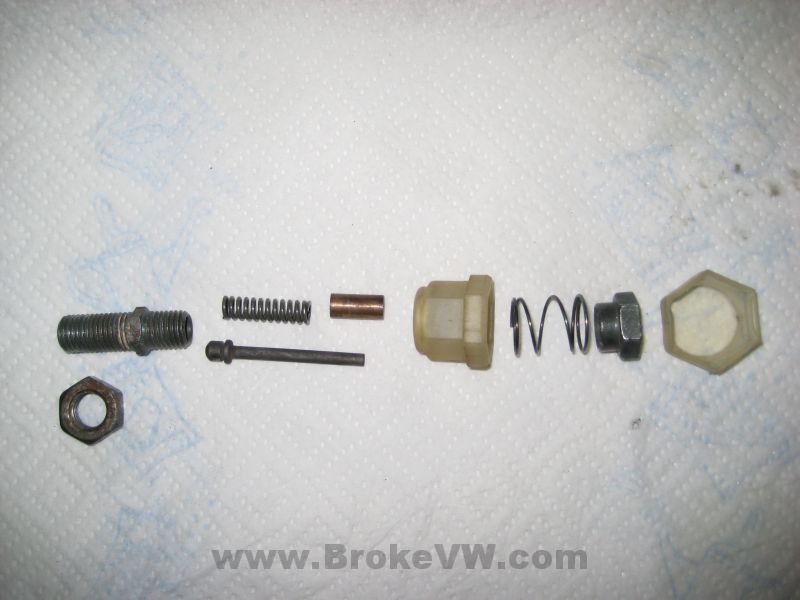
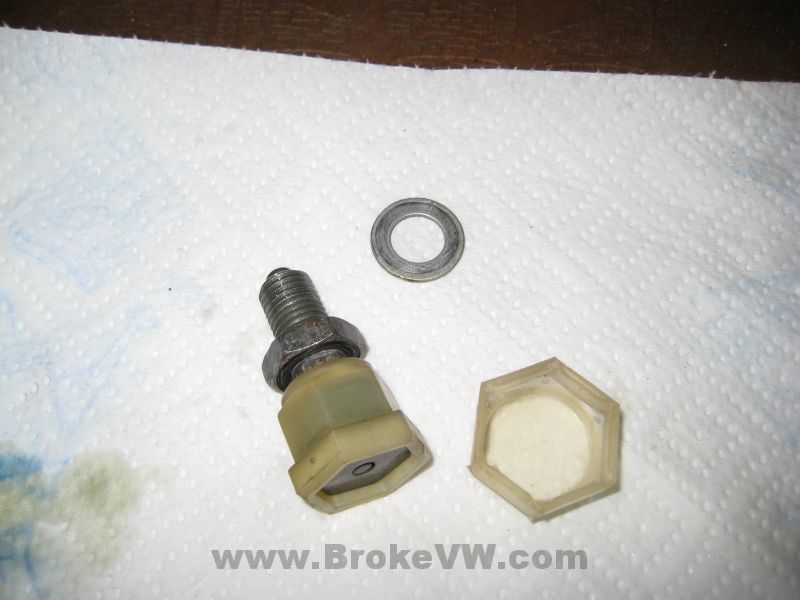
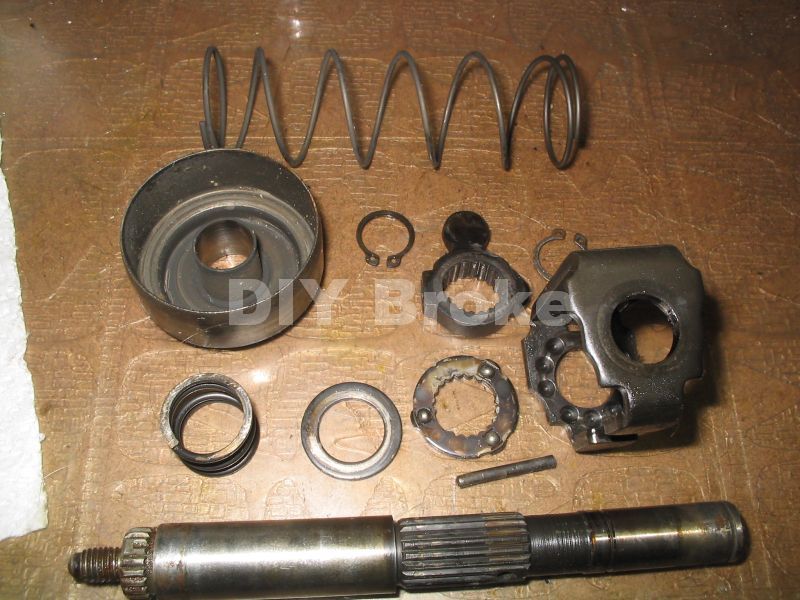
This is a pic of the parts of the detent, and the order of assembly. The rod is inserted into the hollow threaded pipe in the direction shown, and the spring and brass spacer slide over the rod. The big plastic cap holds the big spring, and the metal cap nut, which threads onto the hollow pipe and controls how much compression the small stiff spring gets, and as a result, how hard it is to push the rod with the rounded end up into the hollow pipe.
Lightly lubricate the parts prior to assembly to prevent corrosion...
This is a view looking down into the hole where the detent goes, and you can see the tab of the selector mechanism inside which the rounded end of the rod contacts.
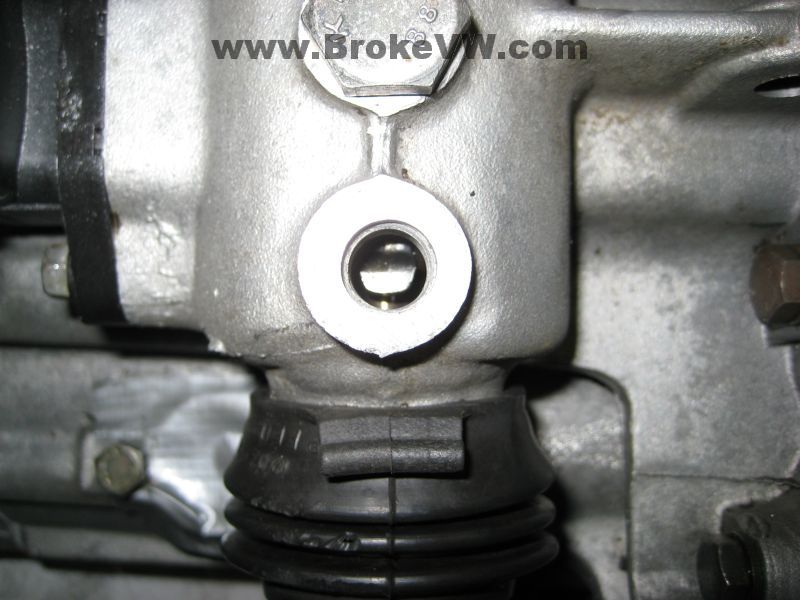
As the selector is pulled out, on the way towards 5th gear selection, you can see the selector has a raised portion, and it is this raised up portion which will shove the rod in the detent bolt up, compressing the small stiff spring. You can insert the detent bolt too far, and it won't allow you to get 5th gear. Too loose and the rounded end of the rod won't catch the selector tab or raised portion.

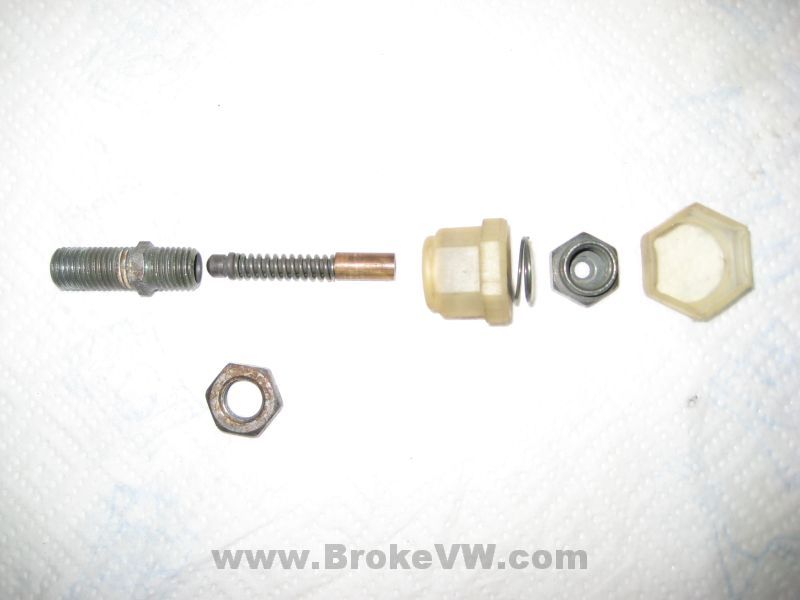
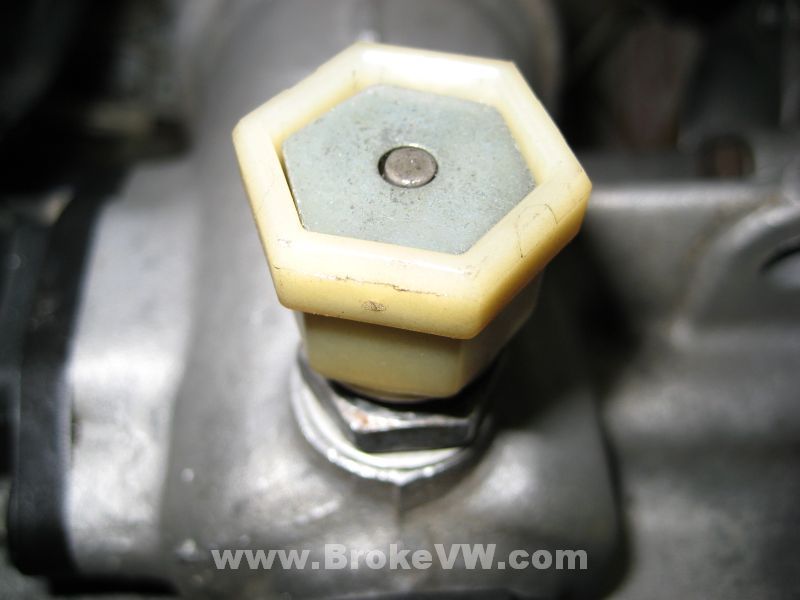
Assemble the selector bolt as shown, adjusting it so the rod is about flush with the top of the cap nut, and running the lock nut all the way up the bolt. Don't forget to use a sealing washer.
With the trans out of gear, thread in the detent, and watch the rod in the middle. As you thread the bolt into the trans, the rounded end of the rod will hit the tab on the selector. You'll see the rod start to lift, and you'll feel the small stiff spring start to compress. Back the bolt out 1/3 of a turn, and spin the lock nut down, so you tighten the detent bolt into the trans. The rounded end of the rod should now be just hovering over the tab of the selector inside. If you pull the selector out as if engaging 5th gear, you will see the rod in the middle raise up as it rides up onto the raised portion of the selector inside.
To adjust, you lift the large plastic cap up, and this will compress the big weak spring, and allow you to turn the cap nut without turning the threaded pipe portion of the detent bolt, so the previous procedure won't be affected. When you have the plastic portion lifted, spin it to adjust.
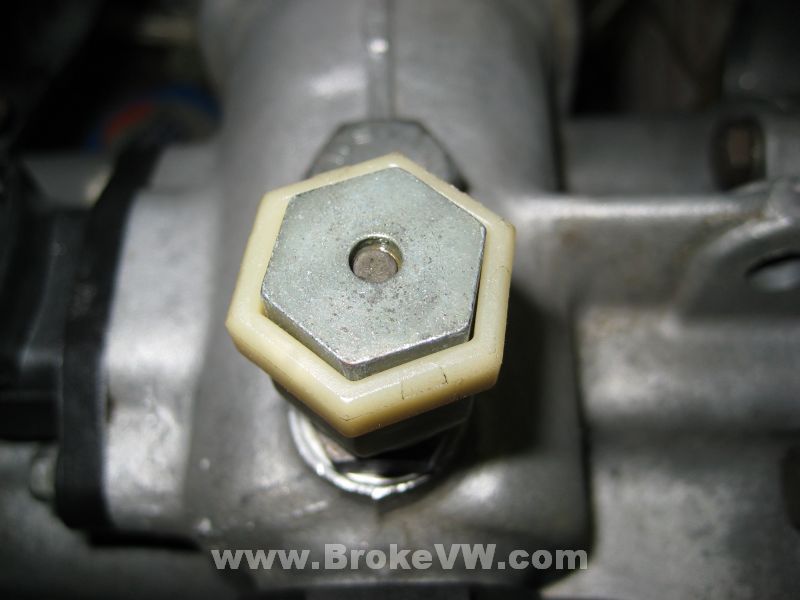
This picture shows the cap nut nearly unscrewed from the threaded pipe, the small stiff spring inside is less preloaded, so it is the weak setting.
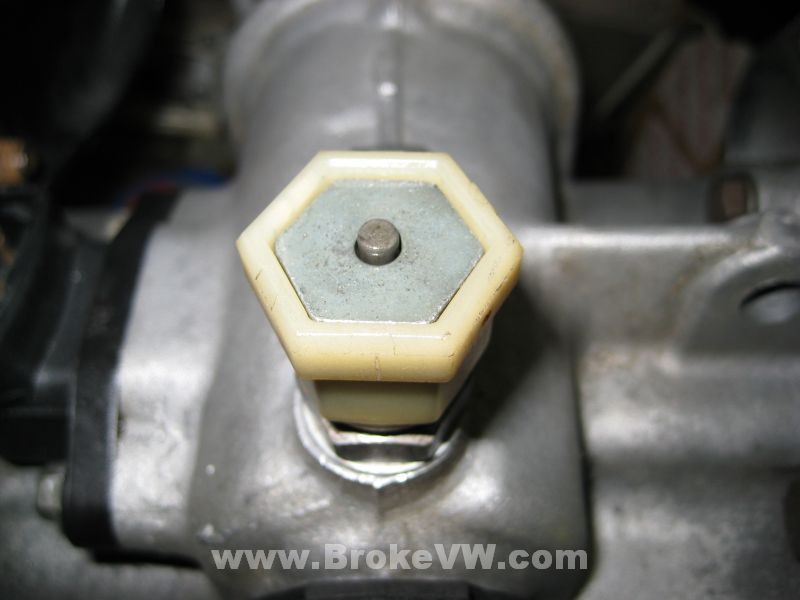
This pic shows the cap nut threaded as far down as you can go, giving maximum preload on the stiff spring inside, making this the strong setting, and requiring the most force to get the shifter in the car moved to the right.
Replace the protective plastic cover and you're all done!
VW, being VW, have a specific starting spec for this force, and then it is adjusted to suit the driver, but sure enough, they give a base figure specification for it. You use a spring gauge, and attach it to the selector, and it should take 22 pounds to overcome the catch. At the gear lever in the car, it should take a minimum of 9 pounds, measured below the gear lever knob.
These bolts rarely fail.
Adjusting the main detent bolt
The main detent bolt for the selector is found on some of the early MK1 boxes, and it is properly adjusted by doing the following:
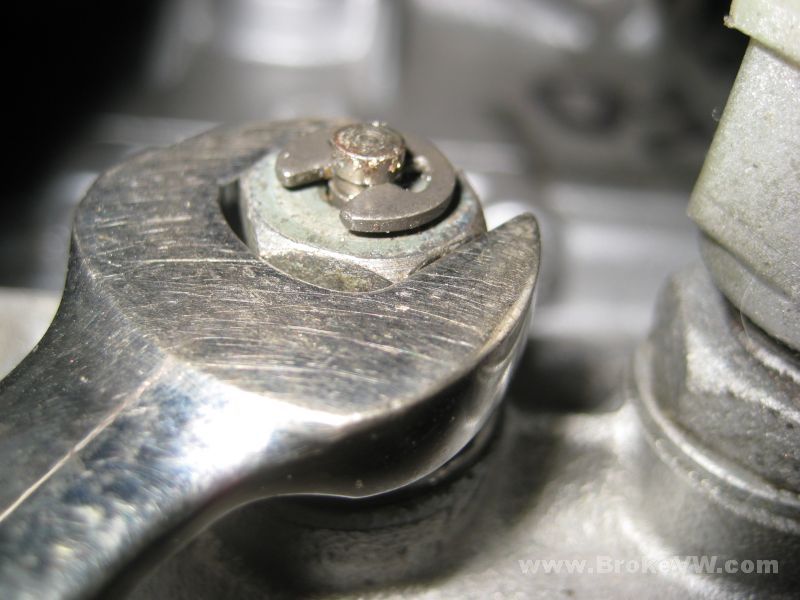
With the trans out of gear and the linkage removed, tighten the 13mm head of the bolt down until the e-clip lifts off from the body of the bolt....
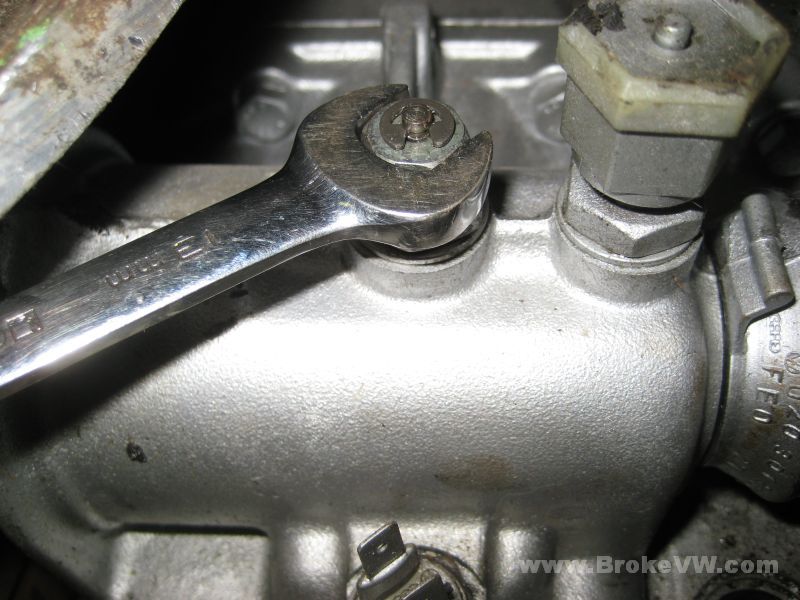
Once the e-clip has lifted up, back the bolt out of the trans
until the e-clip just contacts the head of the detent bolt again.
The e-clip should start to lift as soon as the selector is turned slightly when
properly adjusted.
These bolts rarely fail. They do wear out on the end, but wouldn't be much money to replace with new.
Selector Assembly Types
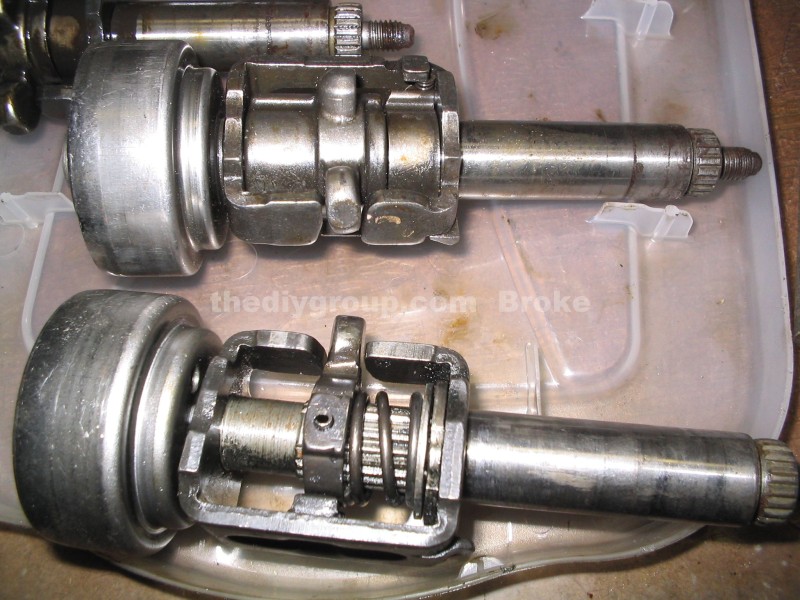
There are at 3 different types of selectors for the 020. This is a pic of 2 of them, showing the major differences. The top one is from a MK3 trans, the bottom is from an early MK2 trans. I call the top one a floppy style, and the other type is, well, not a floppy type:)
The name comes from holding the selector by the shaft and twisting it in your hand... the center piece in the cage will either be loose and floppy, or it won't be.
In the early MK1 trans, they were floppy, not exactly like the top selector in this pic, but close, and floppy. With the MK2 trans, they went to a selector that had internal detents, and with it, the detent bolt on top changed. The MK1 floppy selector used a spring loaded detent bolt, shown above with the e-clip. The MK2 selector with the internal detents used a plain bolt with a smooth end that was a guide pin only, the detent action was integral to the selector itself. Starting in Feb 1989, they went back to the floppy selector, and a new spring loaded detent bolt again.
This is the MK2 non-floppy selector torn down. You can see the ball and dimples that they engage to give you the click you feel when shifting, and to positively locate the selector for each gear.
They rarely fail... any of the selectors, they all seem to be just fine from what I have opened here. The guide bolt can wear, but it is just a bolt and for a few bucks you can have a new one.
Late-MK2 and MK3 Detent Bolt
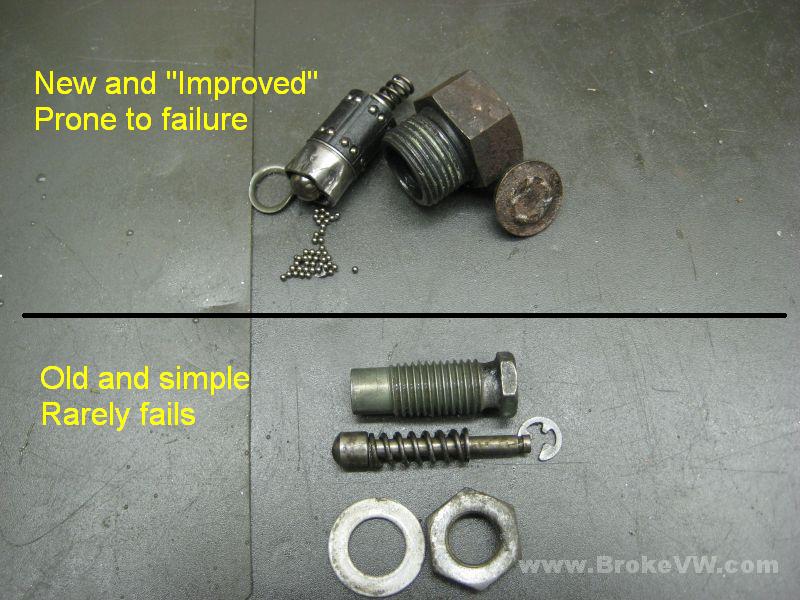
Starting Feb 7th, 1989 (07029 date code), they switched to a new style detent bolt, and it sucks badly. Previous to this, the MK2 boxes had a plain old bolt that had a smooth portion on the end and it would act as a guide pin for the selector assembly. I need to add a pic of that bolt, actually, since I have pics of everything else, but it looks like a regular bolt from outside the trans.
Anyway, I'm not sure what idiot thought this one up, but I hope they didn't design too many things for VW!
When they went to the new floppy selector in 1989 (...also starting 07029, the selector shaft now rides on a bearing in the casing, totally pointless), they changed to a new detent bolt with big threads so the new casing needed a bigger hole for it... so you can't put the old bolt in.
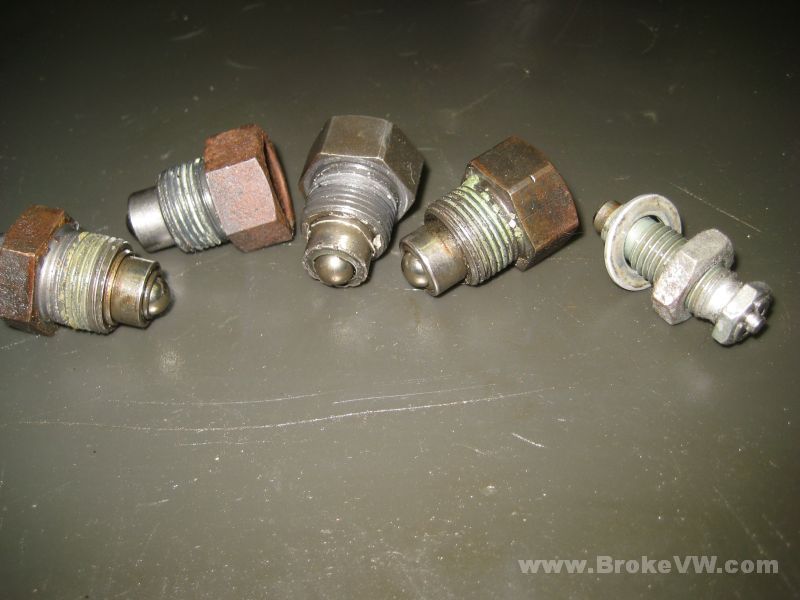
This is a pic of a few old bolts, and the old MK1 style spring detent bolt on the right. Over the years the bolts change a little, but they're basically the same big stupid spring loaded detent. Now they come with a roller ball on the end, like a ballpoint pen, so they addressed the wearing of the ball end on the MK1 bolts, I guess.
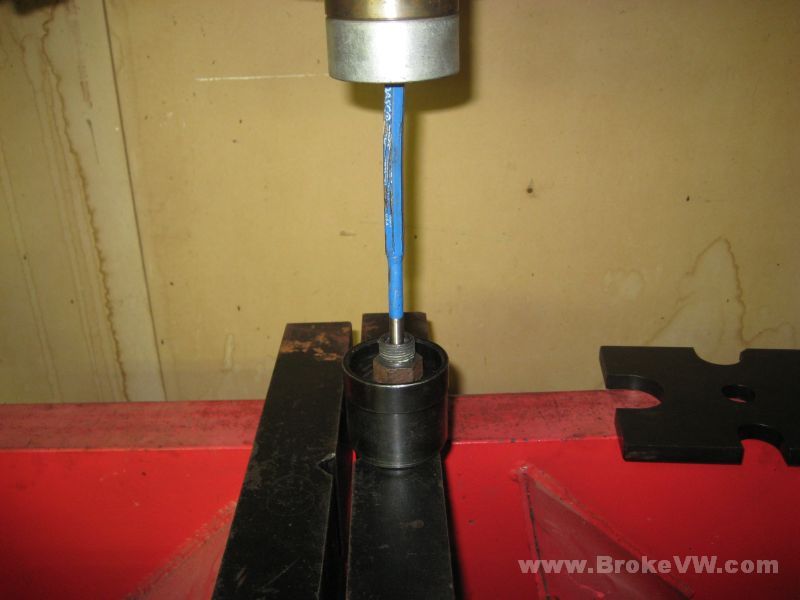
Lets crush the end of one of these bolts, and see what is inside, since it is pretty common for these bolts to just come apart inside the trans. Sometimes people find MOST of the parts, sometimes they find just the empty hollow bolt body and maybe the big roller ball. With it being on top of the trans, right over the selector, very near the hole for the shift forks, it is quite possible for whatever is inside this bolt to get into the trans, and between some gear teeth or in a bearing roller. Let's have a look!
Crushed end, the ball fell out, the ring that used to hold the
ball in place is laying on top.
When I was out there in the shop destroying (yes, it's story-time) this bolt for
these pics, I not only managed to pinch the ever-loving shit out of the palm of
my hand in the vise, I was surprised at what I found. Hammering on this thing, I
had it clamped in the vise TIGHT. I hammered the vise handle (don't do that,
BTW, you're not supposed to!) to try to keep hold as I planned on hammering a
chisel into the bolt head to drive it apart.
First... this steel is stupid tough. Laughed at the chisel. Laughed at the vise,
barely was able to crush it.
Second... the vise didn't hold it, and I removed the copper jaw caps to expose
the brand new steel teeth on the steel jaws under the caps. It just wanted to
slip. That's how I mashed my hand. I had the vise under so much pressure
grabbing the shiny part of the bolt, when it came out of the vise, the vise
snapped shut partially and caught my palm. Ouch.
One of the times it slipped out, I heard and saw something come loose, and saw the ball had popped out of the end of the bolt, but the bolt was still intact. I also felt something hit my foot (rocking the sandals - another "don't do this" tip), but didn't see anything. I took a closer look, and there in the new carpet I put down the other day I saw TEENY tiny little balls (damn, I forgot to measure them, will get that info later).
A lot of them.
I grabbed a magnet, and started picking them up. They were everywhere. I began to think they were falling off the magnet again, and after 5 minutes of being on my hands and knees picking them up, I started thinking they were from something else, but NOTHING has bearings that small that I've had out there, so it HAD to be from this bolt....
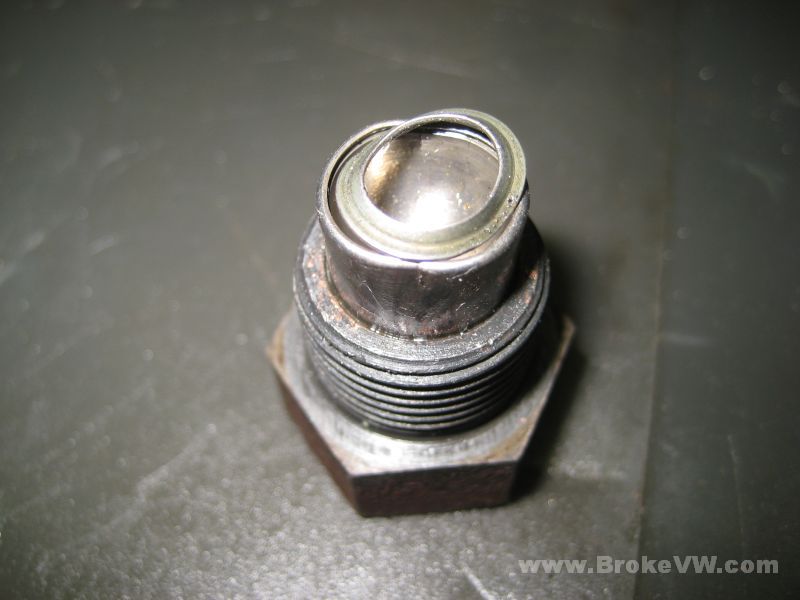
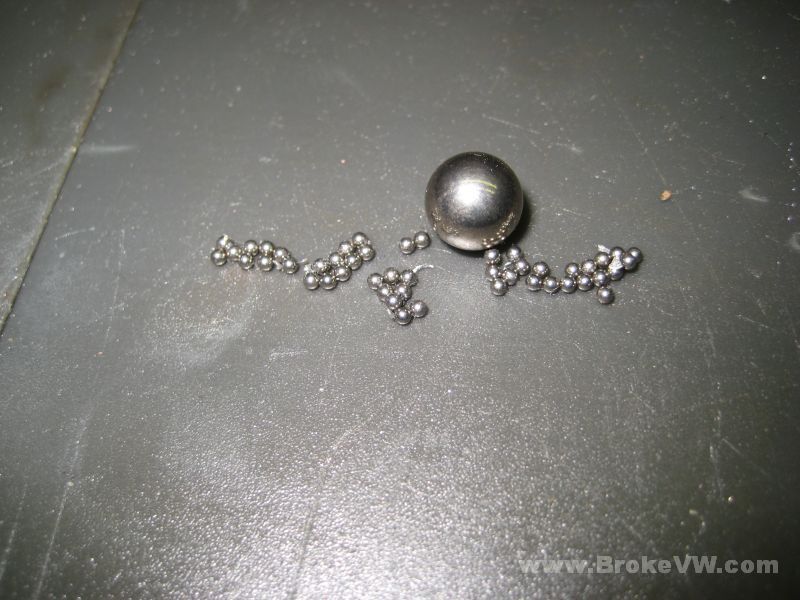
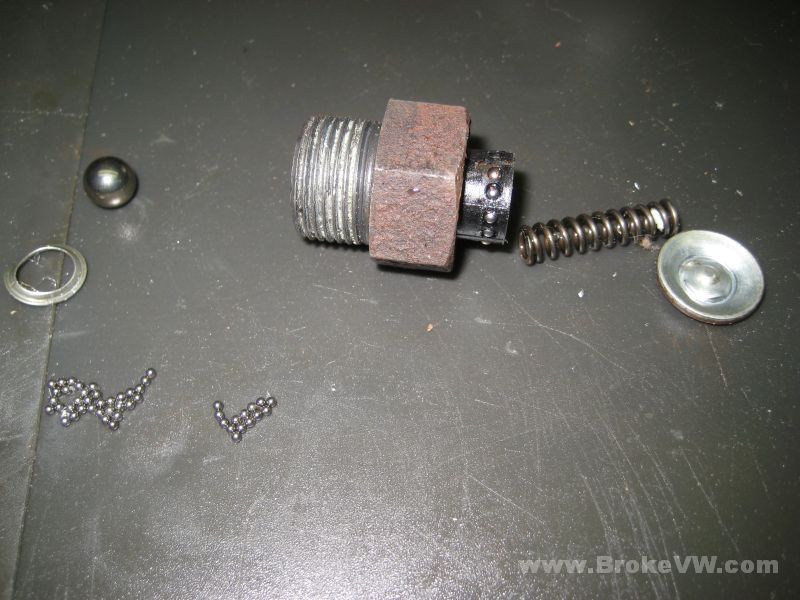
Here is the roller ball from the end of the bolt, it sat in the cup portion above. Around the ball inside the over-sized cup in the end of the bolt is AT LEAST 48 teeny tiny little balls. Holy shit, who thought to put this over the top of the trans?!?
I stopped looking after 10 minutes or so, and I found 48 of them... there are likely more, they went everywhere.
After hammering on this bolt for a bit, I ended up driving the bolt down into the head and popping the cap out of the top of the bolt to get it apart...
The roller ball, tiny balls, retainer ring, then the bolt with yet more balls and a plastic cage, the spring, and the top cap of the head of the bolt...
I think there is a tiny lip on the inner silver bit that prevents it from popping into the trans... so when that lip fails, the bolt pops apart. If the roller ball or retainer gets loose, the 50 or so balls surrounding the roller ball escape. If you find a loose roller ball, you're missing about 50 tiny balls at least....
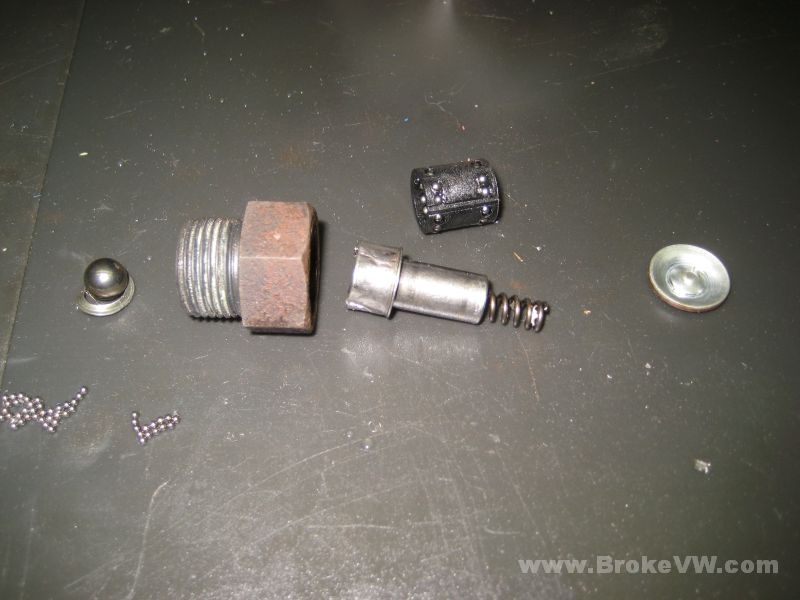
Another pic of the bolts. Simple is reliable. Oh, the black plastic cage around the silver inner portion? It holds 2 dozen more balls, slightly larger than the roller ball bearings. Yes, 24 more tiny balls to drop into the trans. Brilliant.