Joe 4K Rebuild
Arrived 03/21/11 -- Started 4/26/11 -- Done 05/25/11
Joe 4K 5th Swap
Arrived/Done 03/13/10
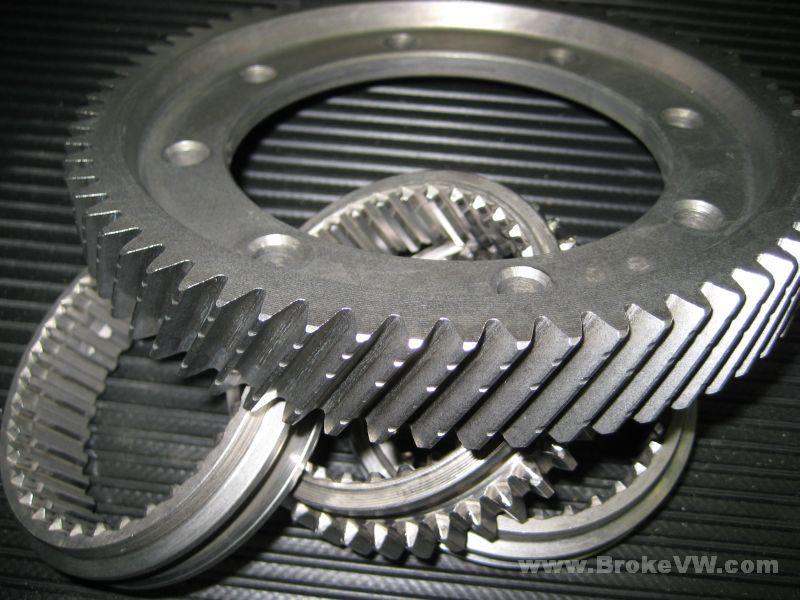
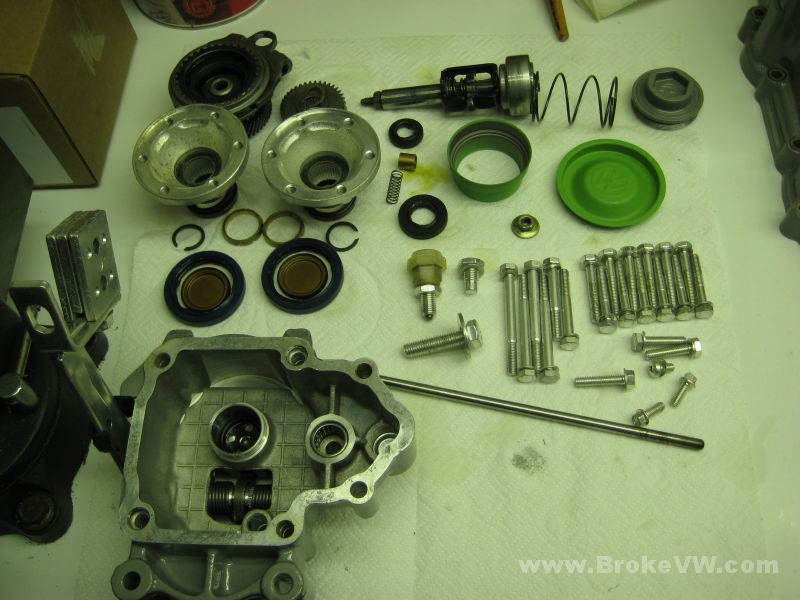
Supplied parts, the 5th gear is a 0.745 ratio, so it will be a nice little drop in revs on the freeway...
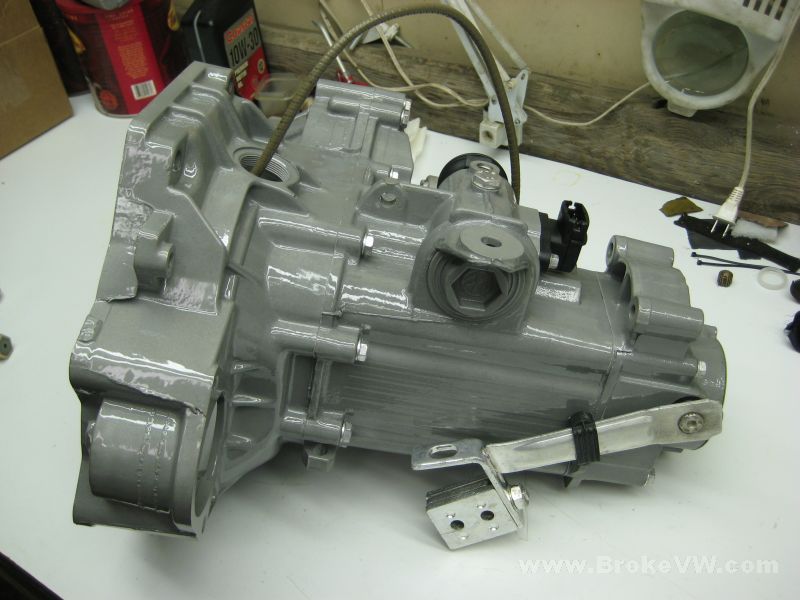
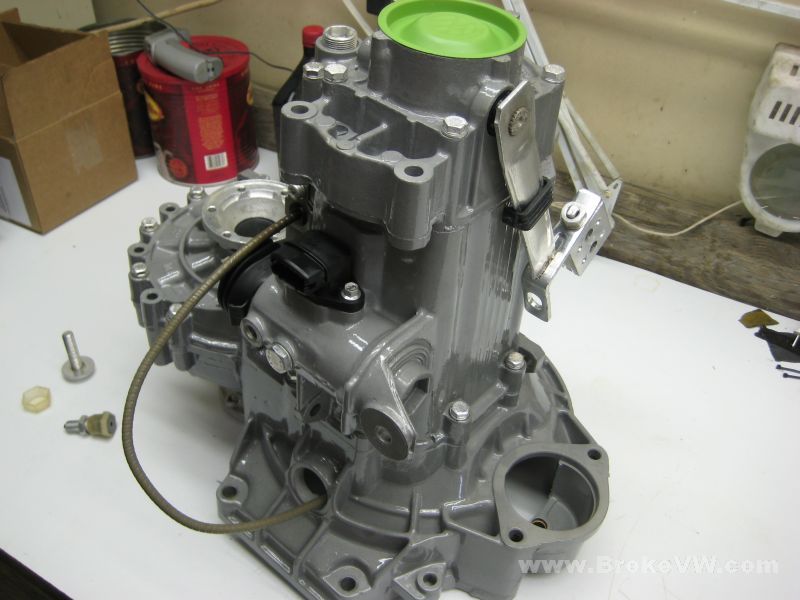
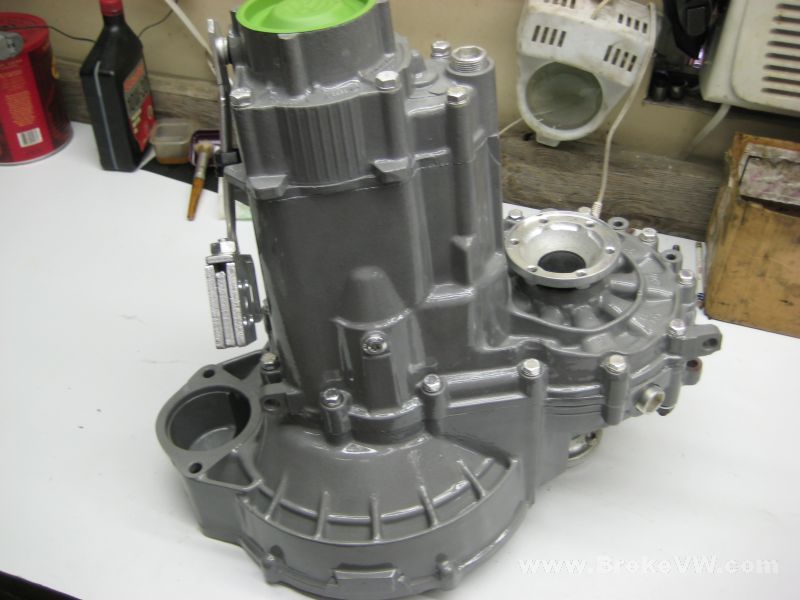
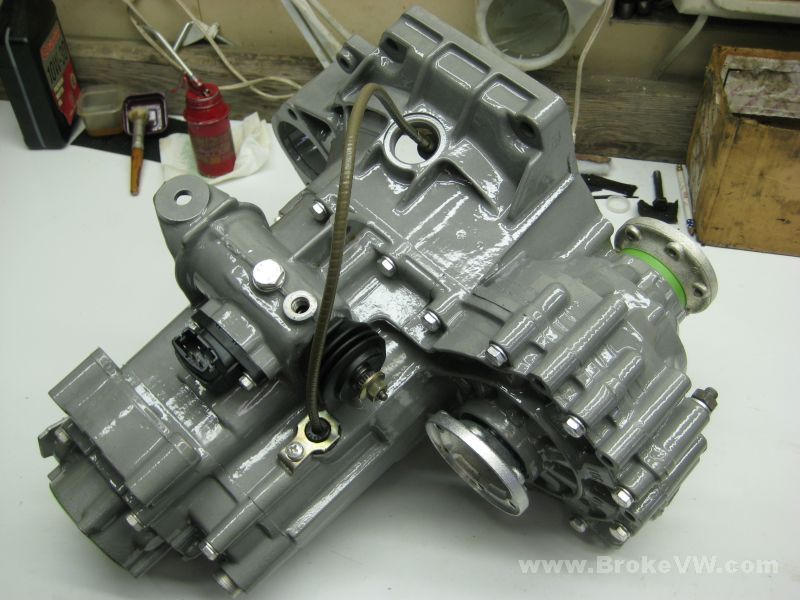
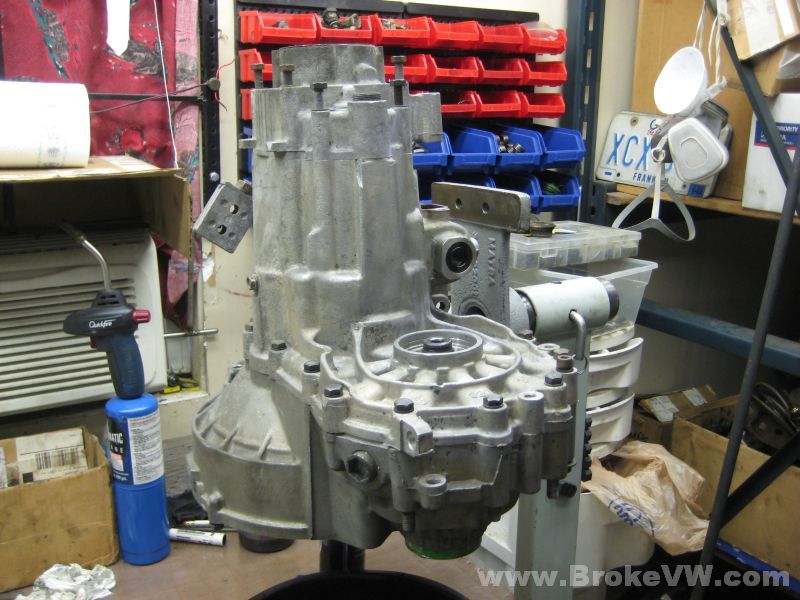
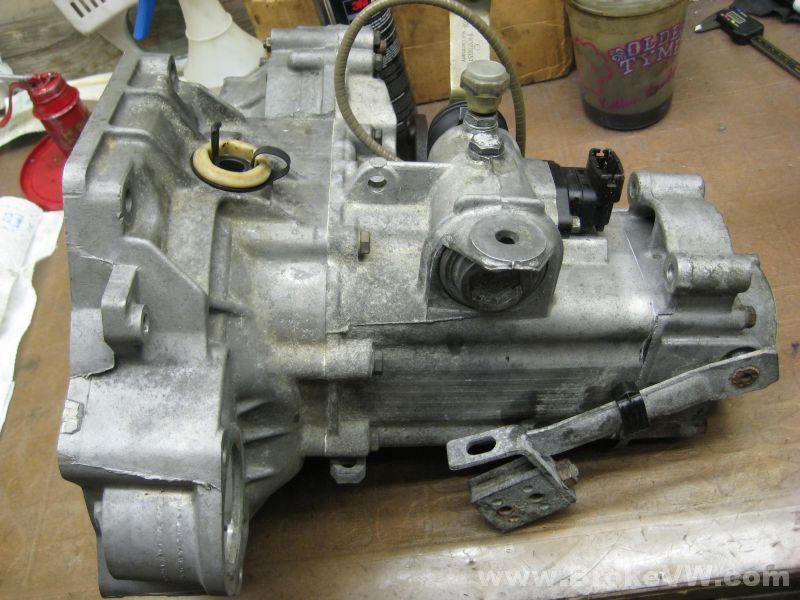
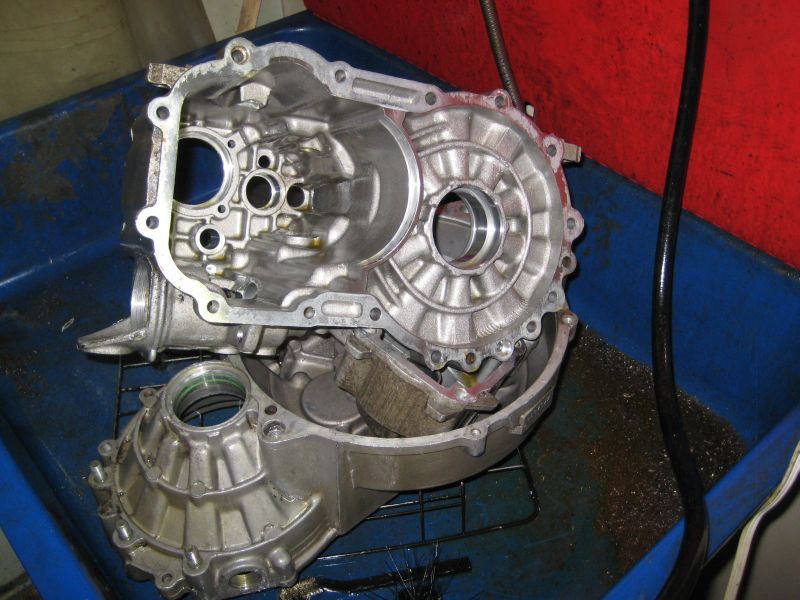
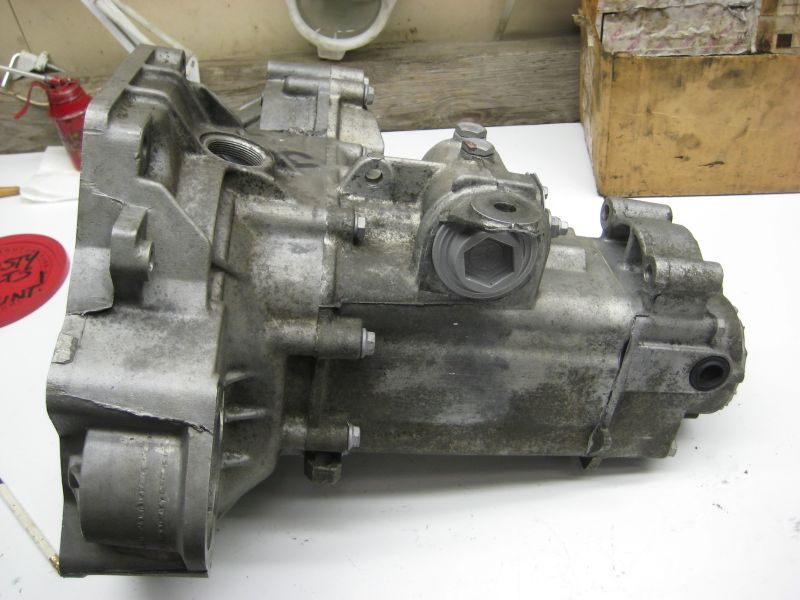
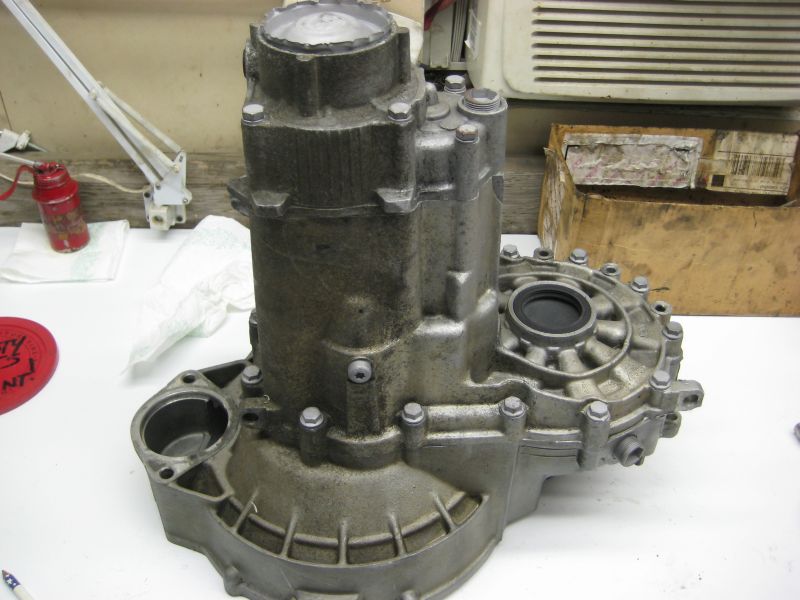
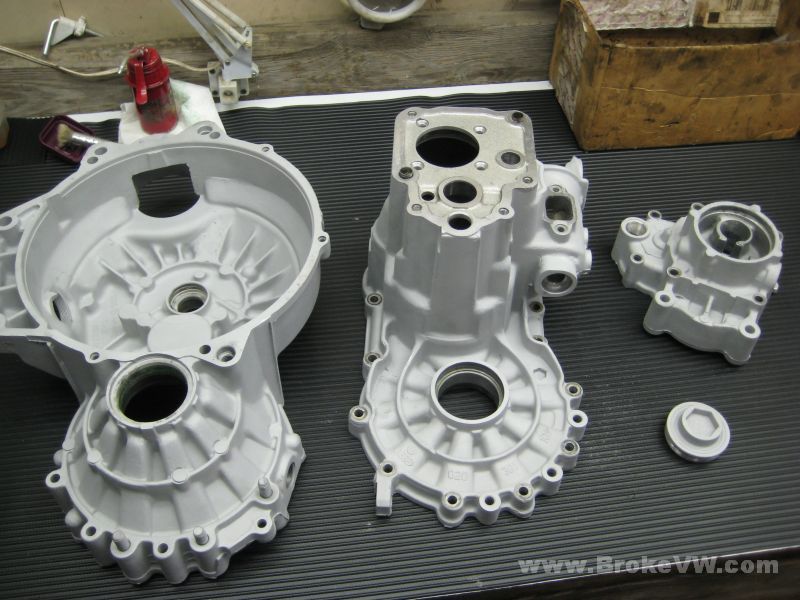
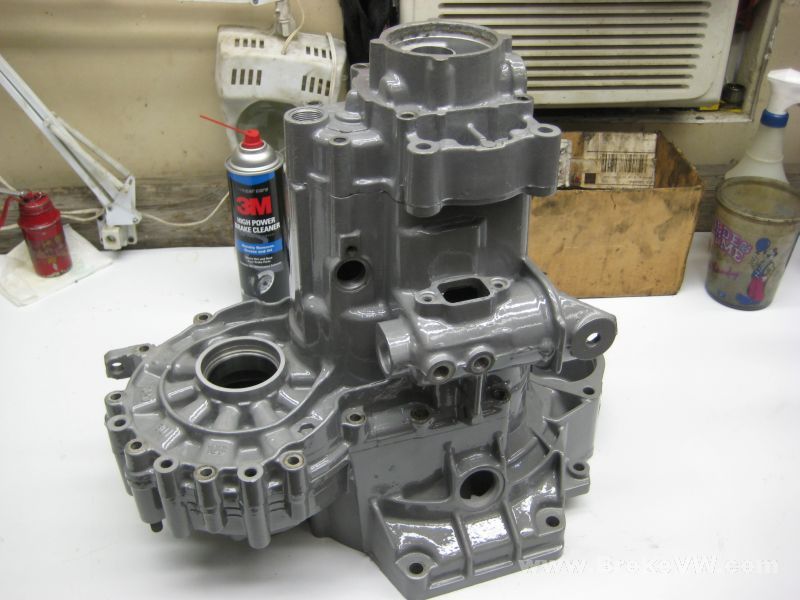
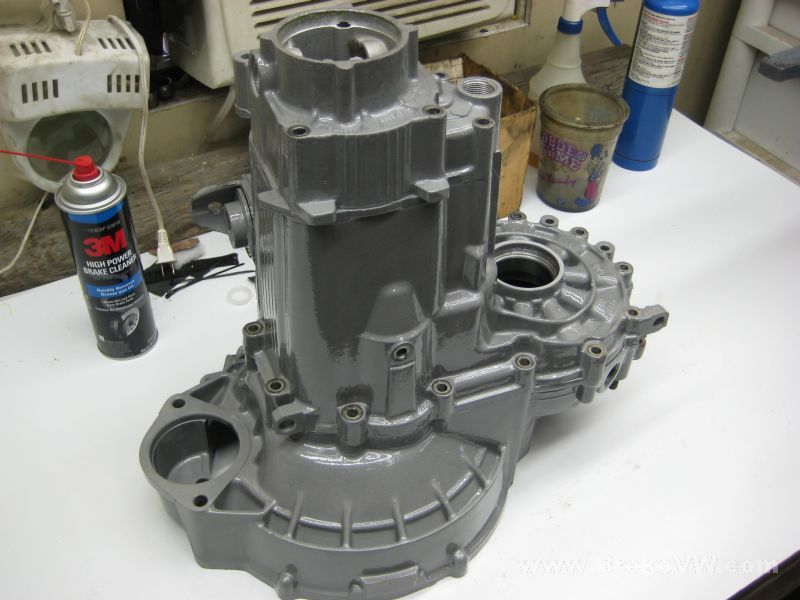
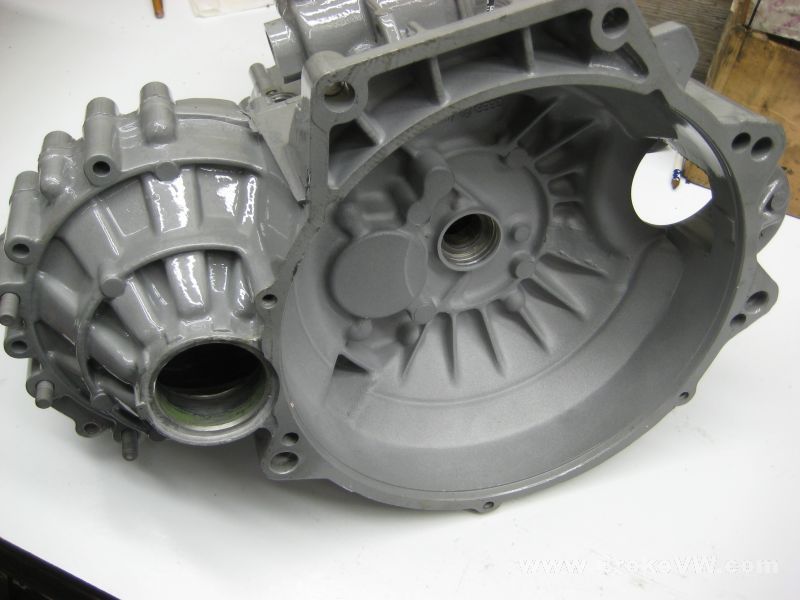
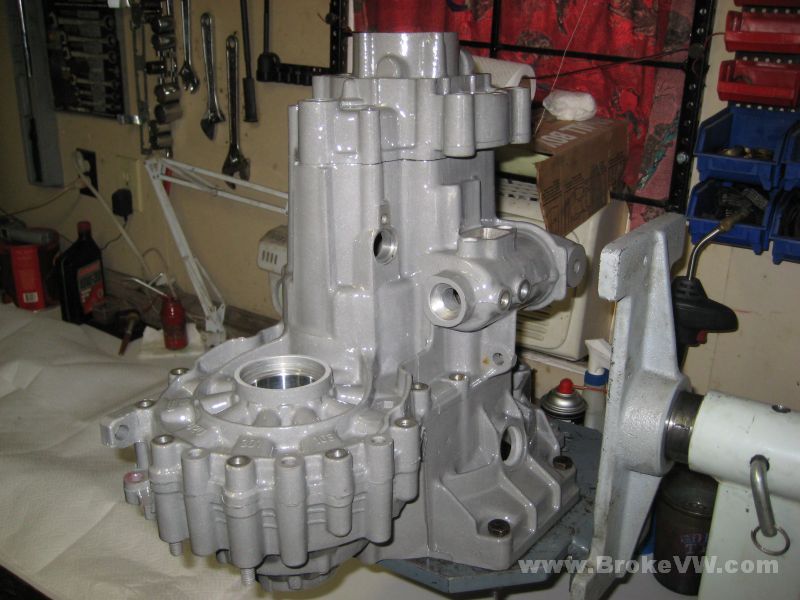
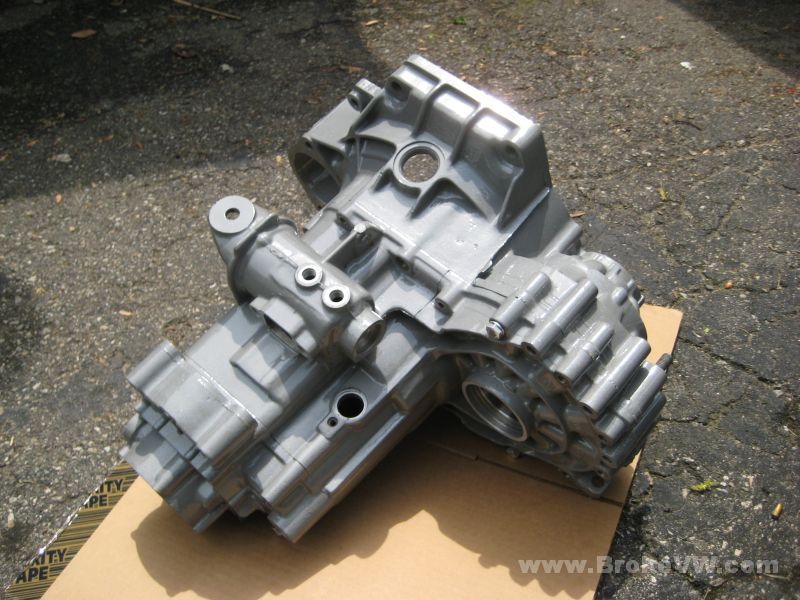
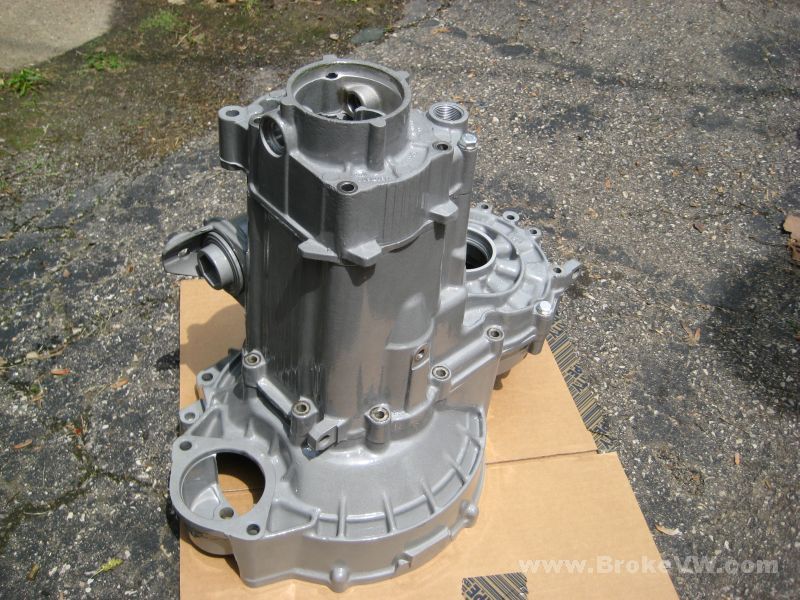
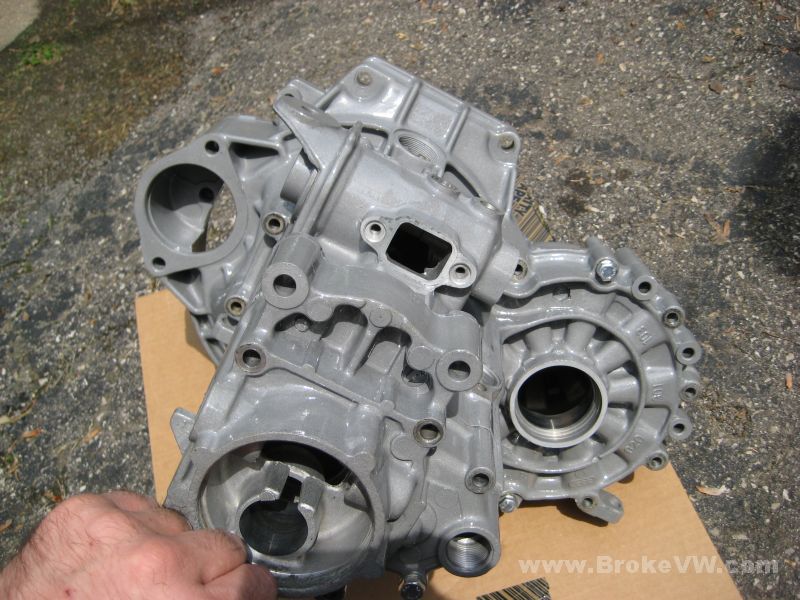
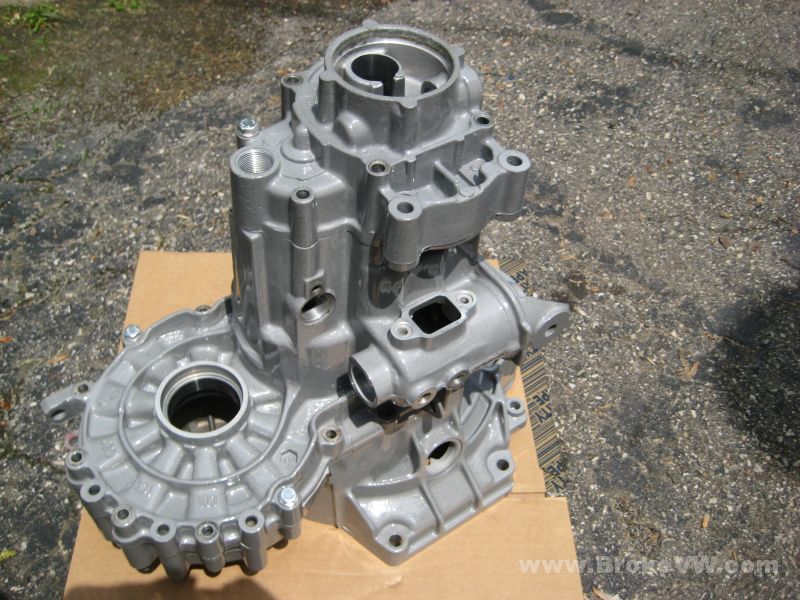
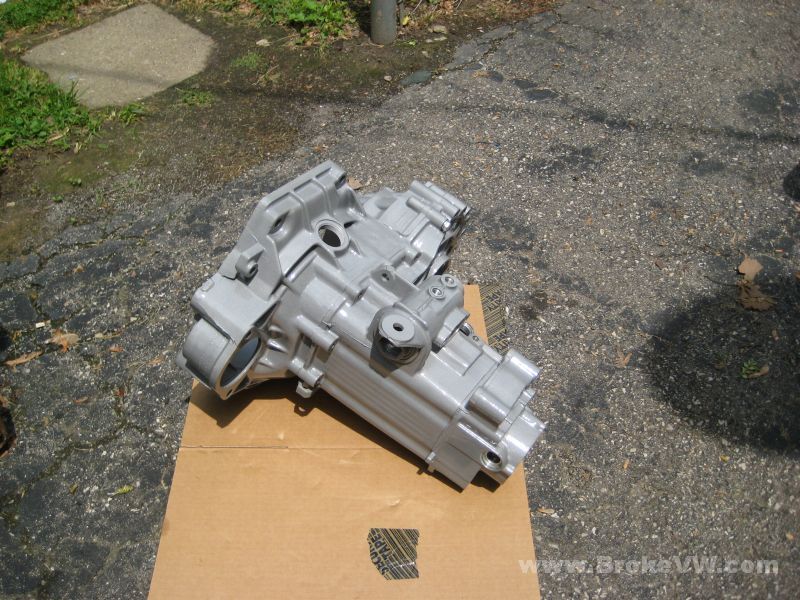
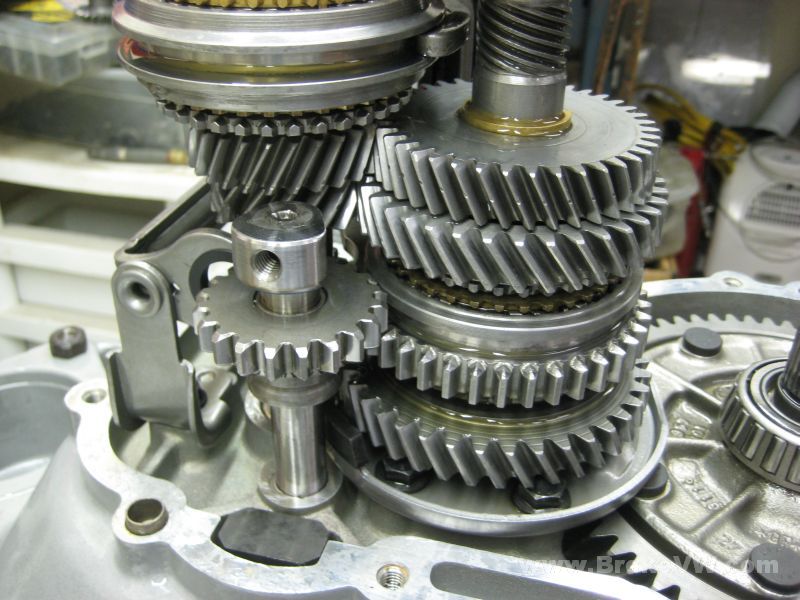
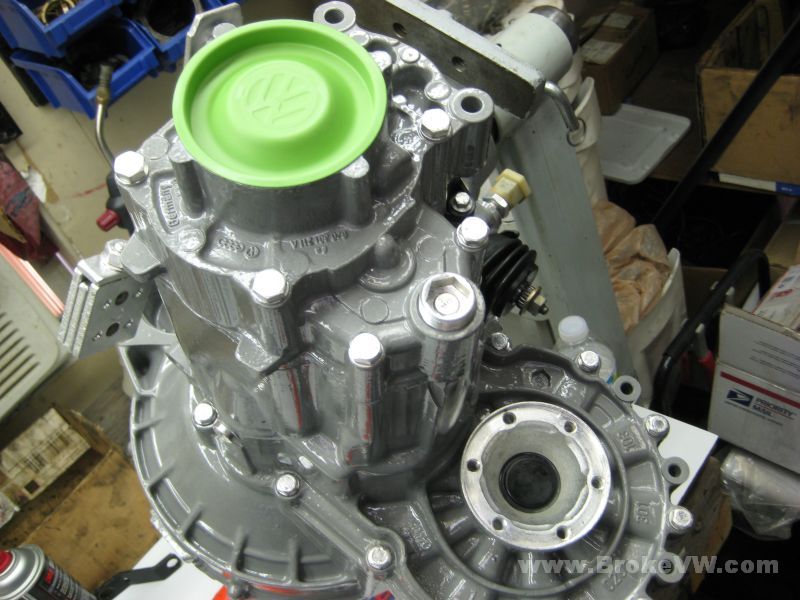
As arrived...

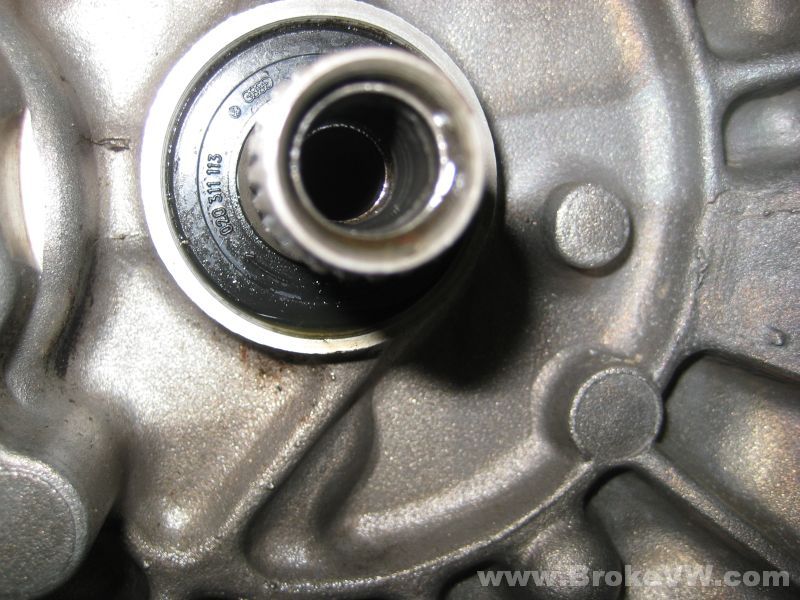
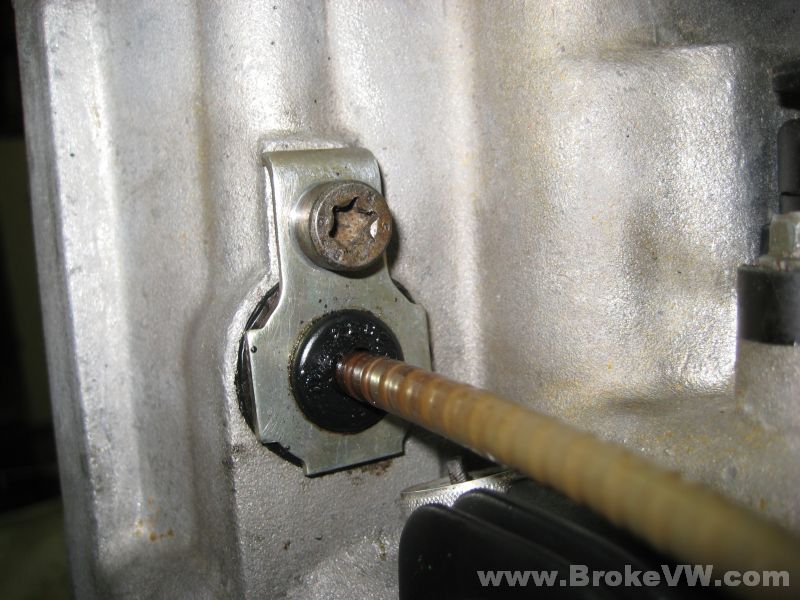
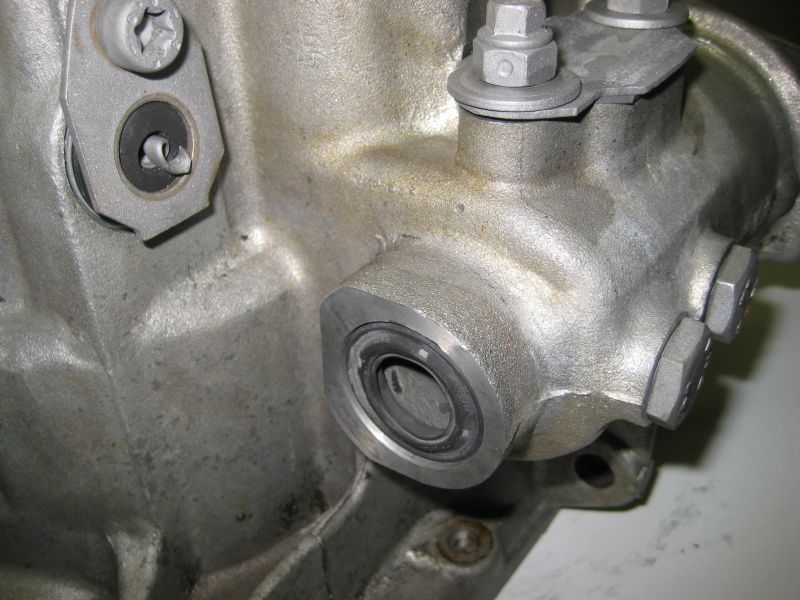
The speedo bolt that is going to be replaced... I only have torx available, I thought I had some allen, but I don't. I'll get it replaced with a good Torx bolt (T-40 size) that isn't rounded out...
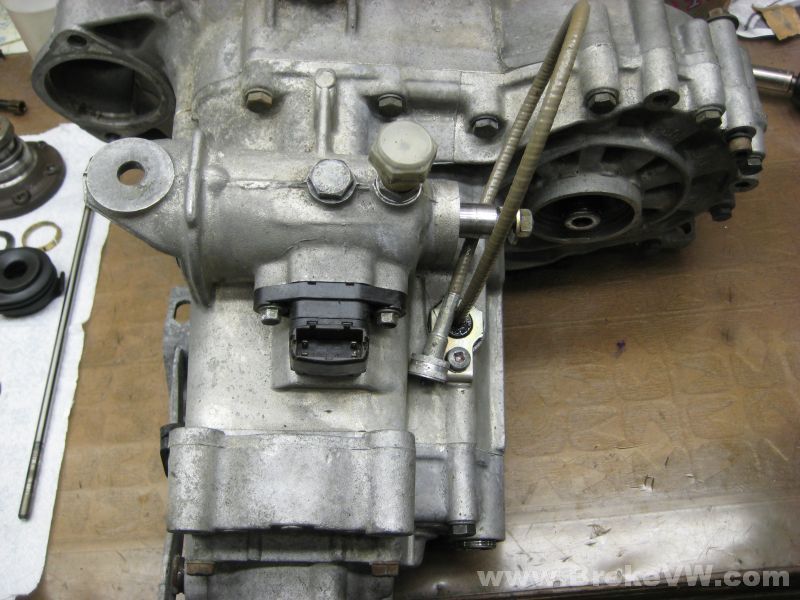
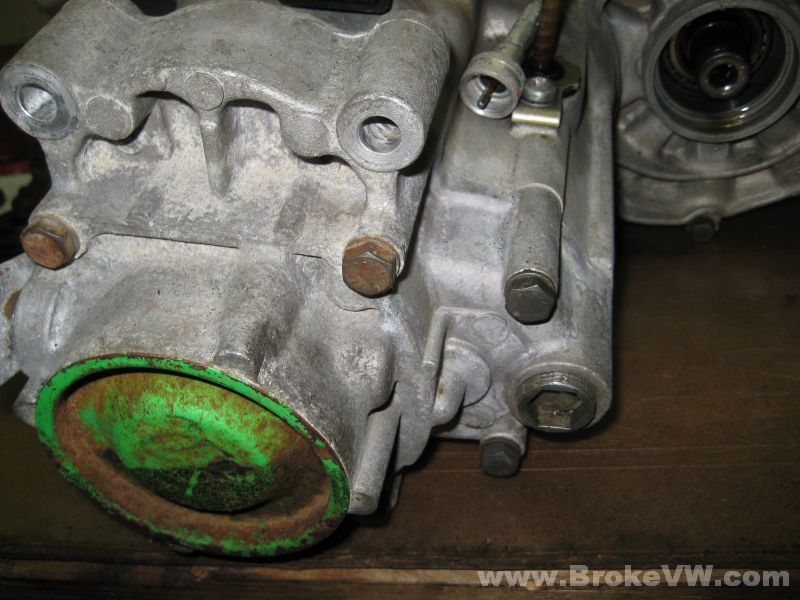
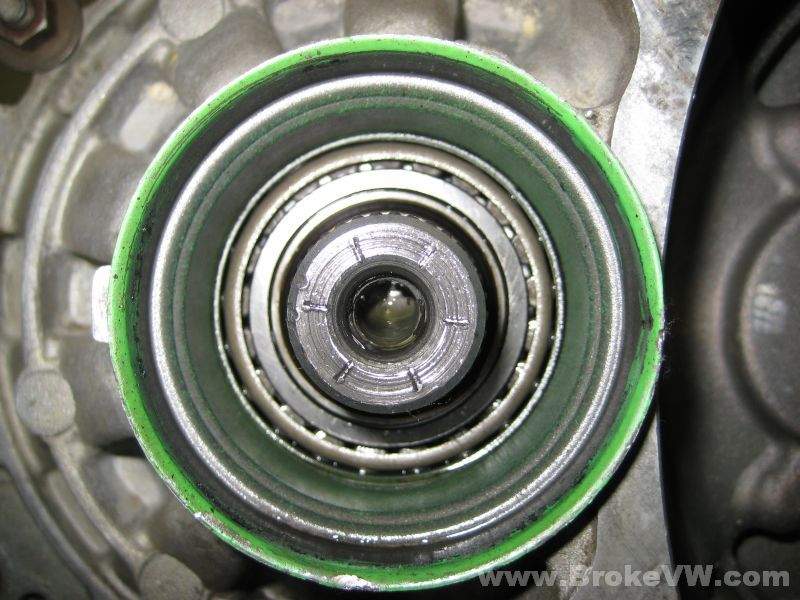
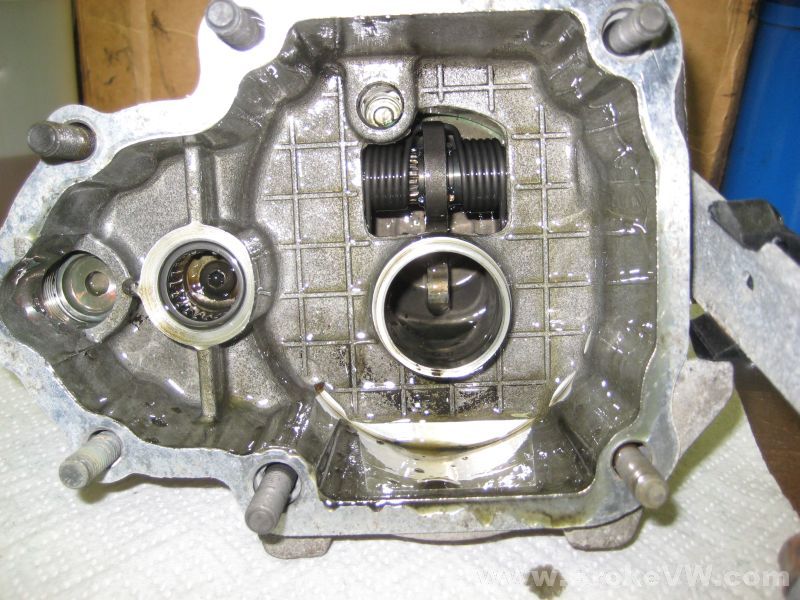
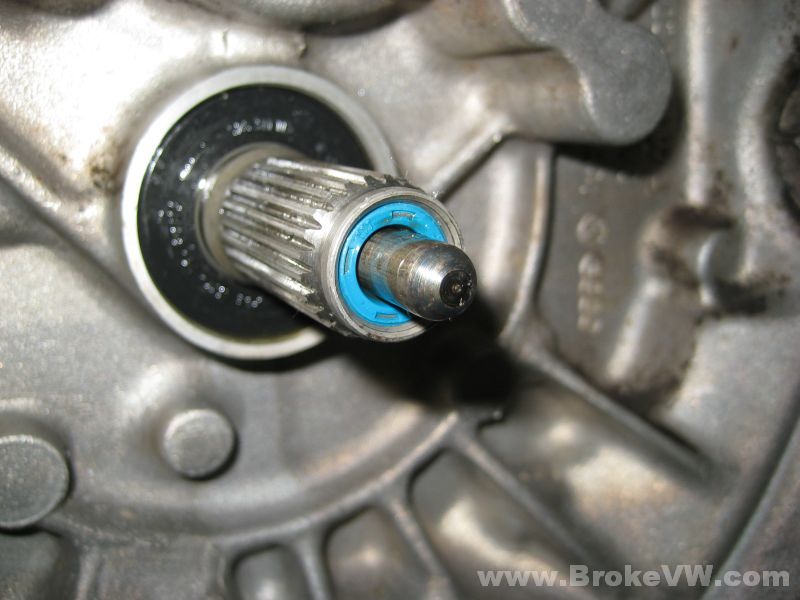
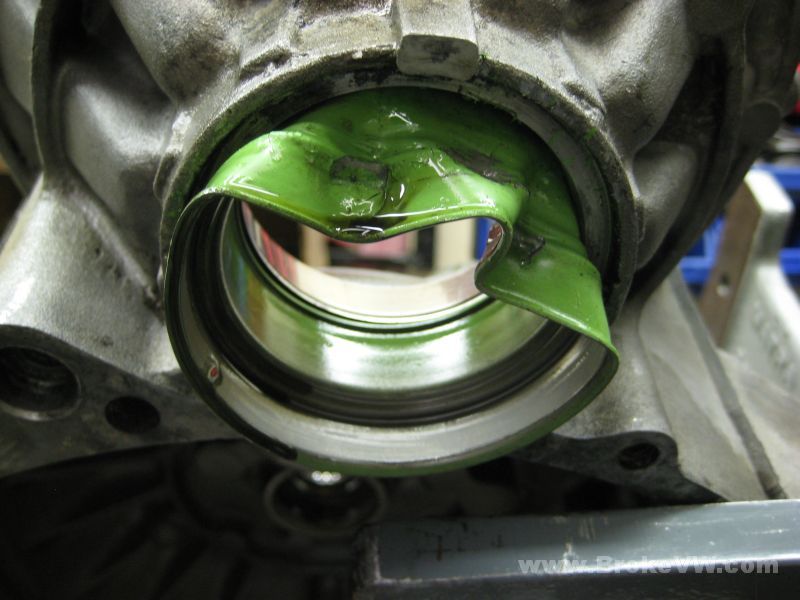
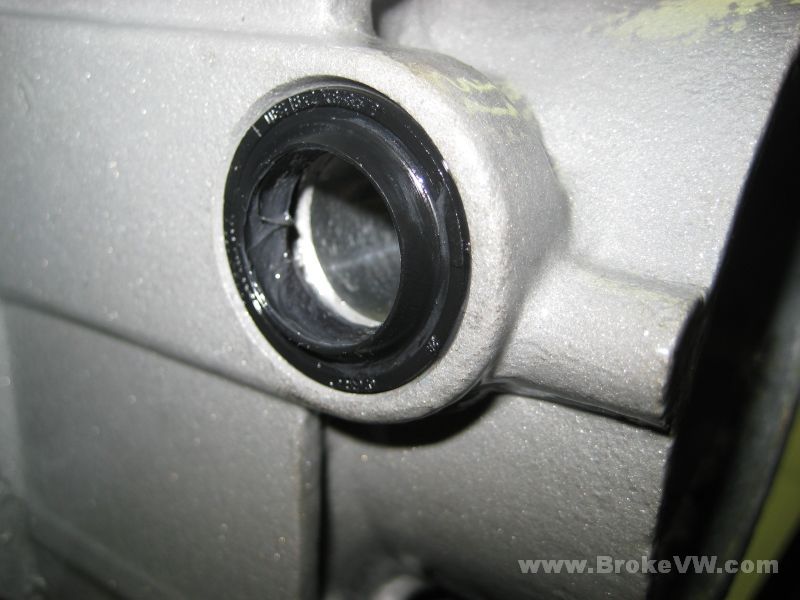
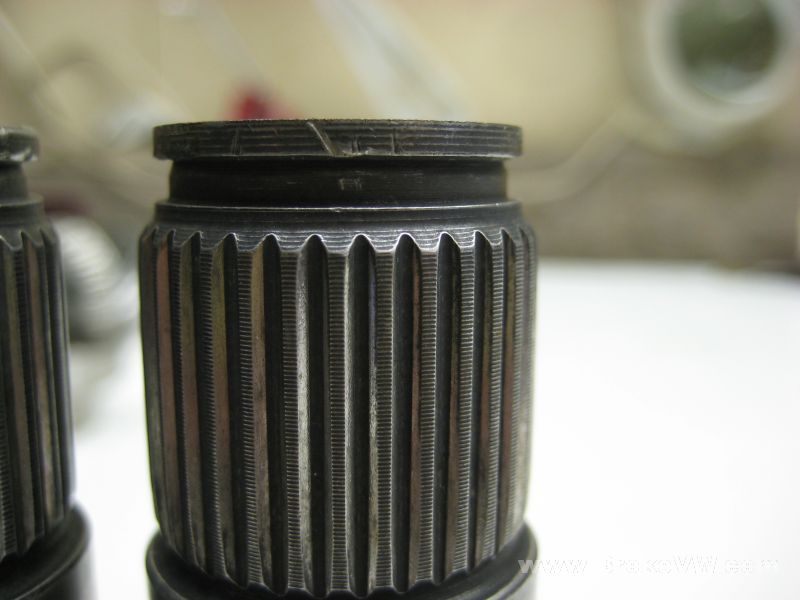
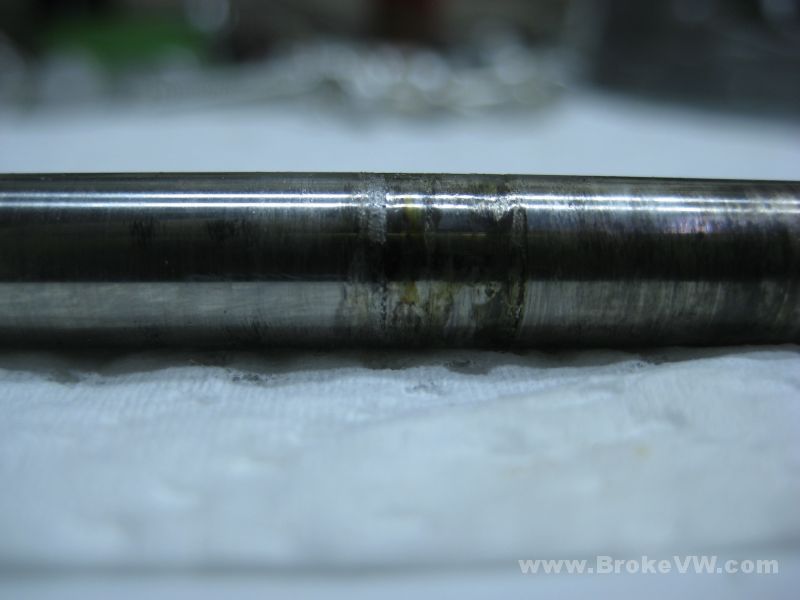
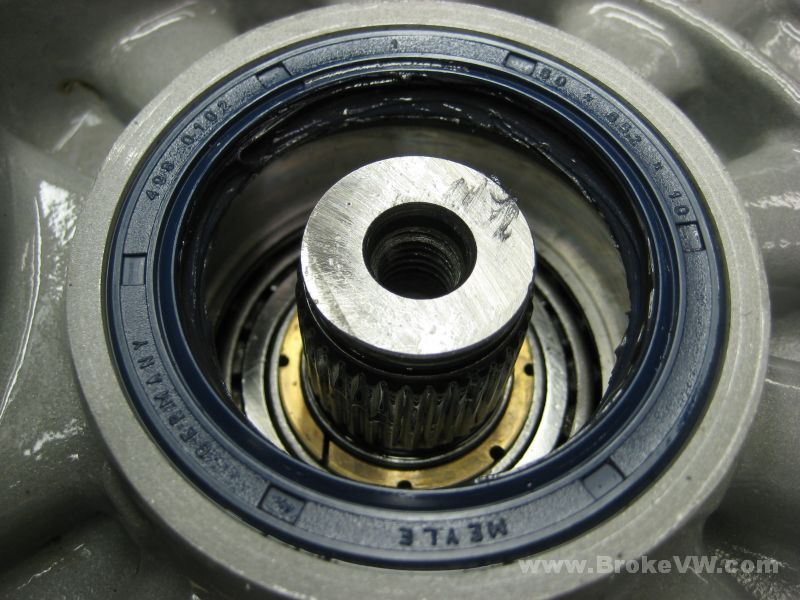
This pic shows a dent in the green seal sleeve, it will need replaced...
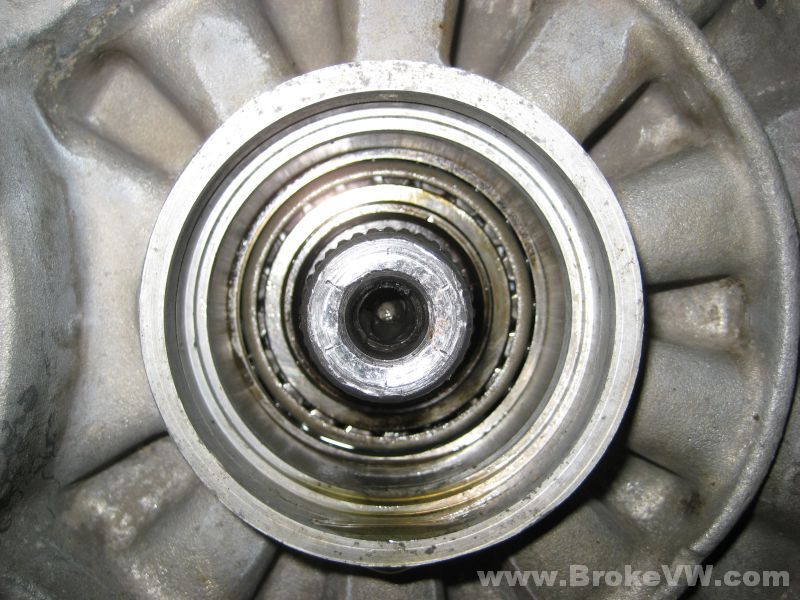
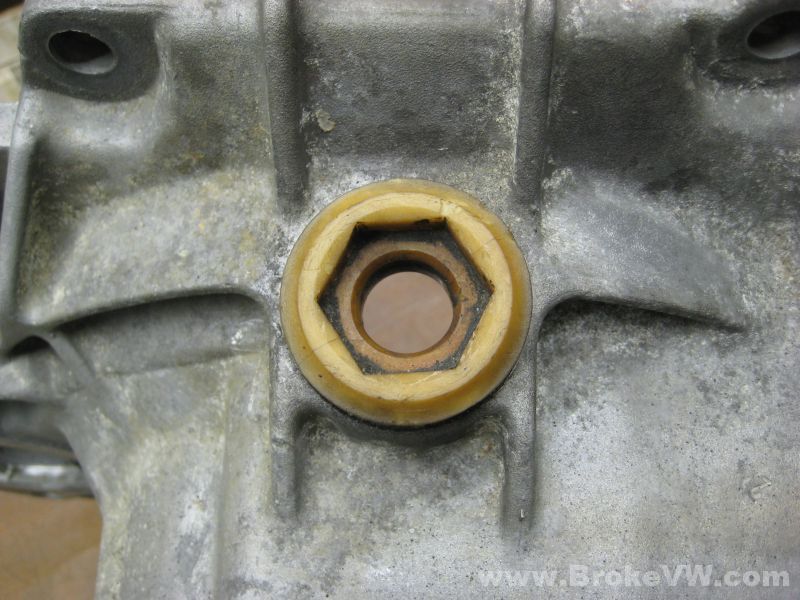
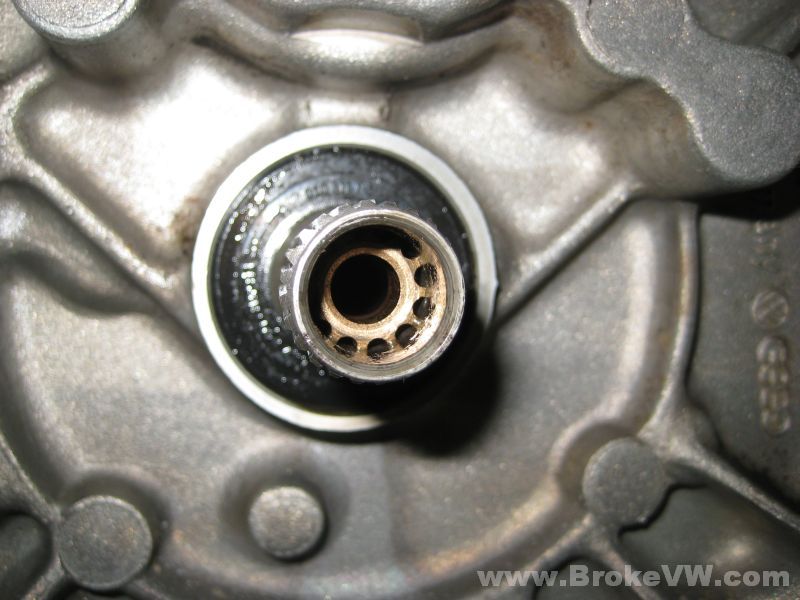
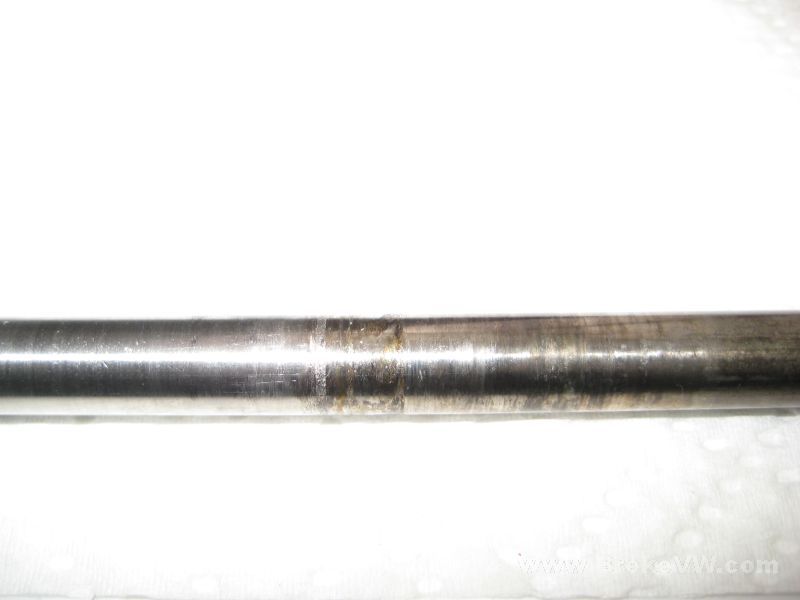
The pushrod bushing and seal are totally shot...
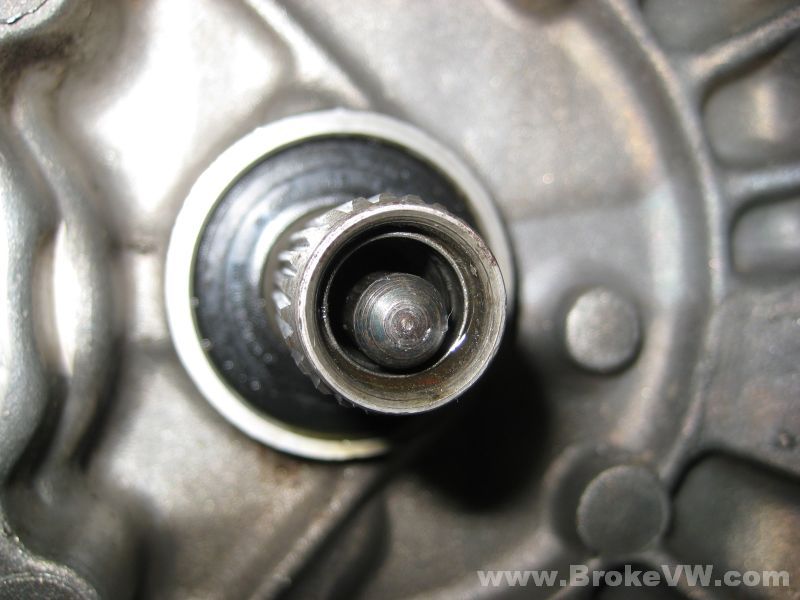
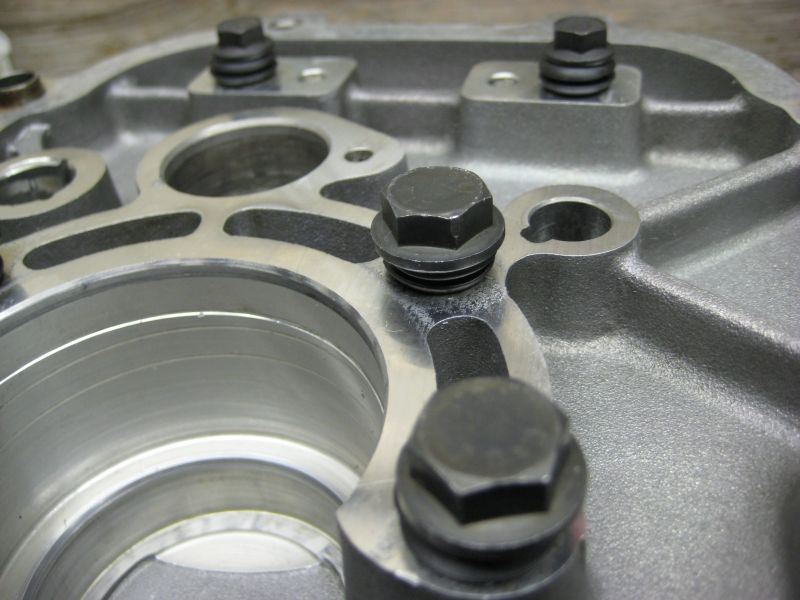
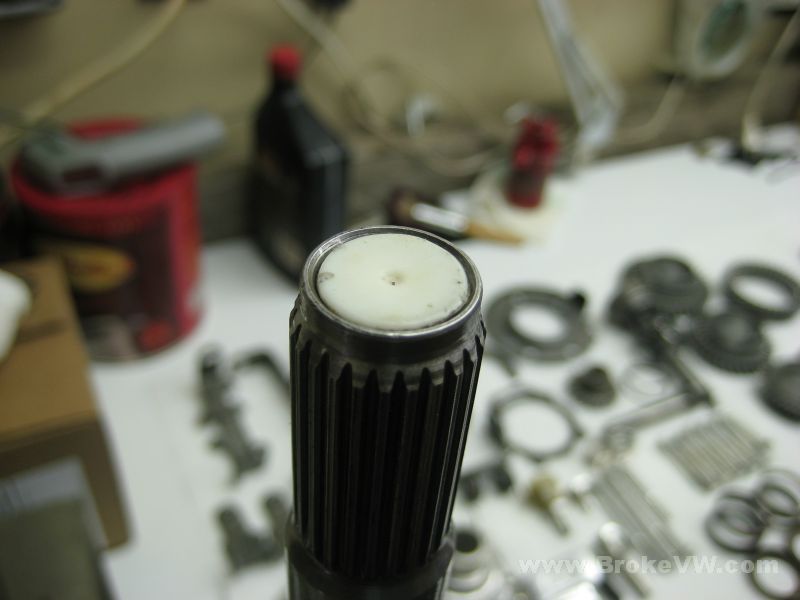
The white timing plug you want changed to a better condition...
The dent in the sleeve is from a flat blade screwdriver, likely caused when the seals were being removed...
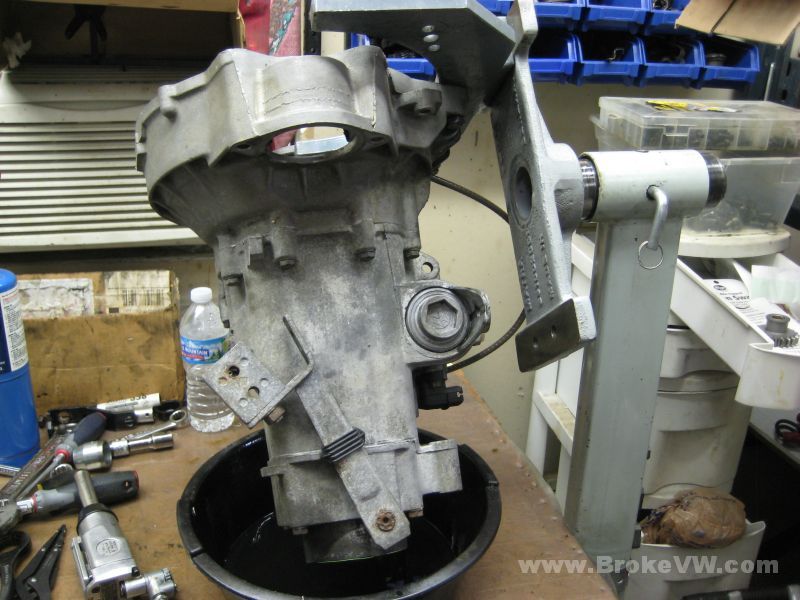
Draining the rest of the fluid out of the trans...
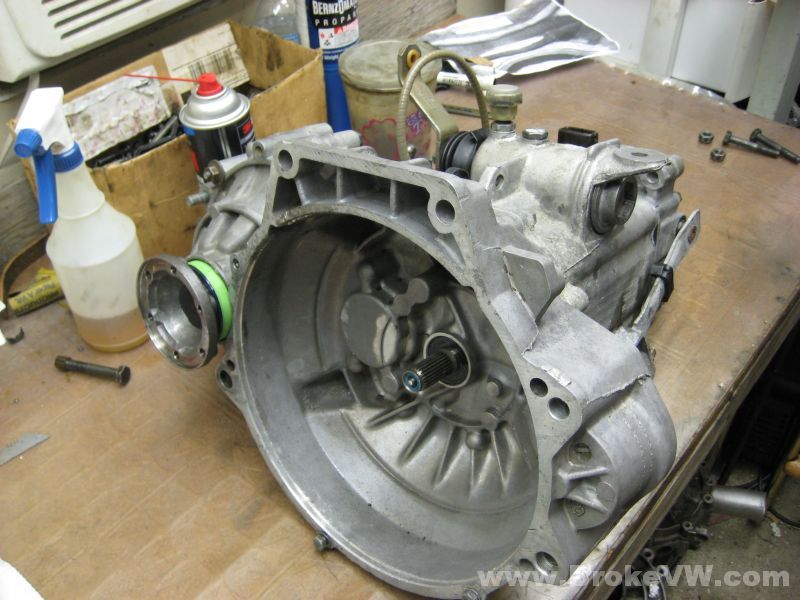
Mounted onto the rotisserie and the 5th housing bolts are loose...
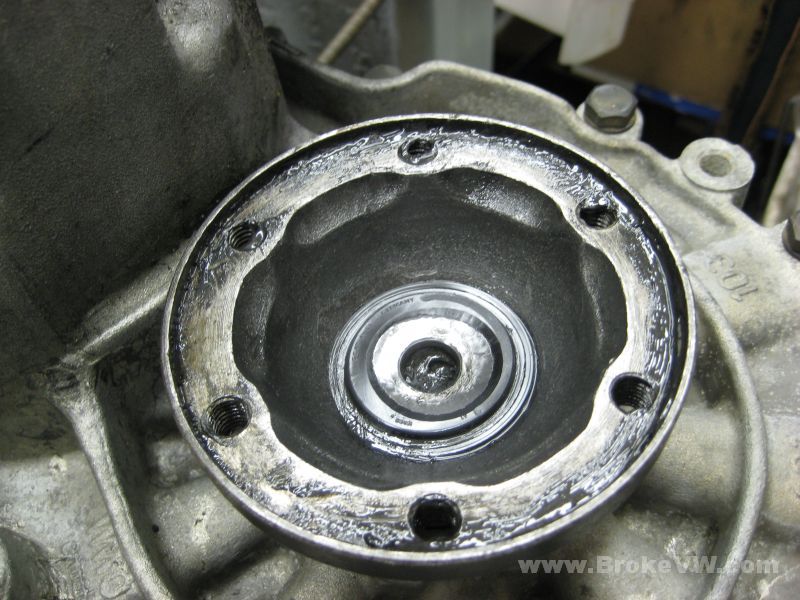
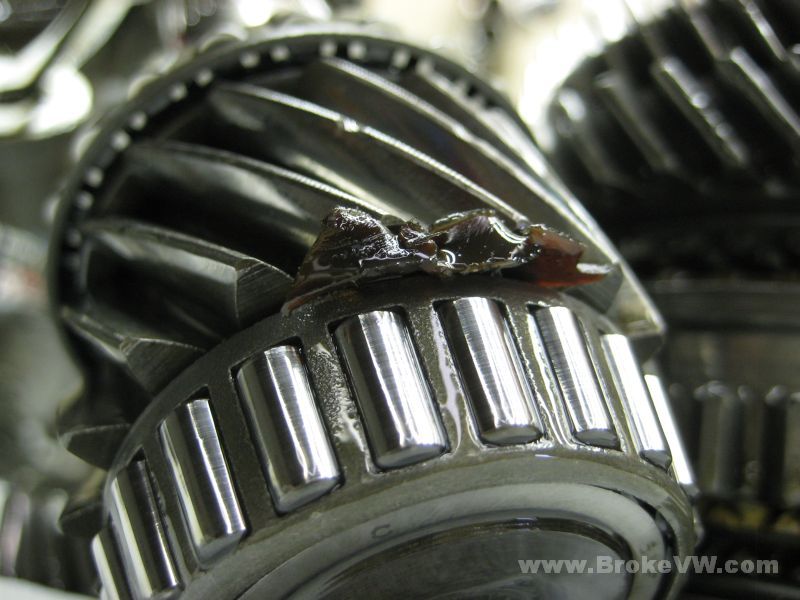
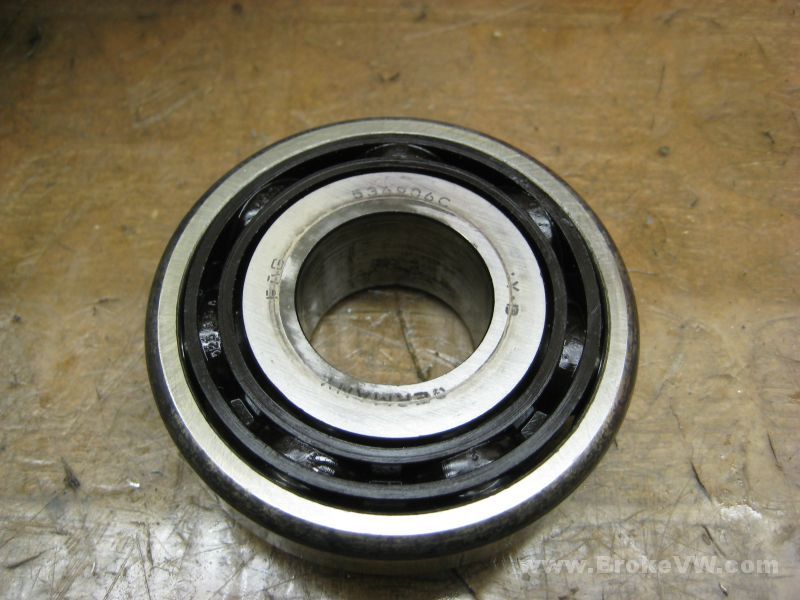
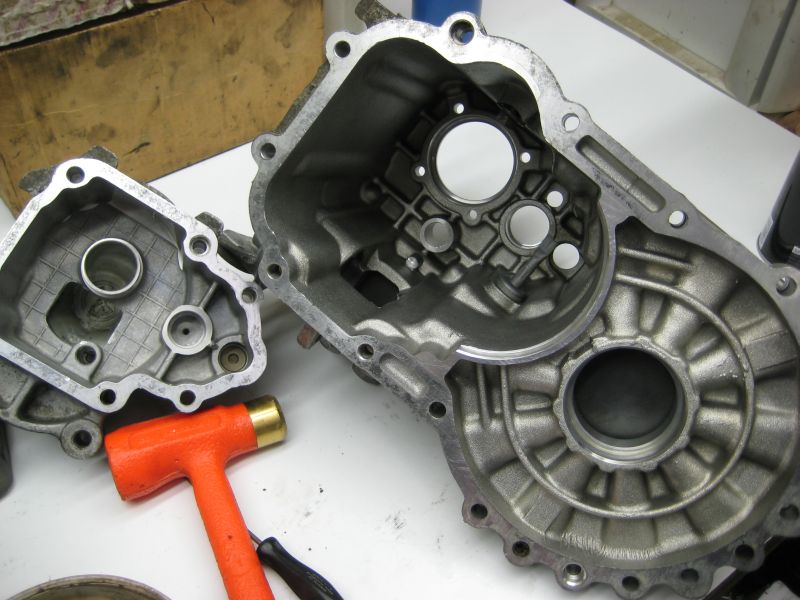
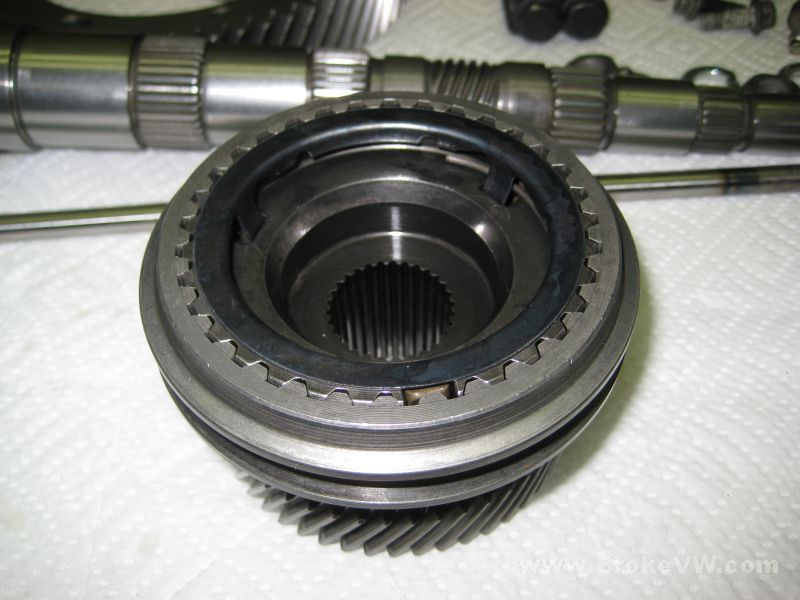
The housing removed, and I notice some debris on the TO bearing....

Not too bad inside the 5th housing, a little more debris in a few places...
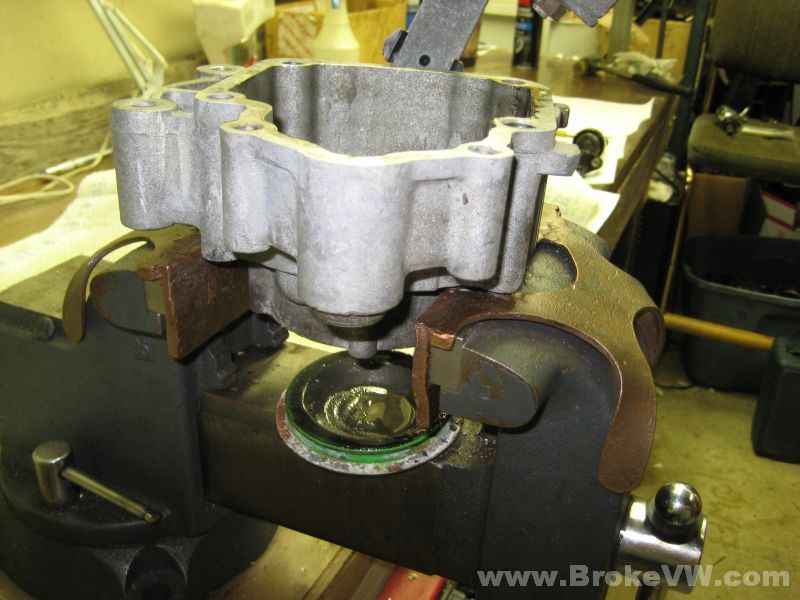
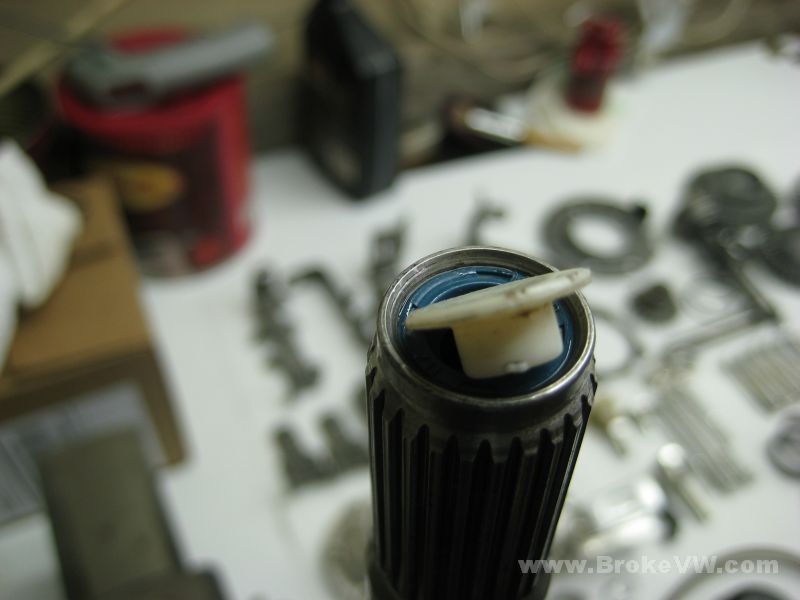
Knocking the green end cap out of the housing...
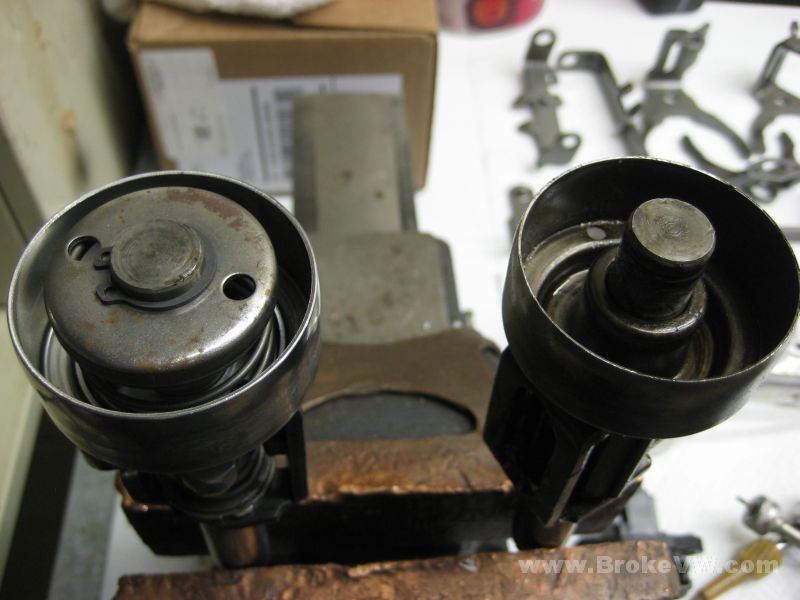
And the area where all of the debris usually collects in the 020. This turned out to be plastic. Plastic is used in a few places inside, but I believe I have found the source of it...

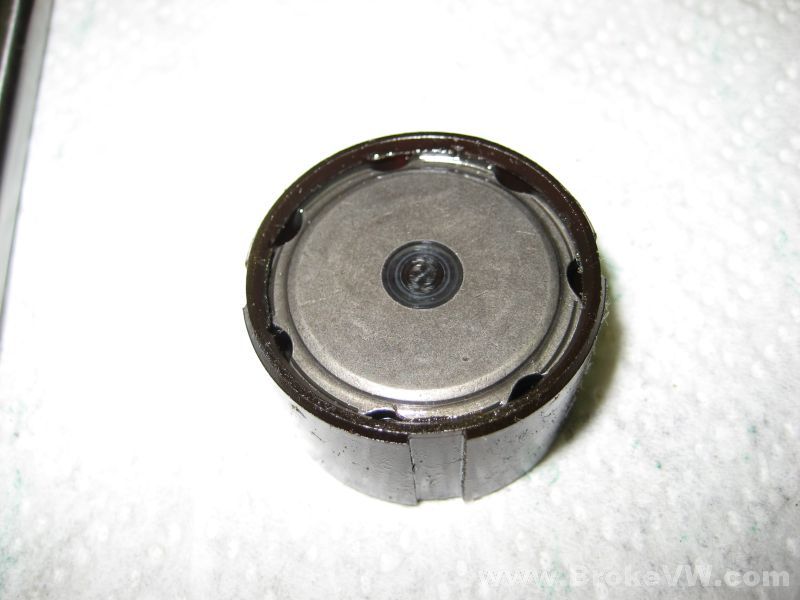
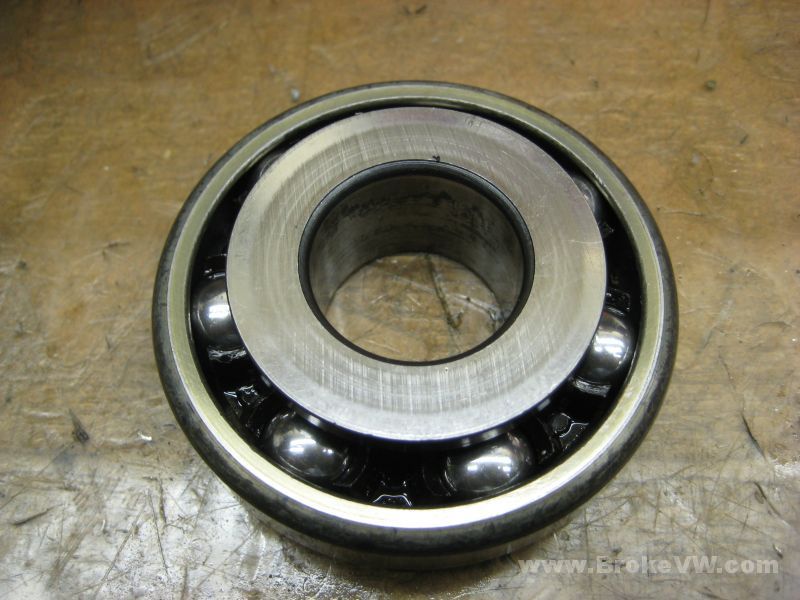
The TO bearing has been spinning as indicated by the mark on the back of it, and this will cause the race to chew into the plastic housing, which is where I think the plastic debris has come from, so a new TO bearing is in order here...
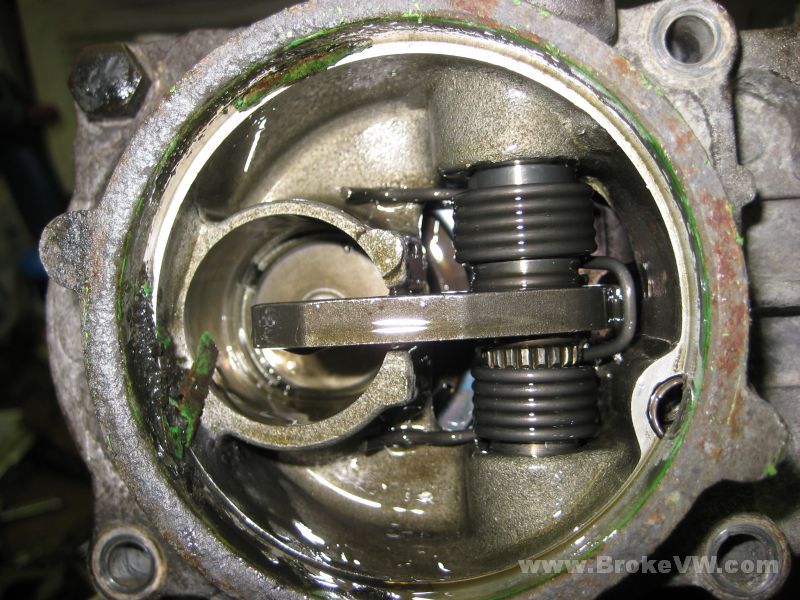
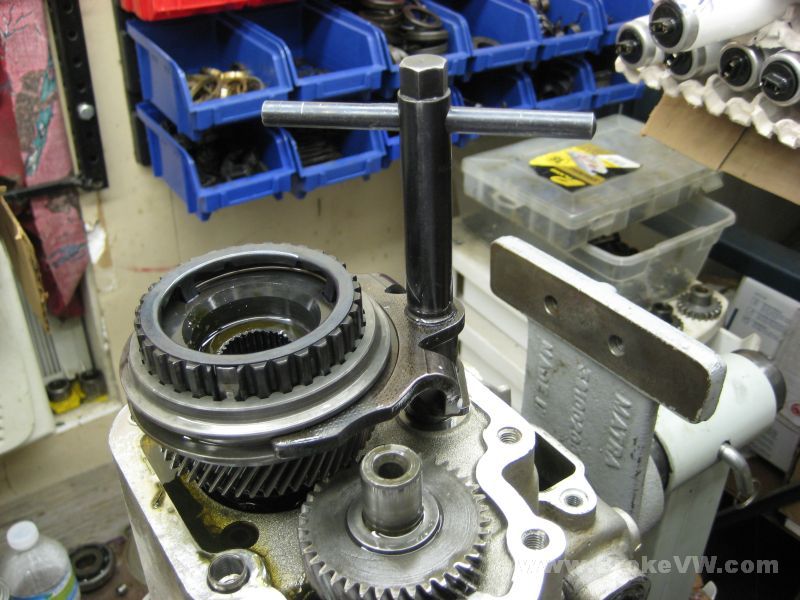
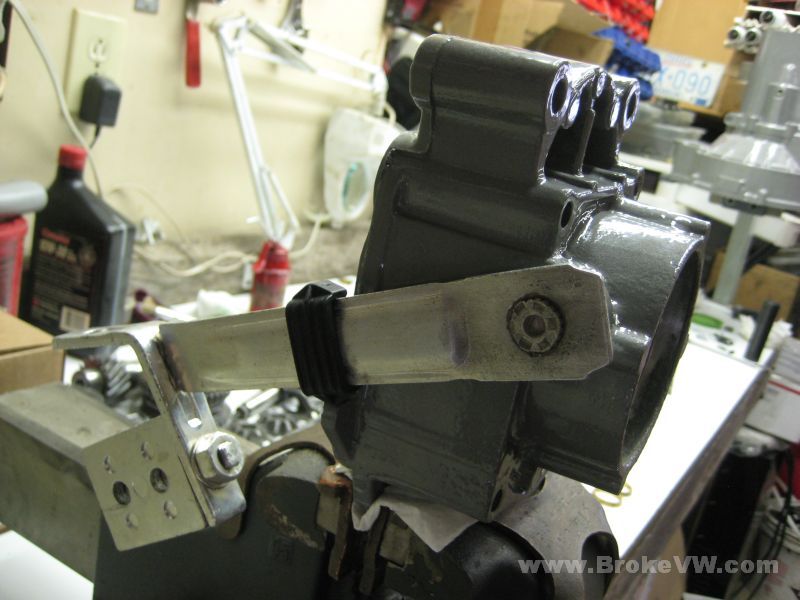
Crap. It is the old style fork lock, with a peened on tube instead of the press-on lockplate used on newer boxes. It is more of a PITA to work with, but it can be done....
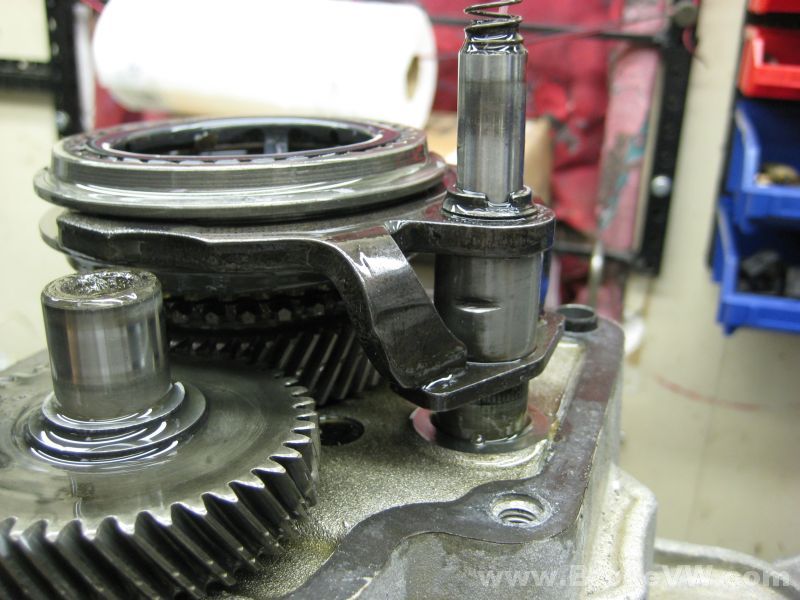
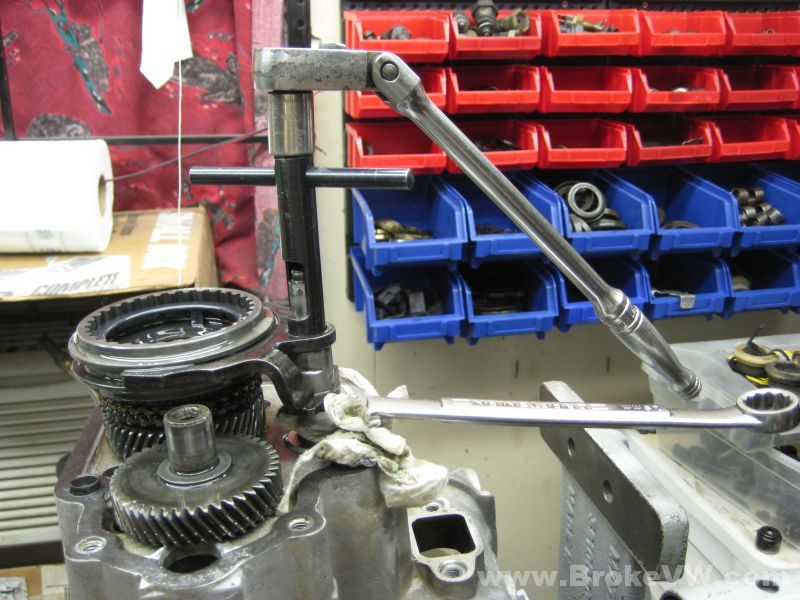
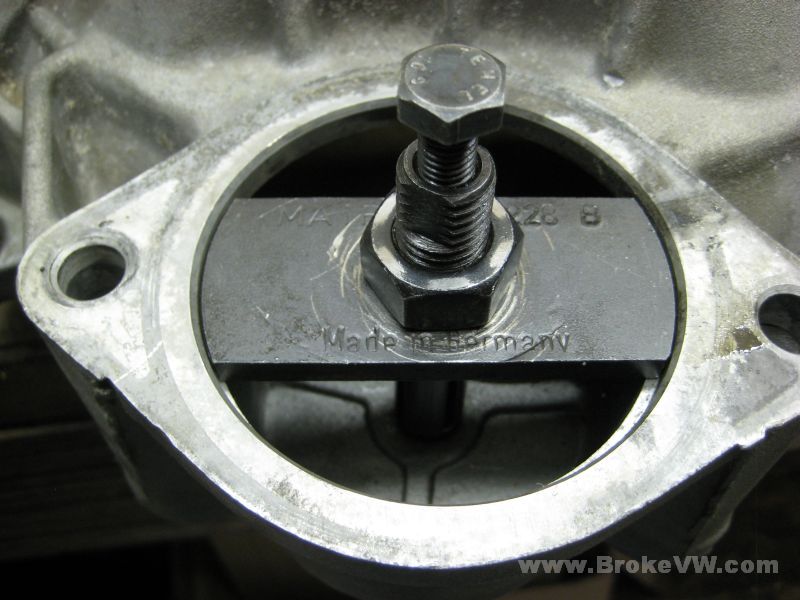
The fork tube needs manually driven off of the tube, this is where the VW 5th fork tool comes in handy, as it has a 13mm hex on top for driving that lock tube off. I support the bottom of the fork with a big 19mm wrench, helping push it up and off the fork tube. The towel under the wrench ensures that it doesn't damage the gasket surface of the casing...
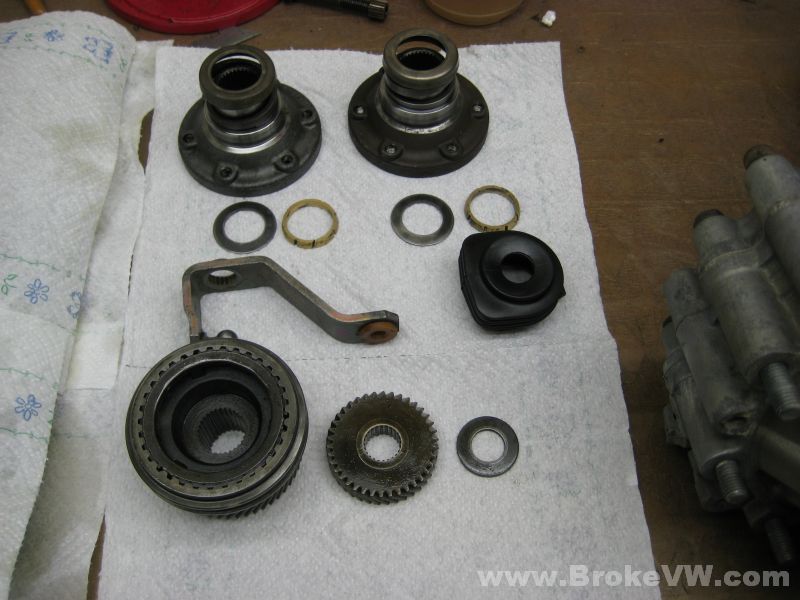
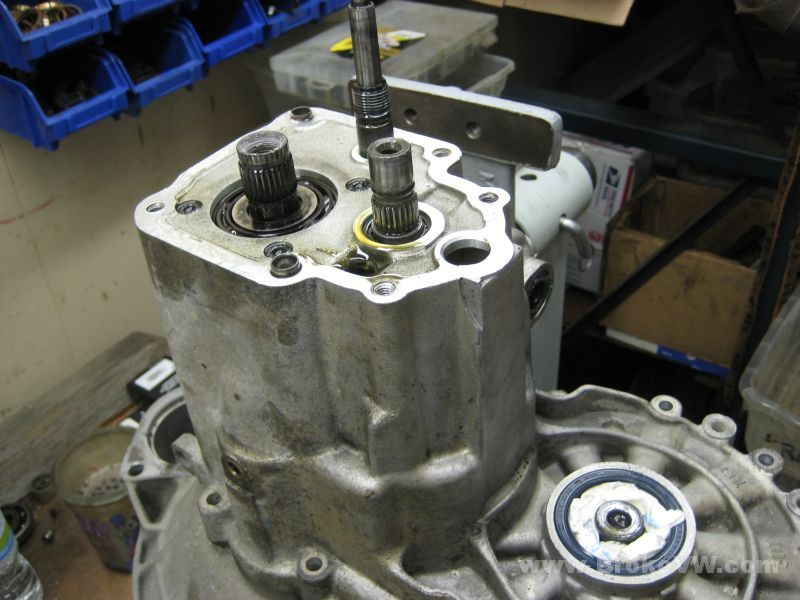
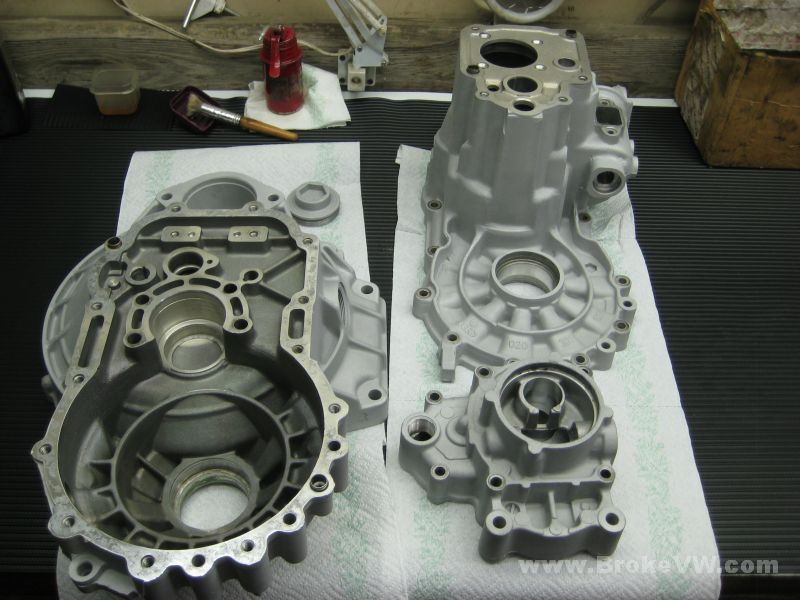
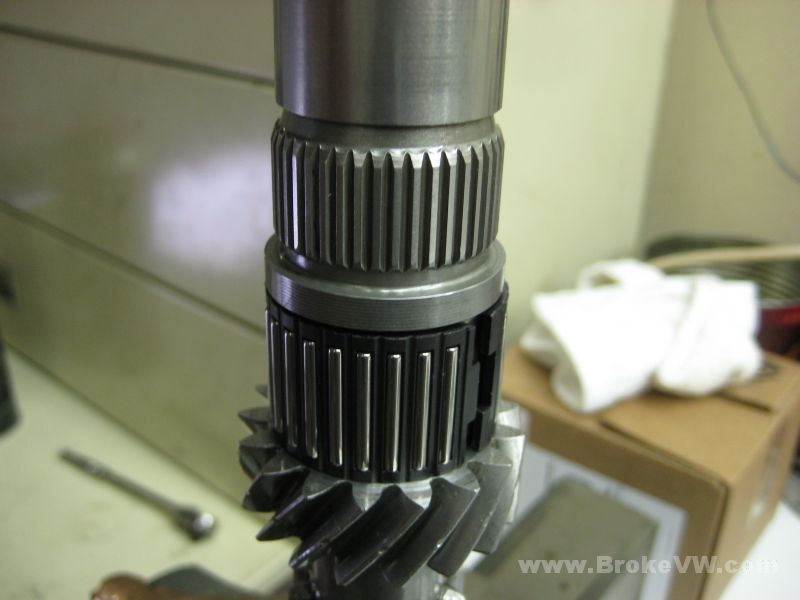
The gears removed along with the old gasket, ready for the swap...
The new cleaned gear being installed onto the 5th selector hub...
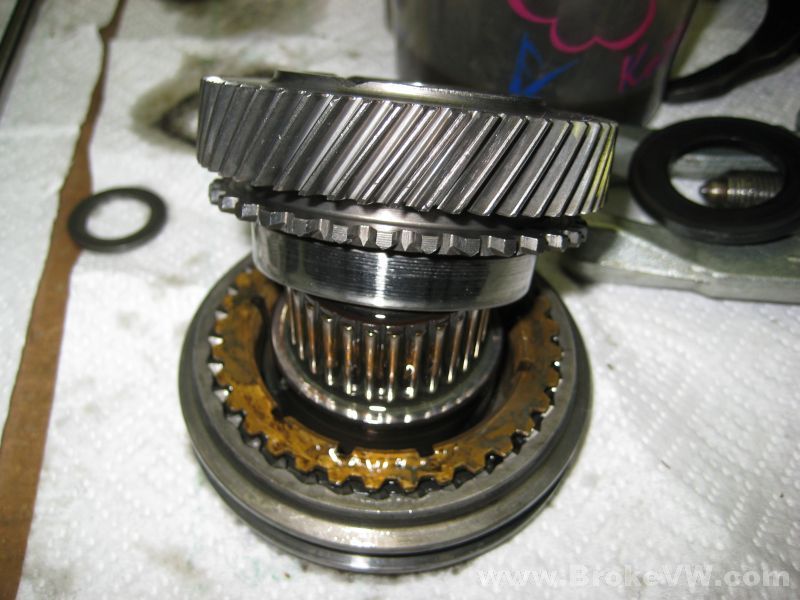
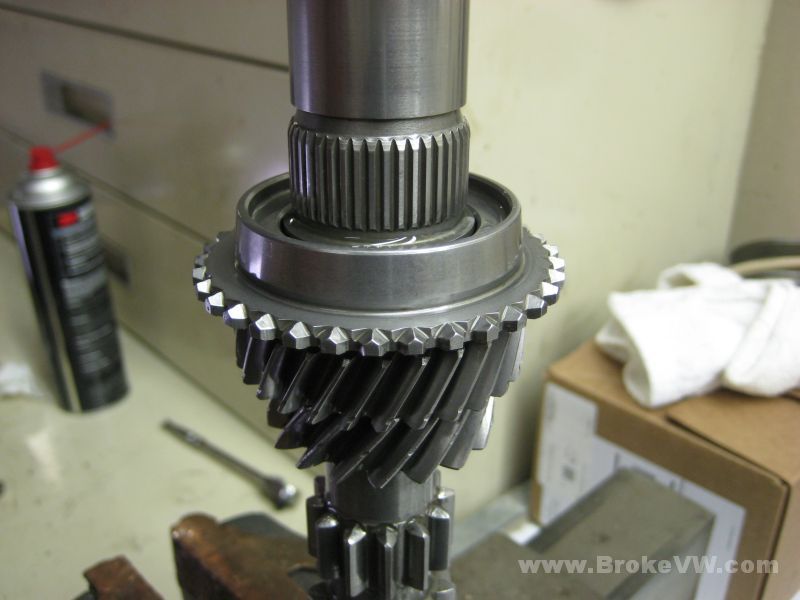
The new gear set in place...
Once the fork is adjusted, the tube is peened again in place with a chisel or screwdriver. Because only the gear set was changed, the tube was put back in the same spot and locked into place with a fresh hit with a chisel....
The old seal being removed...

The old bushing exposed...
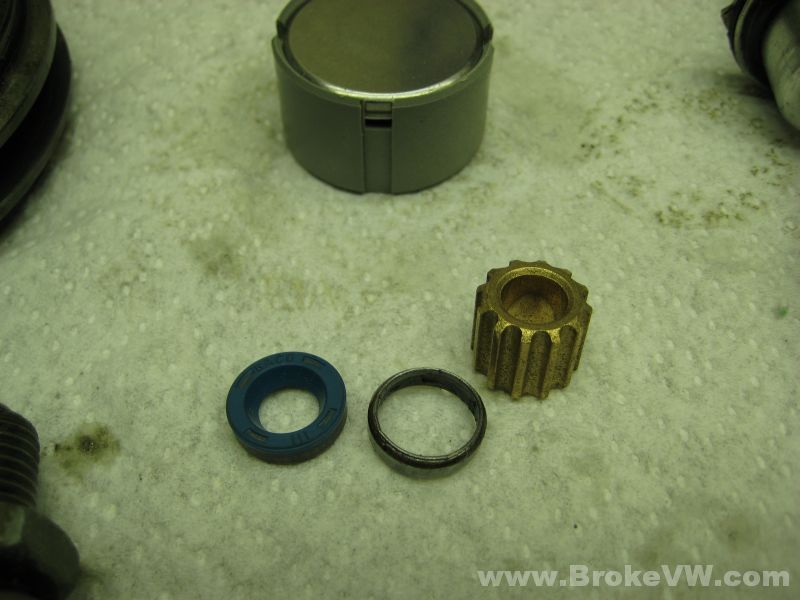
The new TO bearing, seal and bushing, along with what is left of the old seal....
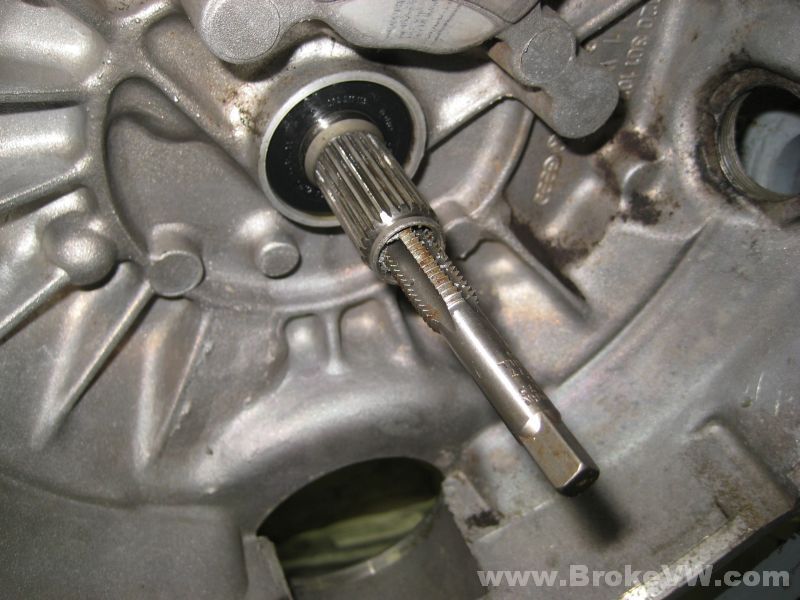
Running a tap in to cut into the old bushing...
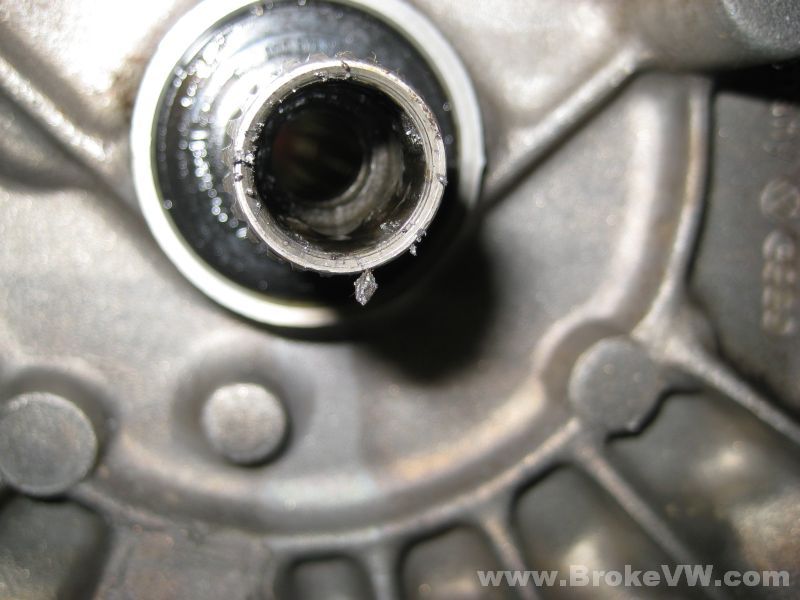
All removed, it only needs wiped out and cleaned off, and the new parts installed...
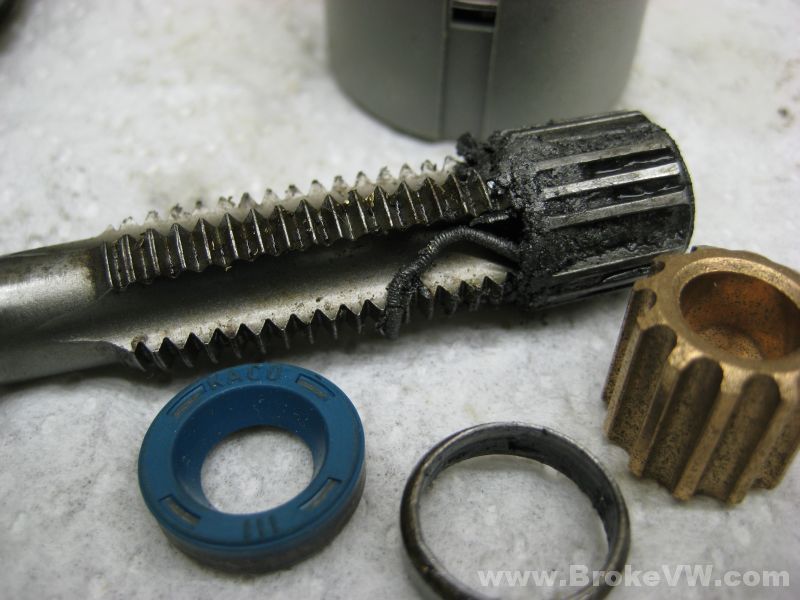
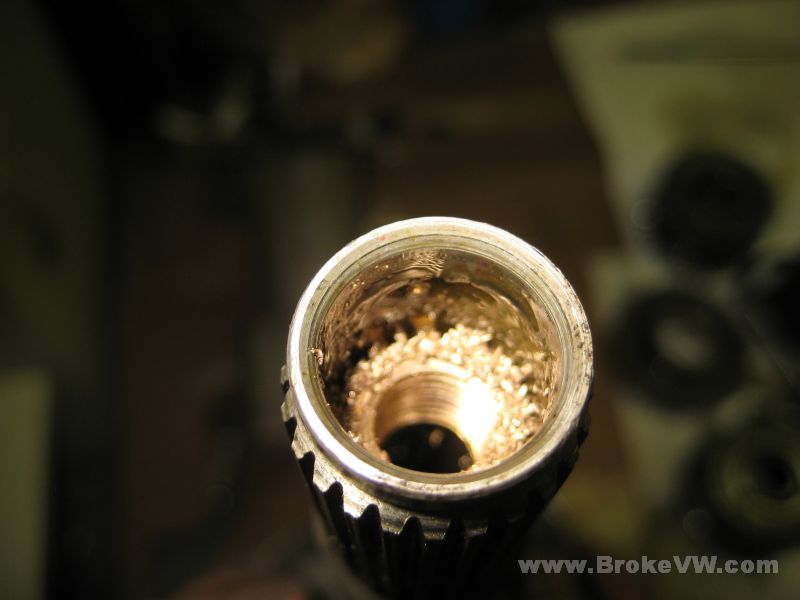
The old bushing, and what used to be the spring to the old seal stuck in there....
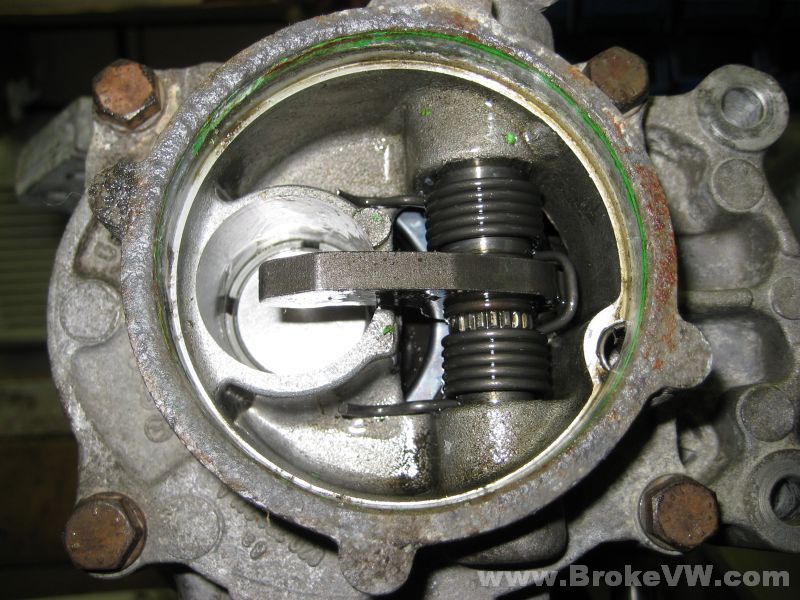
The release arm swung out of the way so the TO bearing can be installed....

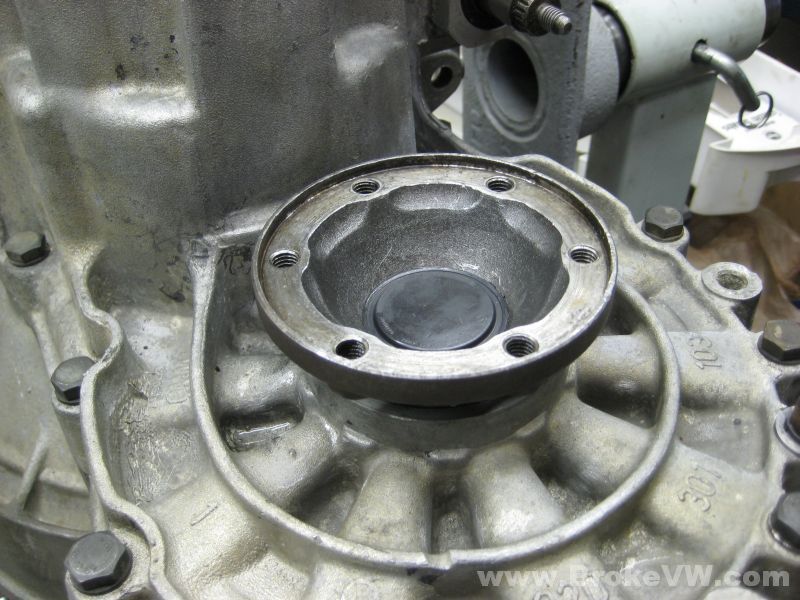
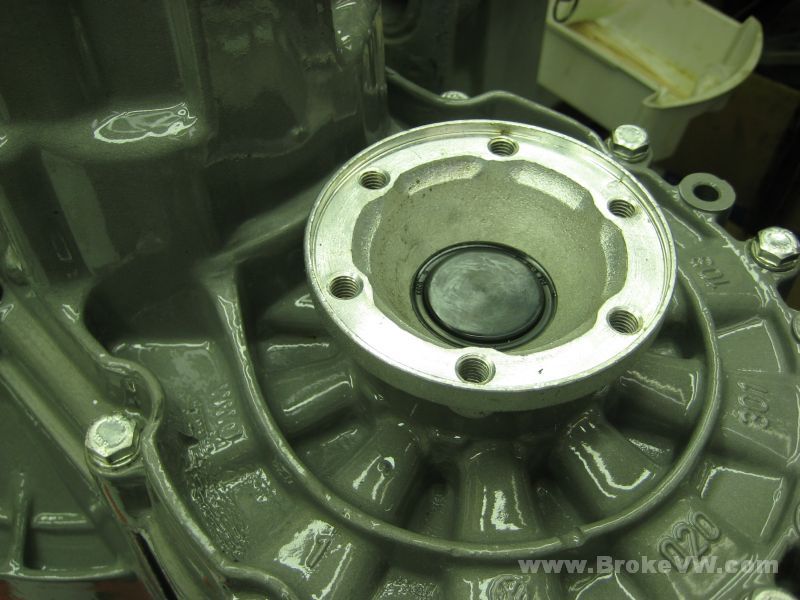
The new flange seal and flange installed...
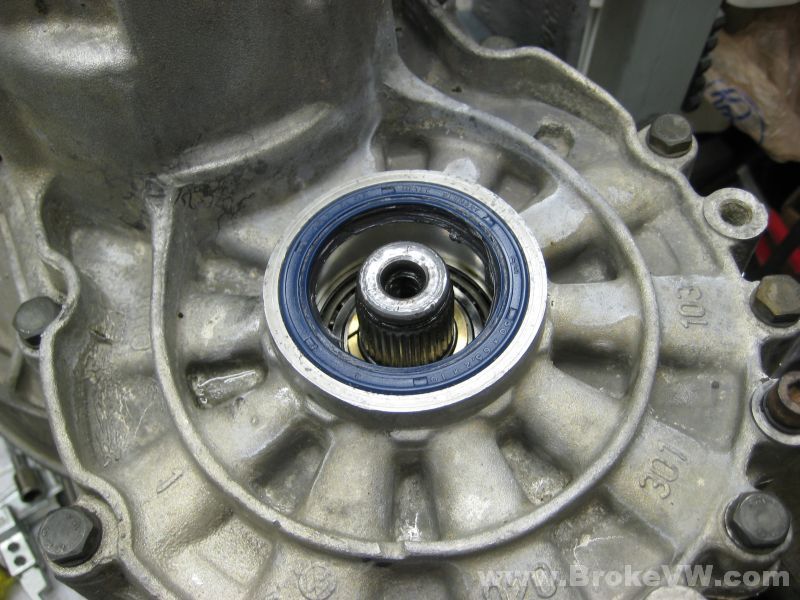
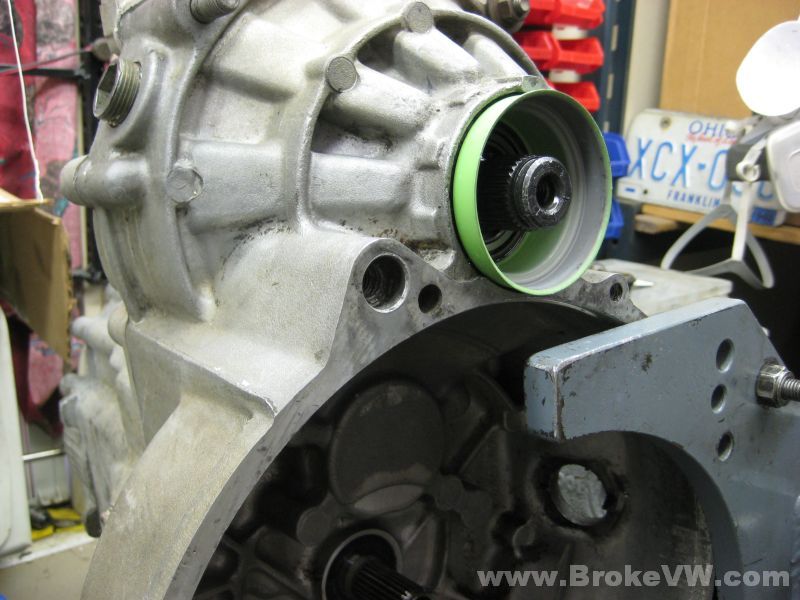
The new VW green seal sleeve installed...
The new pushrod bushing installed along with a new seal...
The replacement T40 Torx speedo bolt...
It's done and ready to be picked up....

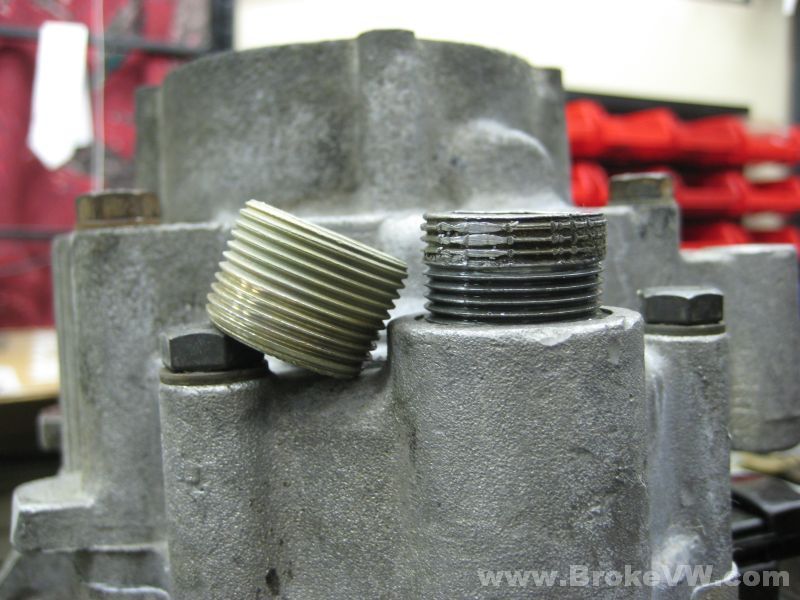
I noticed the filler plug was pretty chewed up and has damaged threads, if you're interested, I have a plug that looks much nicer and has been zinc plated and chromate dipped, $5 for it.

Returned 03/21/11 to be powder coated
Draining the trans to get the steel parts removed so they can be shipped back to you to be plated...
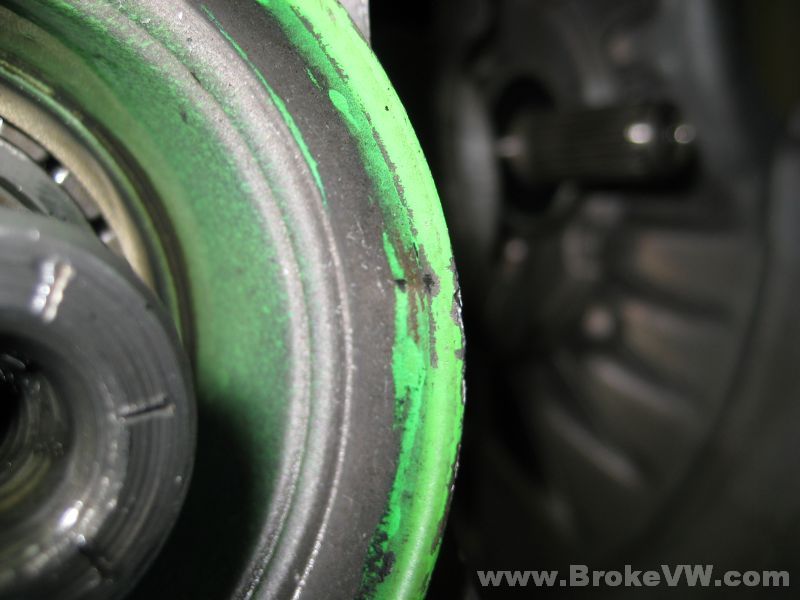
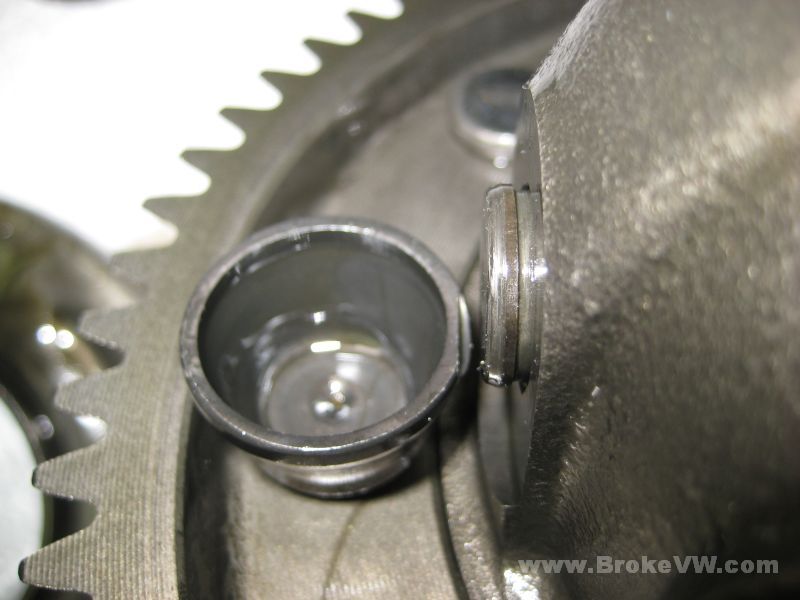
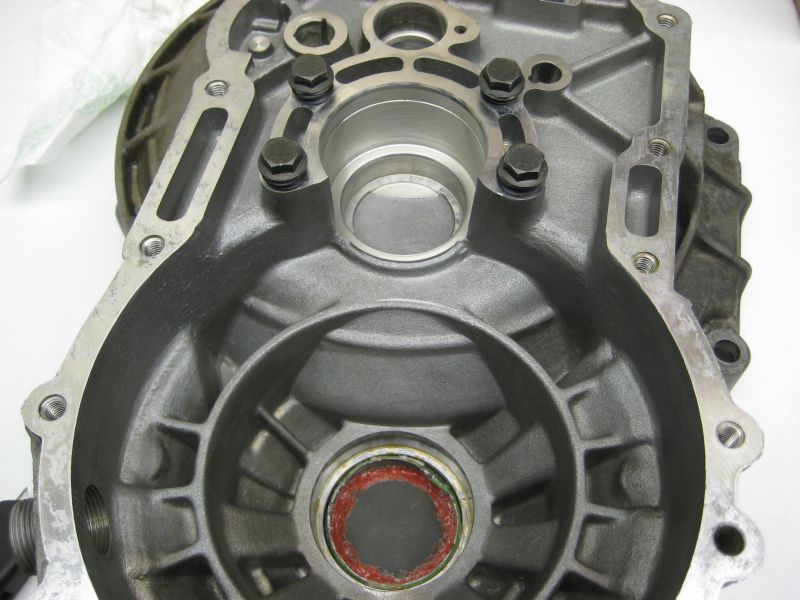
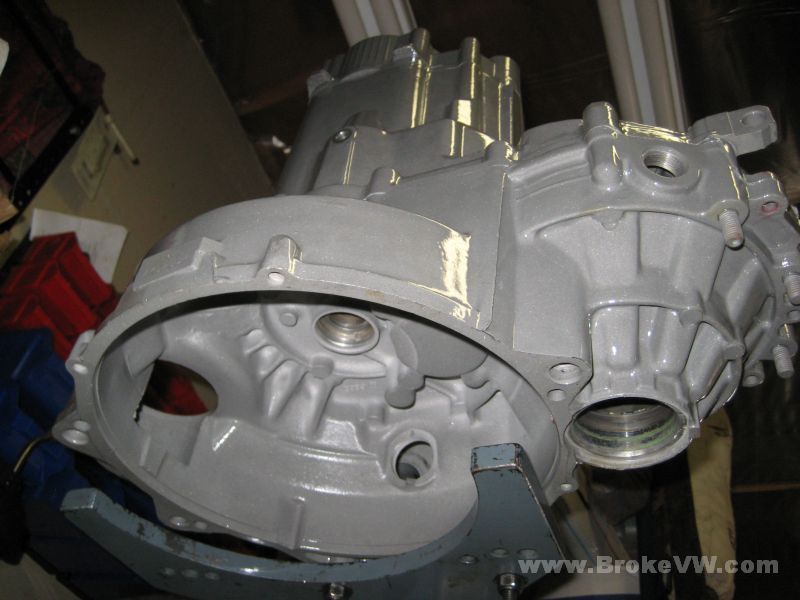
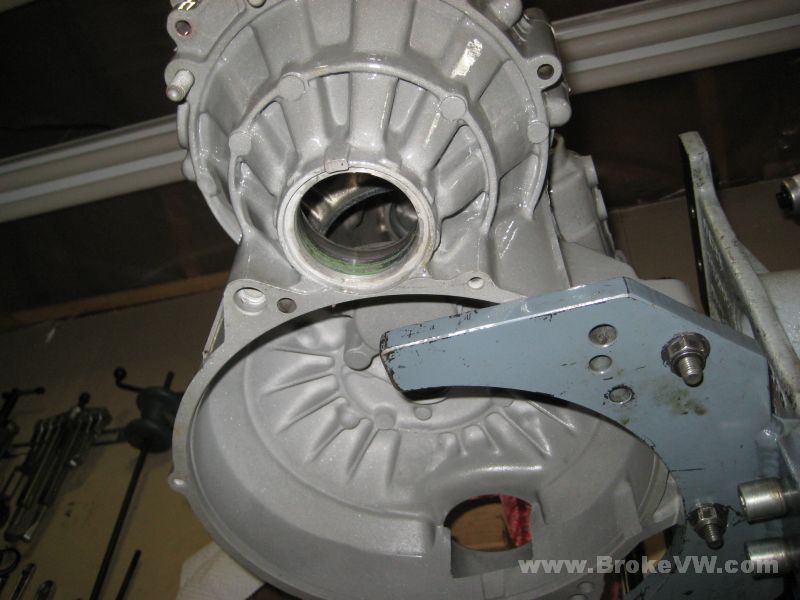
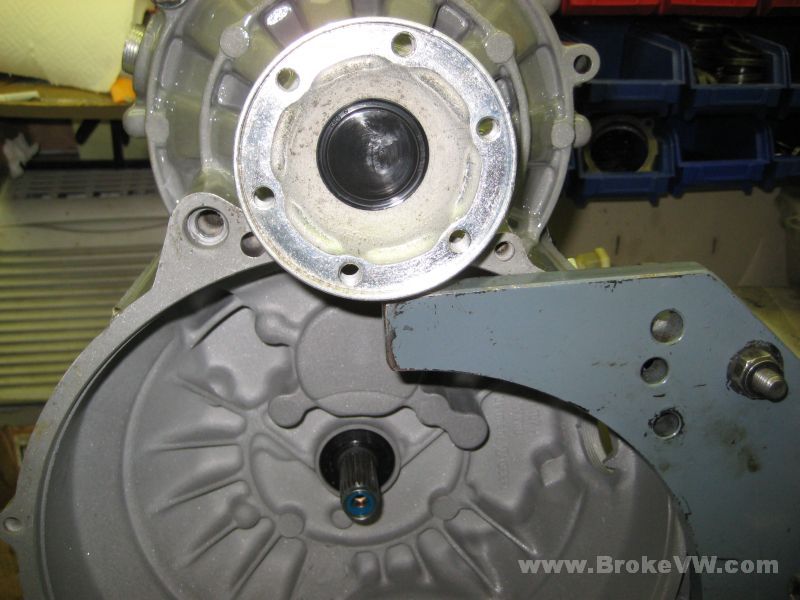
A pic of the damaged cap seal on the passenger flange...
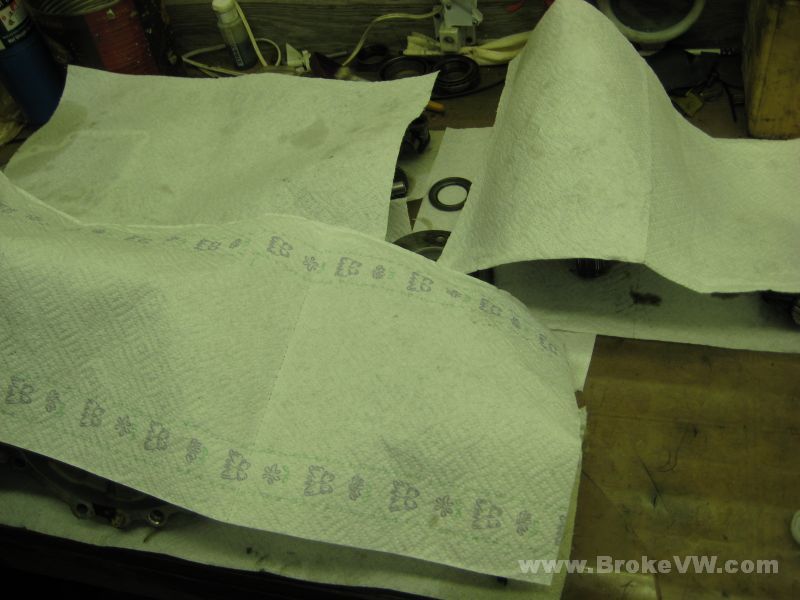
A little debris in the 5th housing...
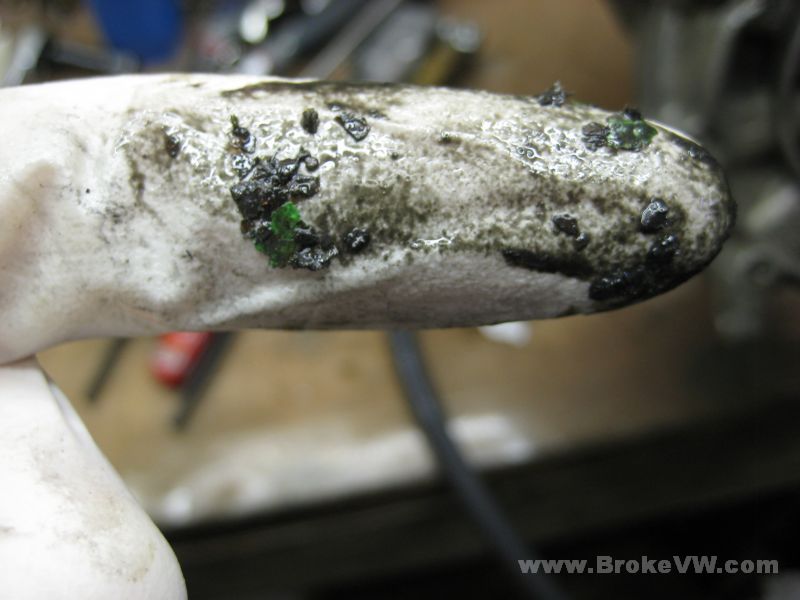
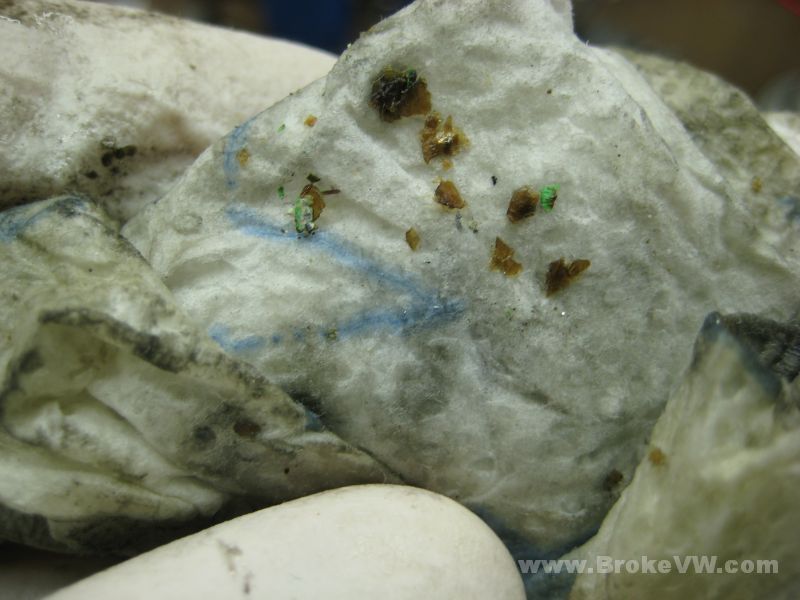
Gathering a little and wiping it on a paper towel reveals it to be a light colored plastic... my guess is that it is the plastic thrust piece inside the diff letting go, when it is split open I'll know for sure...
I've got the trans to the side while I finish another box on the bench now, I'll get started back on it as soon as I can and will get it torn down and get the case coated.
Update 04/26/11
I've started tearing your trans down today to get it ready for cleaning.
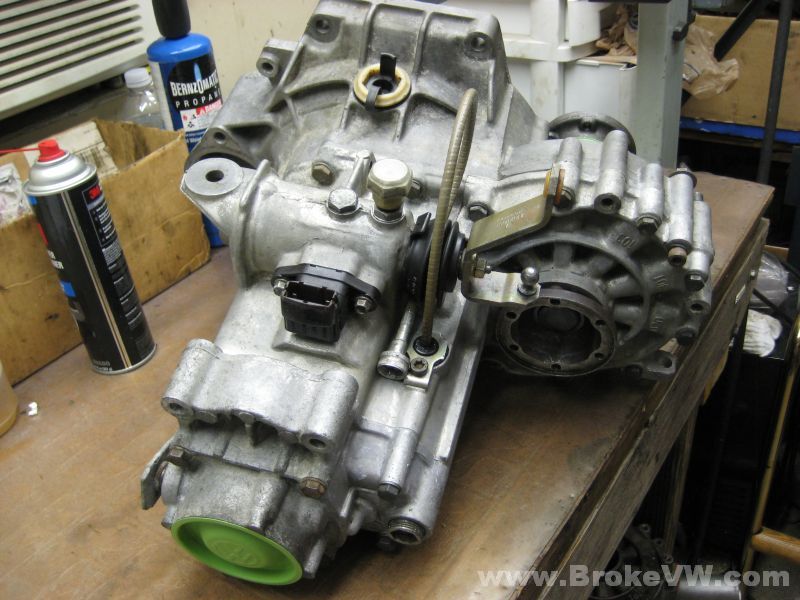
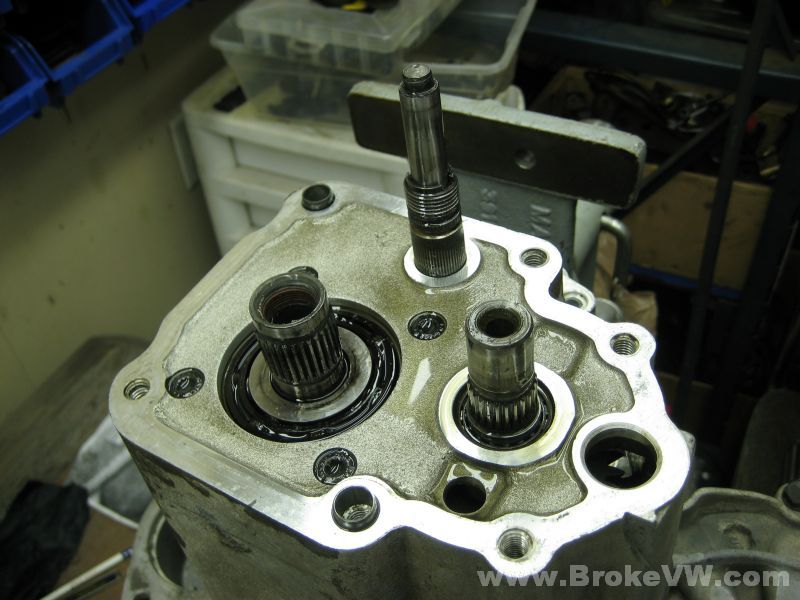
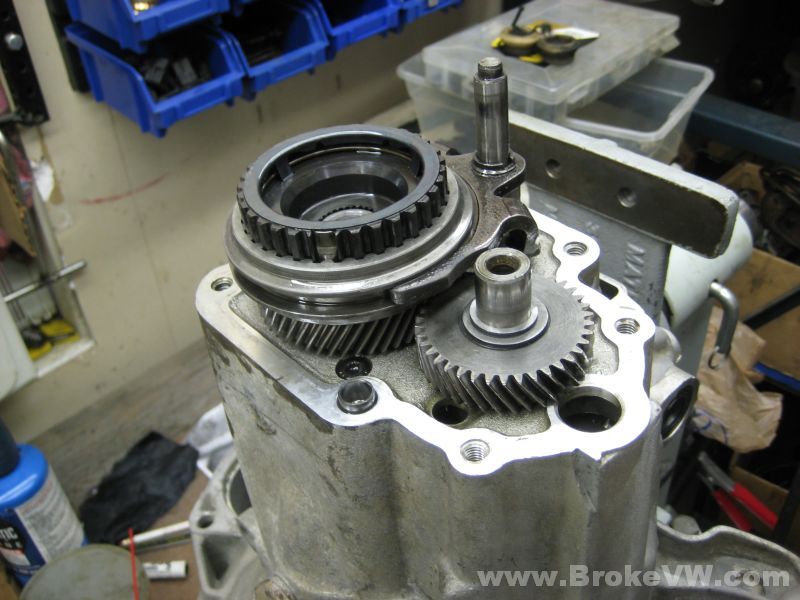
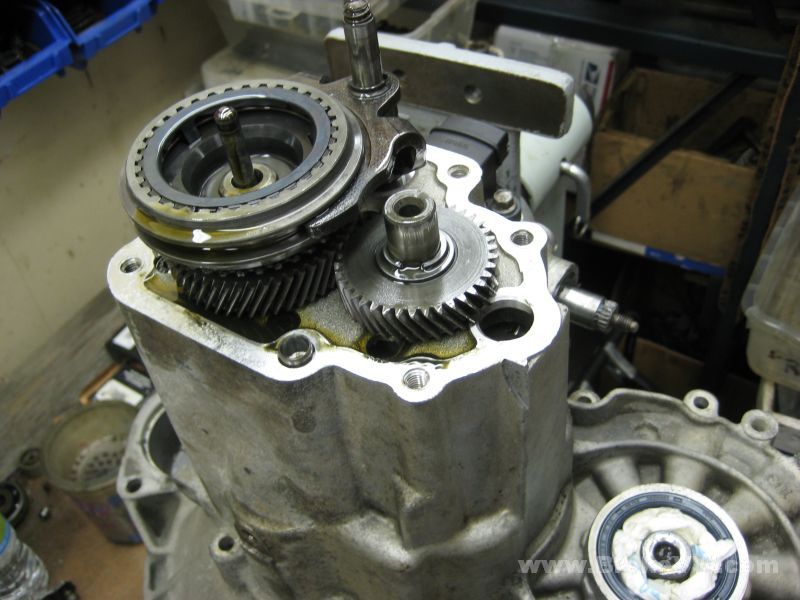
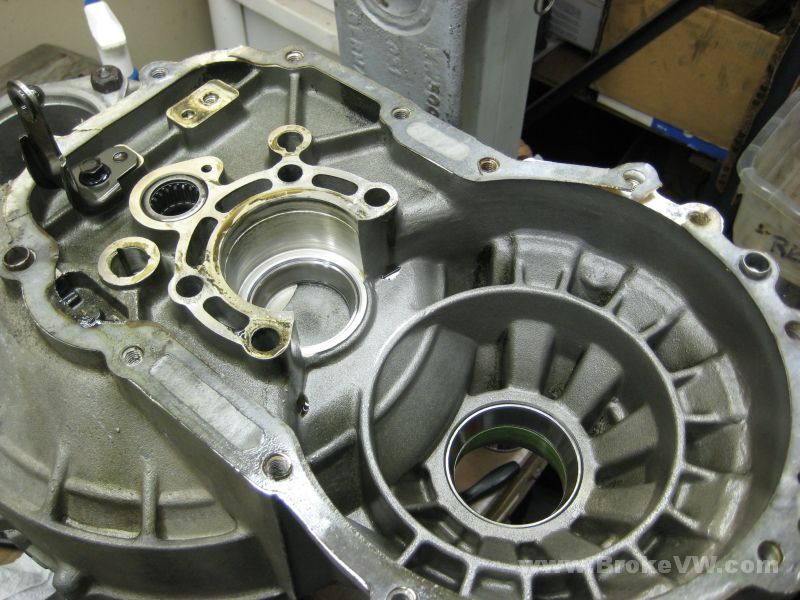
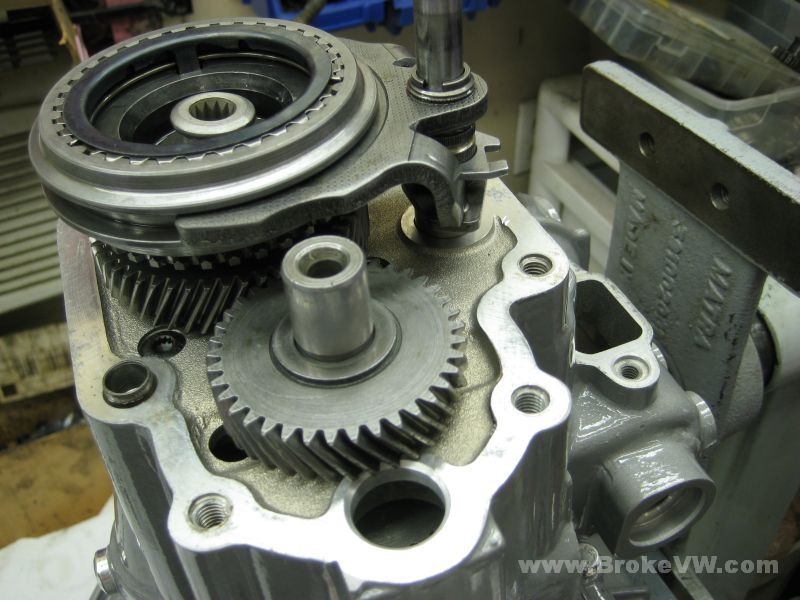
The 5th housing removed with the gears exposed...
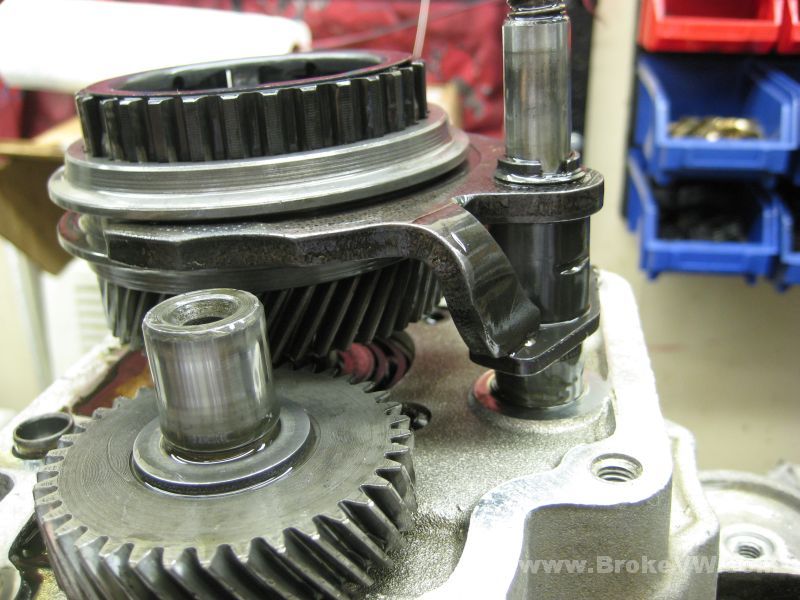
The penned on lock tube needs driven off before the gears can be removed. When I rebuild this, I will change the fork tube to a new style which will use the new style lock, so the peened on tube can be dumped...
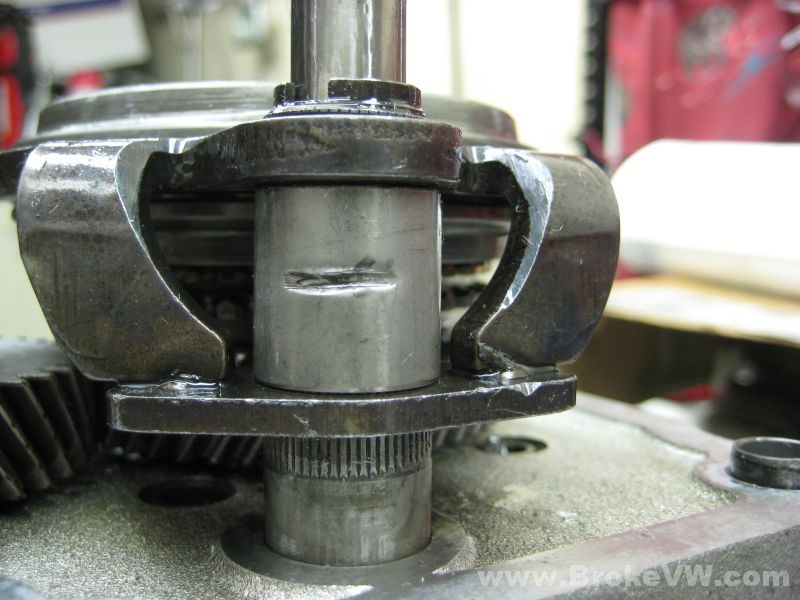
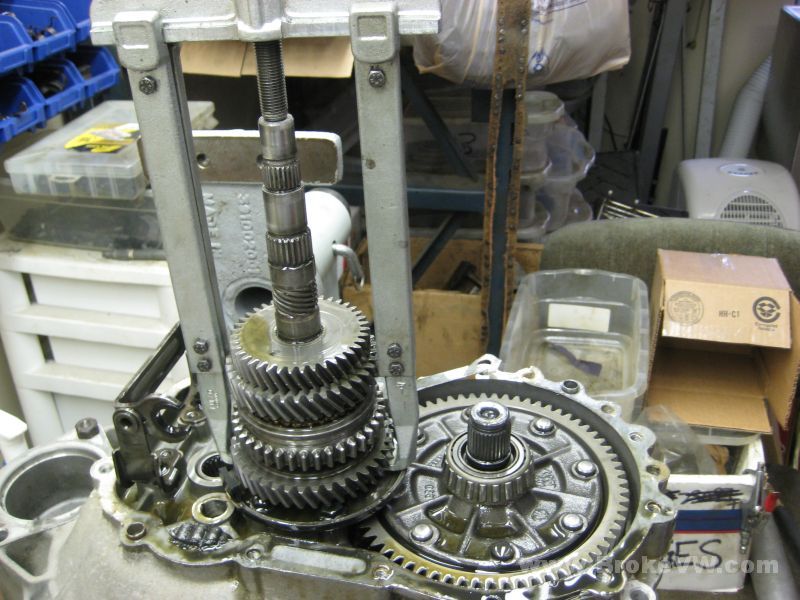
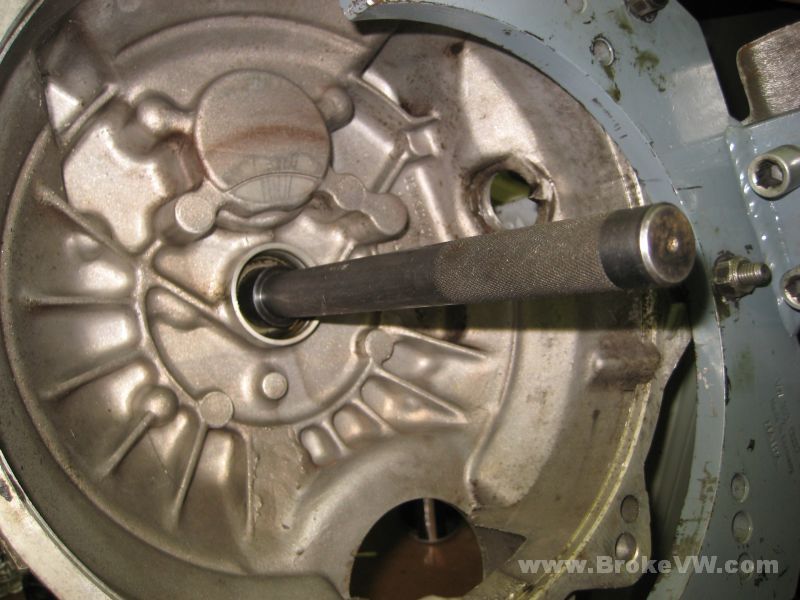
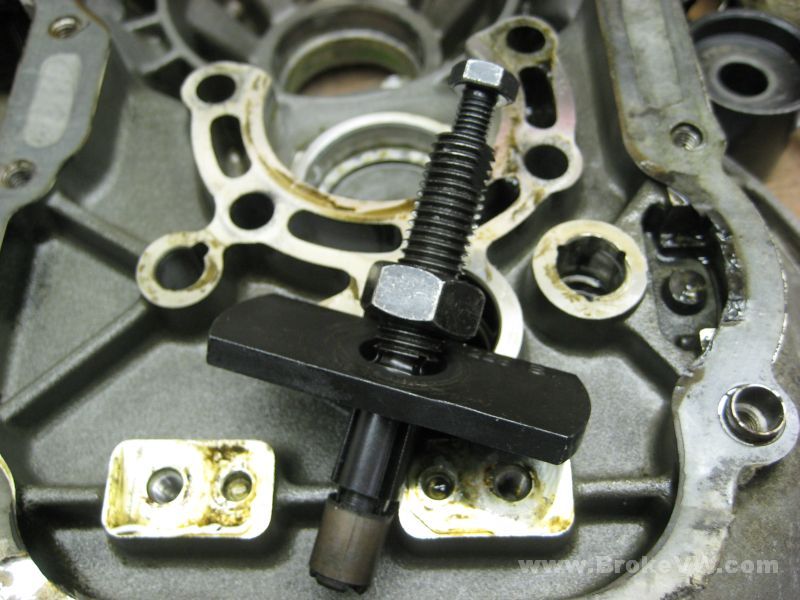
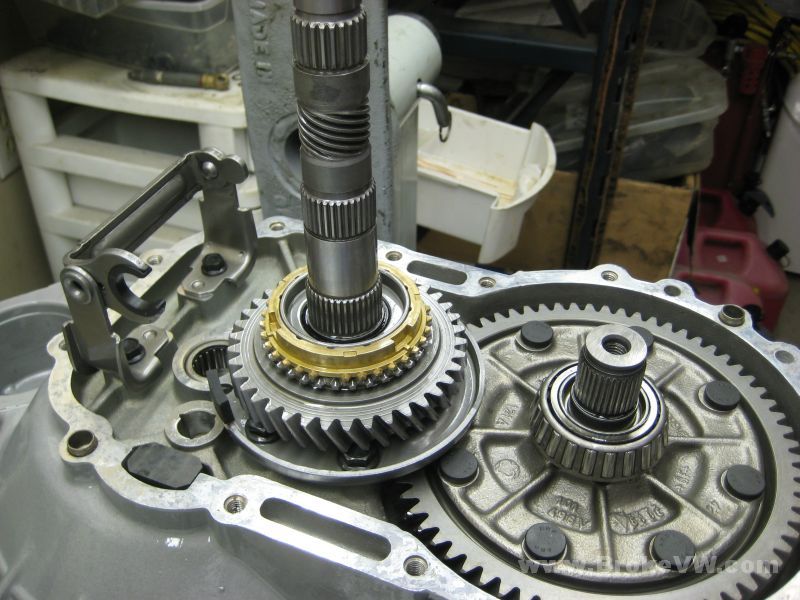
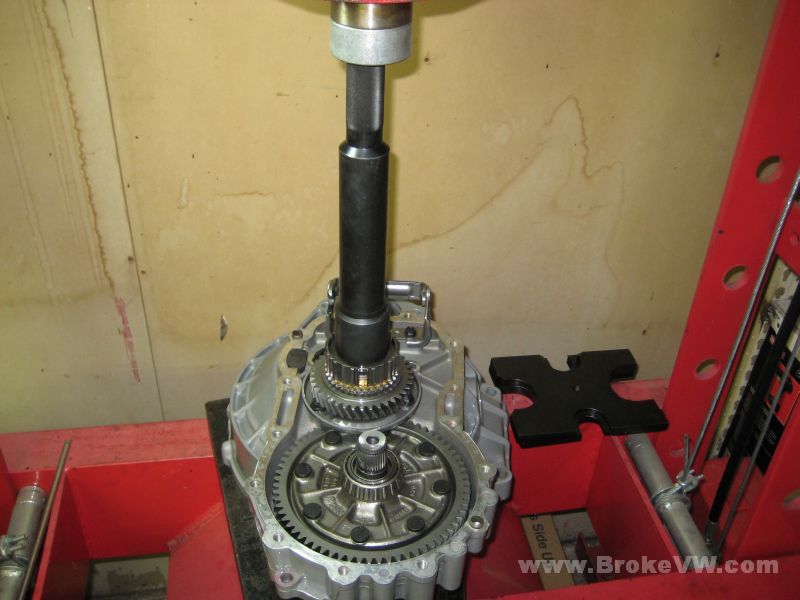
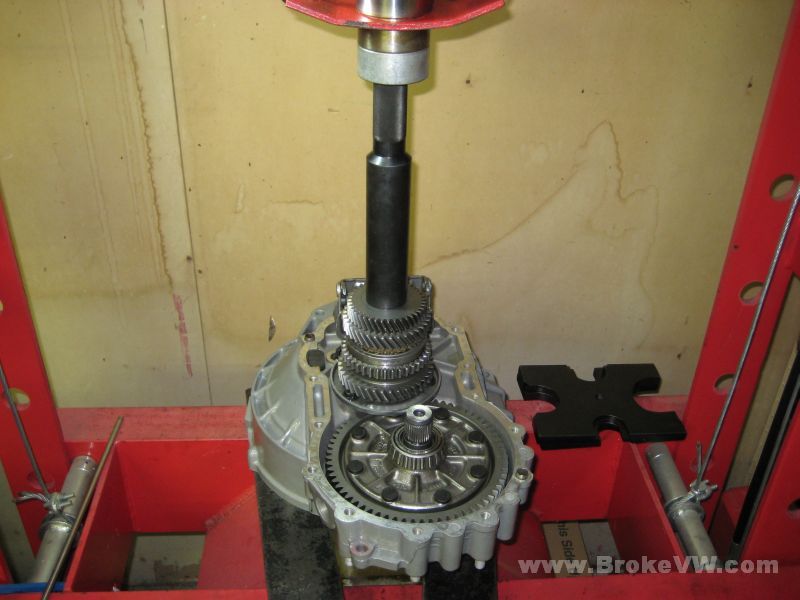
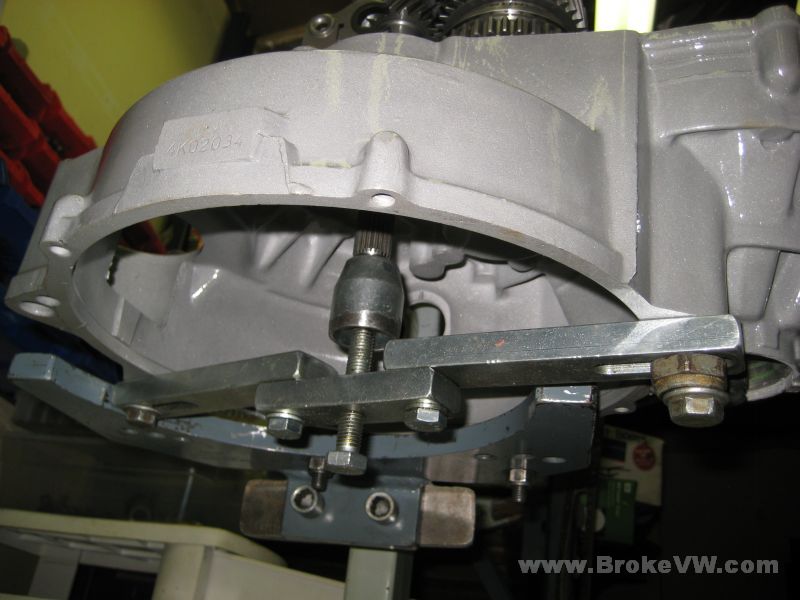
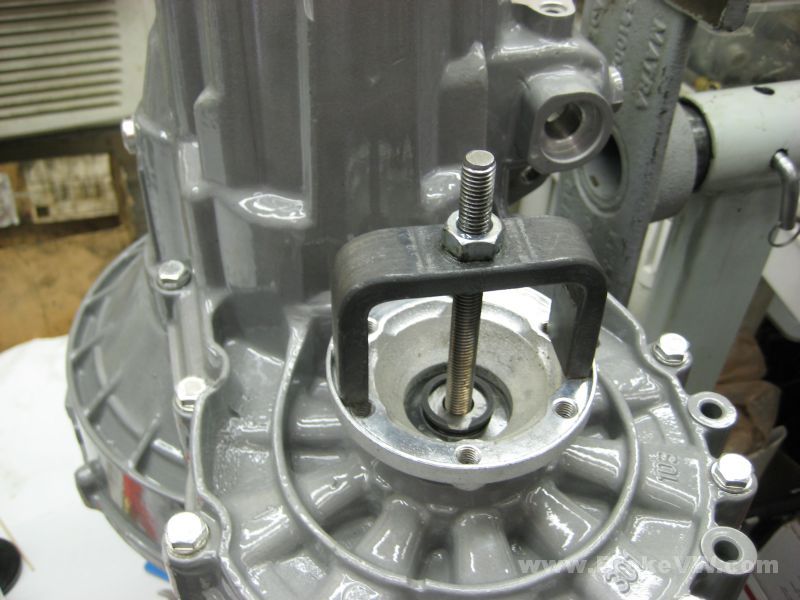
Before the case is split, the input shaft needs supported from below with the VW special tool...
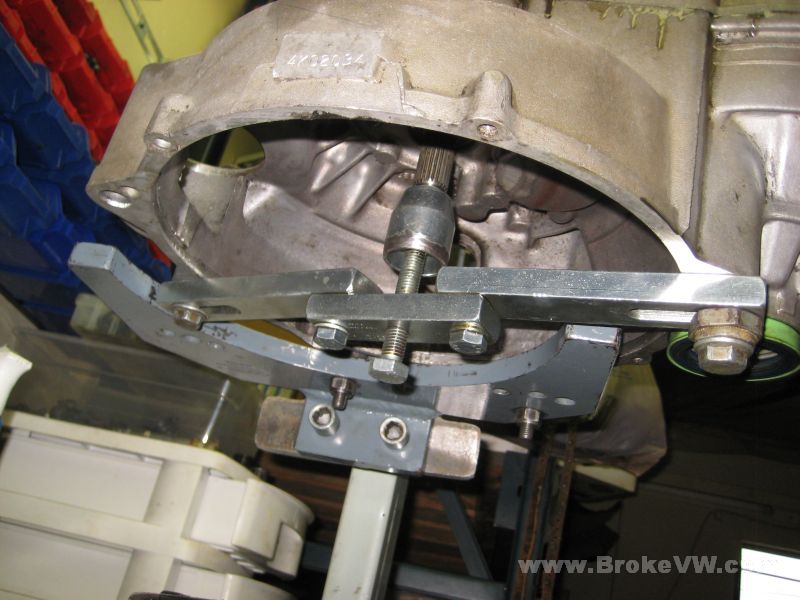
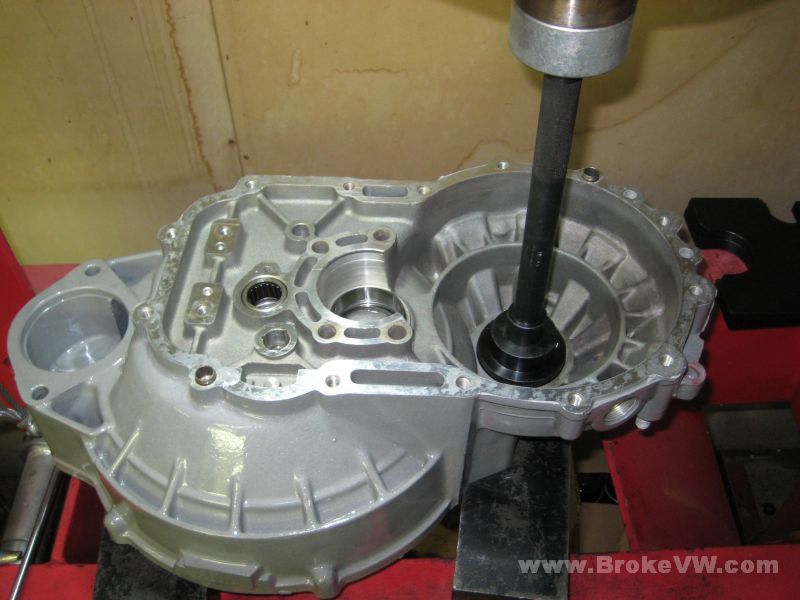
The trans can now be split using the splitter tool...
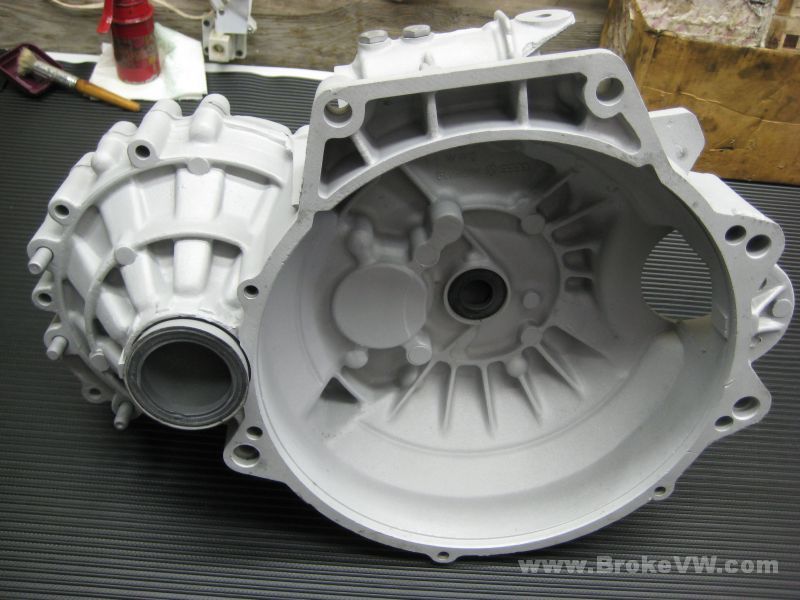
The inside doesn't look too bad... not great, but I've seen worse. I am hoping the stain is easy to get out...
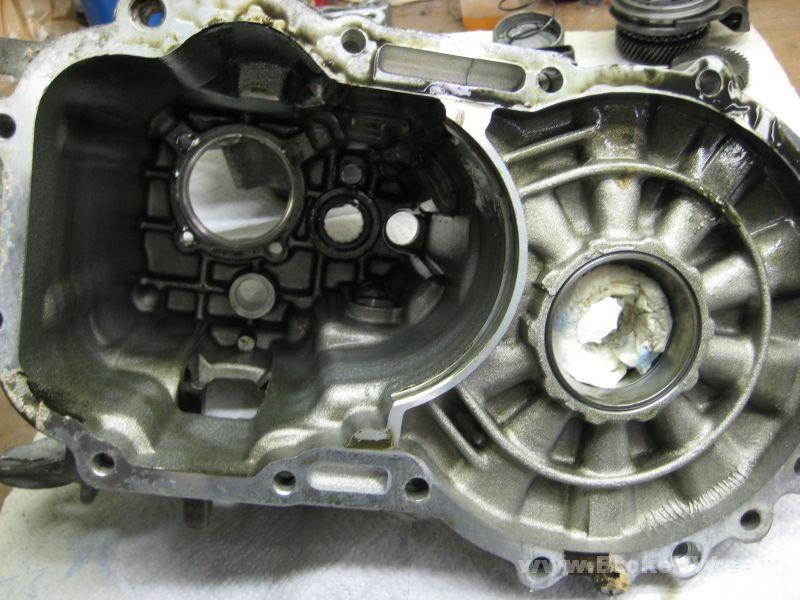
With the case lifted off and the stacks exposed, this caught my eye as it isn't supposed to be in there. That looks like a speedo cable o-ring seal to me. The magnet looks like it has caught some stuff over the years. I'll have to moosh through the pile to see if I can find any chunks...
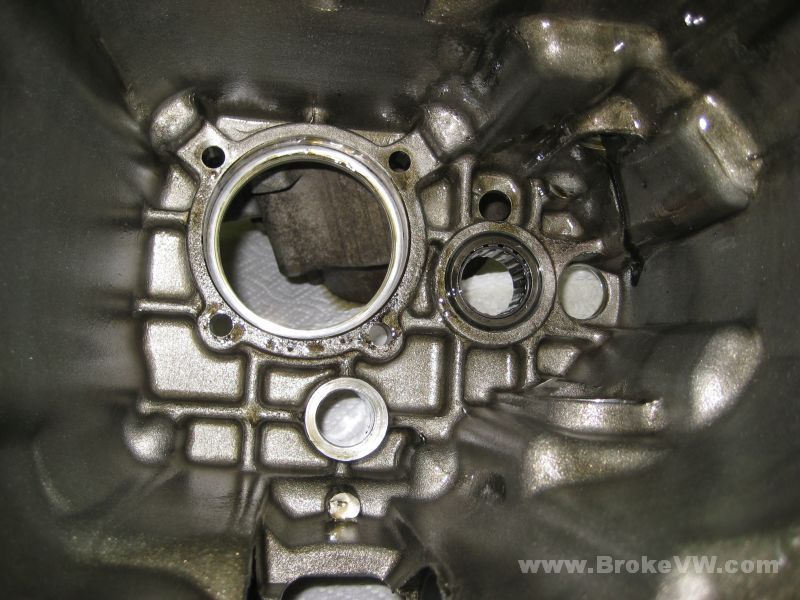
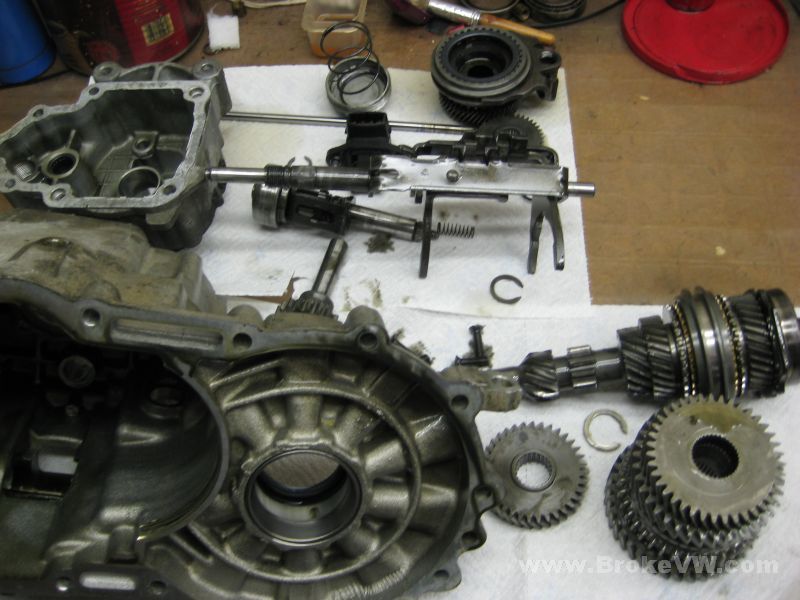
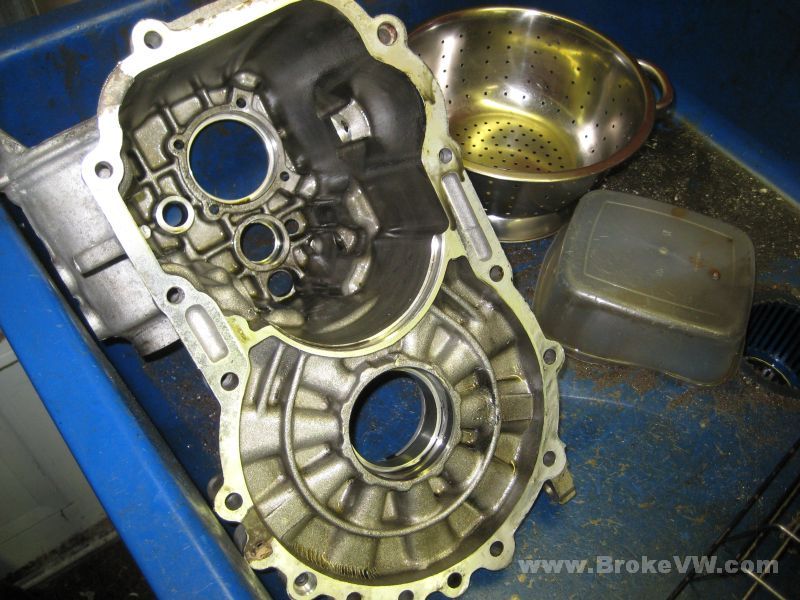
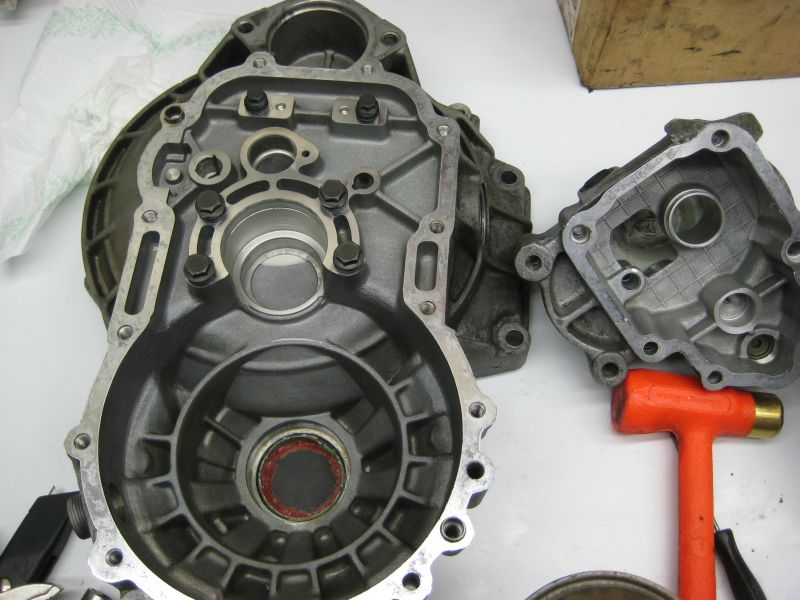
The gear box opened up...
The bearing race for the diff on the gearbox half doesn't look too bad. Worn, but nothing catastrophic...
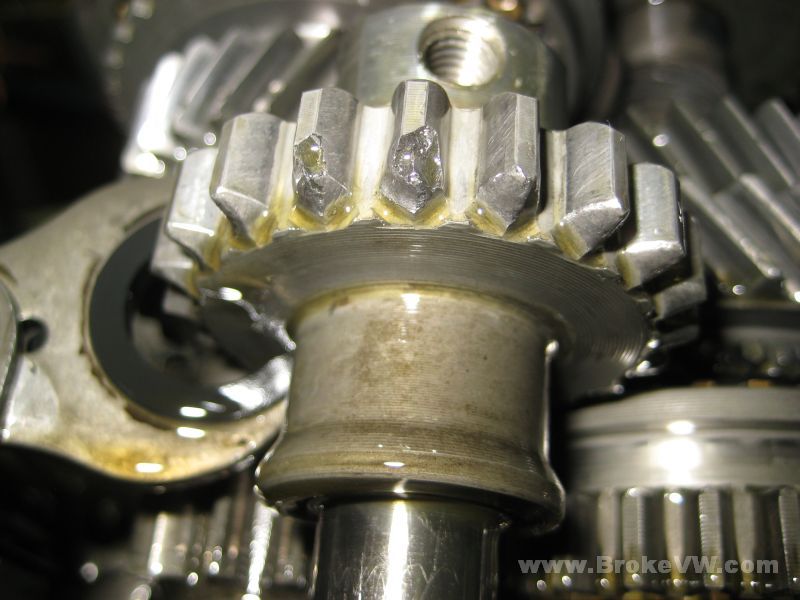
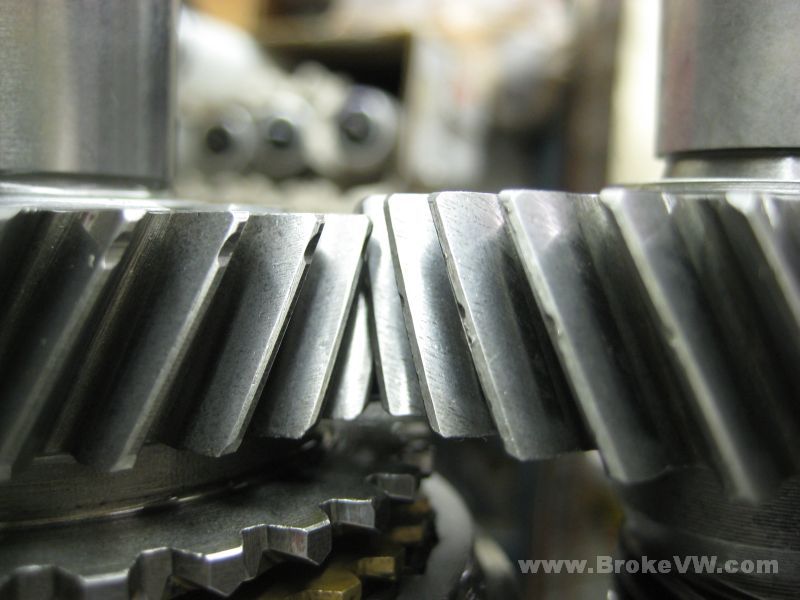
The reverse idler gear has taken a hit or two, and the grinding has damaged a few idler teeth...
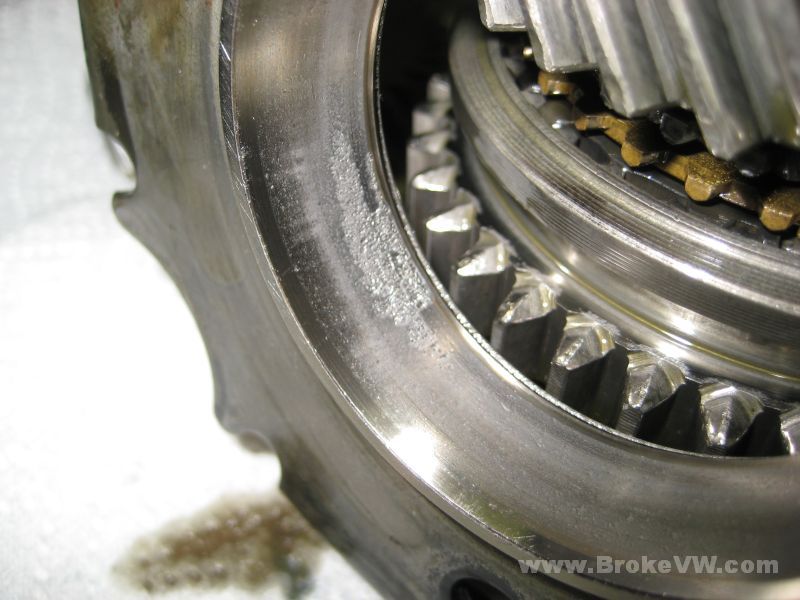
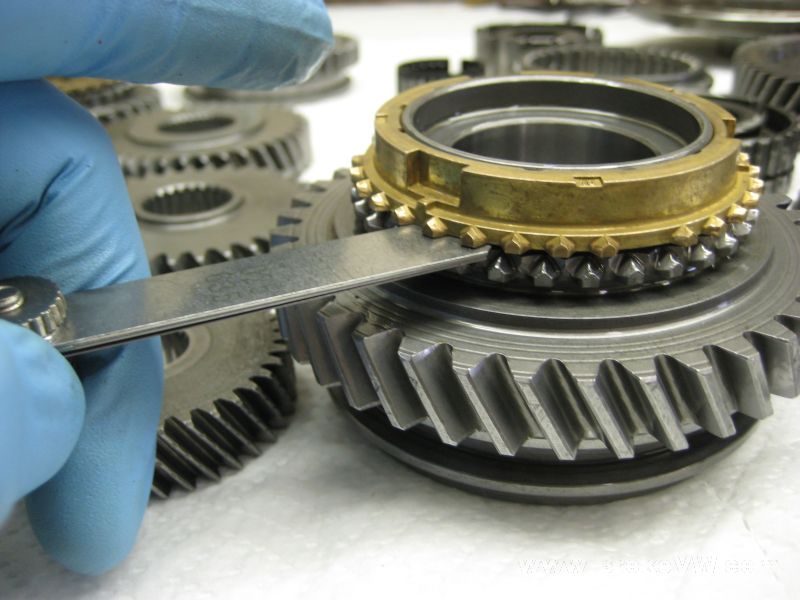
The reverse teeth on the 1st/2nd sync hub assembly don't look too bad. This was about the worse I found on your hub...

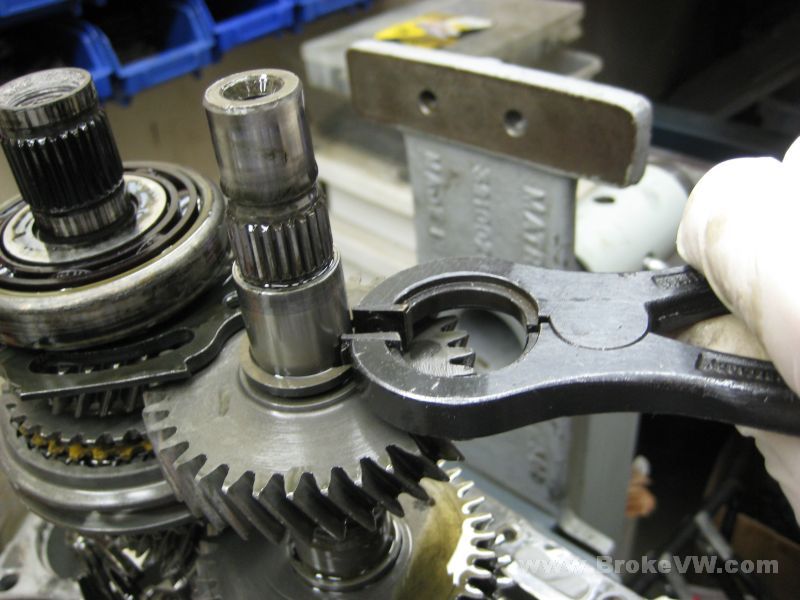
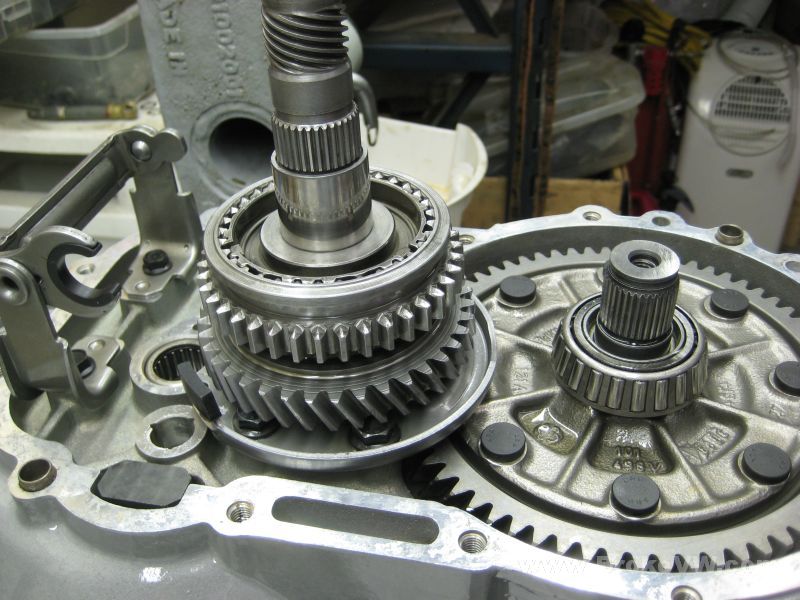
Removing the circlip for 4th gear, then 4th can be lifted from the output shaft at the same time the input shaft is lifted out...
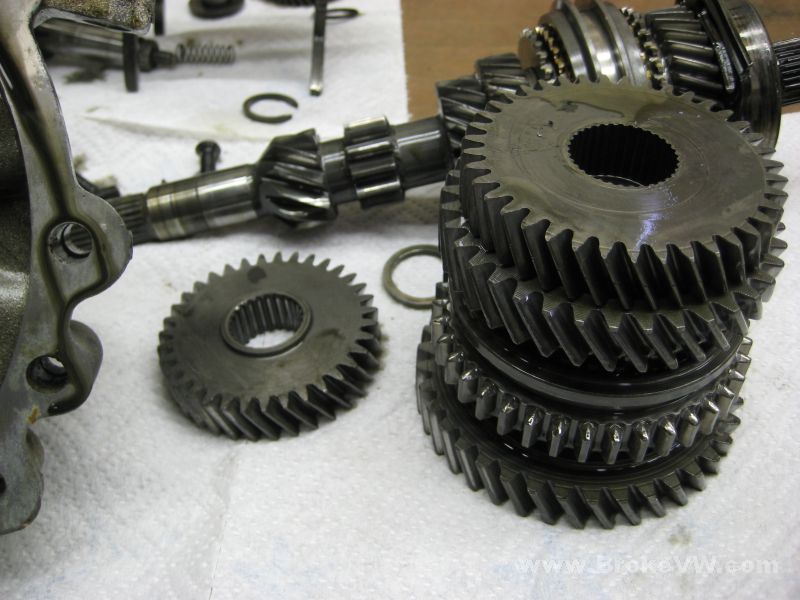
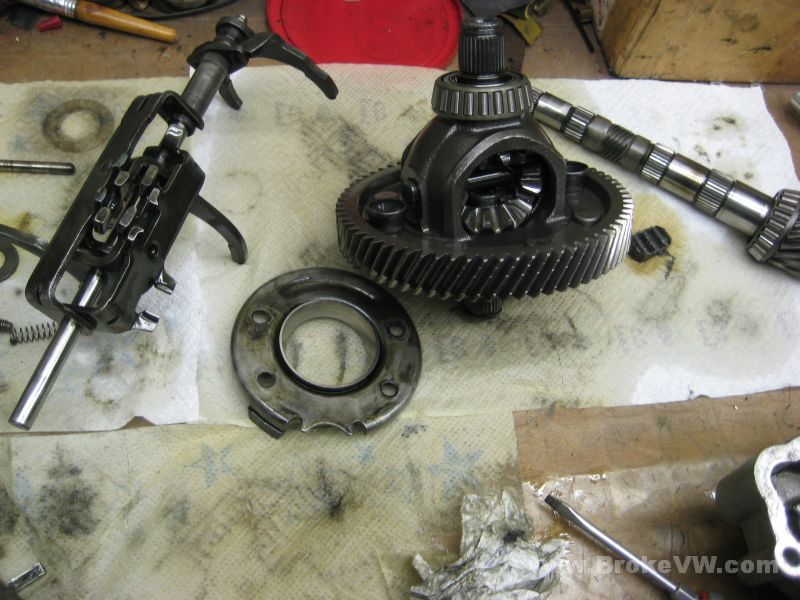
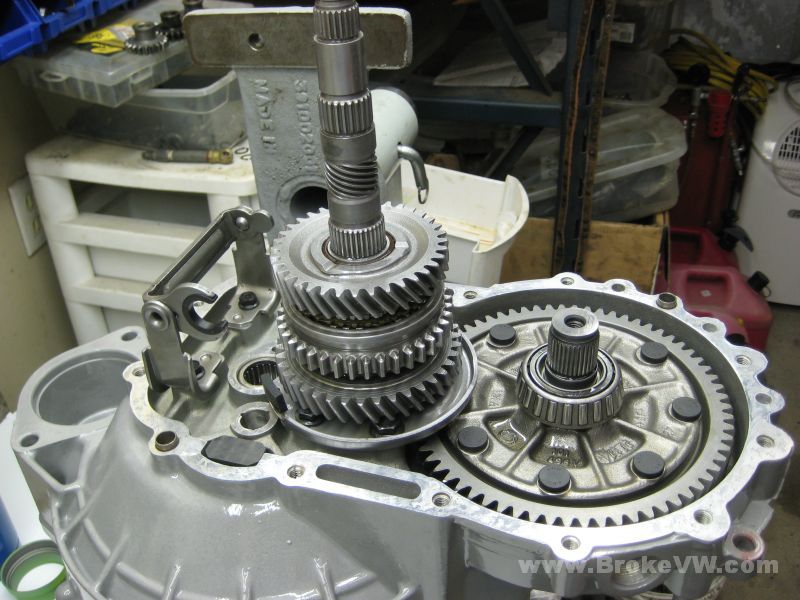
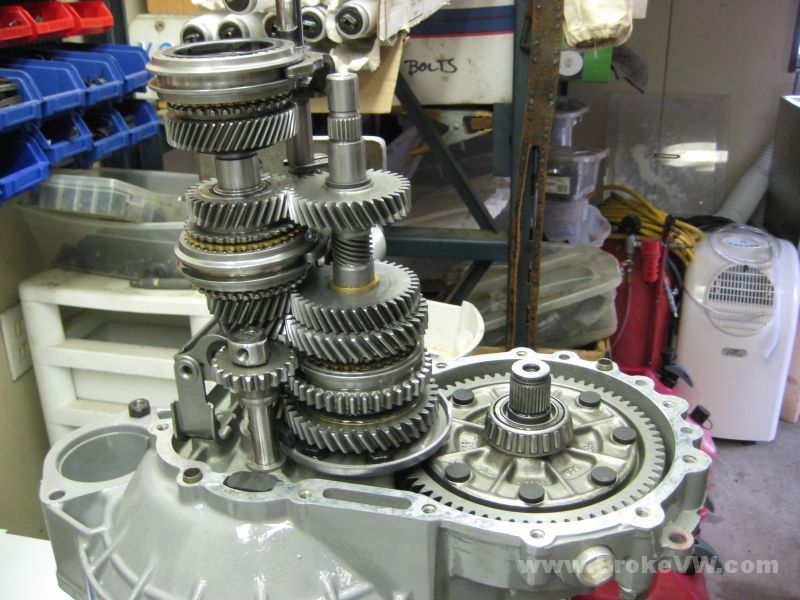
Pulling 1st, 2nd, and 3rd gears all at once...
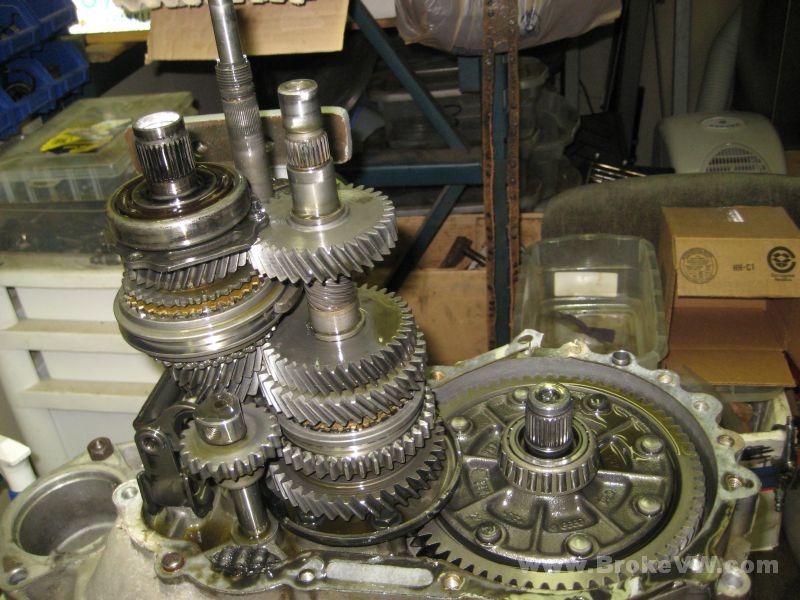
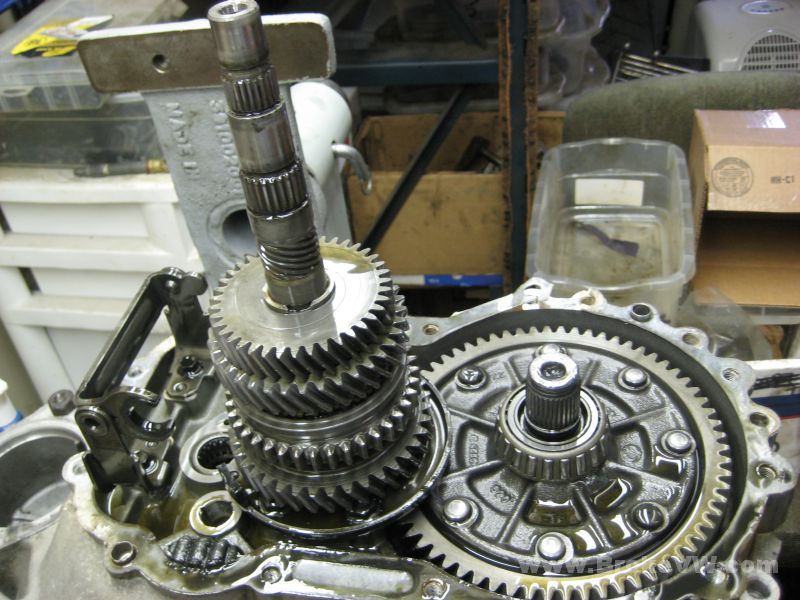
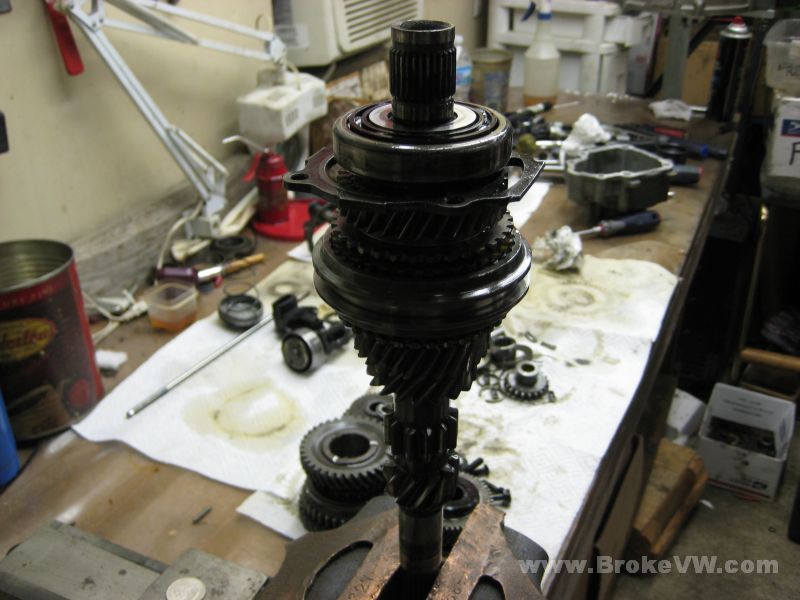
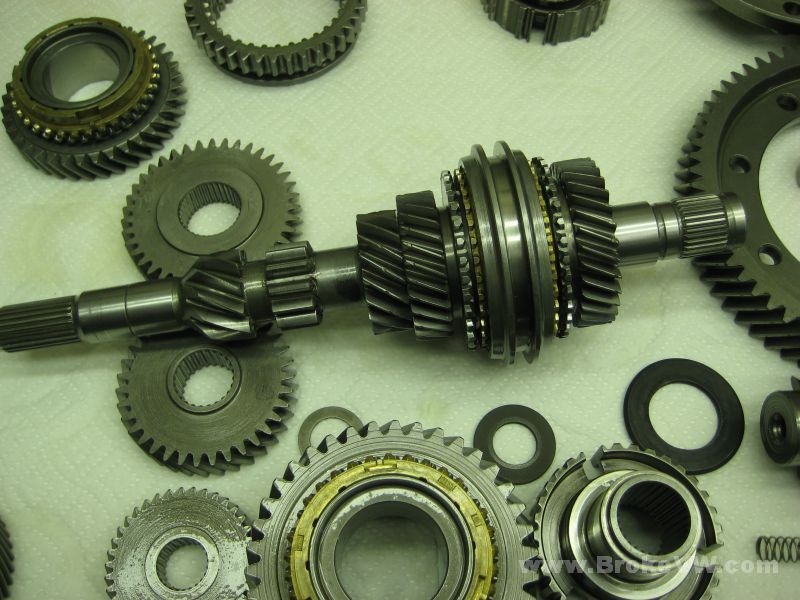
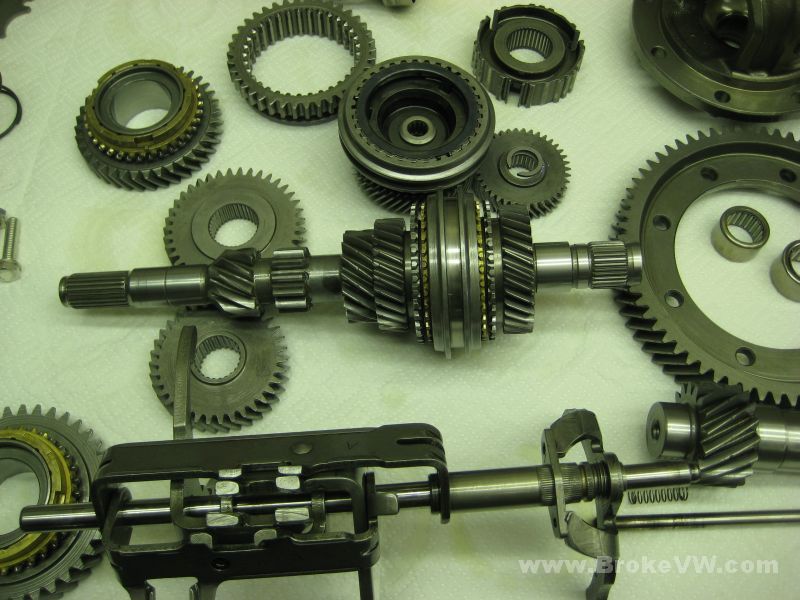
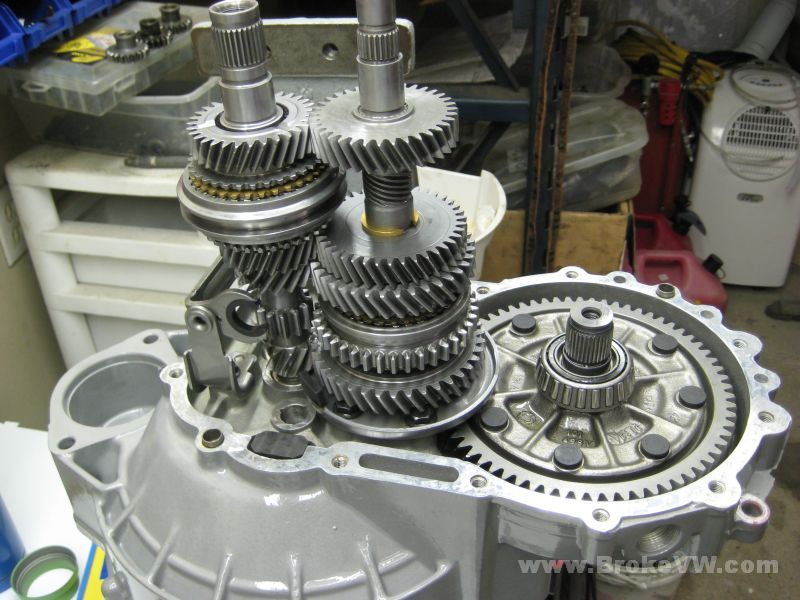
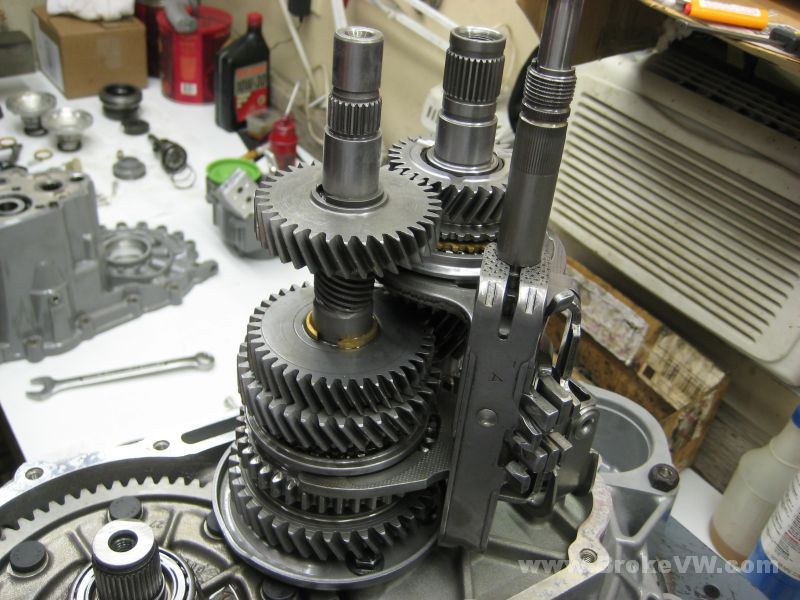
The complete output shaft stack that was just lifted out, followed by an out of focus pic of what has been removed up to this point...
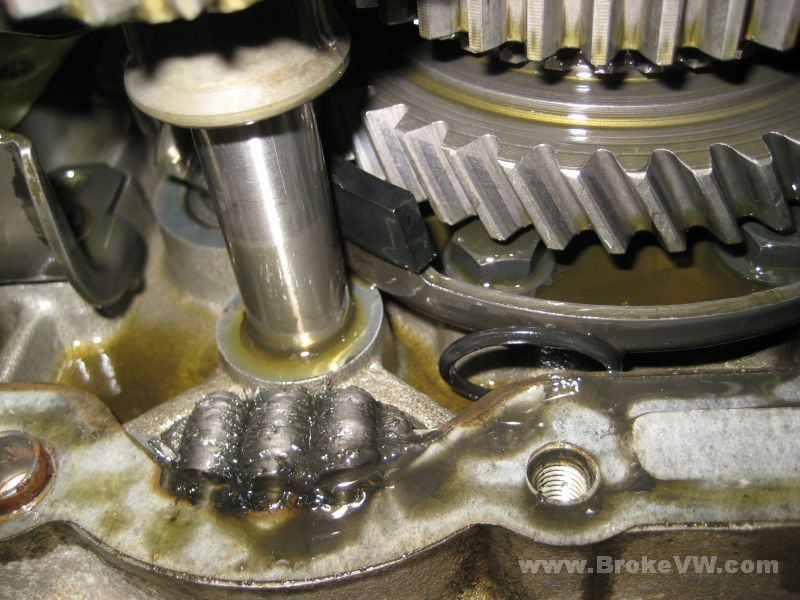
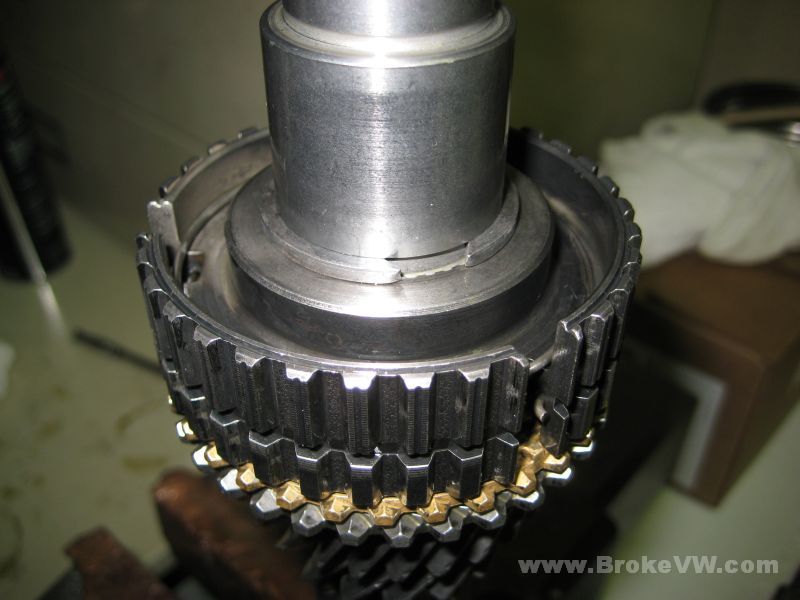
Removing the output shaft clamping plate and upper bearing allows the shaft to be lifted out... and this is what I found. Plastic has made it into the meshing R&P teeth and has been squished up and is sitting at the lower bearing...
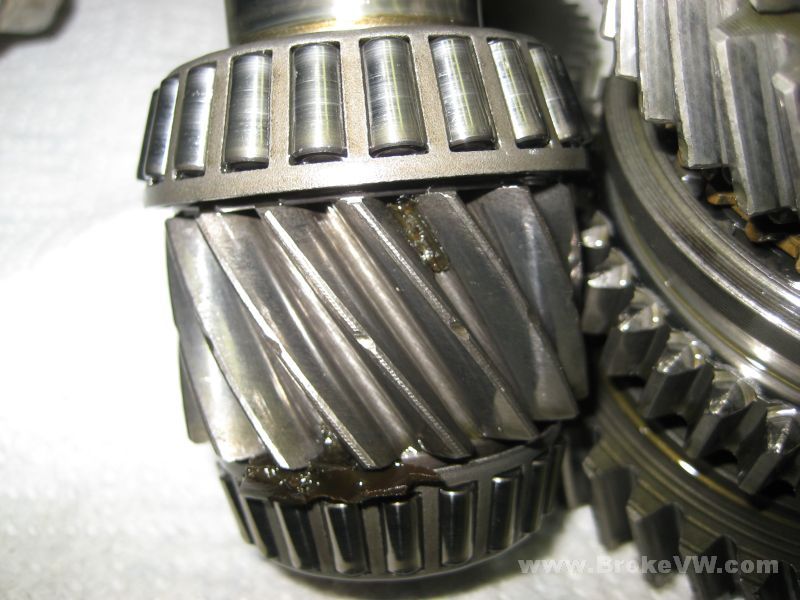

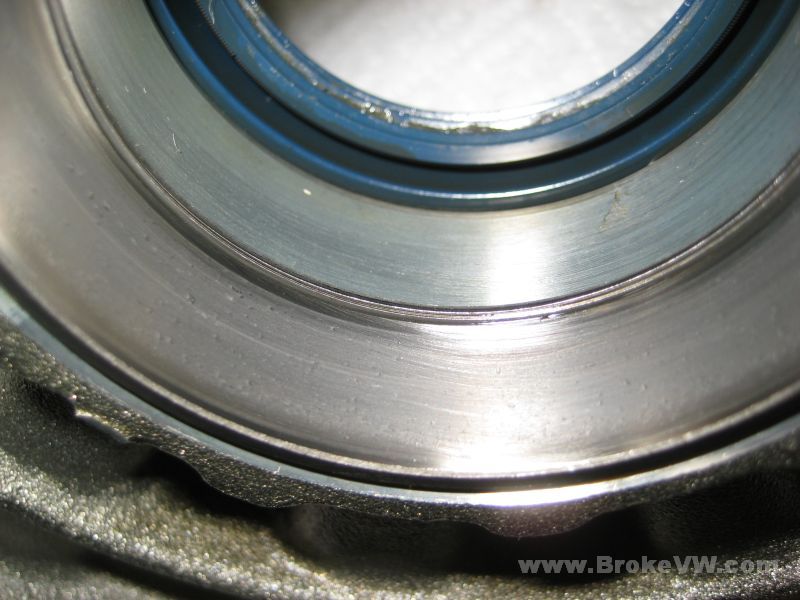
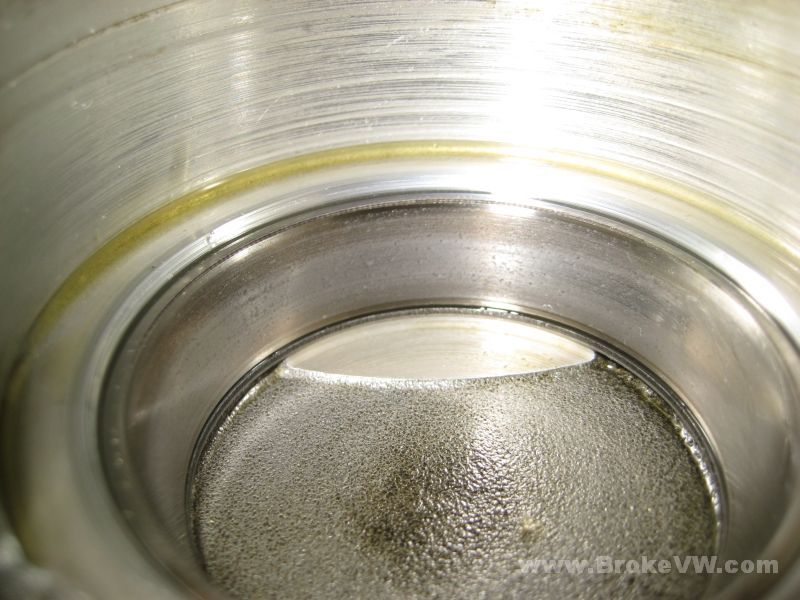
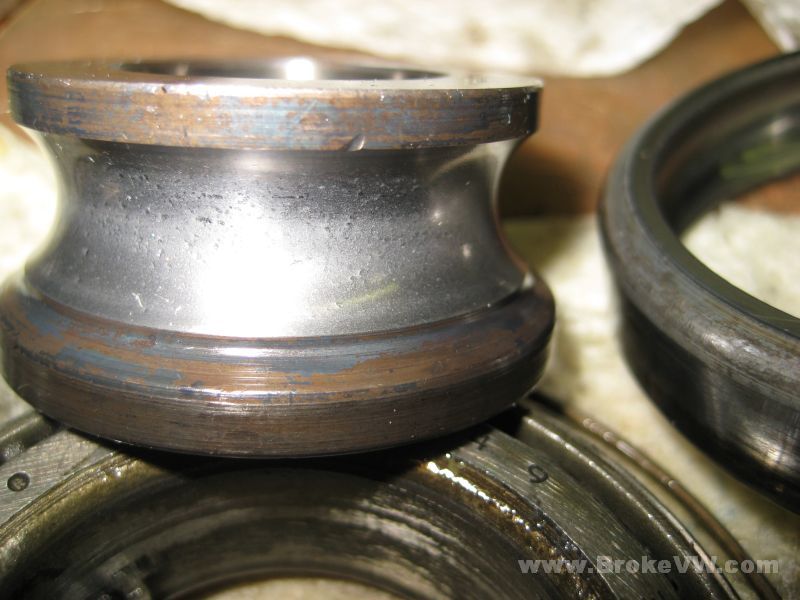
A look at the upper bearing race on the output shaft shows some considerable wear....
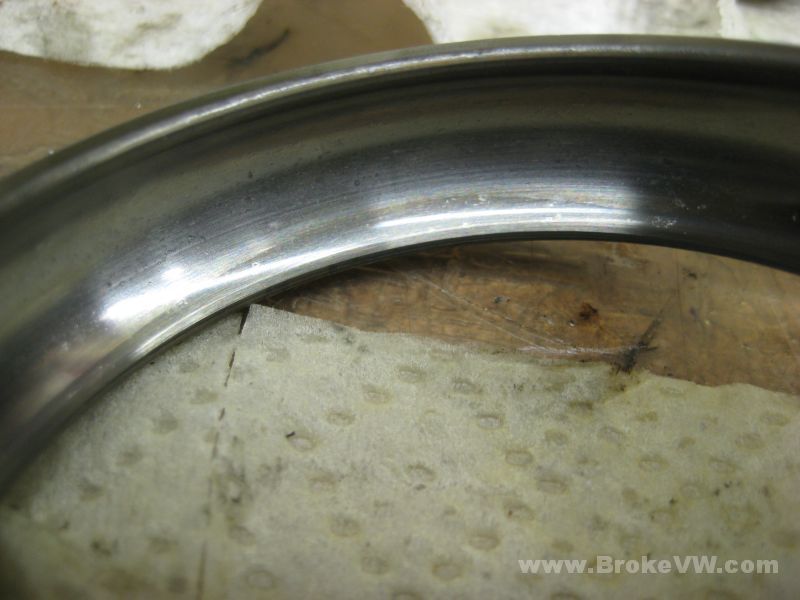
The smaller output shaft bearing is in better shape...
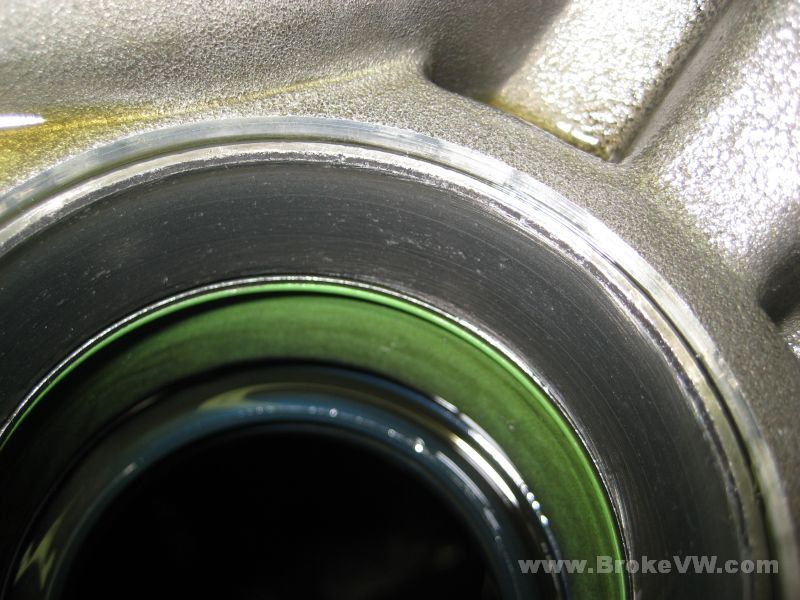
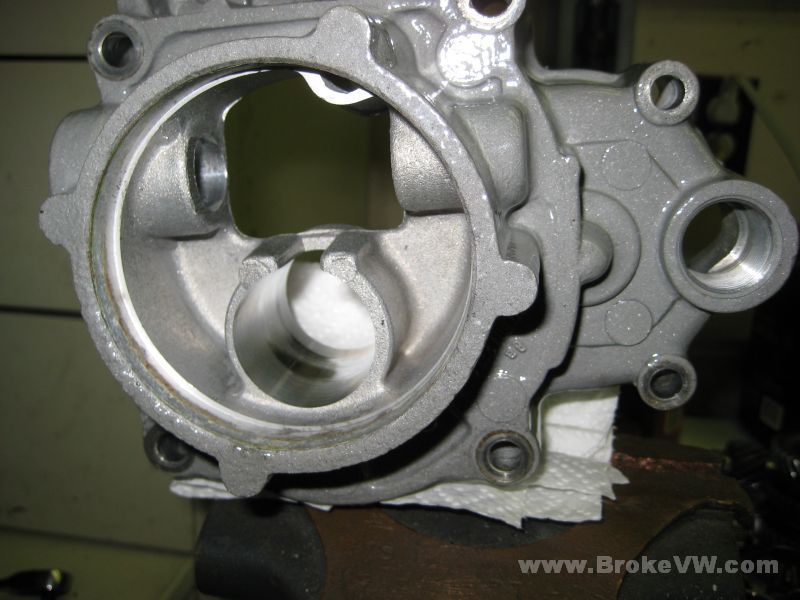
This is the other diff bearing race, in the bellhousing...
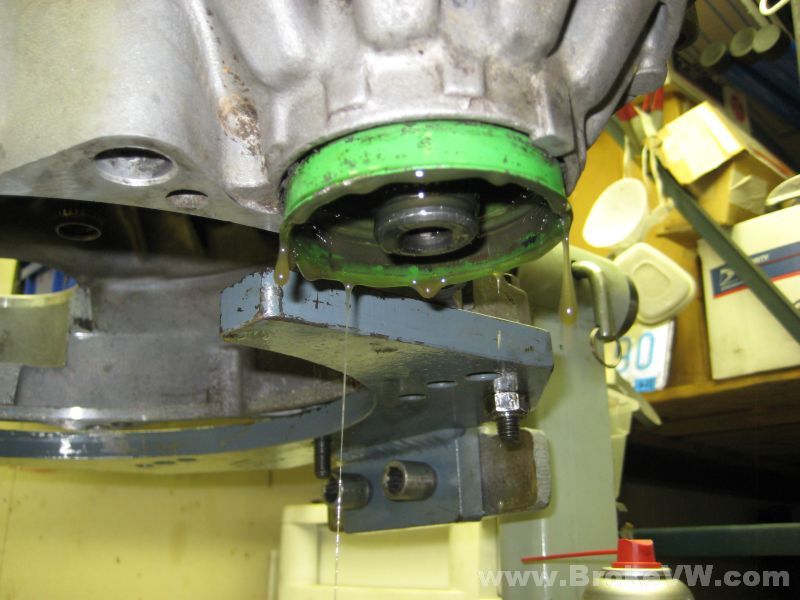
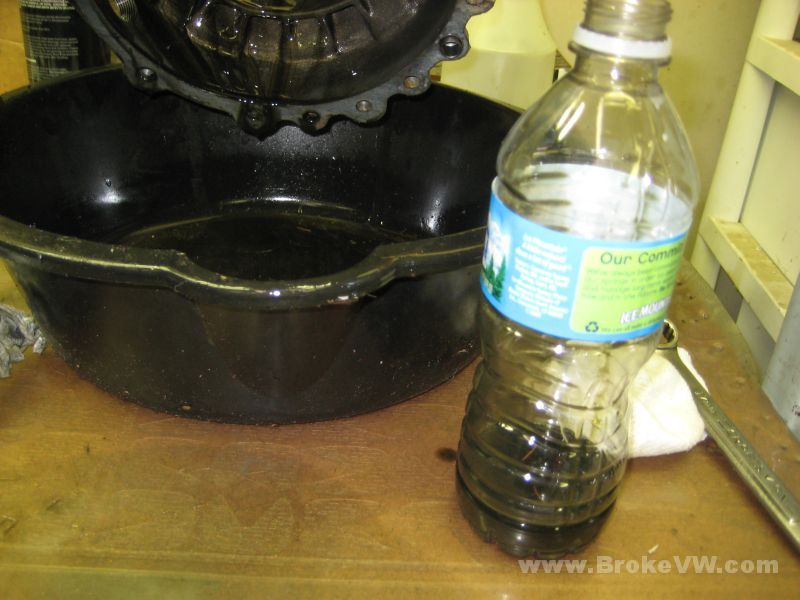
Even after all the spills, draining the trans earlier, letting it sit and leak on my floor a bit, wiping up pools of it from the trans as I opened it... this is the amount of oil sitting in the trans at this point....
Still draining but I poured 2 ounces that was just sitting there into a water bottle. I ended up collecting about 4 ounces. There must be 0.25 liters of fluid left in a trans after someone drains it.... one of these days I'll remember to start collecting the oil from the start as I split one open...
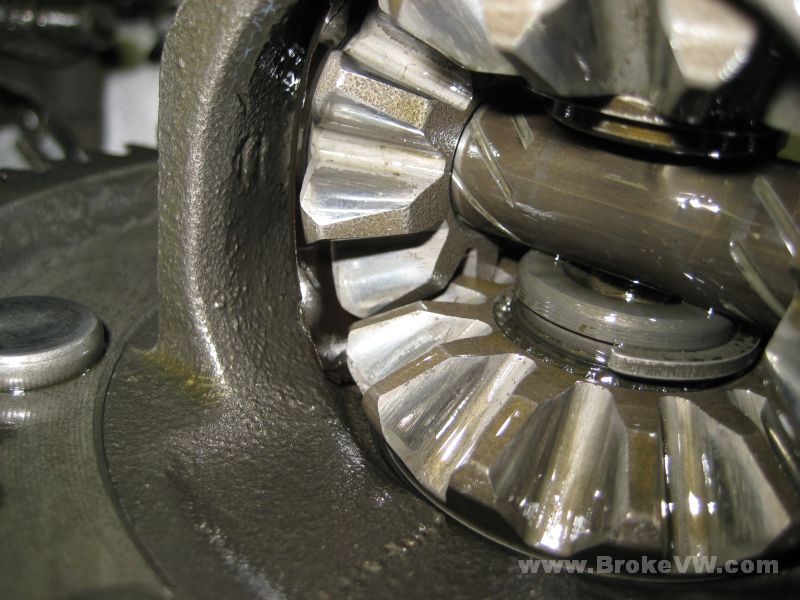
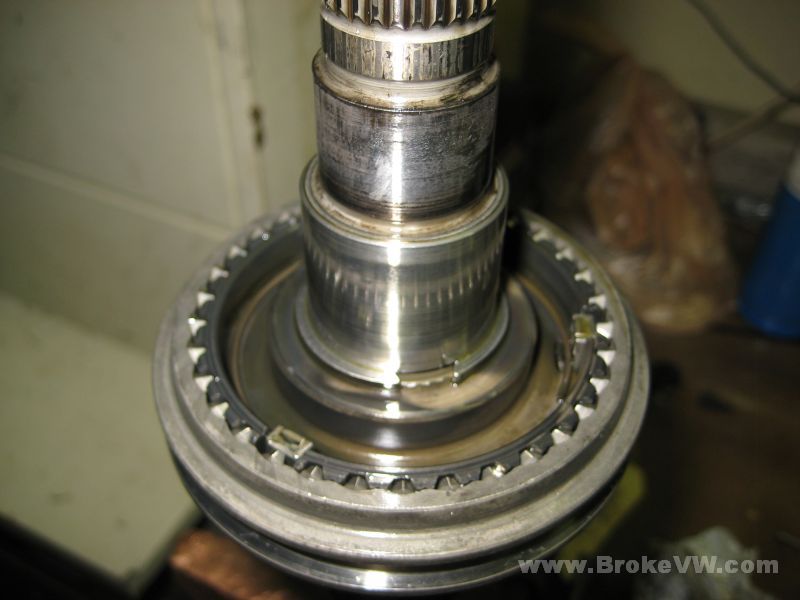
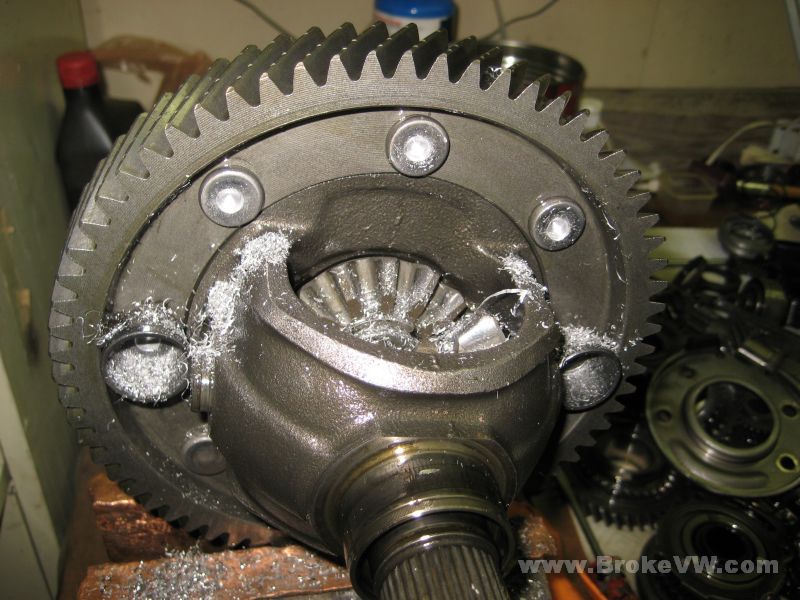
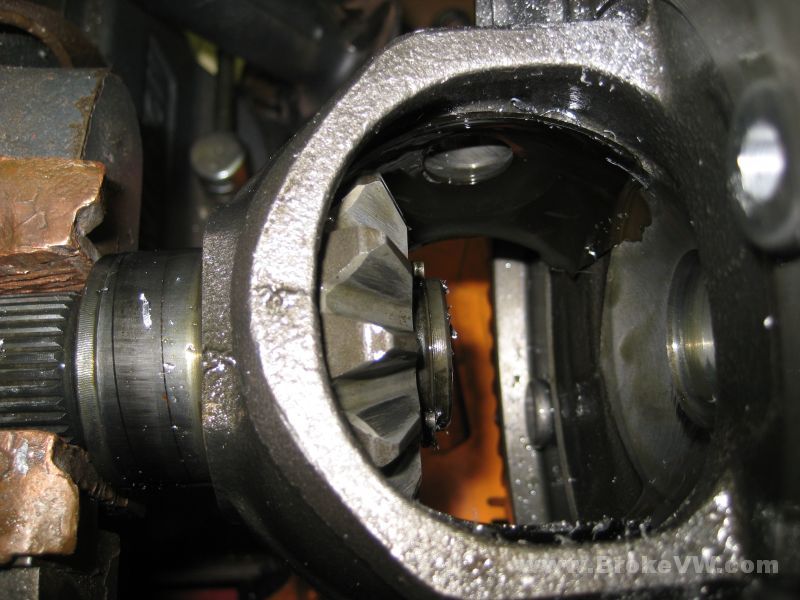
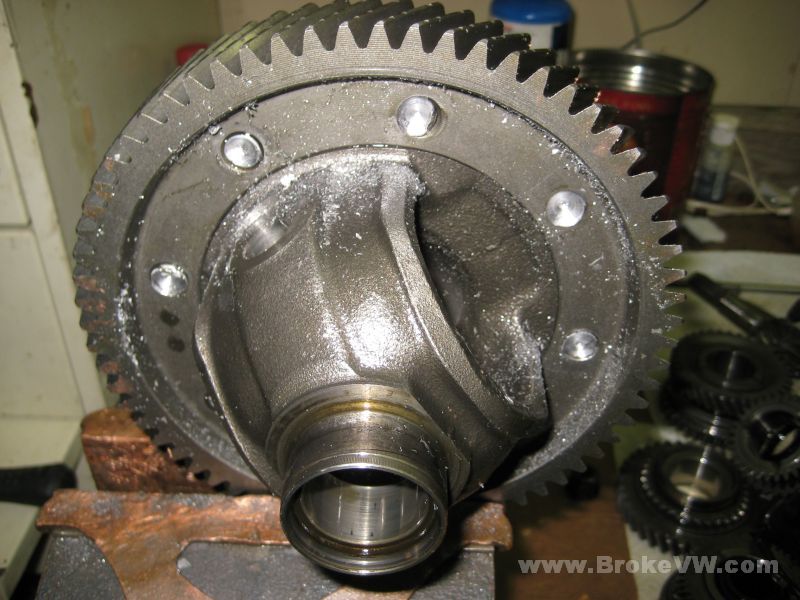
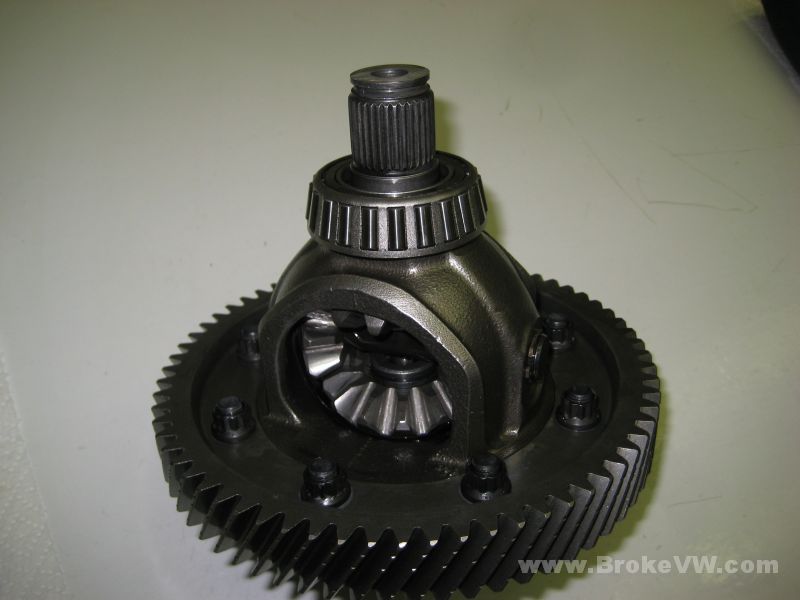
This is a shot inside the diff. The gears look OK, but notice that bottom snap ring, and how it is sitting so high up off the gear. It should be on the gear... there is a plastic thrust piece behind the spider gears, and I think yours has worn, which would be a source of the plastic in the lower output bearing....
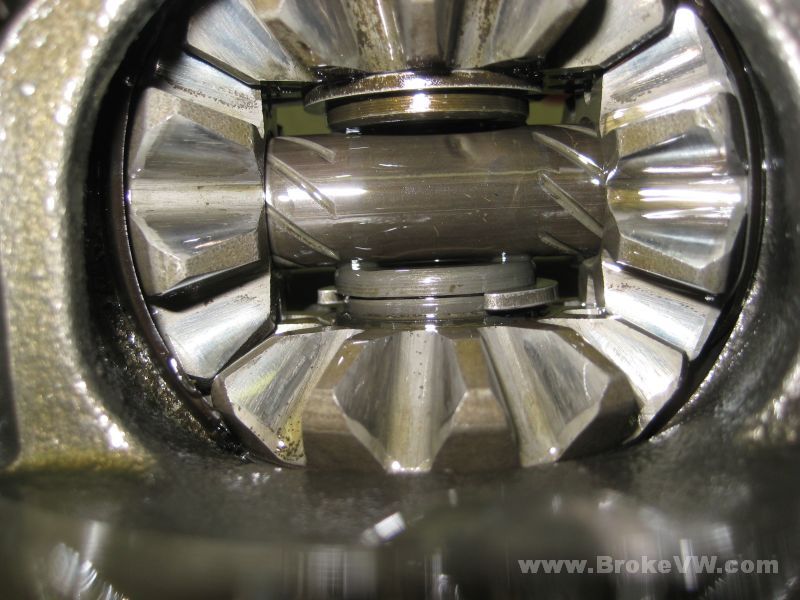
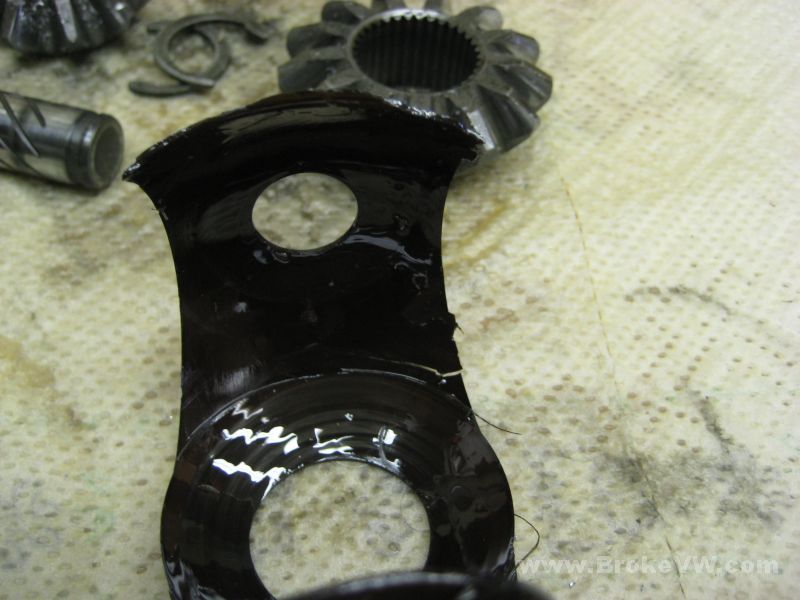
This is a pic of the plastic thrust behind the gears... the portion sticking out looks odd to me but I'll know more when I get the diff stripped down...
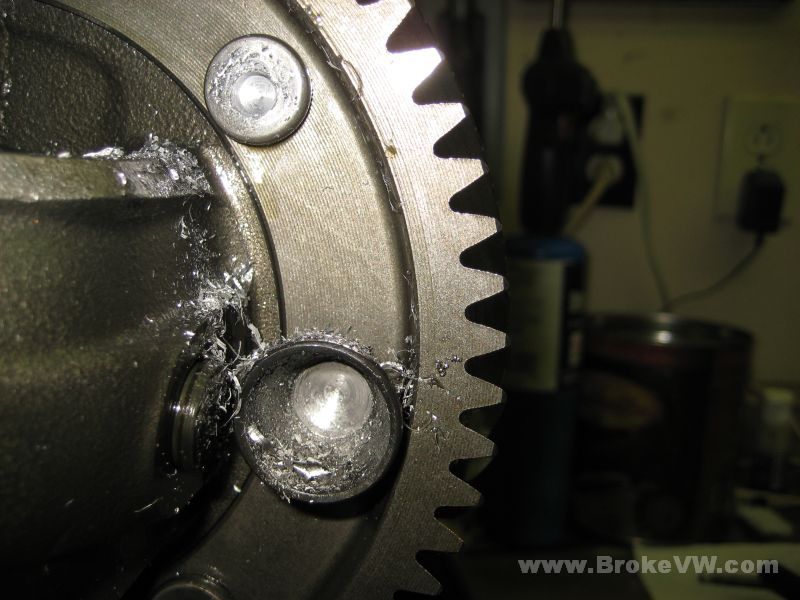
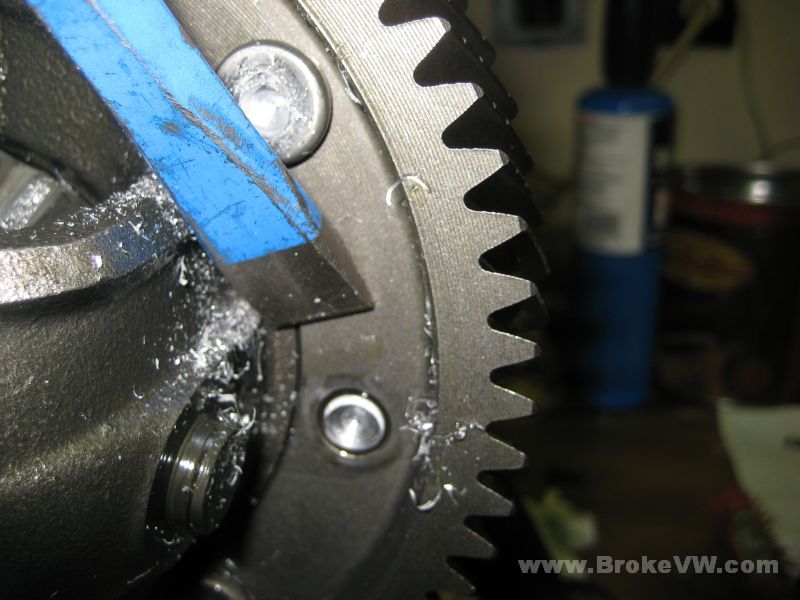
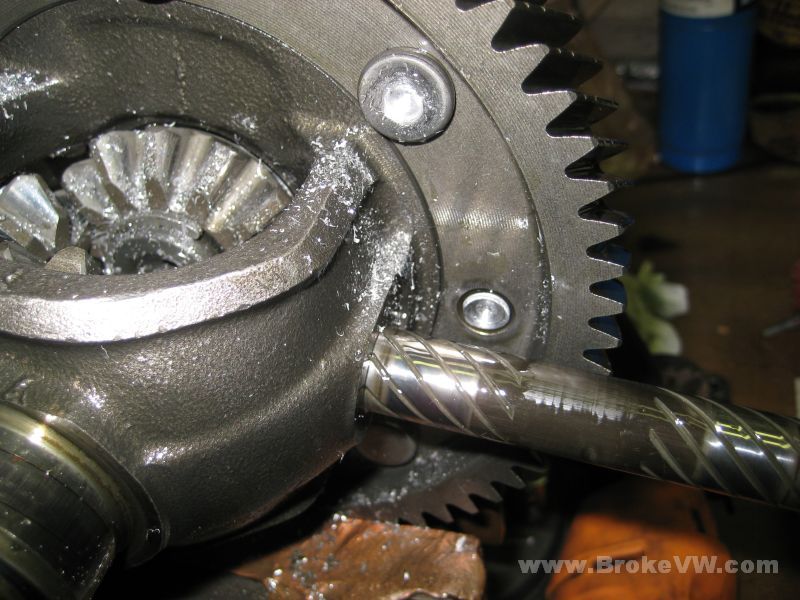
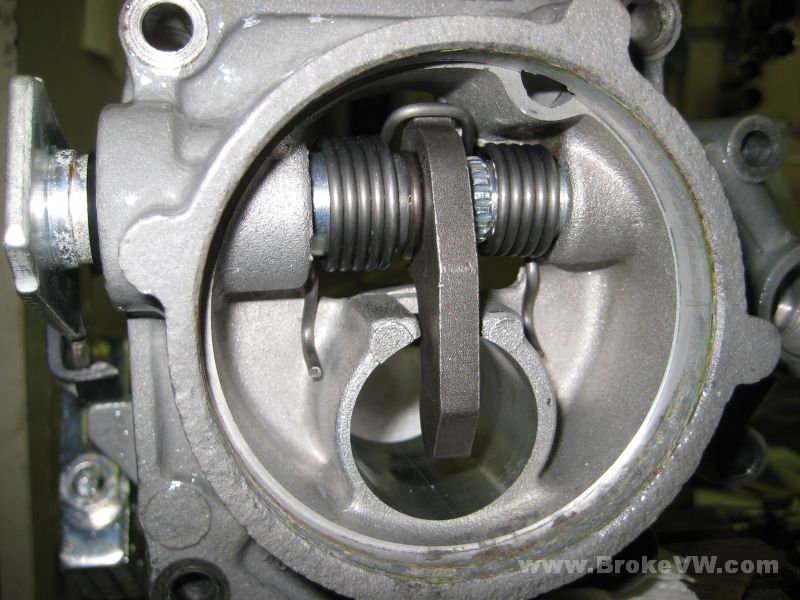
Time for a bolt kit for sure... this trans never came with the snap rings for this cross shaft, and as a result, it has banged into the rivet heads on each side, beginning to work towards SMS...
Everything covered up when I'm not working on it... I've got some errands to run but will pick up on your trans again soon...
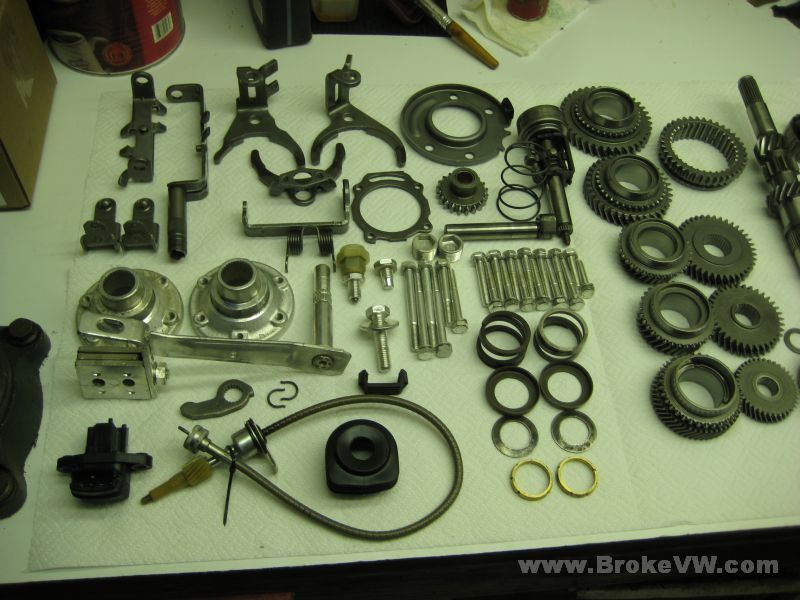
Stripping the case and shafts down to ready them for cleaning...
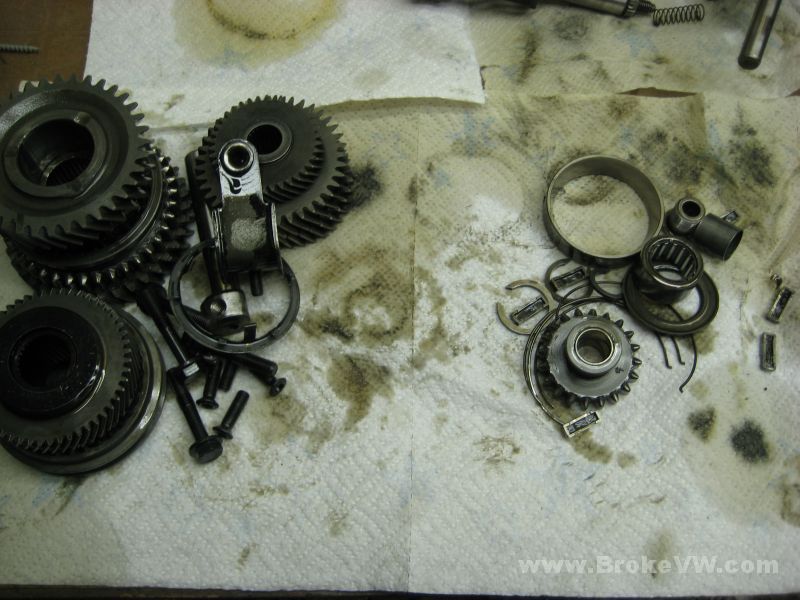
The parts on the left will get cleaned, the stuff on the right is being replaced...
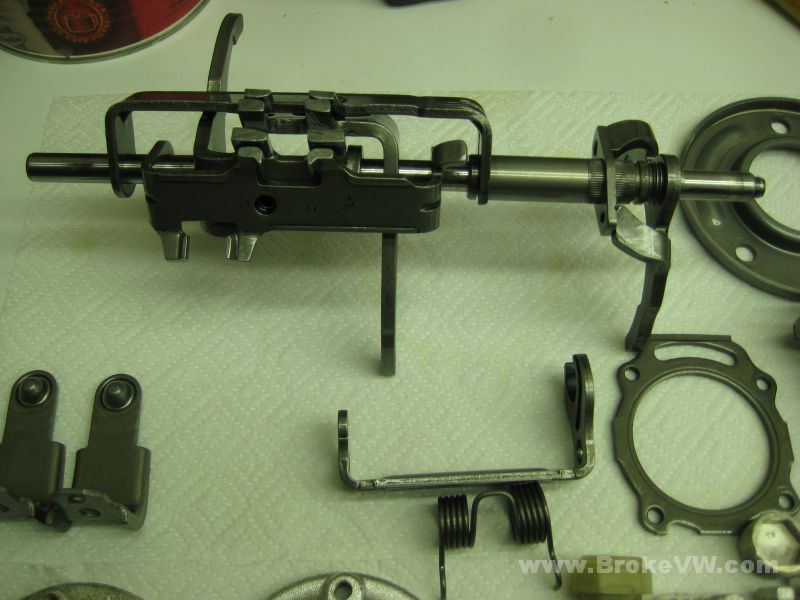
These parts I need to tear down. The shift forks I will replace the tube to a newer version while it is apart. The bearing plate will have the race pressed out, the diff will have the bearings pulled and the rivets drilled then the ring gear pressed off, and the bearings will be pulled from the output shaft...
The dirty case in the dirty parts washer, soon to be washed with dirty kerosene...
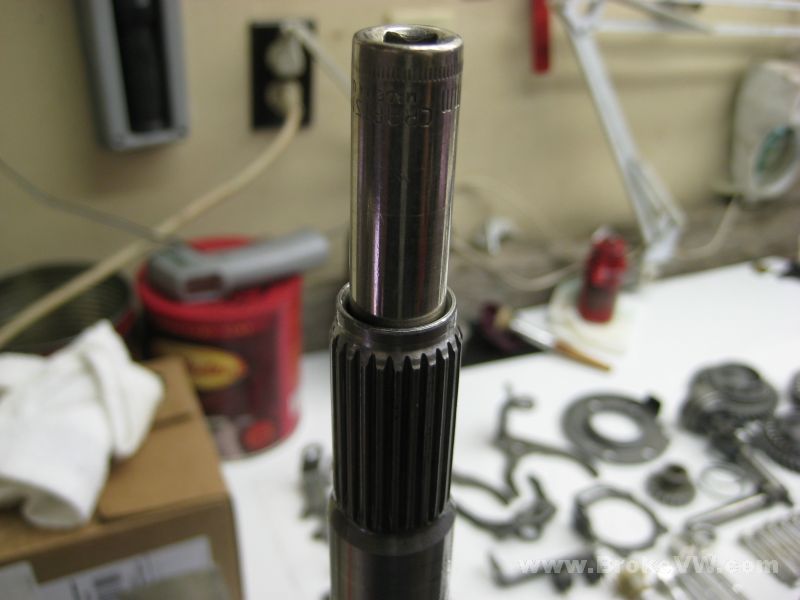
The input shaft in the vise, ready to be torn down...
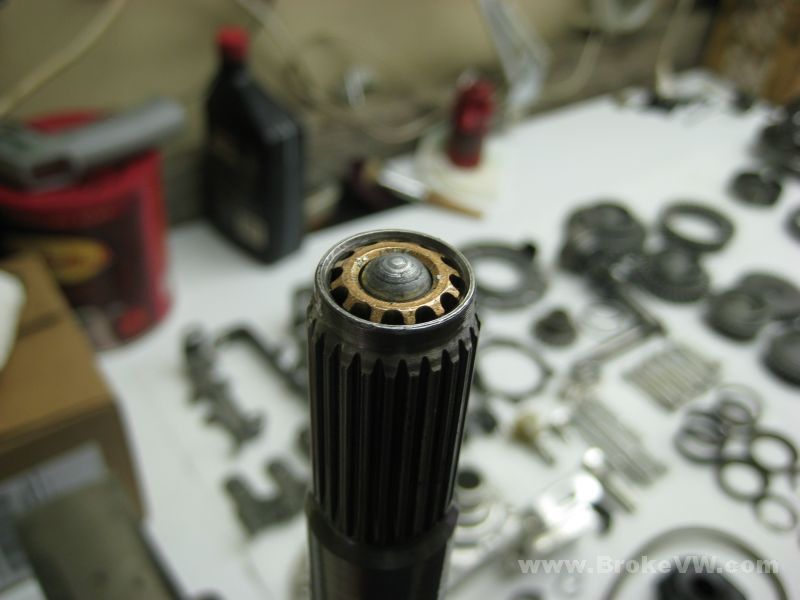
An out of focus pic of the circlip on the input shaft, once it is removed the 3rd.4th sync hub can be removed...
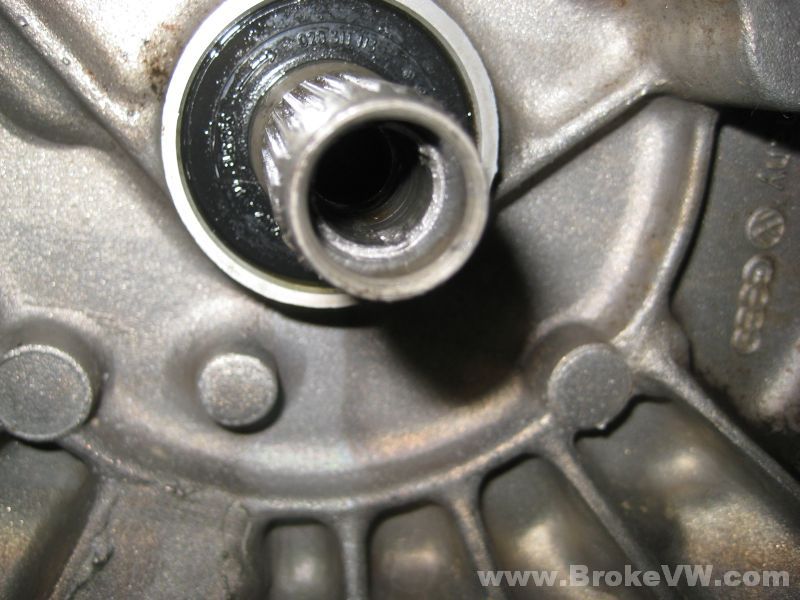
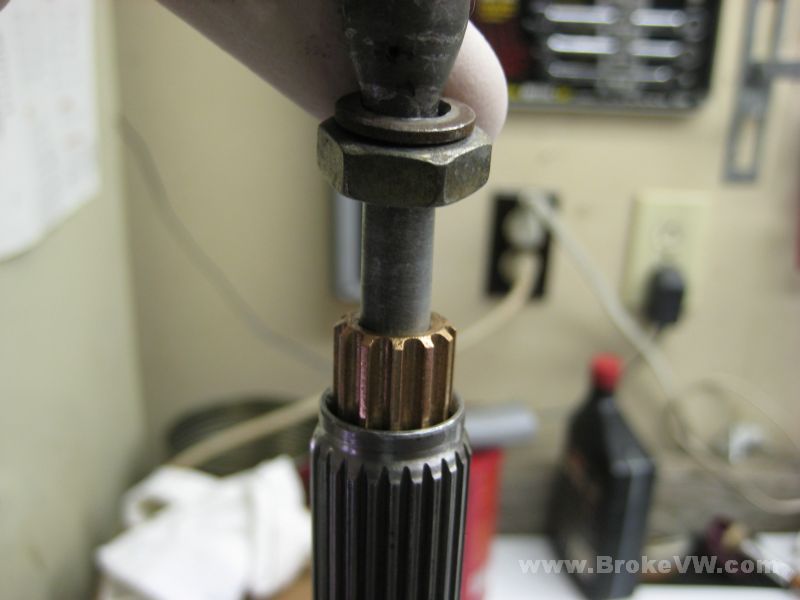
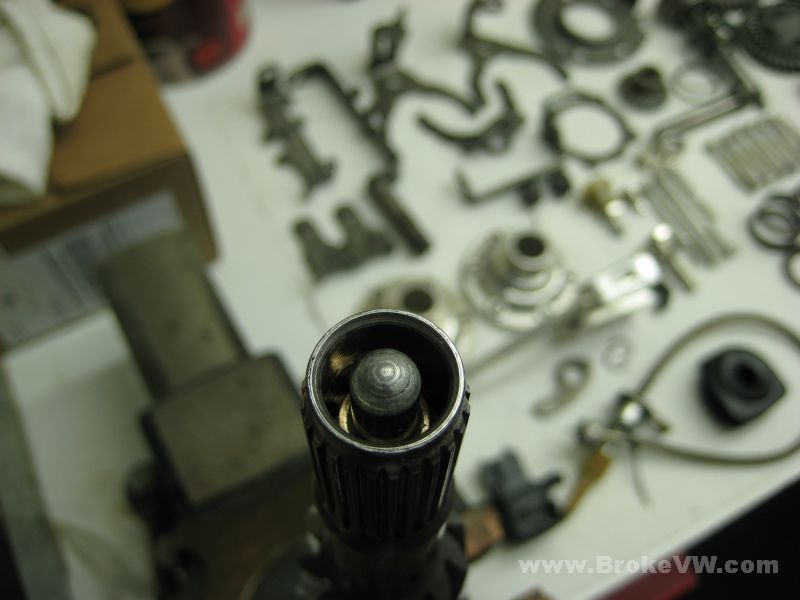
After popping the pushrod seal out, the pushrod bushing is tapped and a bolt threaded in. An old pushrod is used to knock the bushing out...

Pulling the roller bearing from the 5th housing. The bearing is NLA and VW has determined it can be discarded and the bore left empty, but I'm working on getting new bearings that should fit the housing, they just won't be held in with the bolt...
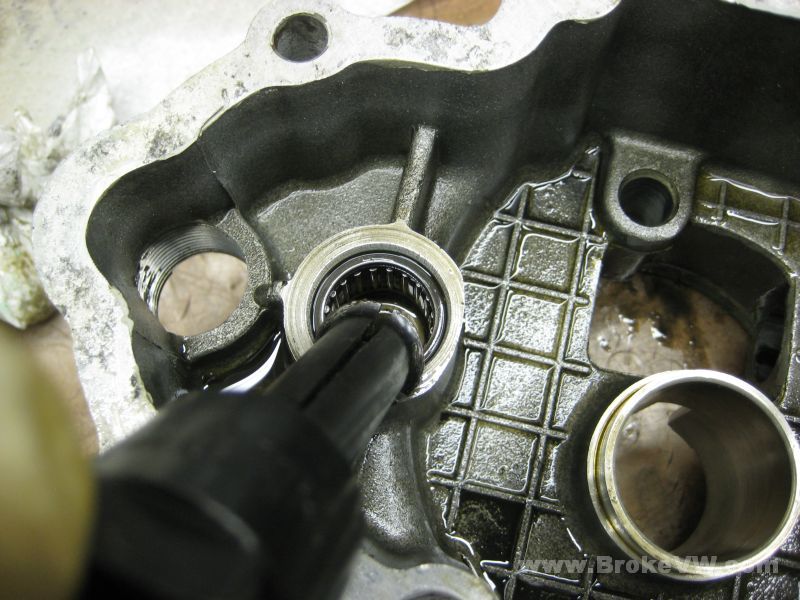
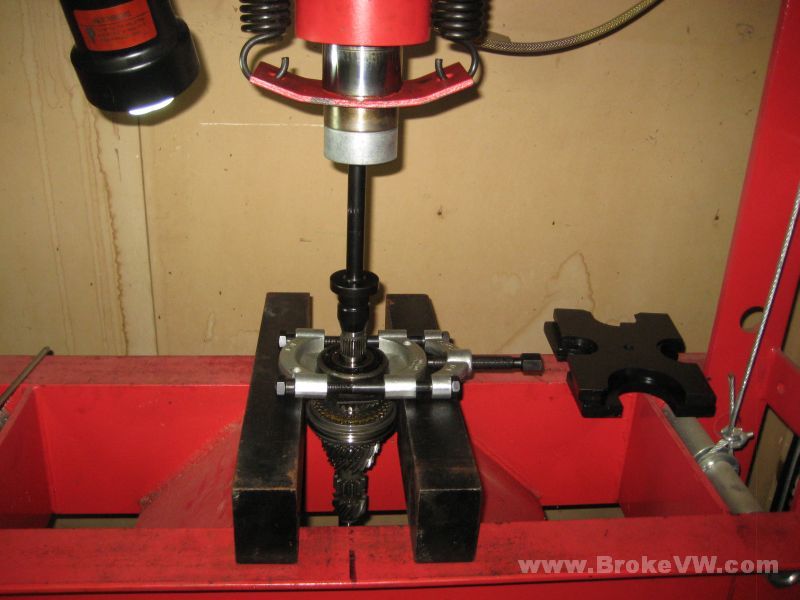
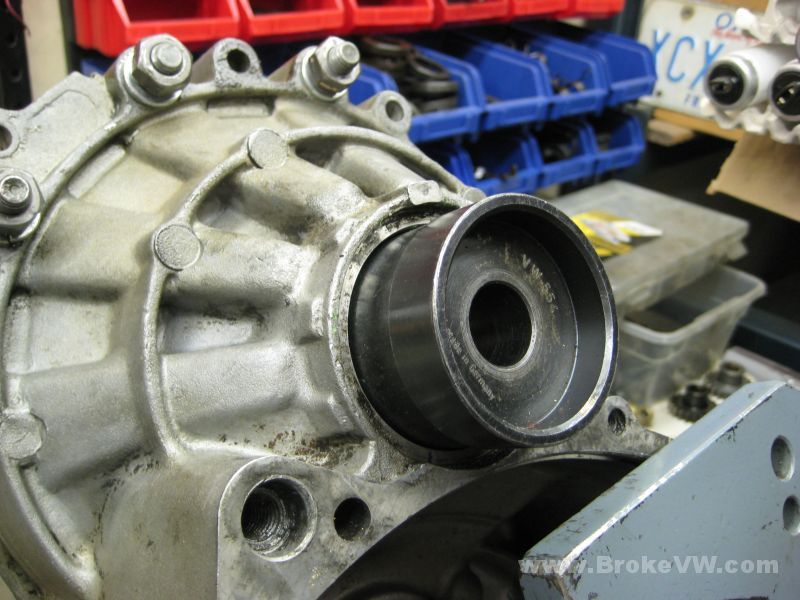
The same tool with a different puller end is used to remove the small taper bearing race for the output shaft...
The green seal sleeve is hit with a hammer and punch to collapse it in on itself, then it just falls out...
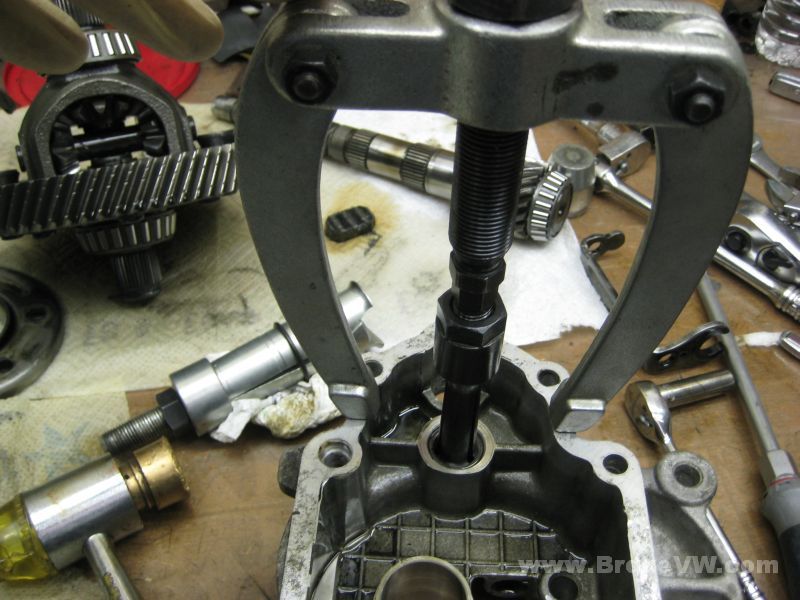
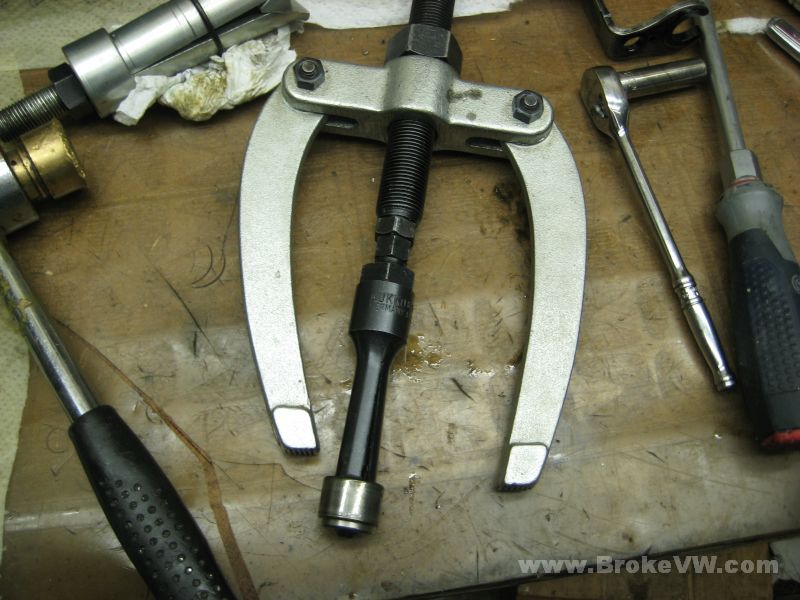
A couple tools used to remove the diff bearing races and the input shaft roller bearing...

The last part to pull out of the case pieces is the starter bushing...
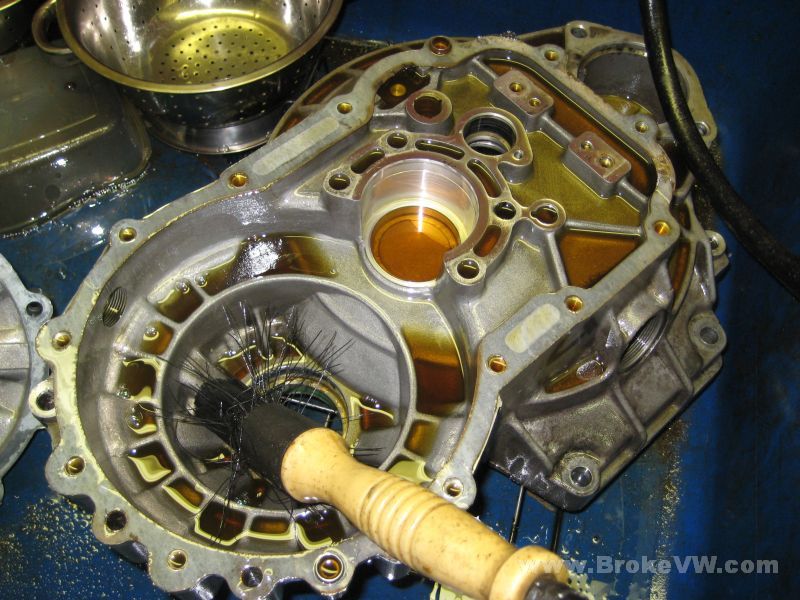
Letting the case soak will allow the gasket to be more easily removed...
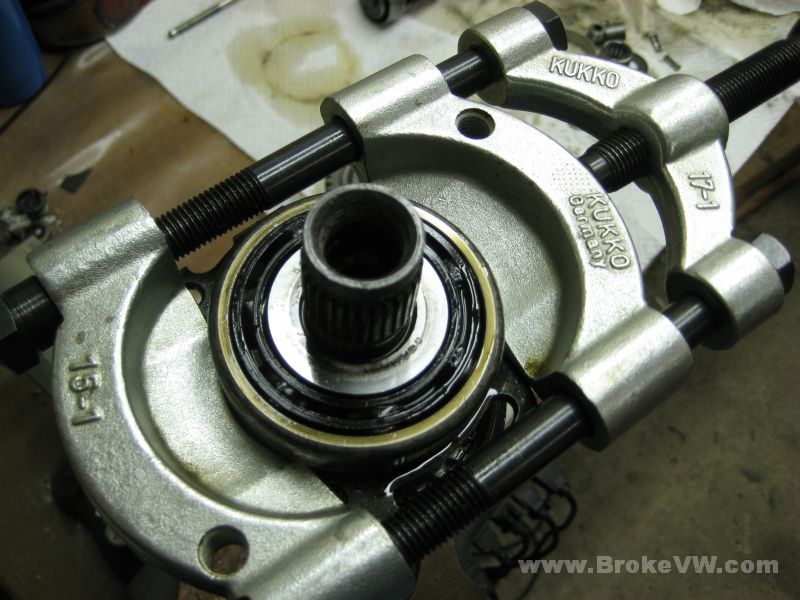
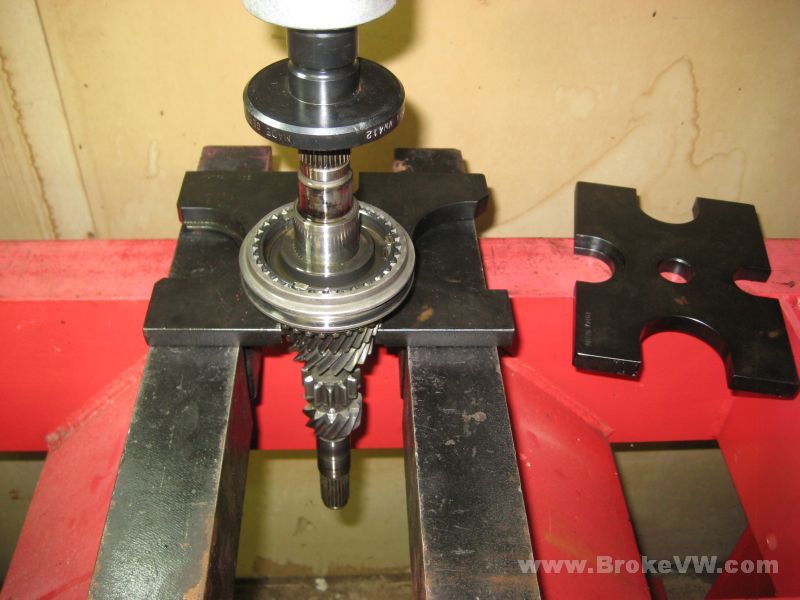
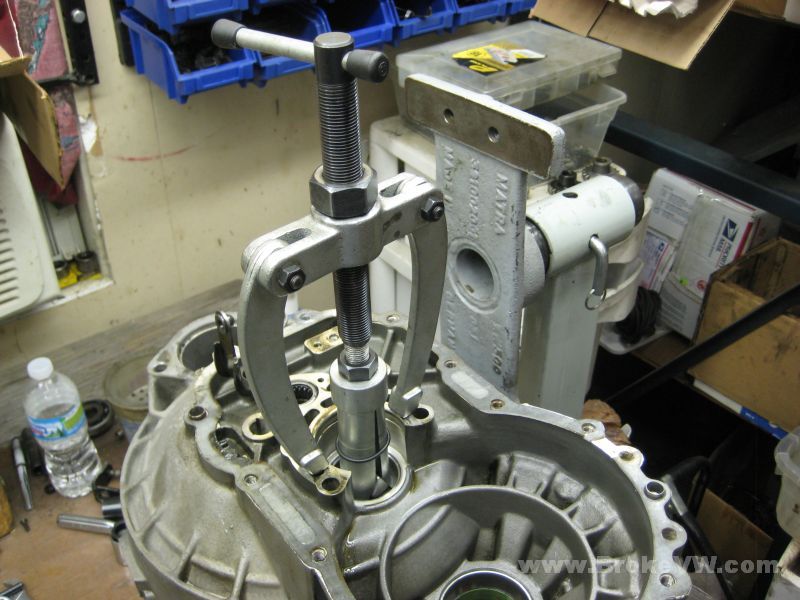
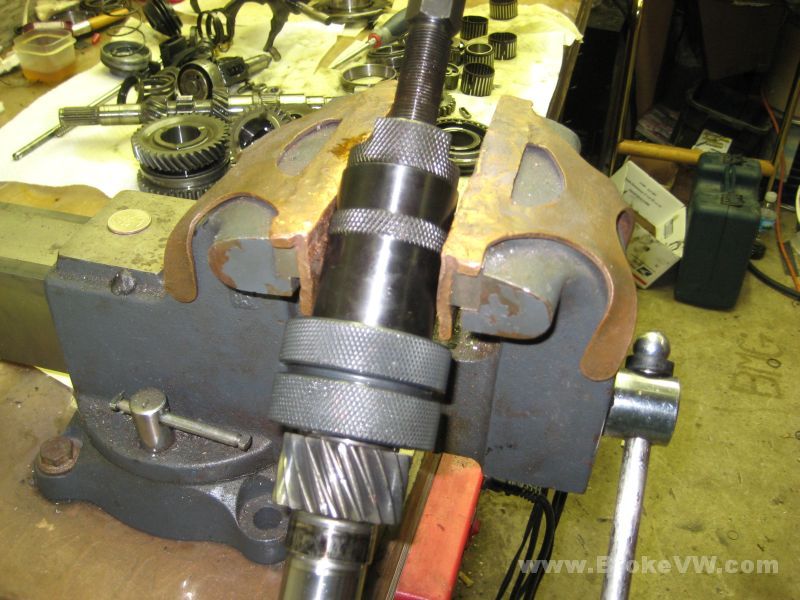
This VAG1582 puller is used to pull the taper bearings from the diff and output shaft...
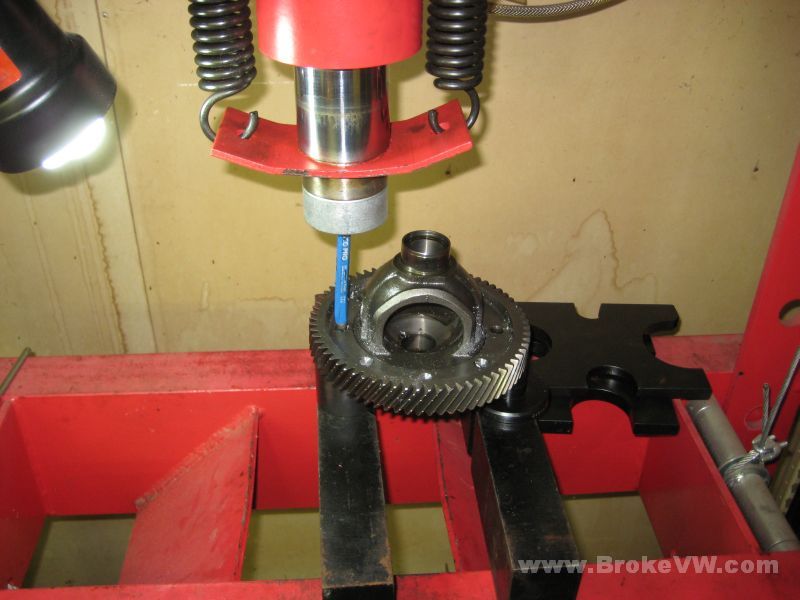
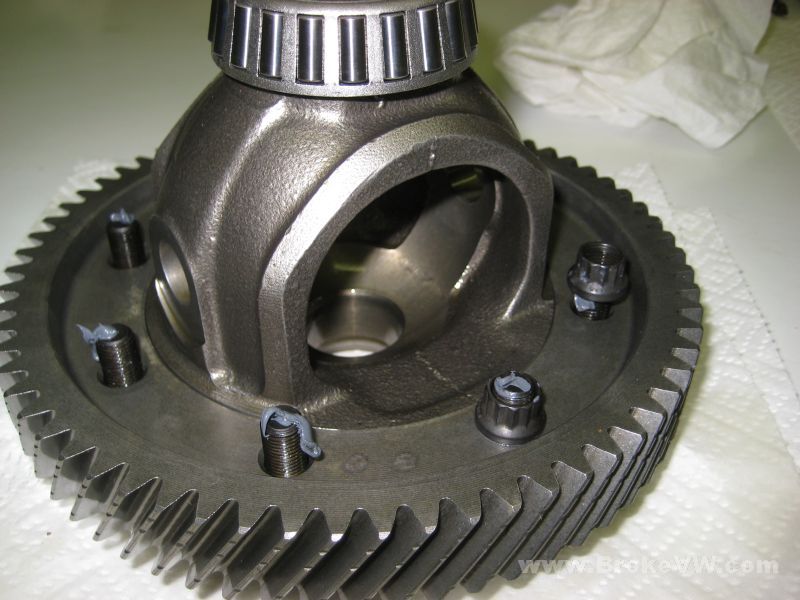
Drilling the rivets from the diff so it can be stripped down...
A 6mm hole is drilled about 6mm deep into the rivet, followed by a 12mm bit to remove most of the rivet head, then it is knocked away with a chisel...
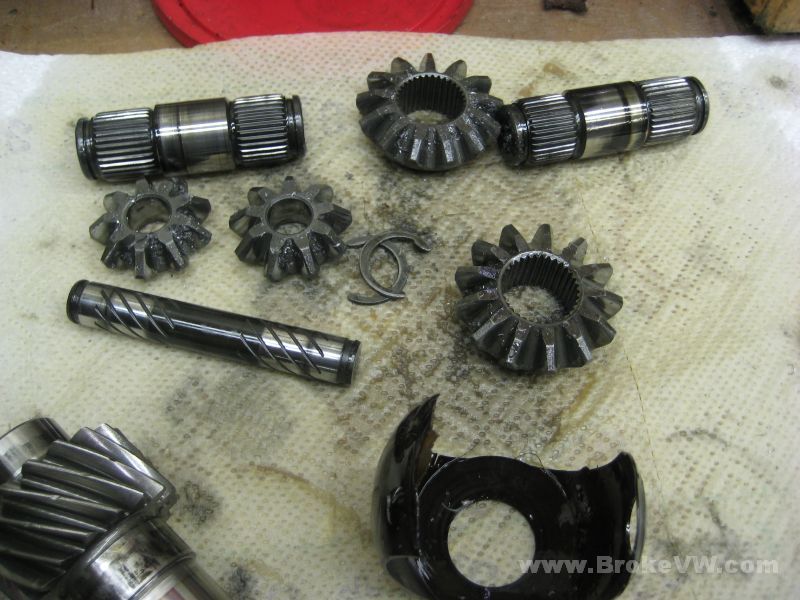
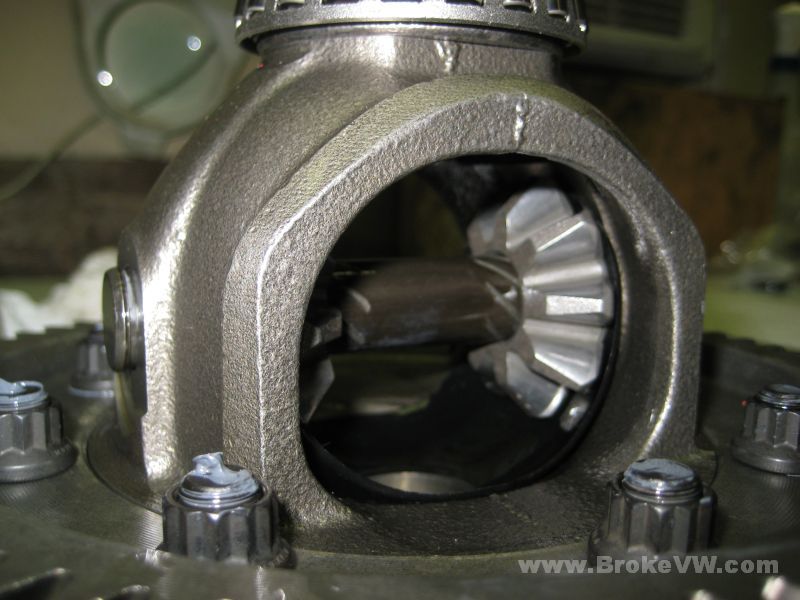
With the big rivet removed, the cross shaft can be slid out and the gears removed from the diff...
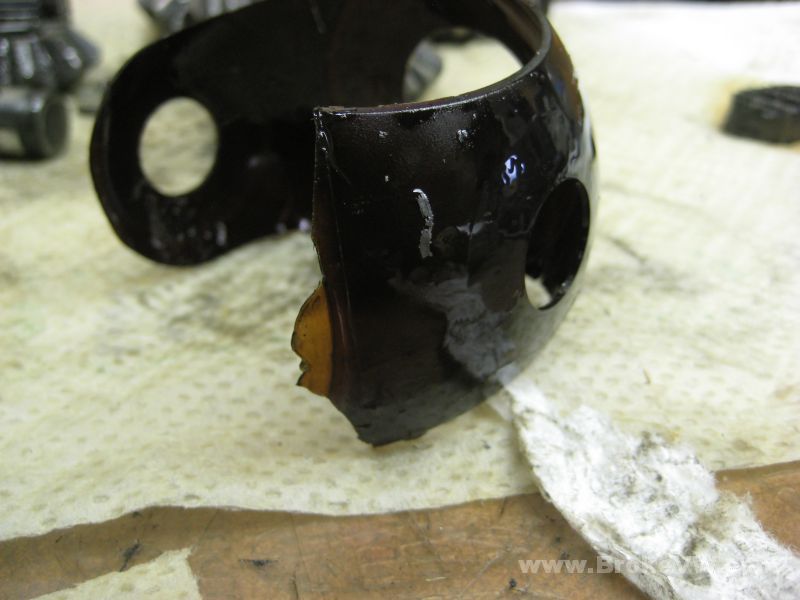
This would be the source of the plastic, and you can see as it is worn thin it becomes more clear and less black, which is the plastic found behind the green end cap in the 5th housing.... this plastic thrust washer is missing a rather large chunk...
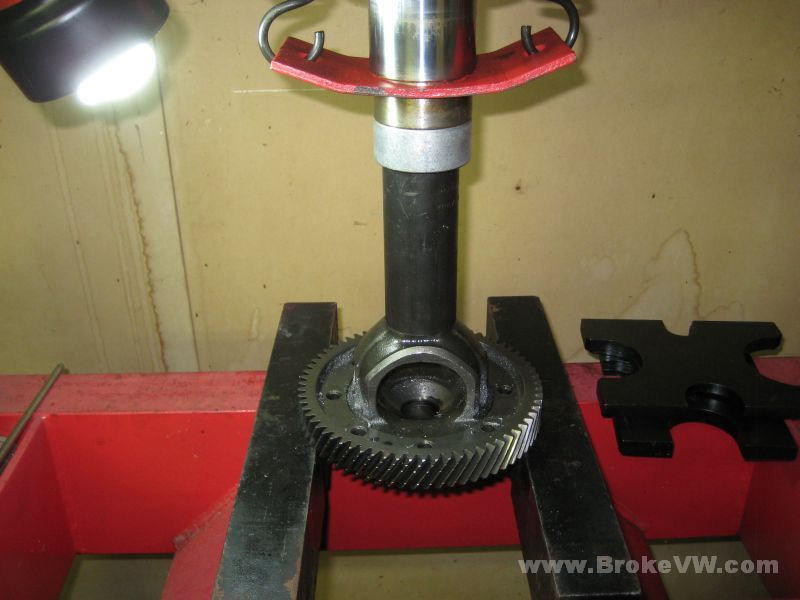
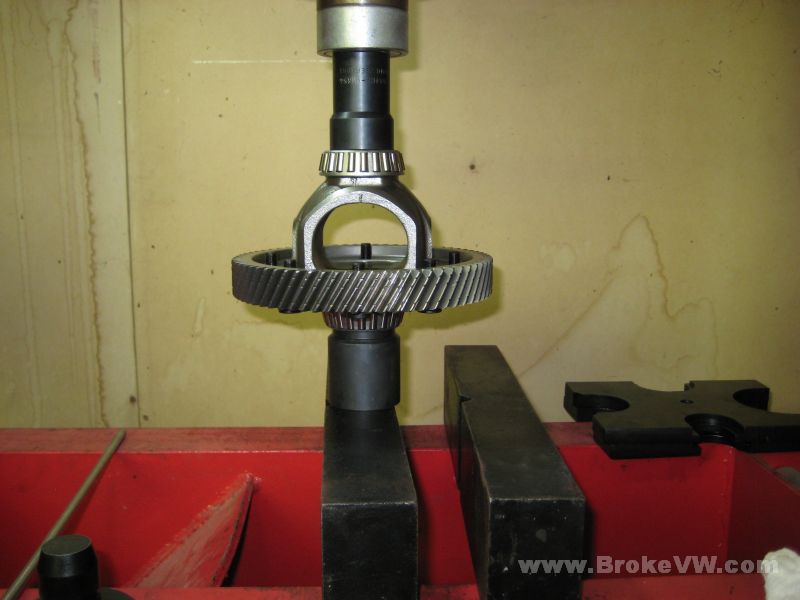
With all the rivet heads removed the diff is taken to the press and the rivets are punched out, then the ring gear is pressed from the carrier...
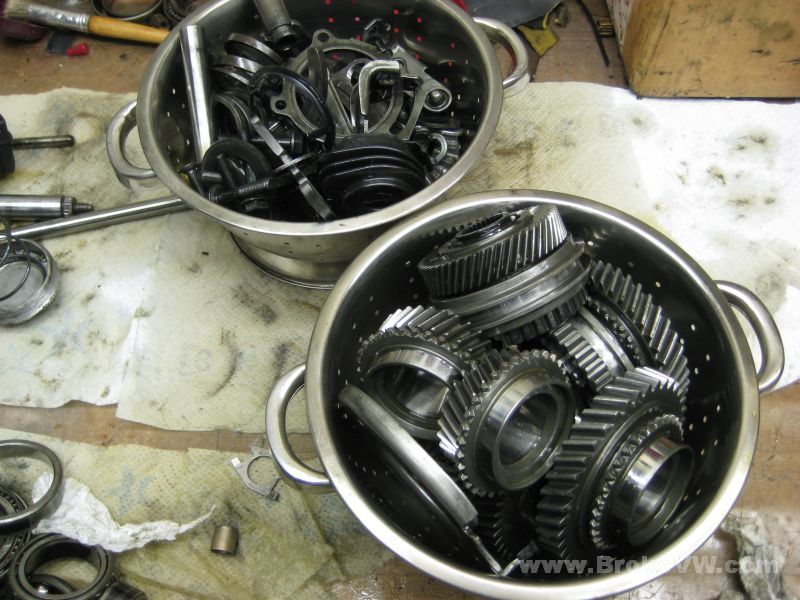
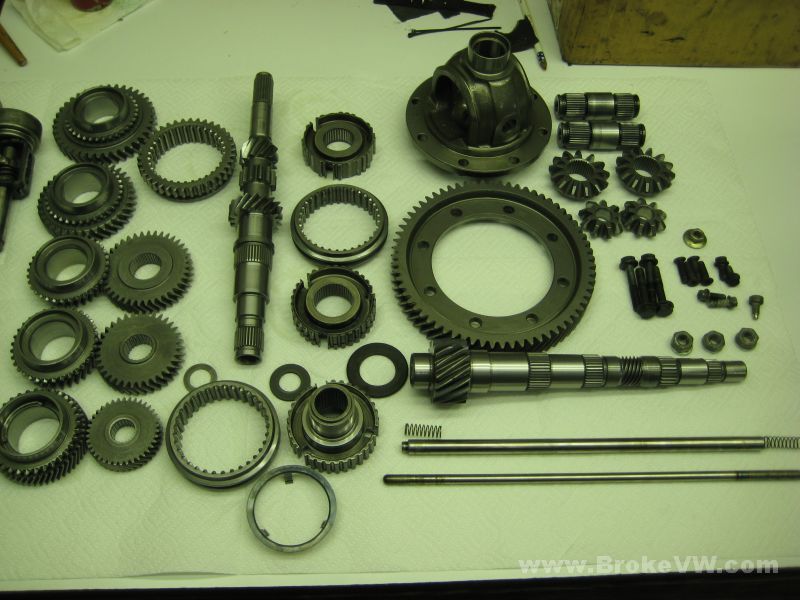
All the parts from the trans, not including the case bolts, drain plugs, flanges, etc. that were plated....
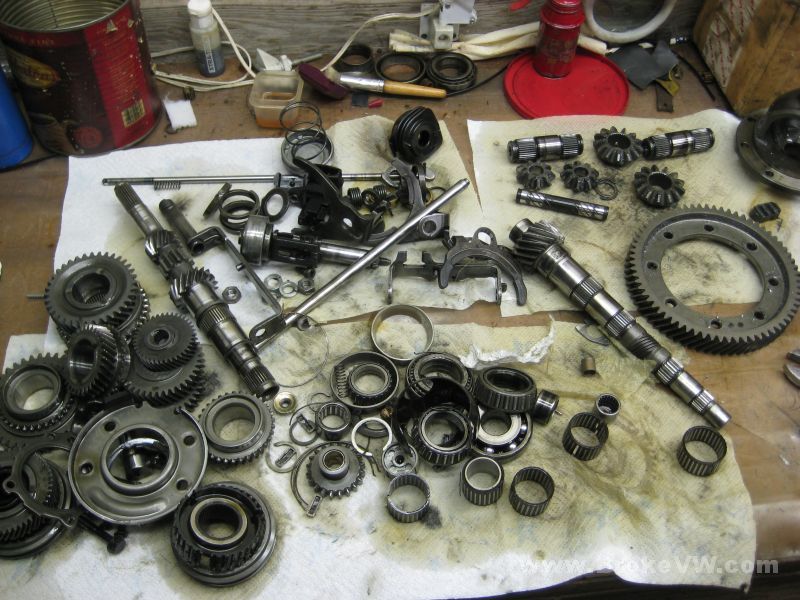
Into the SS bowls to be taken to the parts washer...
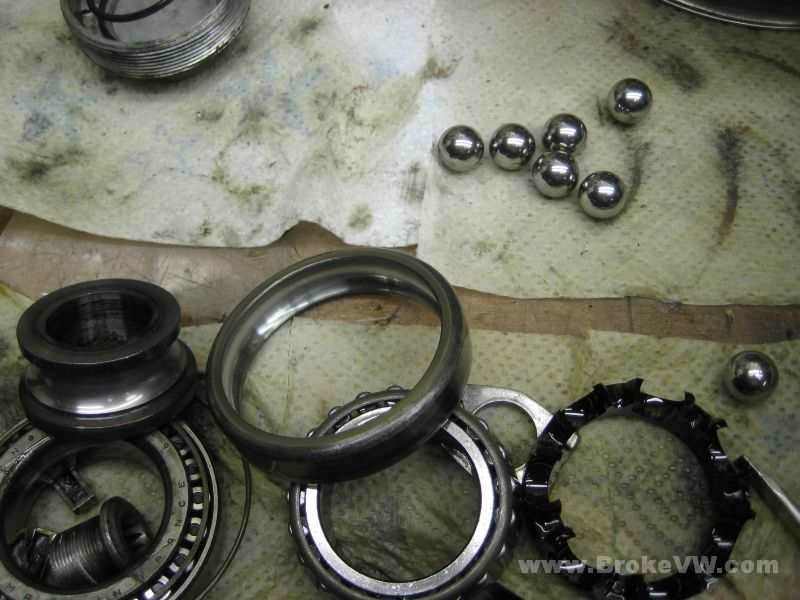
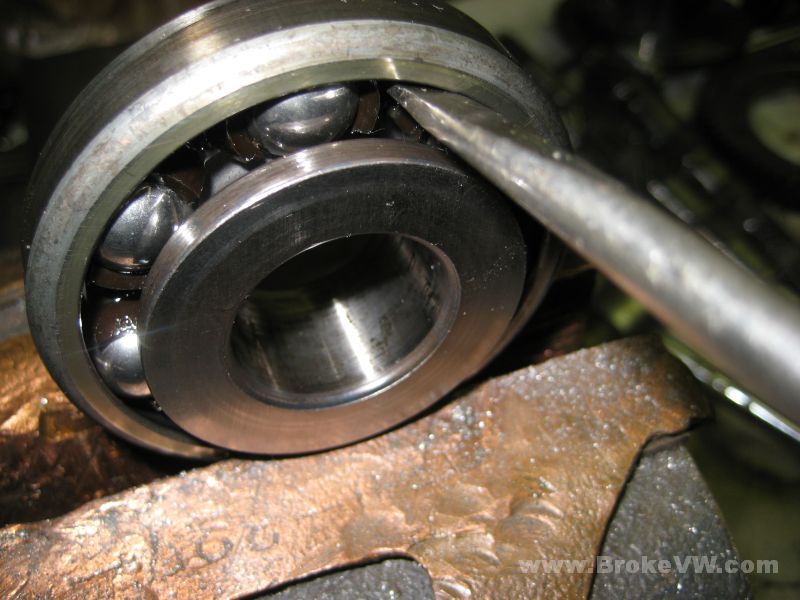
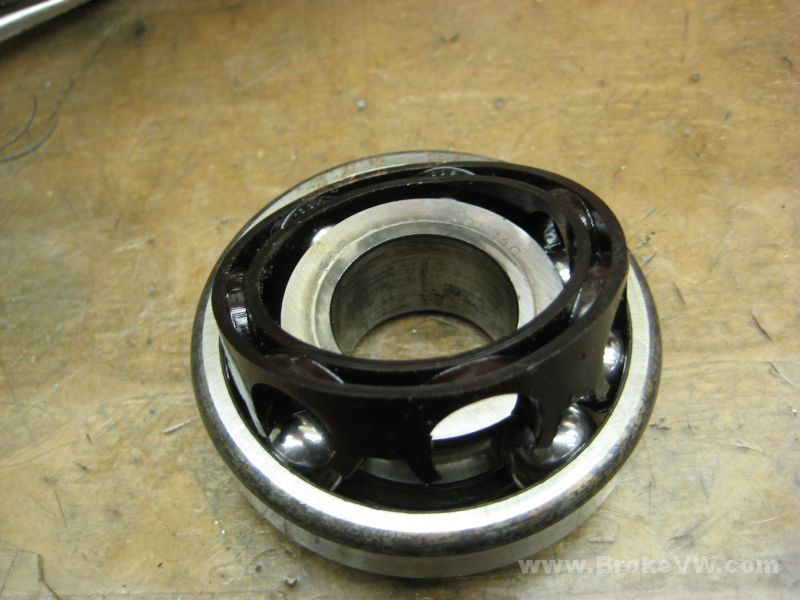
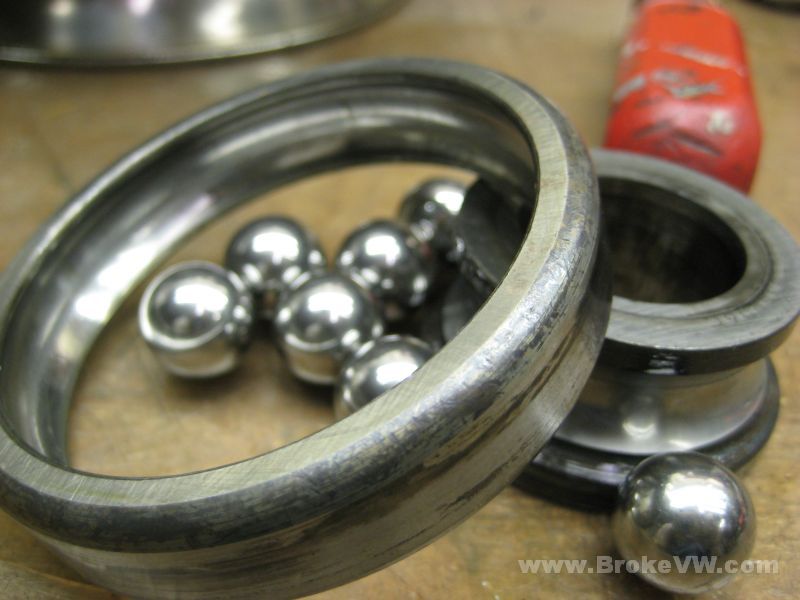
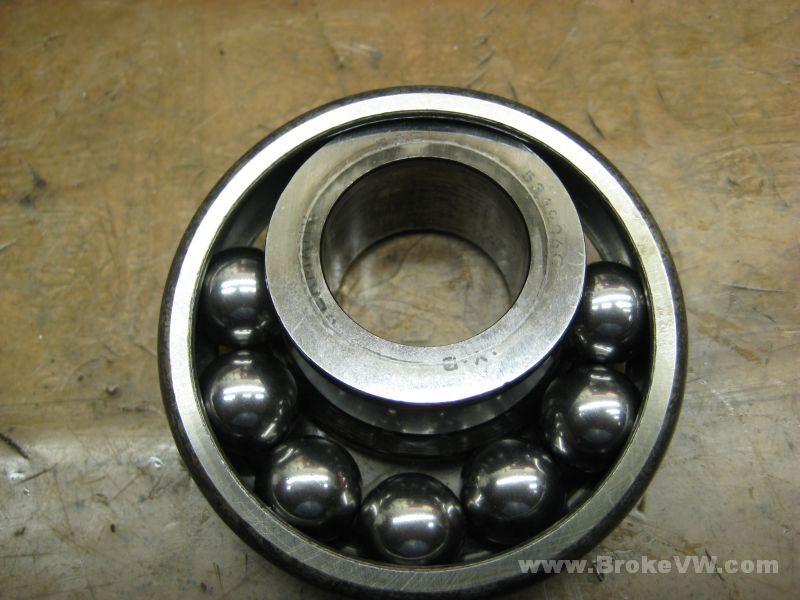
I decided to pop your input shaft ball bearing apart to check the condition, and it is worn and needs replaced, but I took the chance to get pics of how to assemble and take apart the bearing...
That is it for now, the case is soaking in the parts washer, next will be to clean the case up, get it blasted, and get it coated. The cleaning takes the most time, so there won't be any updates to the page for a bit as I will be just cleaning for some time.
How to take apart the deep groove ball bearing in the 020 trans (although it might not be the proper method, so if it damages it when you try.... hmmm, sorry!)
One side has a plastic cage, the other side does not...
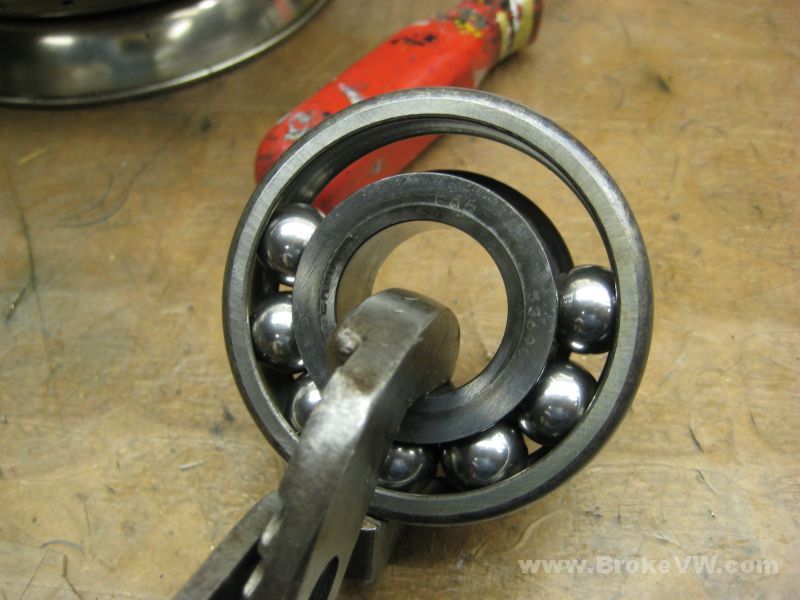
Hold the bearing in a vise, and press the plastic cage out from behind...
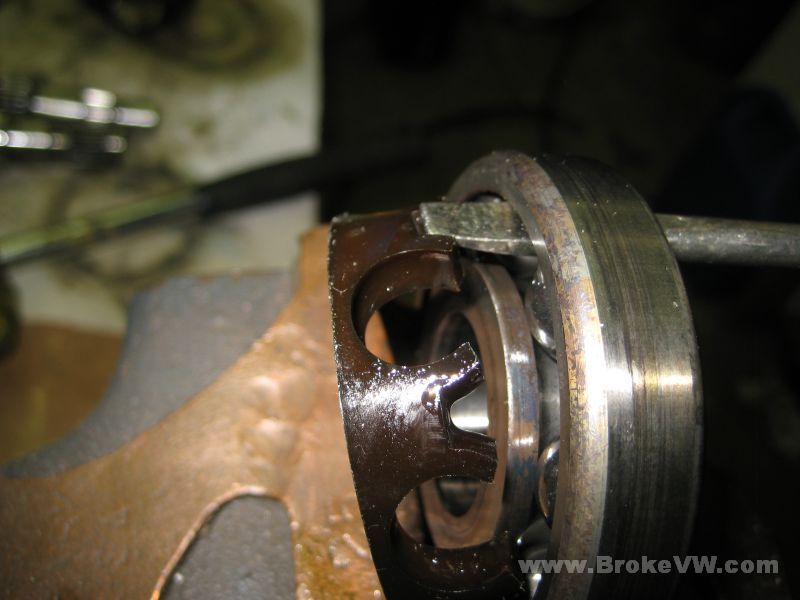
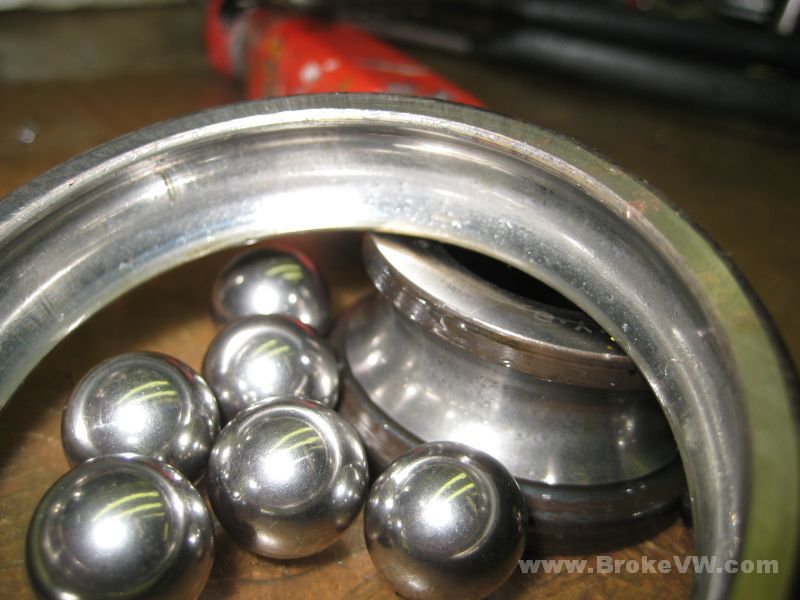
Lift the cage out and hold the bearing so the balls all gather to one side...
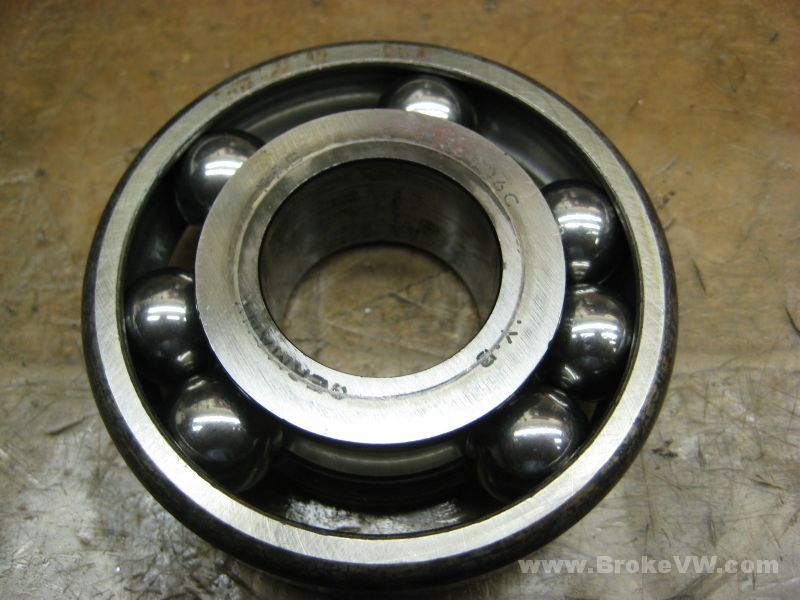
Use channel locks to pop the inner race up to get the bearing apart....

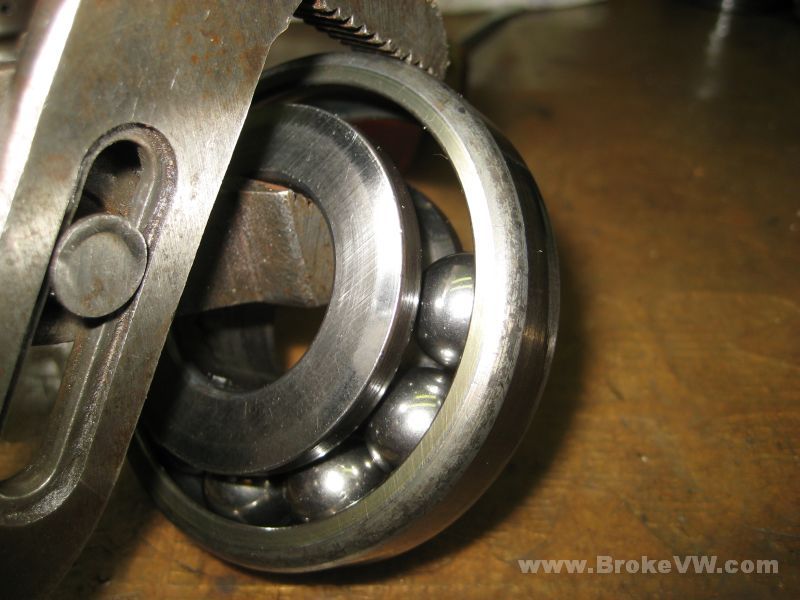
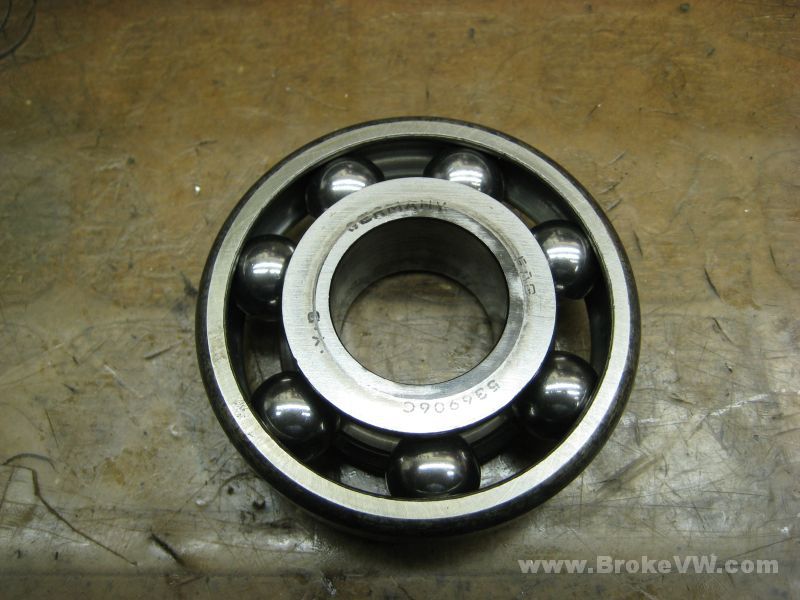
To assemble, make note of the inner race being "thin" side up. The lettering side has less of a lip than the other side, put it thin side up and start dropping the balls in...
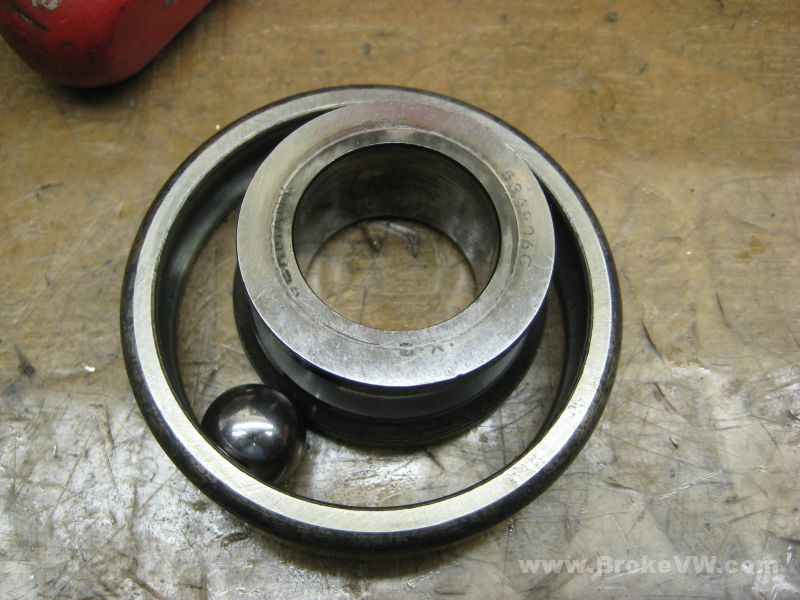
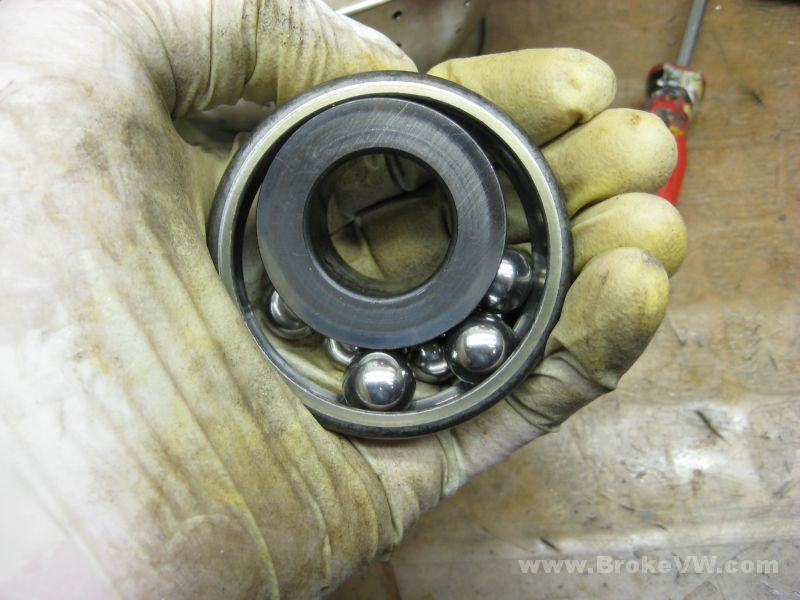
For the last ball, the inner race will have to tilt and tuck under the outer race partially as shown at the top of the bearing....
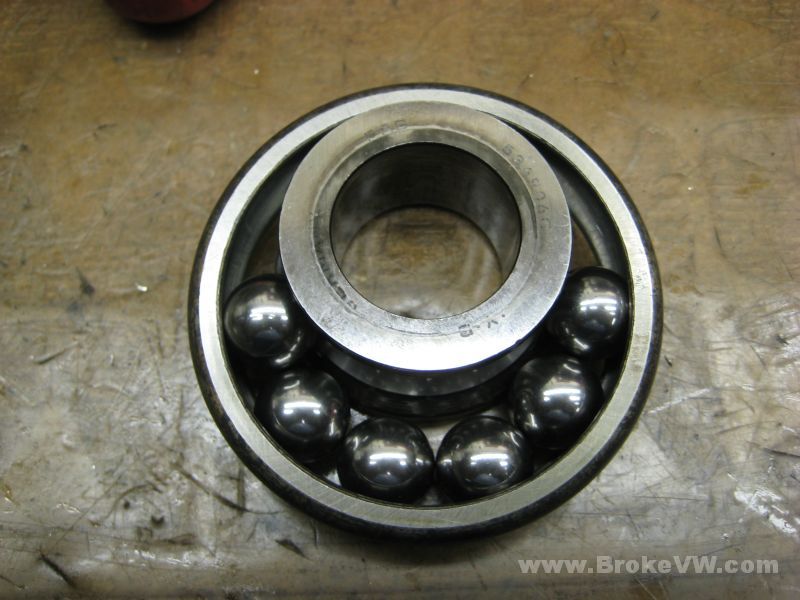
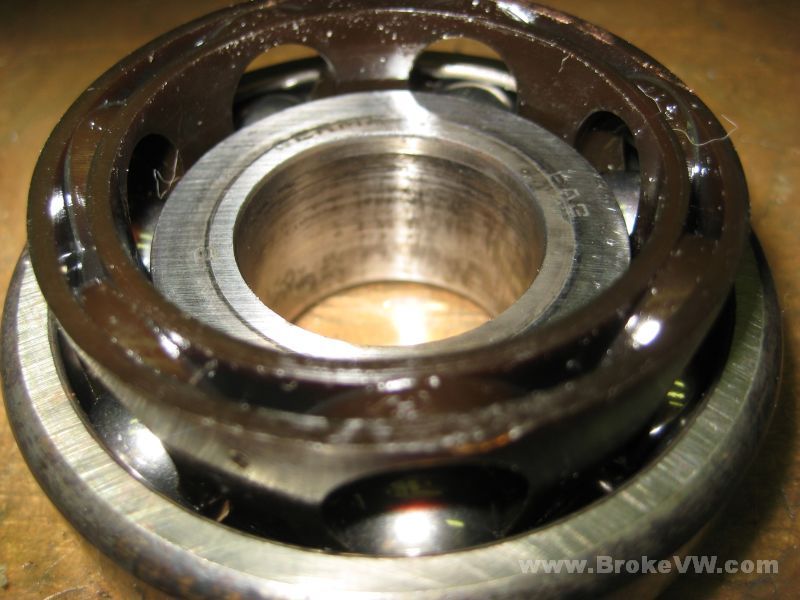
Use the channel locks to pop the inner race back down, space the balls evenly, pop the plastic cage back in place, and the bearing is assembled...
Update 05/12/11
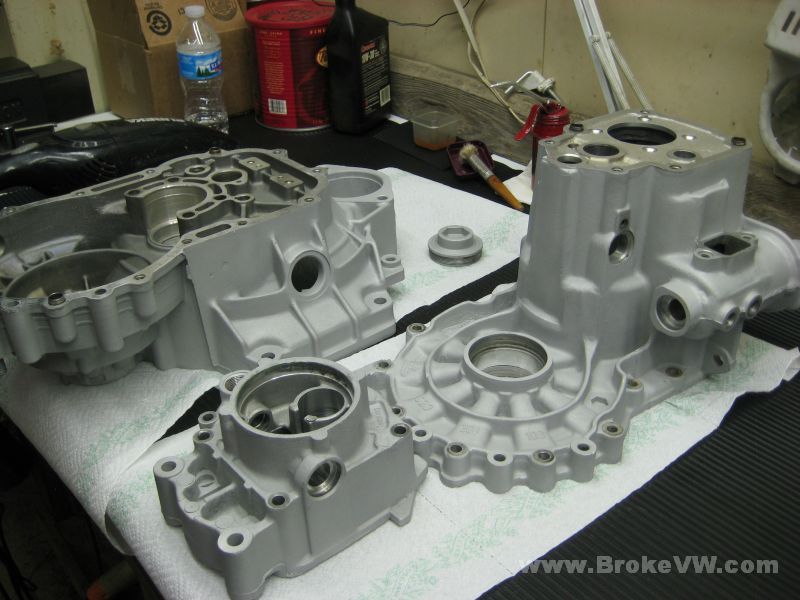
The trans case is cleaned up and dripping dry...
Once it is dried off, the case can be assembled to prepare it for blasting. Sand gets everywhere, but I try to seal up the trans as much as possible to limit how much gets in, so I use rubber sheet cut to fit and old oil seals to hold them in place, along with dedicated bolts and so on to plug the holes up.
The speedo and reverse switch plugged, along with the selector hole and detent bolts...
Inside the trans I use bolts and rubber grommets to seal the holes inside to prevent any grains from getting in, because they are a real PITA to get out again, and they can't be left in there... The orange RTV goop is holding an old seal into an old seal sleeve, the sleeve itself is tapped in place to seal that flange hole up...
A couple pics showing the inside of the casing....
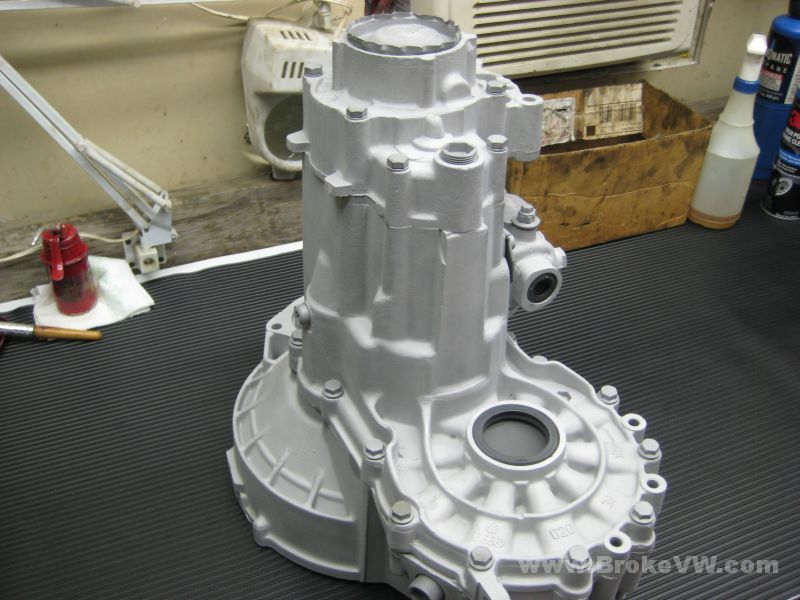
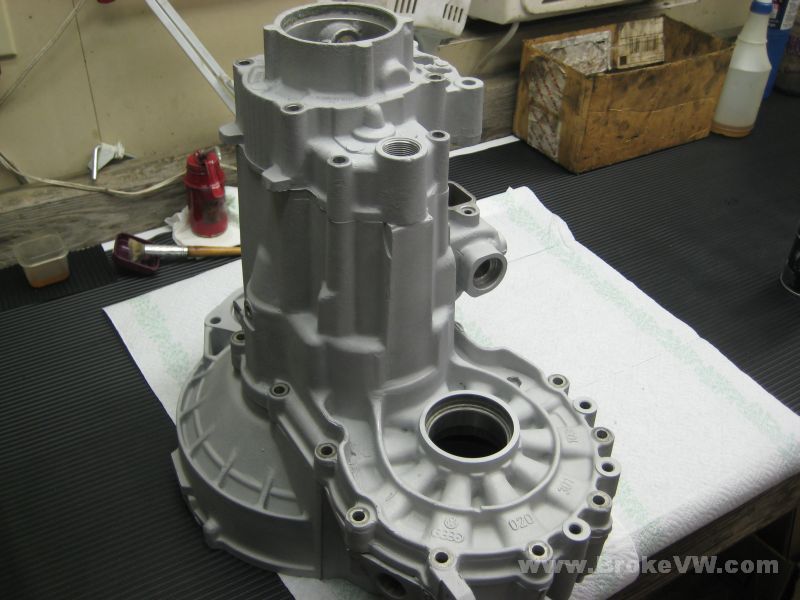
Assembled and ready for blasting, it is bolted with a set of bolts I keep for this purpose (they get blasted, get put away, get rusty, then get used on the next trans to be blasted) and is sealed as well as I am going to get it, and even then it's going to have sand inside anyway. These can serve as the "before" pics of the trans prior to blasting...
OK, and since I'm getting slow to upload pics that need uploaded, those were old pics, these are the most current (from today the 12th) of the trans.
This pic is actually from yesterday, after being blasted, but before I had glass bead blasted it, which didn't end up happening thankfully, as the glass will screw up the powder coating... so I got lucky by forgetting the glass bead the 1st time around!
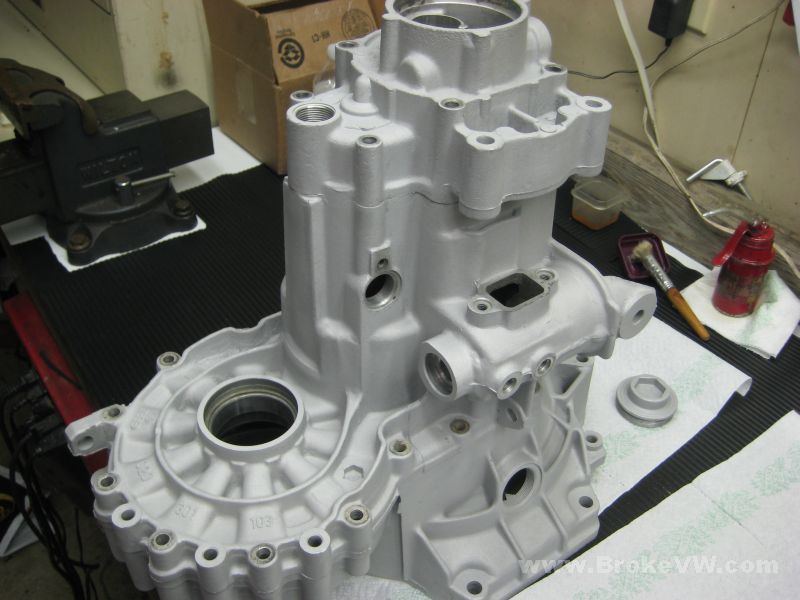
Done with blasting and back in the garage, it needs taken apart and rinsed fully....
The case is very dry and porous and will absorb any oil on the aluminum... you can see wet spots around the gasket mating faces on the 2 pieces, it is bleeding out and getting onto the blasted aluminum....
Here is a cavity in the casting that is holding grease and oil and kerosene from cleaning, it is bleeding out as well... these spots are easily removed with brake cleaned, and they will eventually quit. The powder coaters will clean it before coating with lacquer thinner to degrease it as well, but I've gotten rid of a lot of it already...
The pieces taken apart, before being rinsed....
The corrosion can't be fixed... the pitting is from the case being dry and exposed to the elements, and it has corroded. The blasting cleans everything up, but any pitting will show up as shown in the pic below. When the case is wet with oil from a leak, it will stay preserved for decades and decades.... when the case is kept clean and dry it will be more prone to corrosion over time...
Some places didn't get as uniform as I'd like... it might be a spot I missed or it might have been a badly corroded spot that needed more time to dig it out fully.... which I guess would still be me missing it. Anyway, here is a spot I didn't get as well as I probably should have, but I think in general the trans looks much better and these small places will be hard for most folks to pick out anyway....

The case is now rinsed and dried fully, and it is ready to be taken in for coating. I will likely be taking it to them tomorrow before the weekend starts...
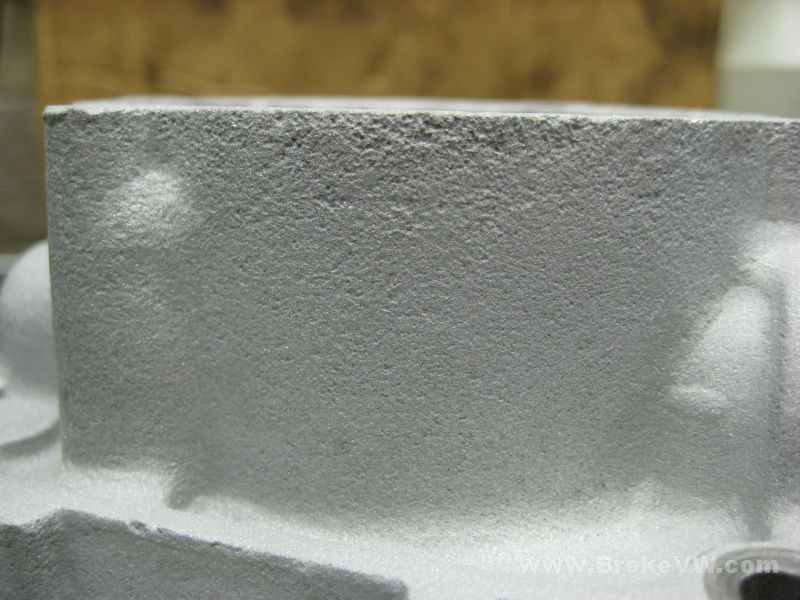
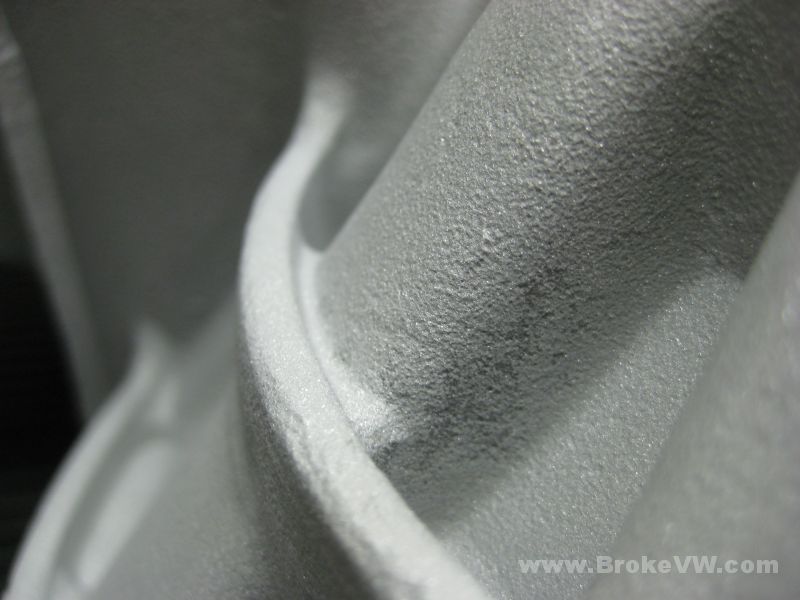
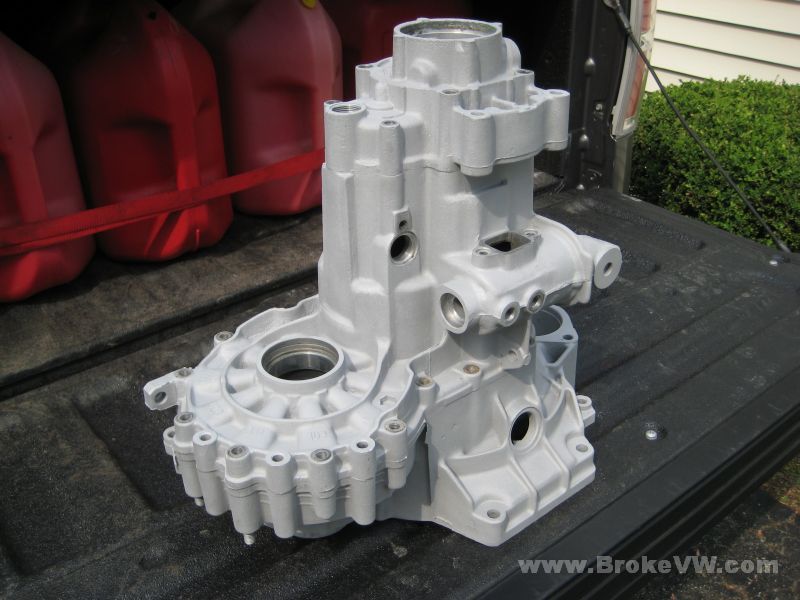
A few more pics of it in the "after" state, and after being rinsed.... this is what is going to get covered in clear powder coat, so I'm guessing it will change as far as looking more shiny, and it will feel smooth to the touch, but it should basically be this color I think....
A pic in the "sun"... even though it was a pain trying to catch the sun without clouds, and this isn't in full sunlight, it might give you a better idea of what it is going to look like in natural light... or what it looks like now, before going in for coating...
Update 05/20/11
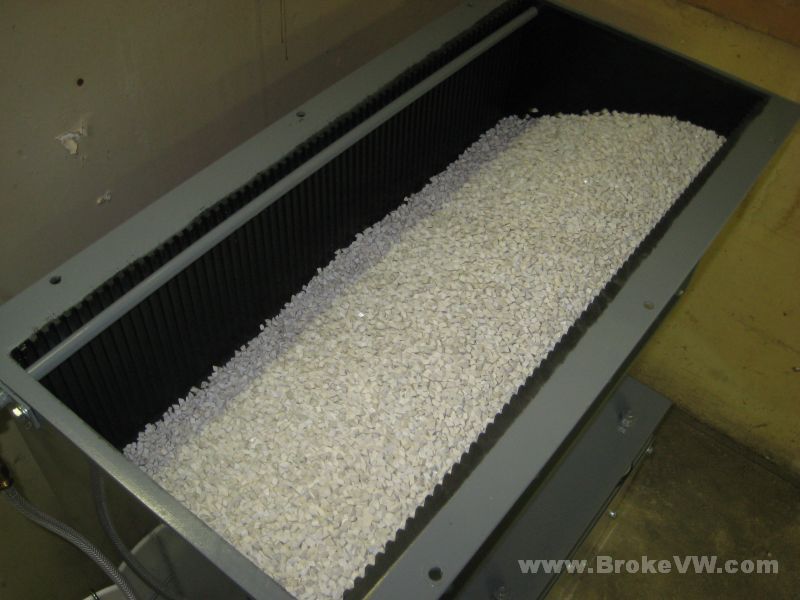
The internal parts are now cleaned, yours was the first trans to be cleaned with the new vibratory cleaner. I'm quite pleased with the results.
This is the new machine that I used. It is a Mr. Deburr DB300 filled with 150 pounds of ceramic media, 1/4"x3/16" angle cut triangles, in a polishing compound, which means there are no abrasives added. Kerosene is used as the cleaning solution, it is cycled through the media from a 7-gallon reservoir and dripped in through the pipe along the back of the tub...
A short video of it running can be seen HERE.
After 30-45 minutes of running the parts, I allowed them to mostly dry off, then they went into the ultrasonic cleaner for about 30 seconds...
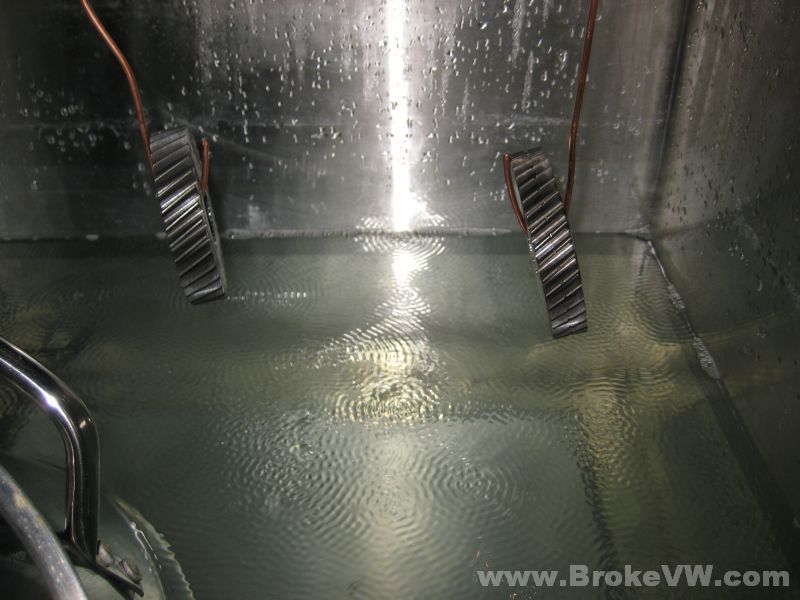
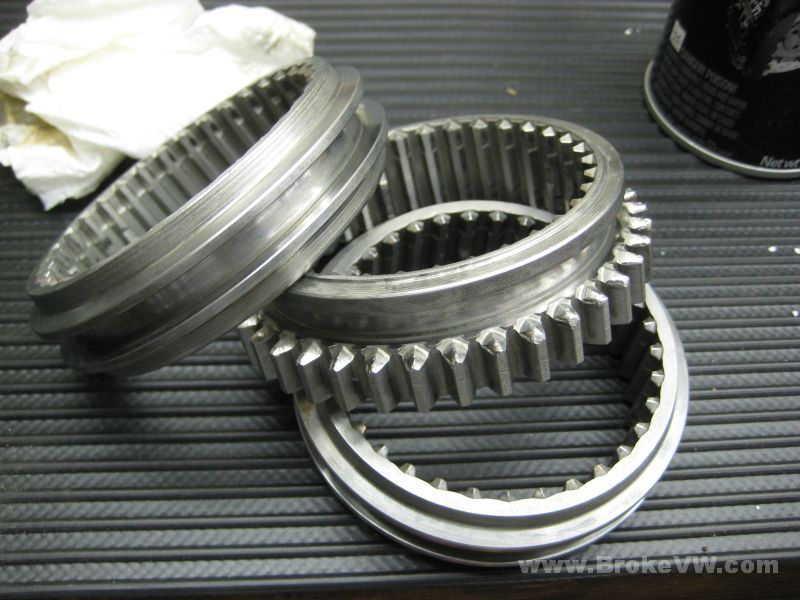
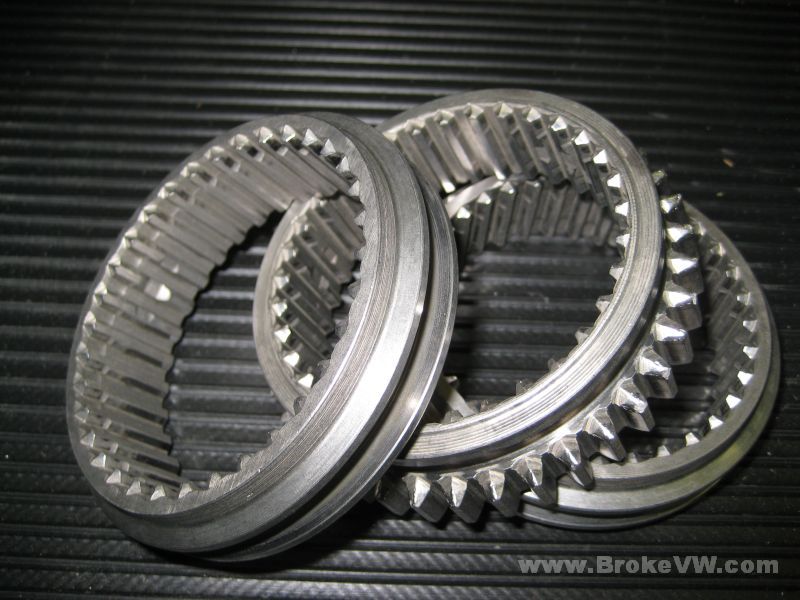
What came out was bright and shiny, totally clean, with no traces of oil or grease anywhere to be found...
I don't have pics of them yet, but the rest of the internal parts are cleaned and oiled, and bagged up waiting for the casing. There are a few small internal parts like springs and so on that are too small for the DB300 cleaner (I'll lose them somewhere in that 150 lbs. of media!) that I need to clean, and then the build can start once the case comes back, and I expect to have the case in the next few days, actually.
Update 05/24/11
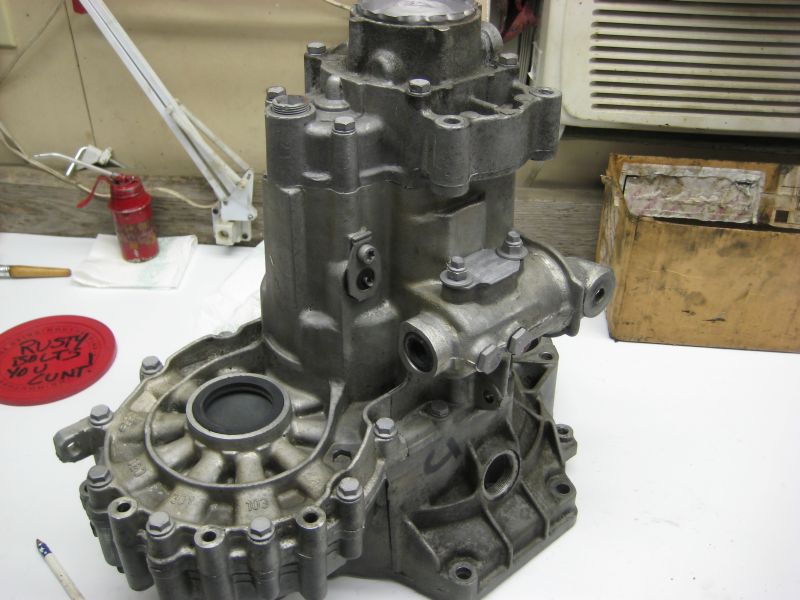
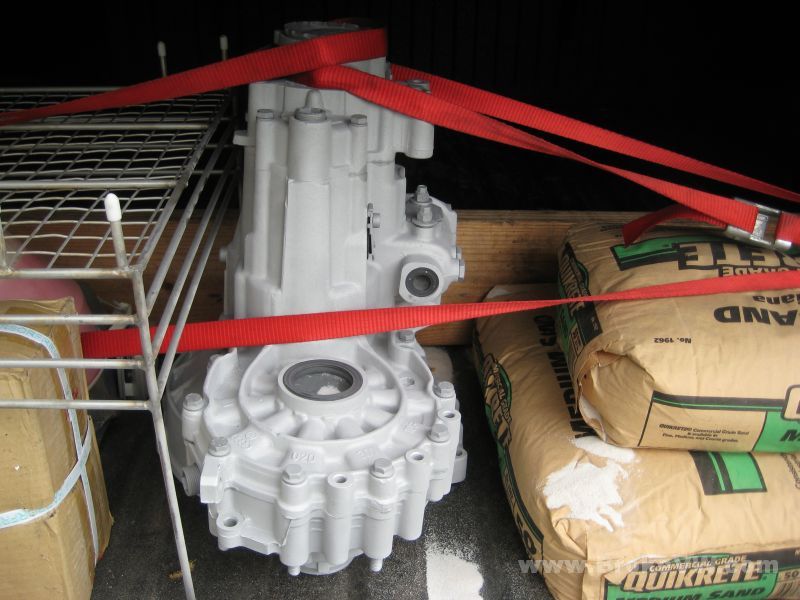
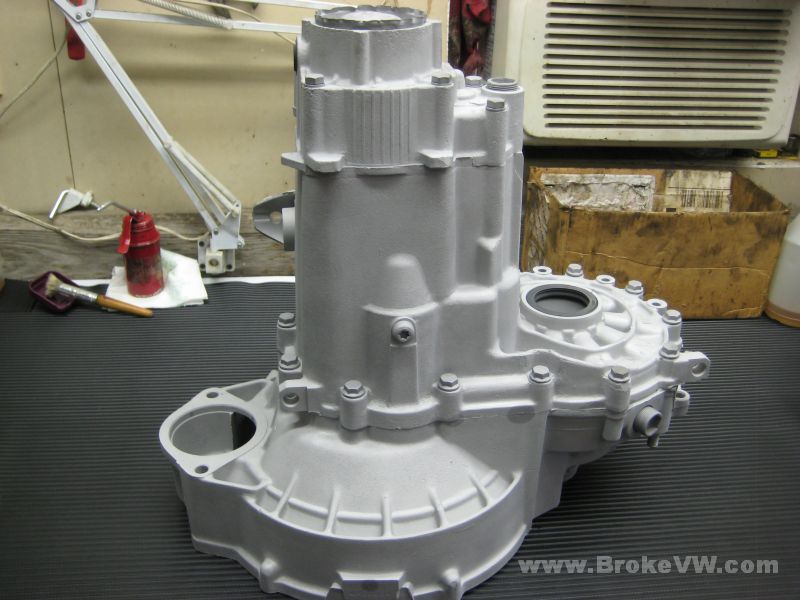
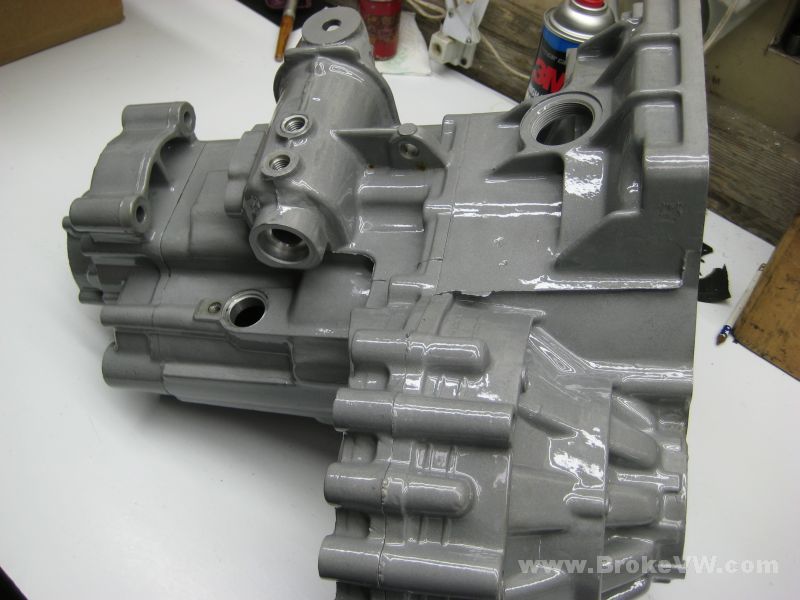
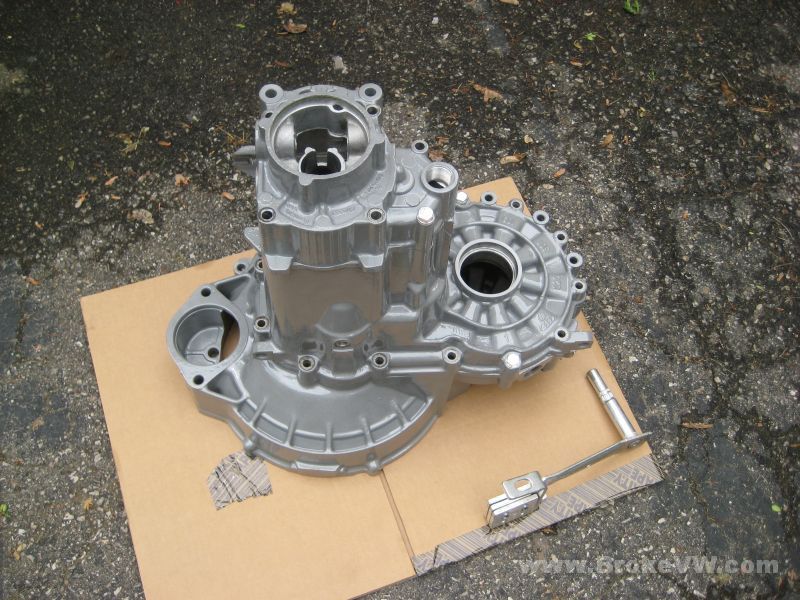
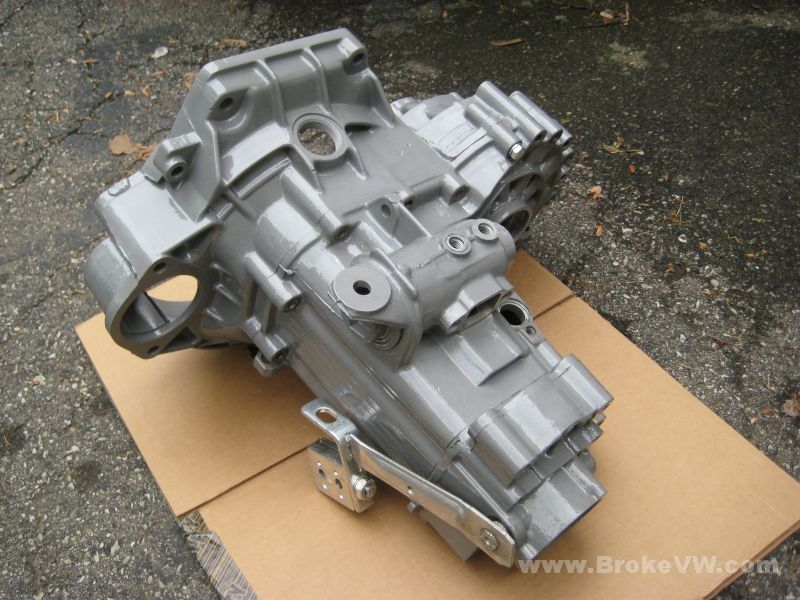
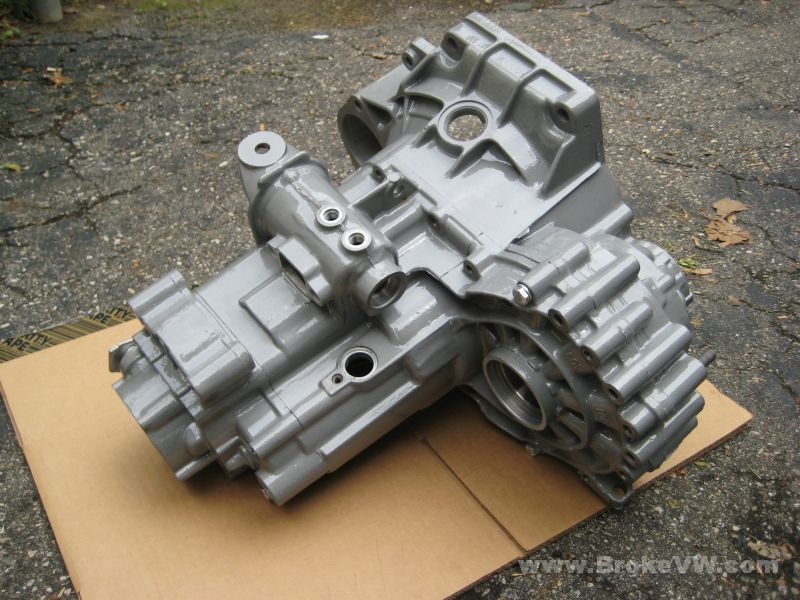
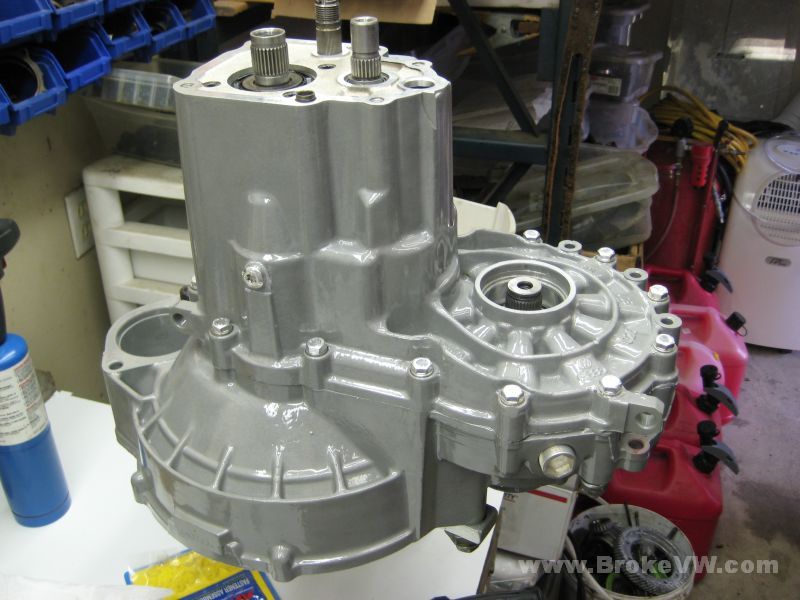
I picked the case up yesterday and it looks pretty nice...
The color is darker than the bare aluminum, but I think it turned out pretty well and should be easy to keep clean. The coater told me to treat it like auto paint and it'll last for ages....
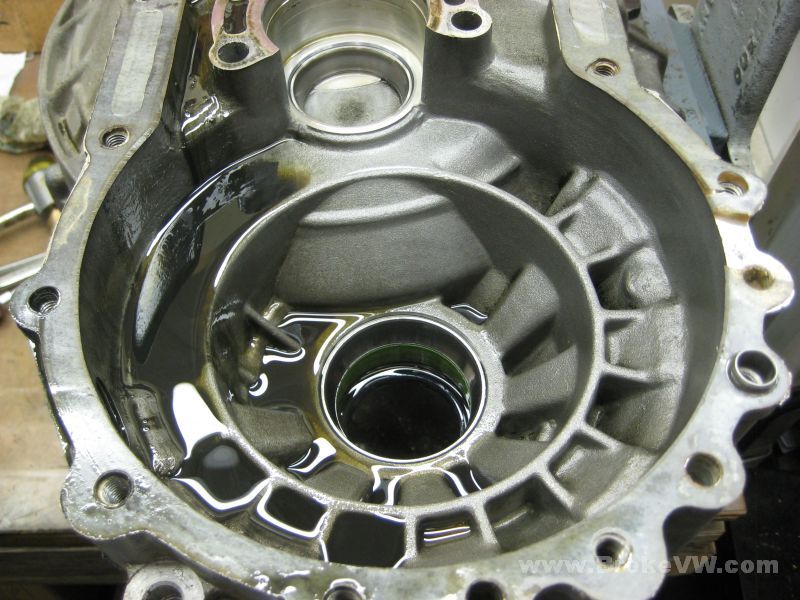
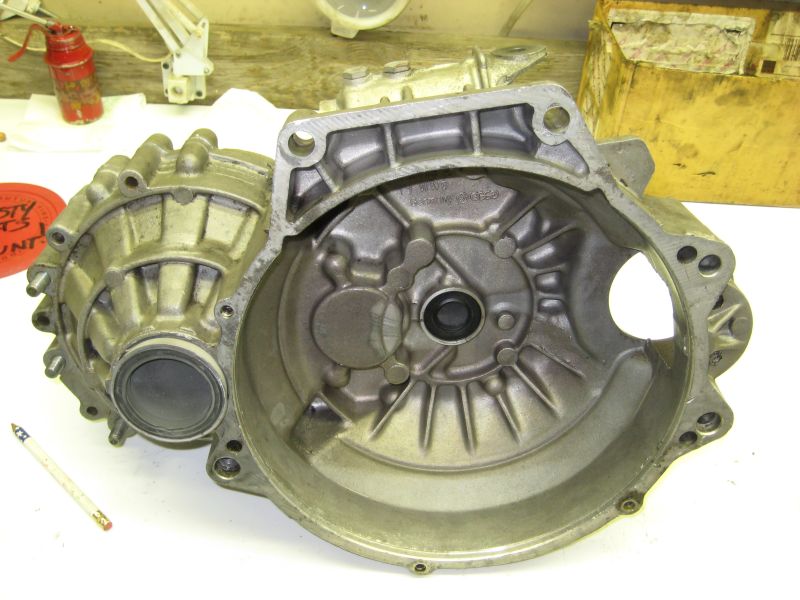
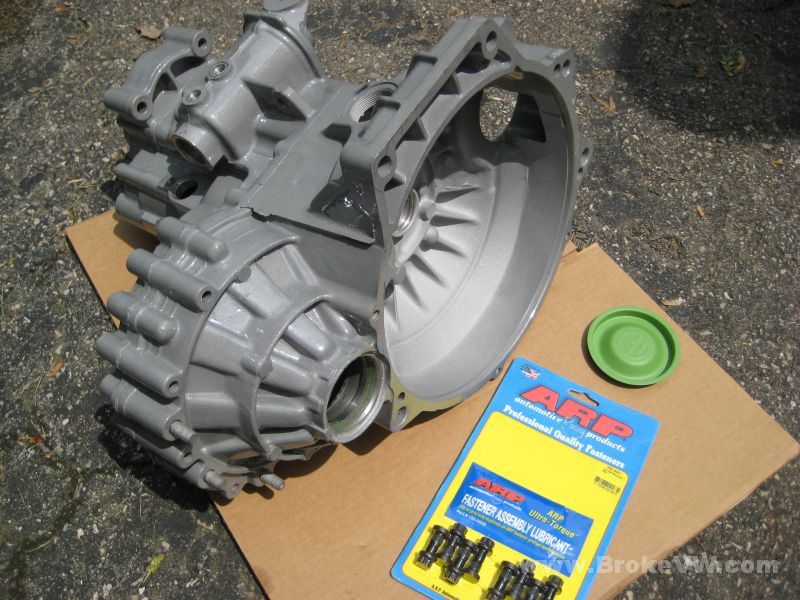
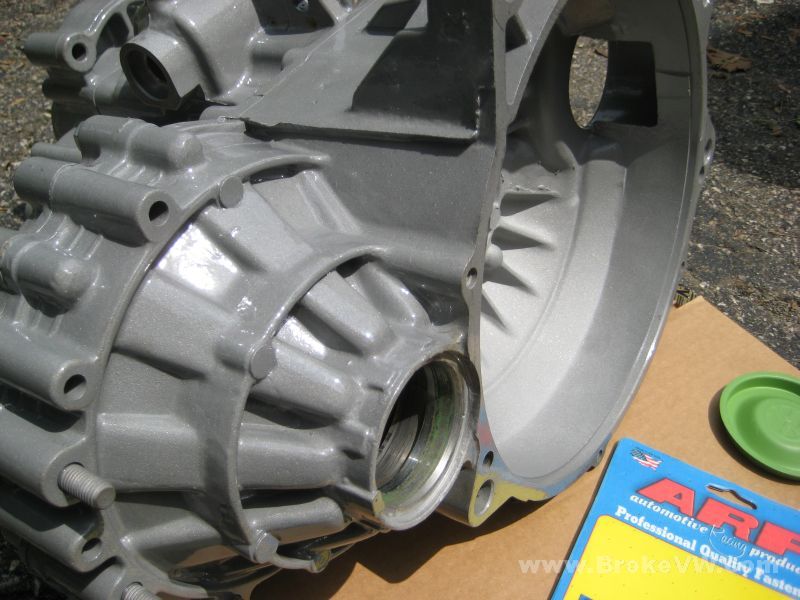
You can see inside the bellhousing where it wasn't coated, and tell the difference between the coated diff area and the bare sand blasted clutch area...
I found a few places on it that I'd like not to see, but there isn't anything that can be done about it unfortunately. The porous nature of the aluminum means it traps oil and grease and holds it. During my cleaning with the kerosene scrubbing followed by the sand blasting, it usually removes 99% of this. Once the coaters get it, they spray it down with thinner once again to remove anything from it, then the pre-bake it to drive anything hidden out before coating. They then re-wash it in thinner and finally coat it and cook it the final time.
There are a couple spots where contamination bled out during the last baking, and with it being clear, they show up. Where you find them you'll find a small cavity in the original VW casting of the casing, and that cavity was holding grime. I can look at the pics above where it was freshly blasted and see a spot of oil bleeding out in the same location where the marks are now, in the pic below...
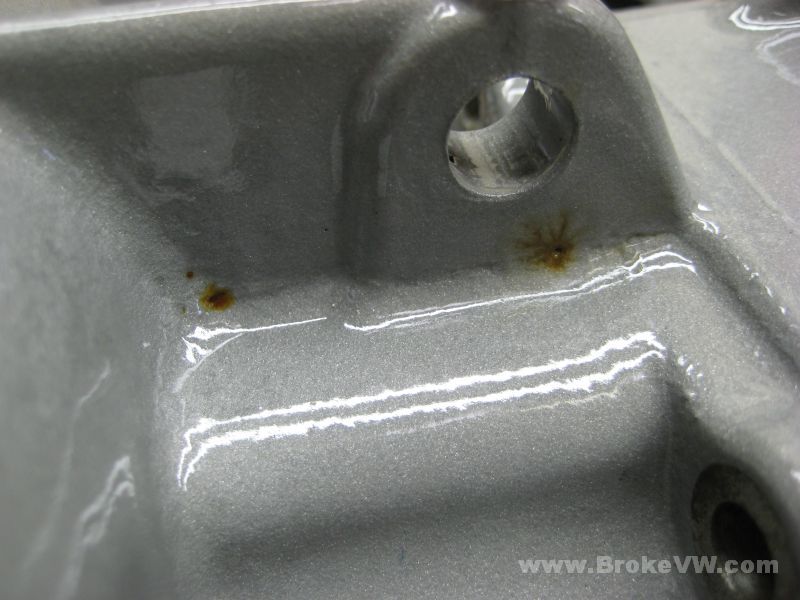
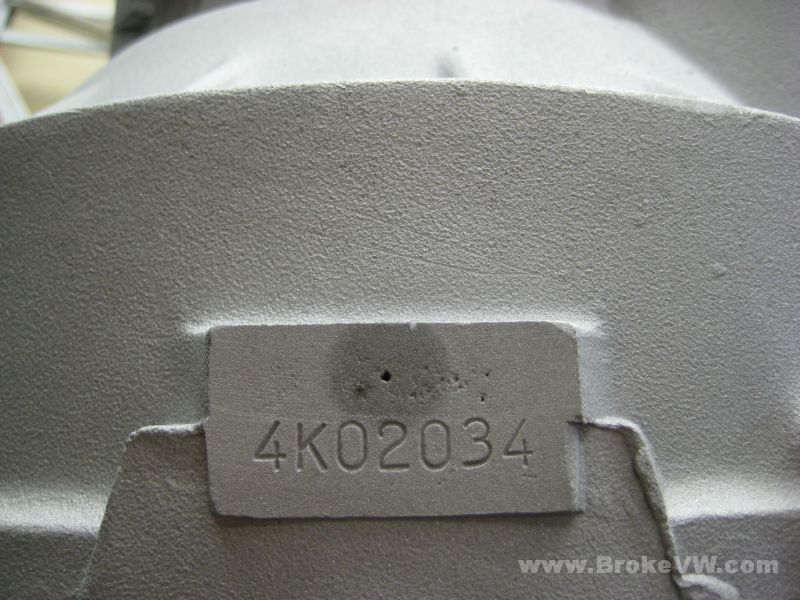
This next pic shows the size of the marks in relation to the size of the rest of the trans. They are small but stand out against the rest of the nice clean trans. I wish there was a sure-fire way to remove all contamination, but there isn't unfortunately. Some spots, like that big cavity right near the code stamping, I washed several times with brake cleaner to attempt to drive the contamination out, and was still bleeding when I took it to the coaters. They were able to drive that out prior to coating it, because it looks good other than the cavity in the casing, but not all of them, so there are a few spots in the finish, but I think it looks pretty good overall, and I bet you could hide those marks pretty easily with some touch-up paint if you wanted to...
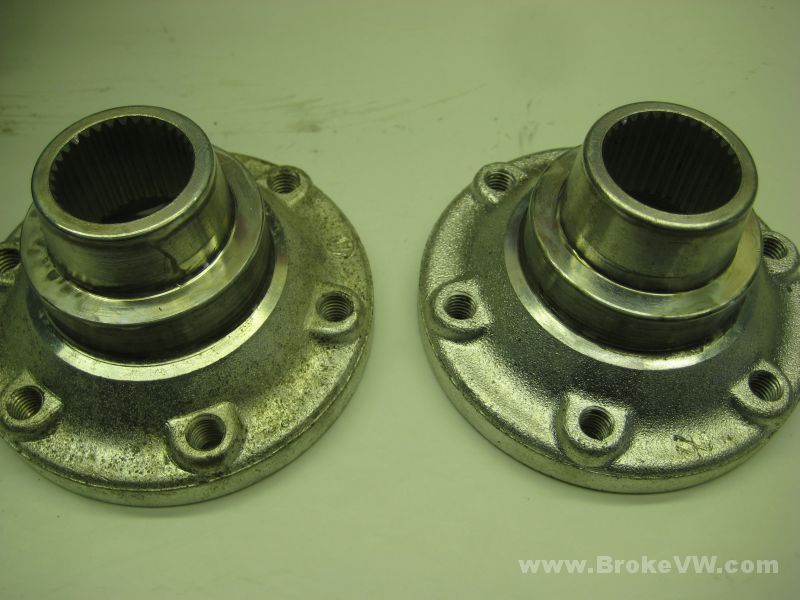
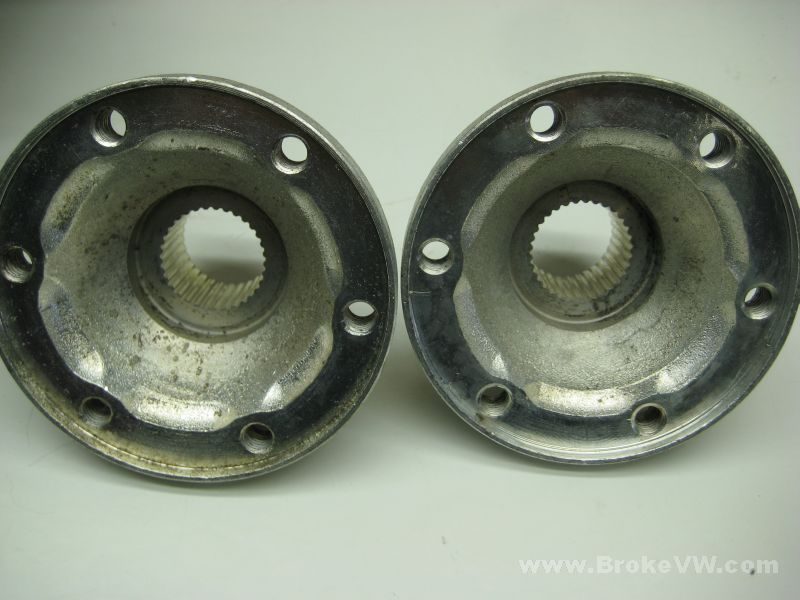
While getting your plated parts out to get everything ready, I noticed some spotting that I don't recall seeing on them when they arrived. I'm not sure if the coating wasn't thick on the left flange or if the surface prep wasn't quite aggressive enough or what, but it looks a little more 'dirty' than the other plated flange you sent...
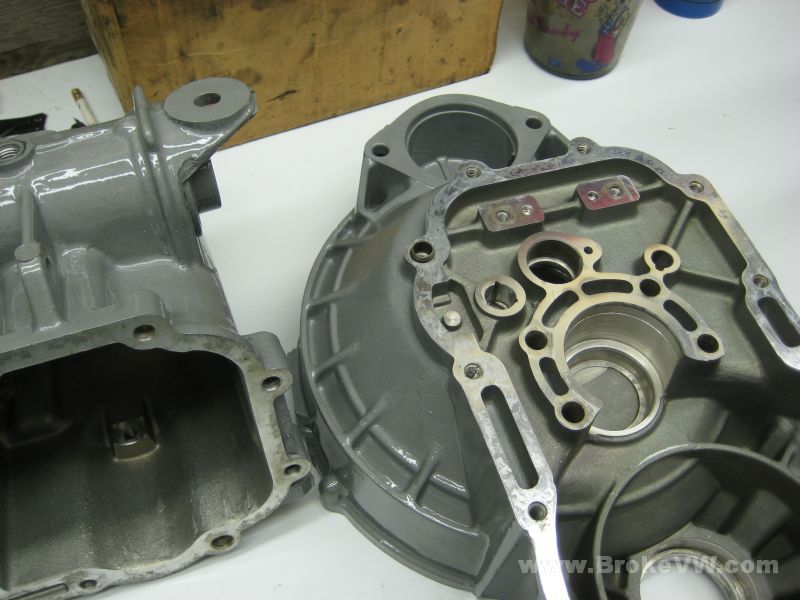
A few pics of the casing insides ready for assembly to begin...
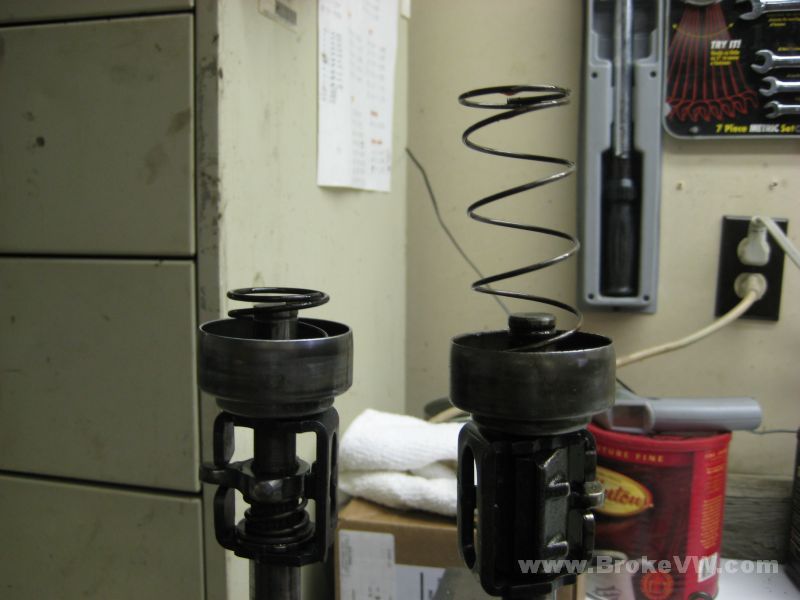
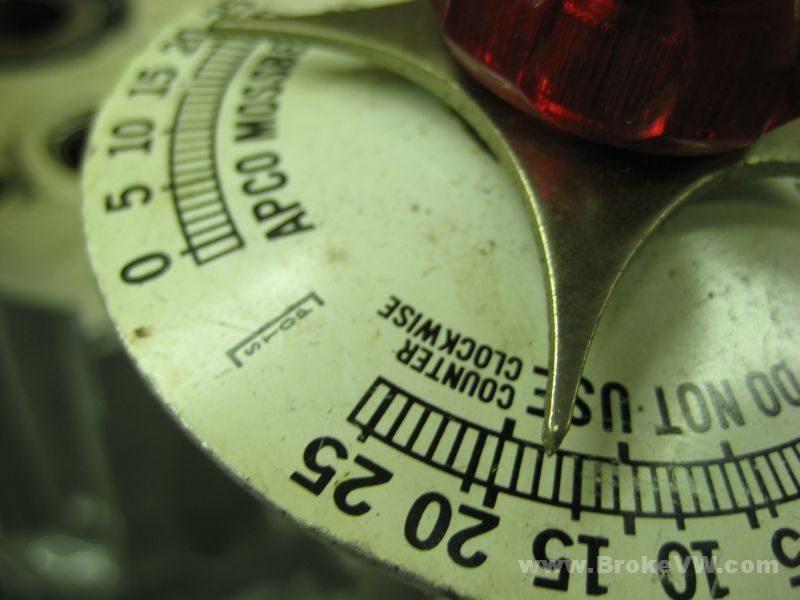
While taking your selector apart to clean it, I noticed the spring was much shorter than many of the selectors I have opened in the past, the spring on the right is what I normally see. I checked my bin of selectors and found more of them with the short spring, so it isn't incorrect, it's just much shorter than the MK2 and MK3 selector springs. This is the spring you would feel when pushing the shifter from the rest position (lined with 3rd and 4th) over to the right to line it up with 5th gear. The spring is the resistance you'd feel, and in your trans, there is also that adjustable 5th detent bolt.
I believe VW uses the short spring on trans that use that adjustable 5th detent bolt. With trans that do not, VW dropped the adjustment option, installed a longer and heavier spring, and left it non-adjustable with either a plain bolt plugging that 5th detent hole, and on later cases no hole drilled for the 5th detent at all.
Your selector on the left cleaned and ready...
A few pics of the cleaned and oiled parts to be installed back into the trans...
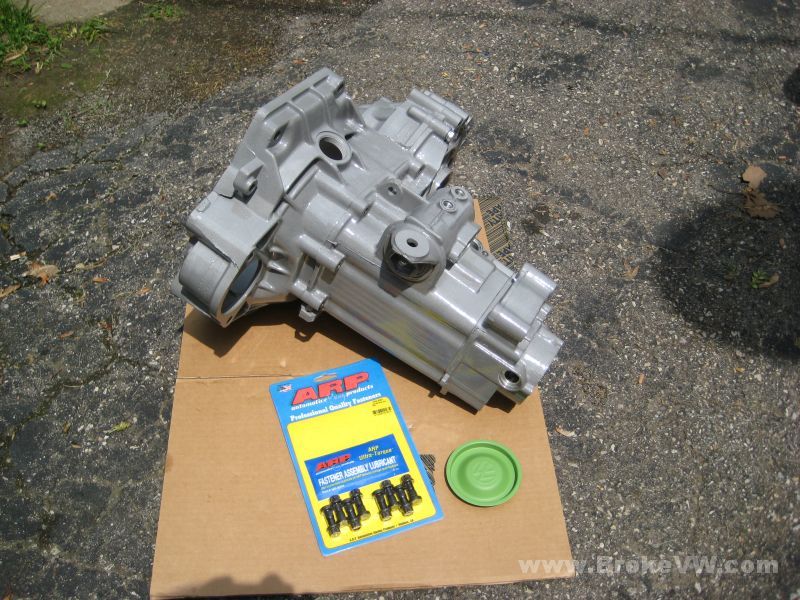
Here are the new parts that will also be installed...

When not in use, the parts are covered until I am ready to get back to them again...
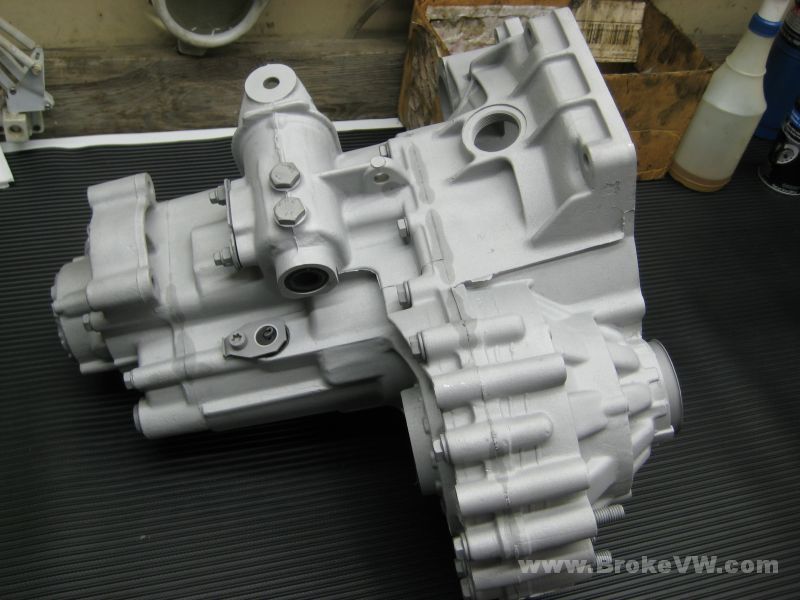
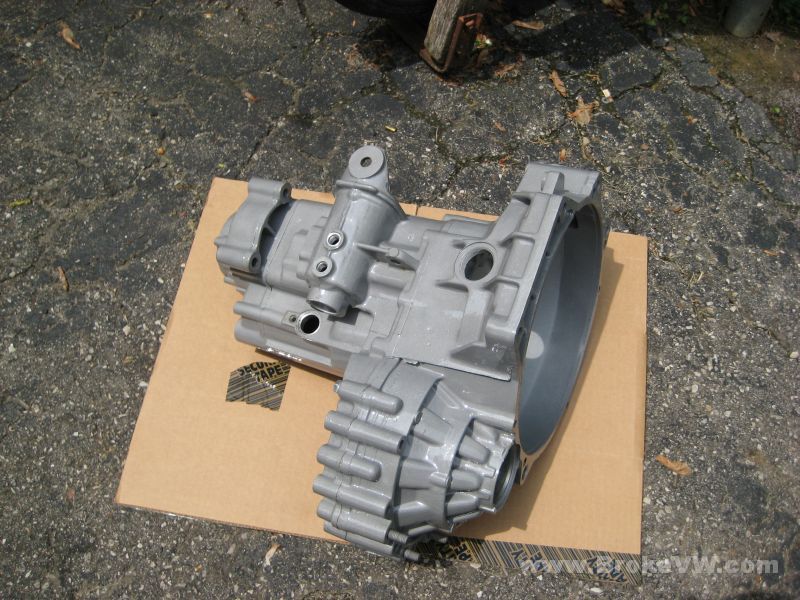
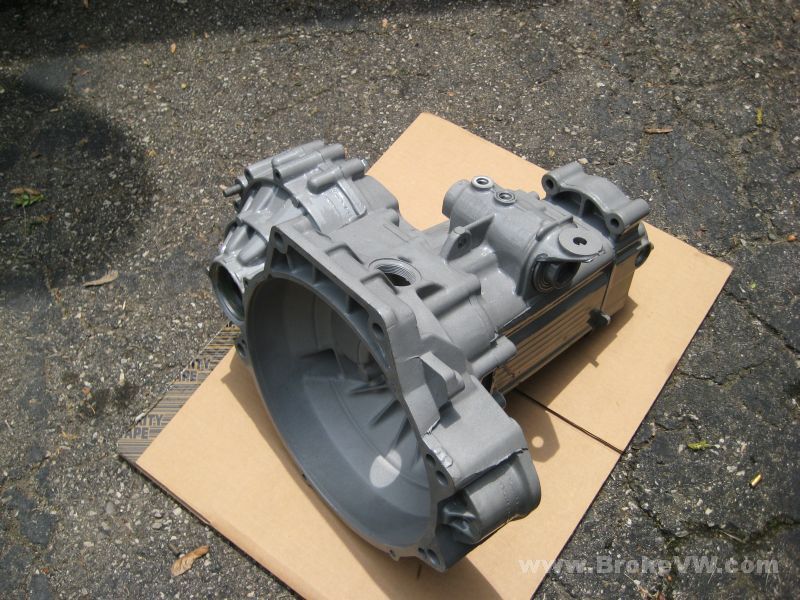
Here are a few pics I took with the flash on the camera in use, to show the color of the trans a little more...
In this pic, you can see portions inside the bellhousing that are shiny that have been dusted while being coated, and in the next pic it shows the bare portion of the bellhousing next to the coated portion...
In the process of trying to sort my garage out for the new equipment, I've got no grinder mounted anywhere now, so I'll be taking your stub axles over to a friends to remove the ends of them a little for extra clearance and then I'll start building the sub-assemblies of the trans.
Pics outside, cloudy with no direct sun...

Pics while the sun was out...
I put the bolt kit and end cap in there for some other colors to reference to...
These pics show the change in color from the raw aluminum to the coated...
Building the input shaft starts with the new pushrod bushing. I built a little tool I use to both support the inside of the soft bushing and allow me to drive it in at the same time. It is just an old pushrod with one end welded up and a nut there for a flat surface...
Once the nut and bushing are driven down flush, the tool is removed and inserted from the other side, so the bushing center remains supported as the bushing is driven in the rest of the way, until it stops using a 10mm deep craftsman 1/4" socket...
The pushrod is removed and the pushrod seal is inserted. Some seals come with an install tool, which is just a plastic plug, but it is designed to allow you to drive the plug and seal in flush, which then leaves the seal the correct depth which is 0.8-1.3mm below flush once you pop the install plug out...
The bare input shaft ready for 3rd and 4th gears...

The new 3rd needle bearing and 3rd gear are installed...
Your sync rings are still in spec and feel like they grab the gear face very well, so those won't be changed, considering the cost of new OE VW rings...
Installing the 3rd.4th sync hub after heating it to 212F....

Once the sync hub is installed a new circlip is put into place, then the new bearing for 4th and 4th gear are installed...
The 5th housing is mounted in the vise with a rag between the jaws to protect the powder coat and the 5th housing assembly is mostly built with the release arm installed and clipped in place once the oiled and greased seal is installed...
The shift fork assembly is built and put to the side for later...
The 5th assembly is built with new springs, keys, and bearing, bagged up for installation later...
The assemblies built before being bagged up...
Next will be to build the diff assembly and bolt the ring gear in place, then the case pieces can be started on, with everything that need pressed into them, followed by the preload procedure. Once the preloads are done the actual trans rebuild can start.
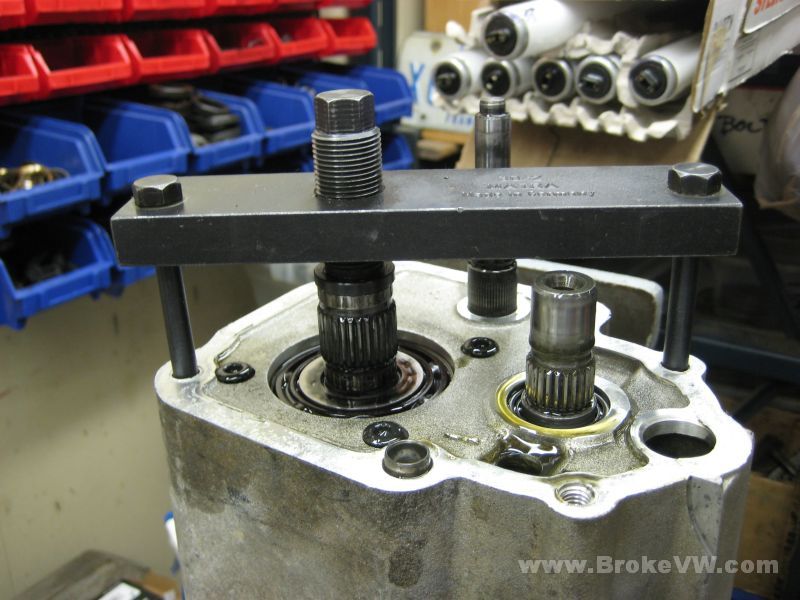
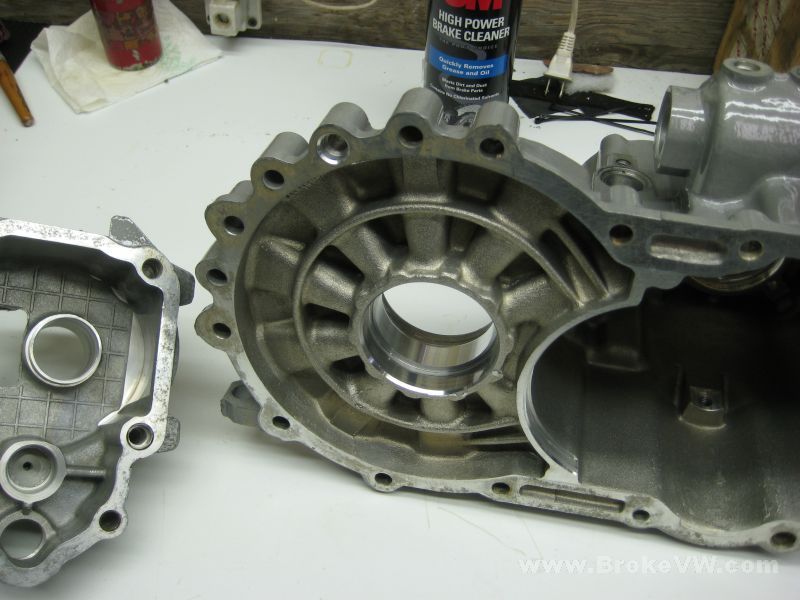
Pressing in the large input shaft ball bearing, the output shaft roller bearing, and the diff taper bearing race into the gearbox half of the casing...
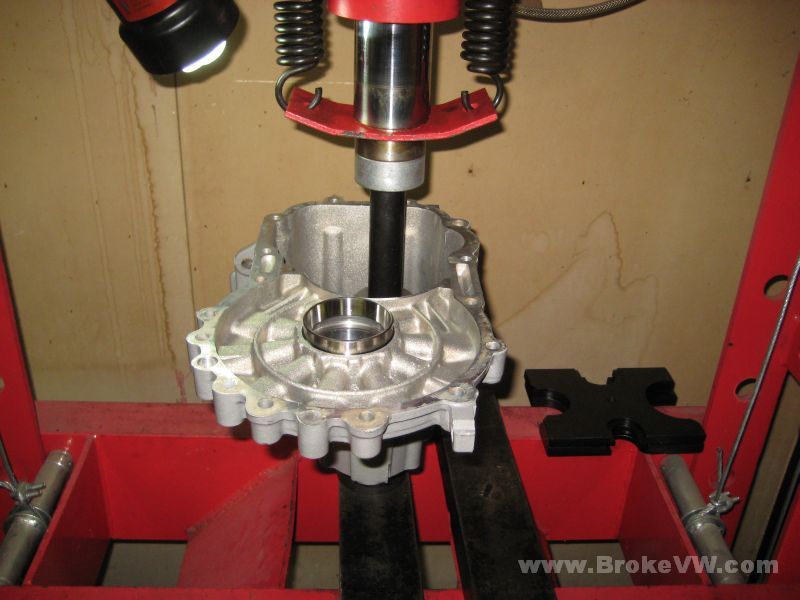
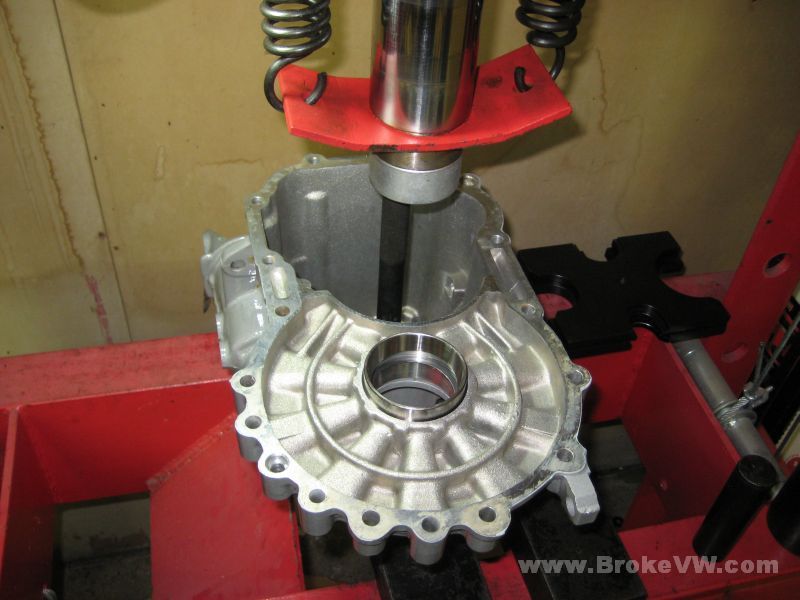
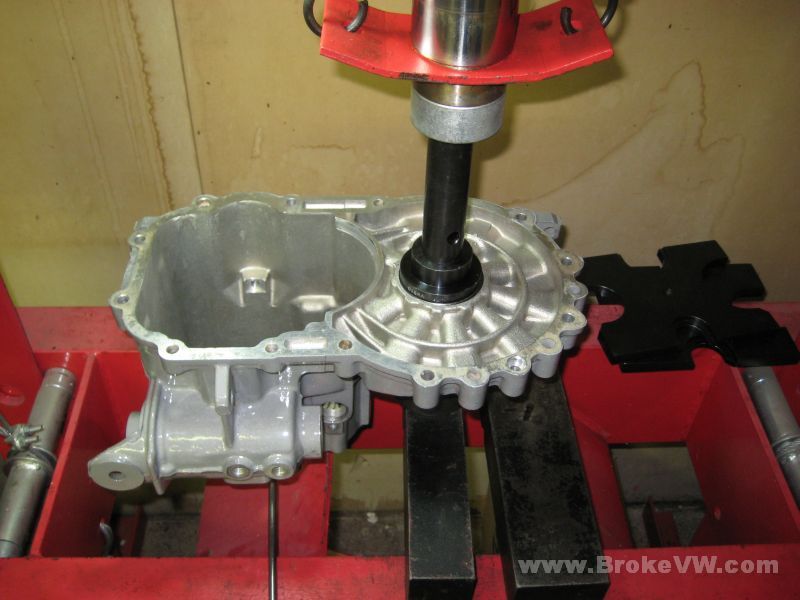
While the races were being installed into the gearbox, the ring gear and all 4 tapered bearings were in the oven at 210F heating up. The output shaft bearings being installed...
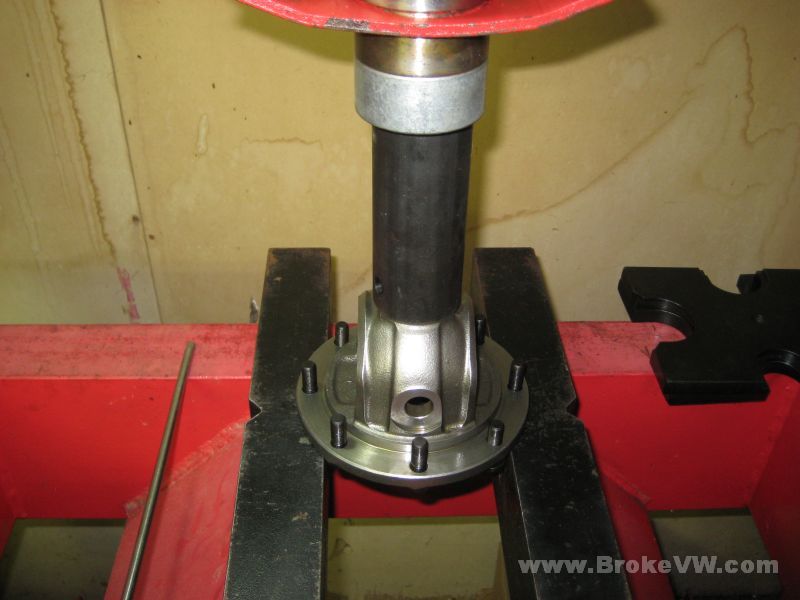
The ARP bolt kit being pressed into place
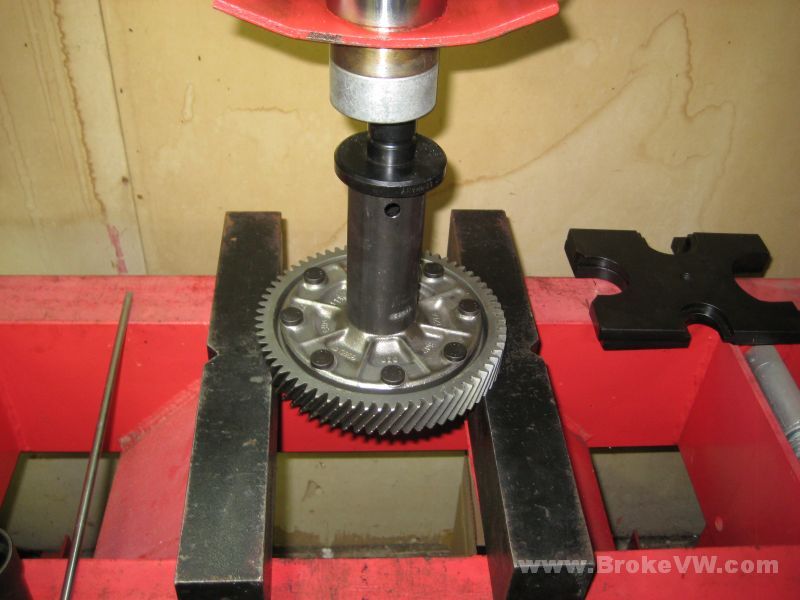
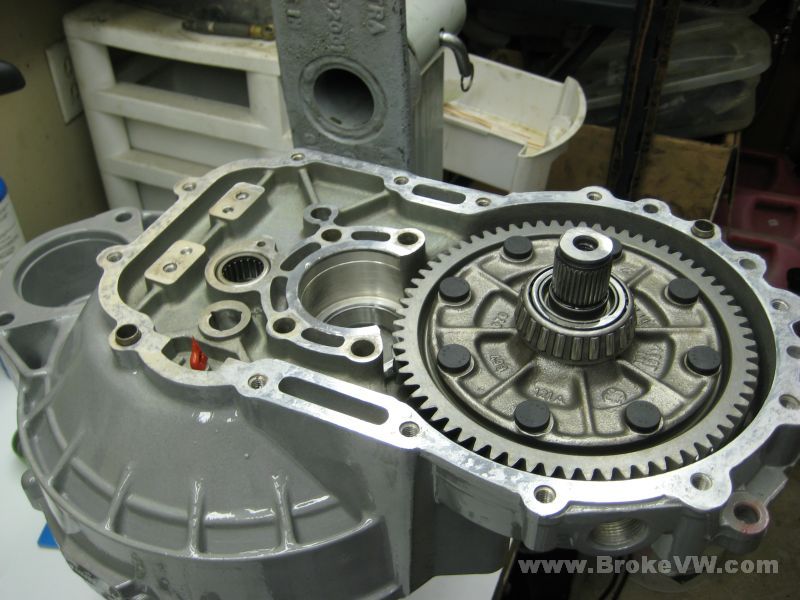
Once the bolts are in place the ring gear can be installed. Your ring gear dropped right into place with no pressing needed. Half of them drop on, half need pressed on with light pressure.... but this ensures it is seated fully...
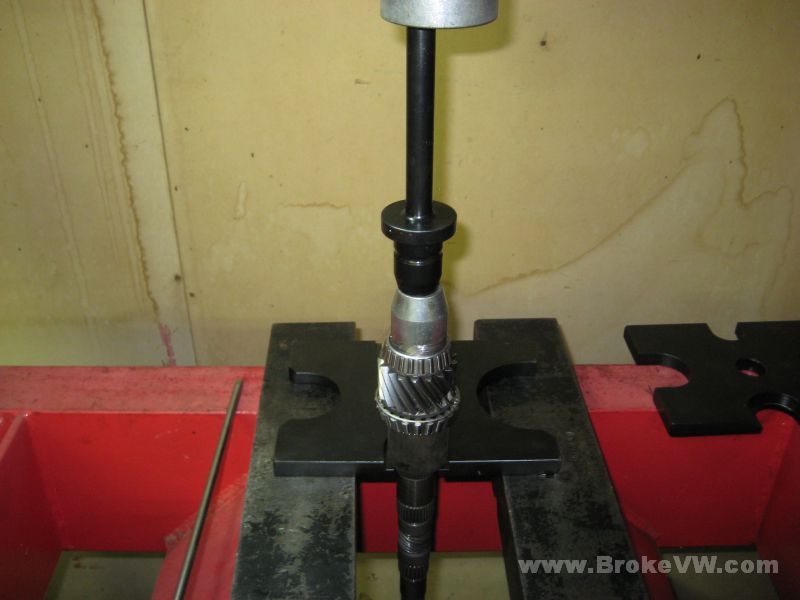
Pressing on the diff taper bearings...
With the ring and bearings installed, the ARP bolts are lubed and the nuts started. They won't be torqued to 40 ft-lbs (ARP specs for their bolts) until the ring gear has cooled down so the torque will be accurate. A strip of lube up the side of the bolt and across the top ensures the first threads are lubed and that the underside of the bolt head is also lubricated, both of which will affect the torque measurement....
The new plastic diff thrust piece is installed along with the small spider gears and cross shaft. ARP doesn't include the snap rings for the ends of the shaft for some reason... I have plenty of the VW rings on hand so it isn't an issue for me, but for someone rebuilding their own they'd be in trouble if the trans didn't come with the rings, and not all of them do...
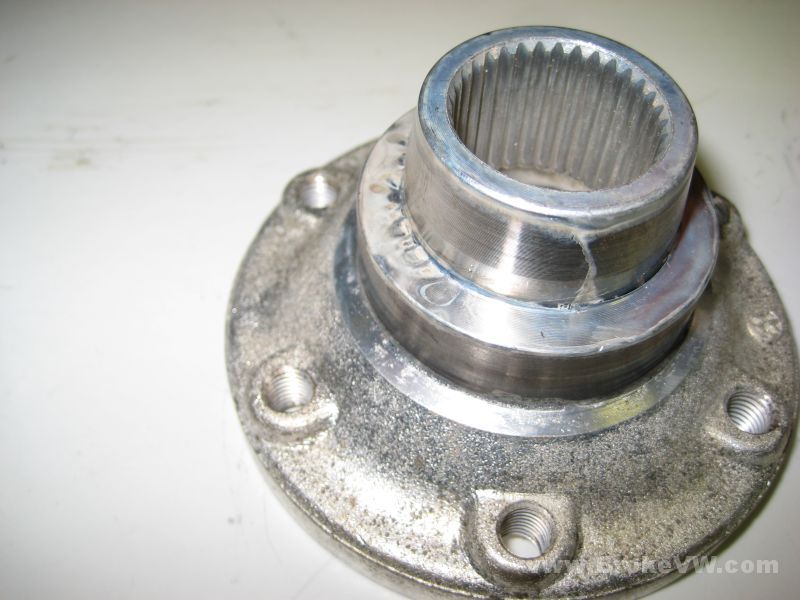
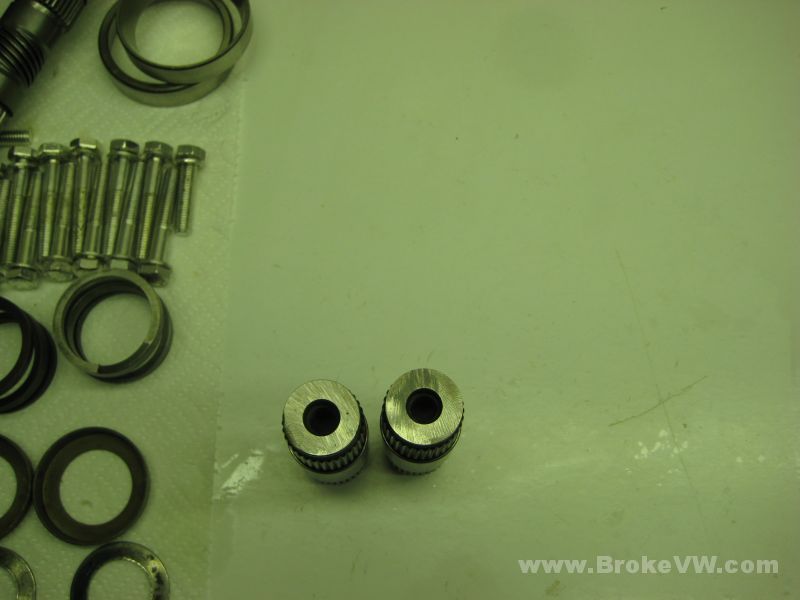
The stub axles I removed some material from... I only shaved about 1.0mm or so from them, so it should help give more rooms for the cap seals without compromising strength...
The completed diff assembly...
The input shaft roller, output small taper and diff taper races being installed into the bellhousing....
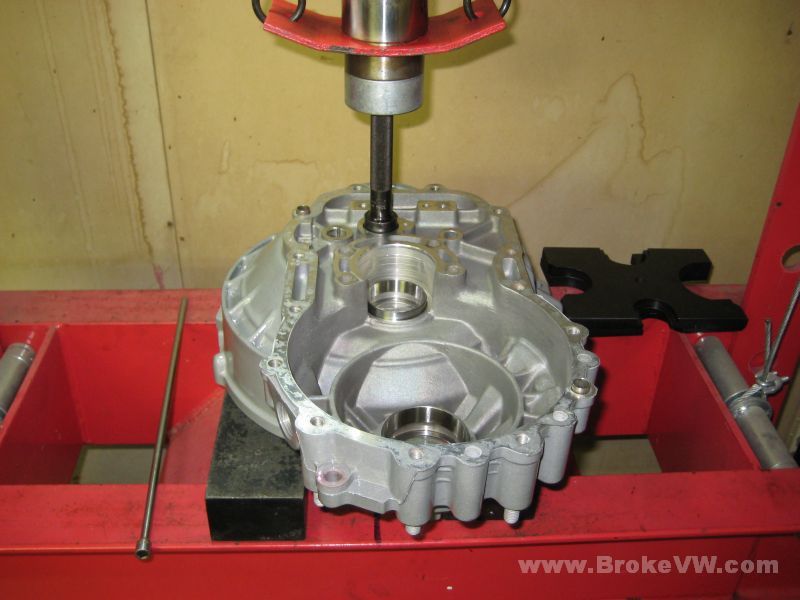
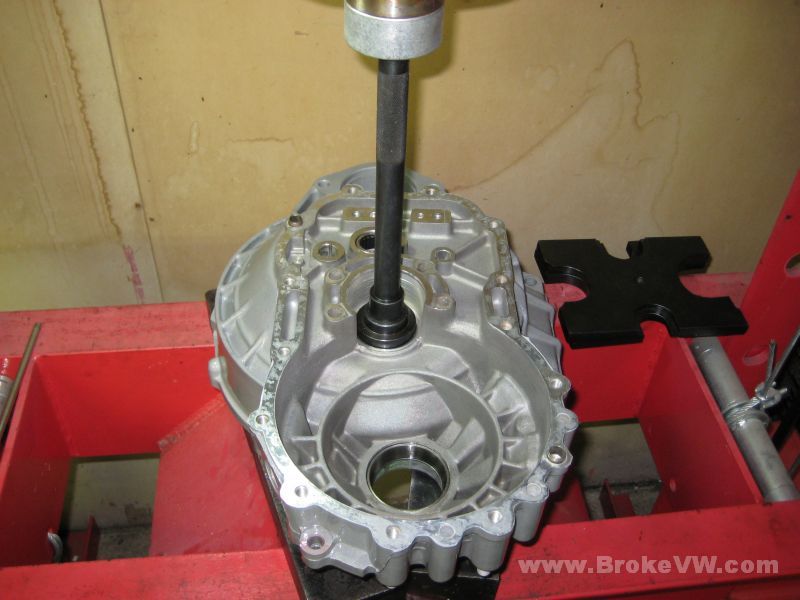
The output shaft bolted into the casing so the preload can be checked by measuring the turning torque of the shaft...
VW spec is 4.4 to 13.3 in-lbs, and your measurement is nearly dead perfect in the middle of the range at about 9 in-lbs, I couldn't be happier with those results. The shim used was a 0.95mm.....
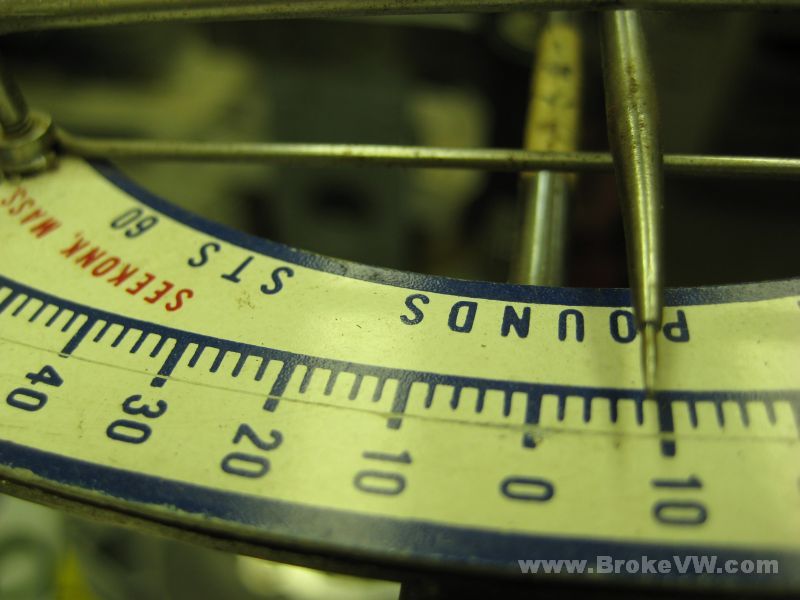
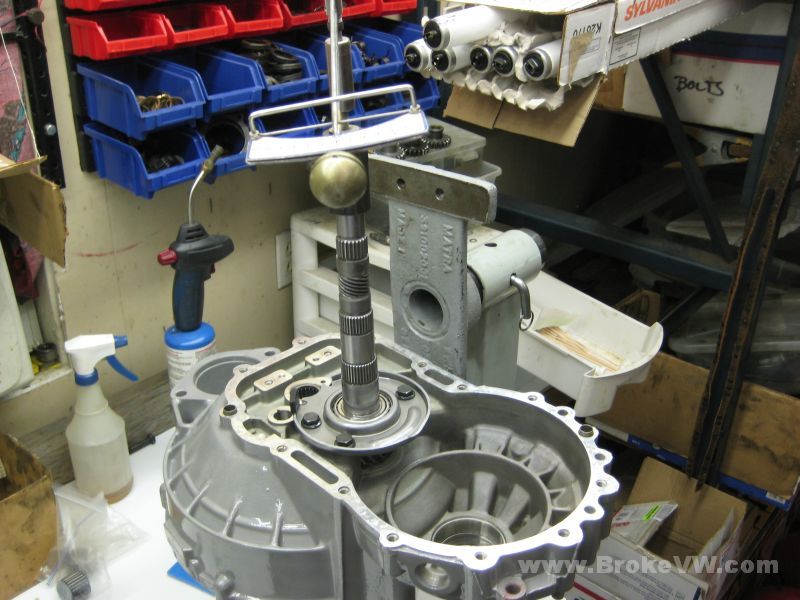
Once the output shaft preload was done, it was time to check the diff. The output shaft was removed and the diff inserted with 5 case bolts tightened to spec, and the turning torque was measured for the diff bearings...
Spec is 11-31 in-lbs and yours is at almost 17 in-lbs, which is a little lower than dead center of 21 in-lbs, but 17 is still well within VW specs, and I'm happy with the preload. The shim used was a 1.00mm in the gearbox and the standard 1.00mm in the bellhousing....
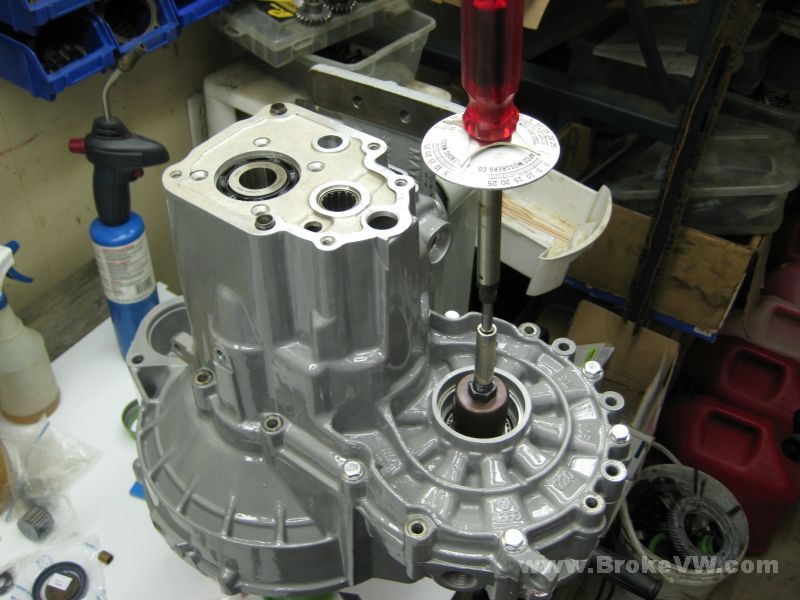
With the preloads done, the build can officially start so the diff is inserted for the last time, and a little orange RTV silicone is used to bond the magnet in place...
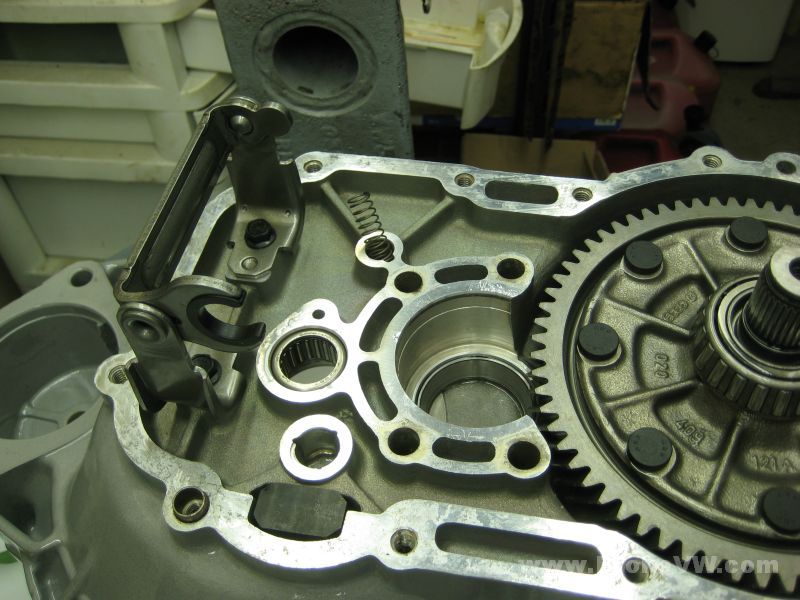
The magnet is set and the reverse fork uprights are installed, along with the a shift fork rod spring...
The input shaft is bolted into place with a new thrust washer and 1st gear needle bearing installed, followed by the install of 1st gear and the sync ring for 1st....
The 1st/2nd sync hub is pressed into place after being heated...
The sync hub sleeve is assembled with new keys and springs and a new 2nd gear needle bearing race is heated and installed followed by 2nd gear being dropped into place...
3rd gear being installed....
The 3rd gear circlip is an adjusting circlip, it is available in a variety of thicknesses and you fit the largest possible that will still close up to take up any axial play in the gear stack. The largest is a 3.0mm and that is what most trans will get, with some of them being 2.9mm or more rarely 2.8mm. Your circlip is a 2.9mm version...
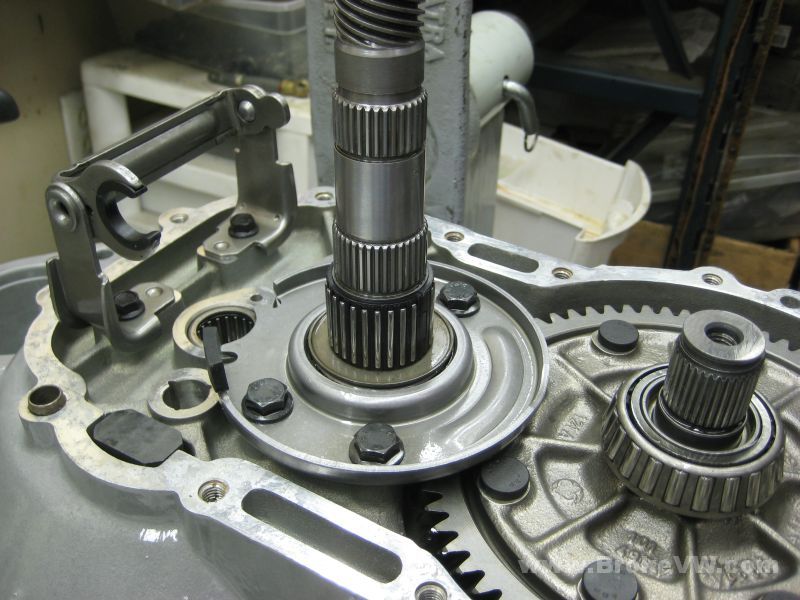
4th gear is dropped into place at the same time the input shaft is placed into the trans. The alignment of the gears won't be good until the input shaft is supported from below by the VW special tool. You adjust the tool to hold the input shaft up so the gears are fully meshed with maximum contact area. The support bar will also hold the forces needed when pressing the casing back together...
The new 4th gear circlip is installed along with the completed shift fork assembly and the reverse idler gear and shaft...
Your pushrod shows some wear I've not seen before, I need to look at it closer to see where exactly it might have been rubbing, but it has gotten into something at some point in it's life. I don't think it is recent. I also don't think it should cause any problems providing it is still true and straight and the TO bearing and pushrod bushing are kept up. If you decide it is something you want to replace later it can be easily accessed from either end of the trans and it just slides right in and out. If you would prefer to replace it I have an OE VW rod in stock that has been cryo treated I can install before it leaves...
These are the parts that are left to install, but I'm dragging at the moment and will be calling it a day. It'll be 1am by the time I get these latest pics uploaded, and I think I started on your trans this morning around 10am or so. It's basically a matter of wiping the seal areas down, bonding the case together with the VW sealant paste, then the flanges, 5th gears, selector, 5th housing, and oil seals to be installed, and it should be done...
Update 05/25/11
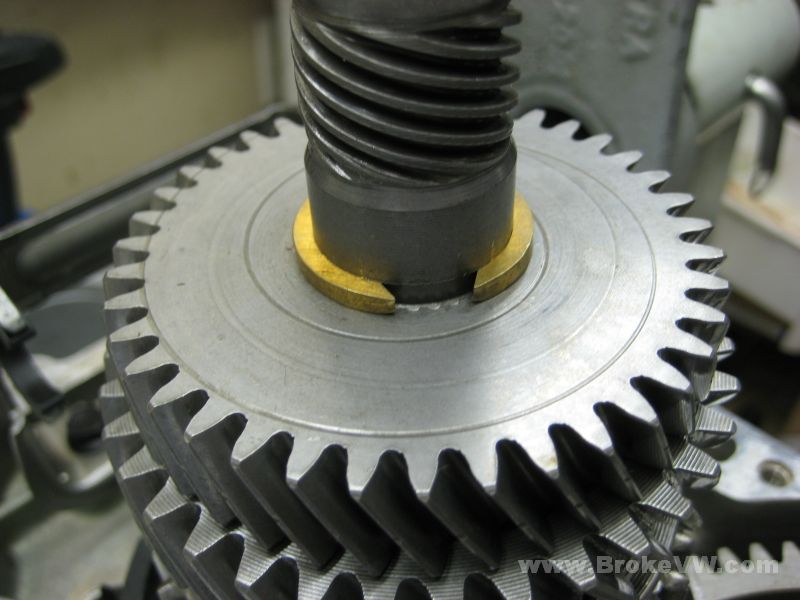
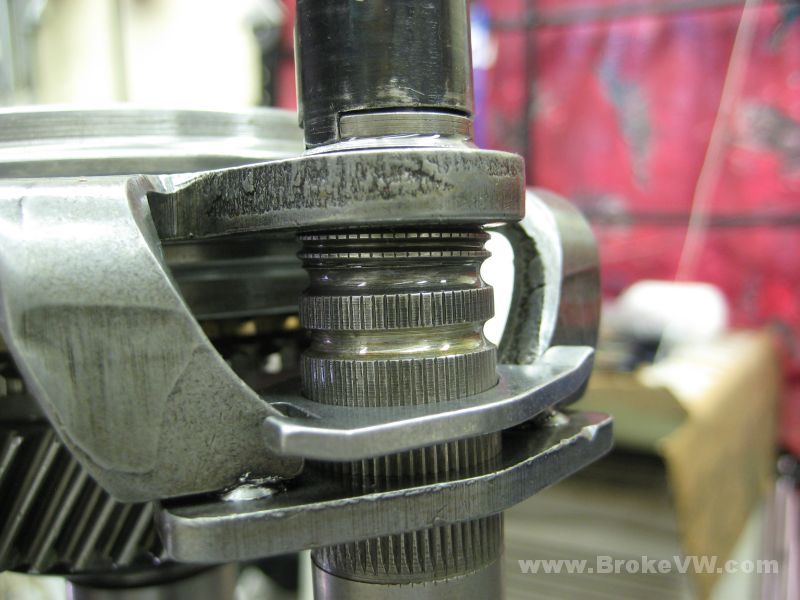
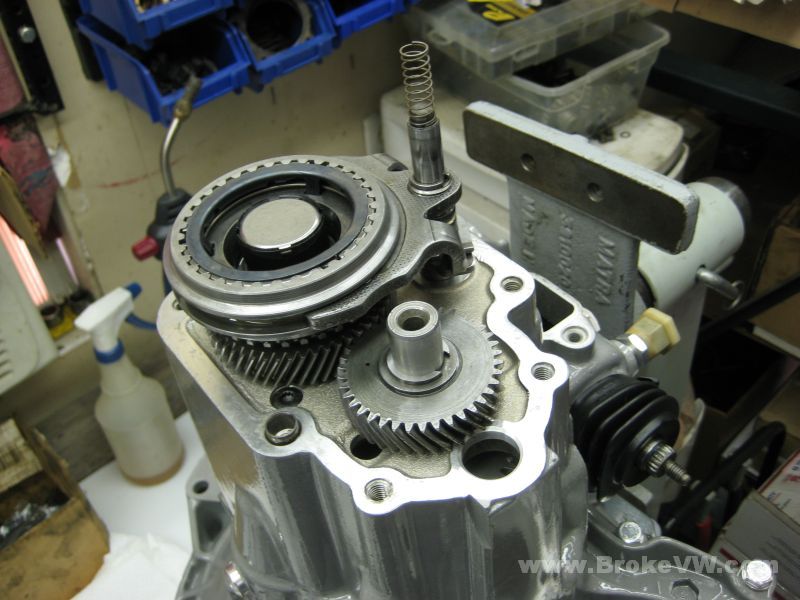
Here is a pic you don't normally see... this is 5th gear installed onto the input shaft before the case is installed. I was mocking up 5th gear to ensure the locking plate I plan to use will work...
This fork lock plate fits the old style tube like you have, which I wasn't aware of until now. It will allow the early MK1 trans like yours to use the new lock plate, as the old tube is no longer available (oops... I just noticed that the tube is the new style, and VW used a peened on sleeve to lock it. This means the OLD tubes still won't work with the lock plate. You must have a trans built during the transition period to the new parts for the 5th tube and lock plate)....
Pressing the casing together...
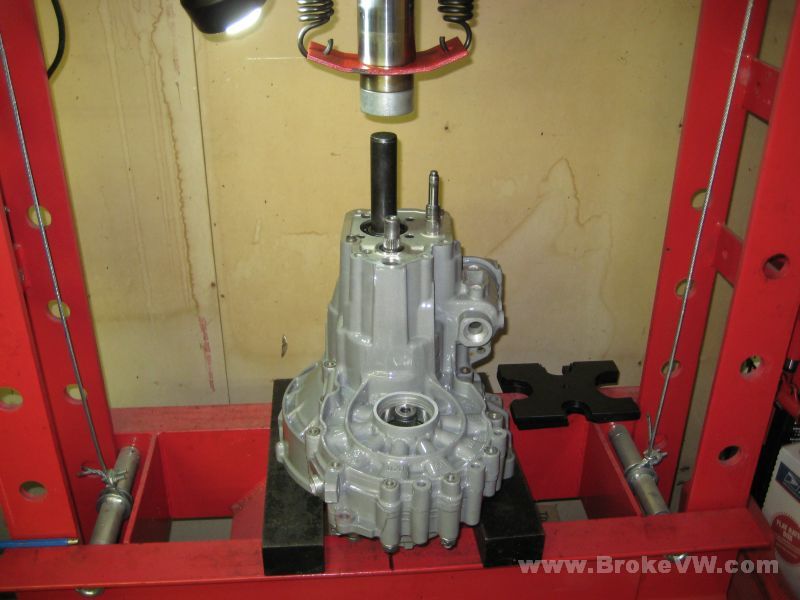
Bolted together...
The drivers side flange seal installed with the conical thrust ring...
Installing the flange...
Now 5th can be installed for real this time...
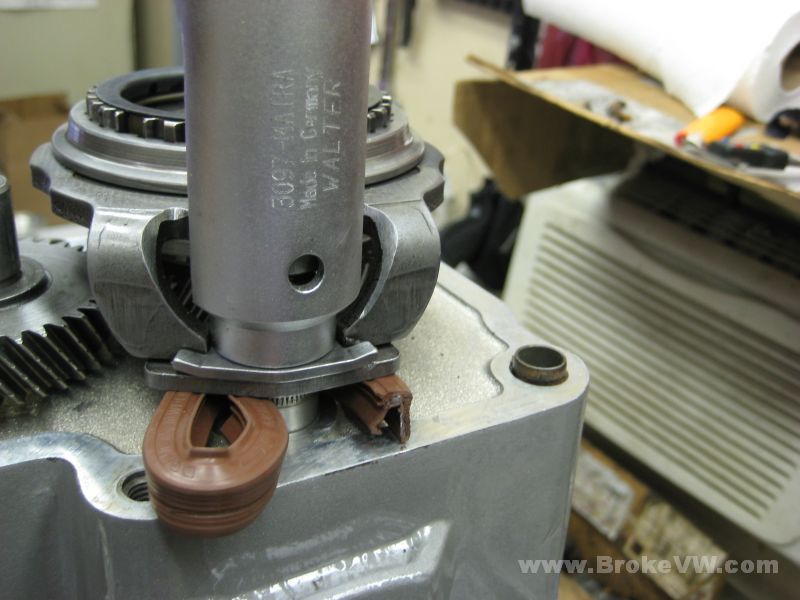
I made a tool to protect the gasket surface of the trans when driving the lock plate on. I just cut an old axle flange seal and bent it so I can hook it around the shift fork tube. Select 5th so the fork drops down and rests on the rubber flange seal. The steel embedded inside the seal supports the fork, the rubber coating protects the trans... it worked really well, in fact...
5th installed and ready for the 5th housing...
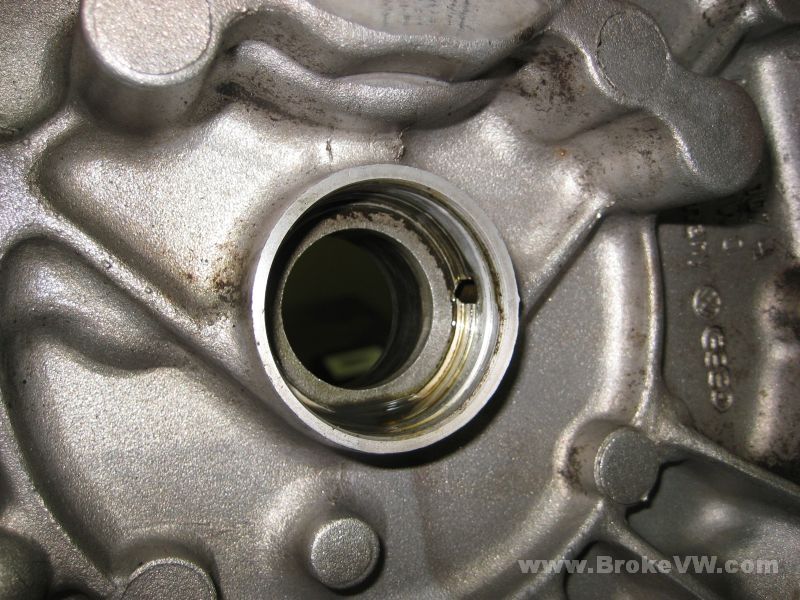
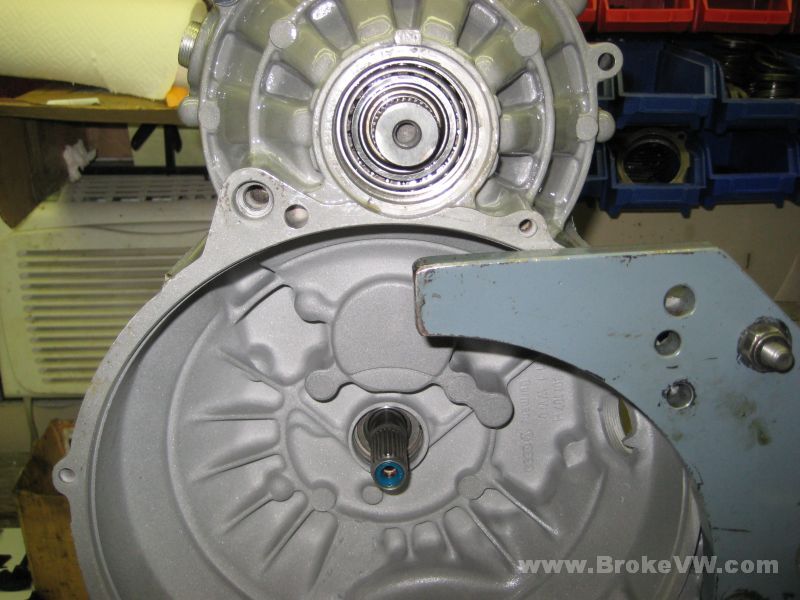
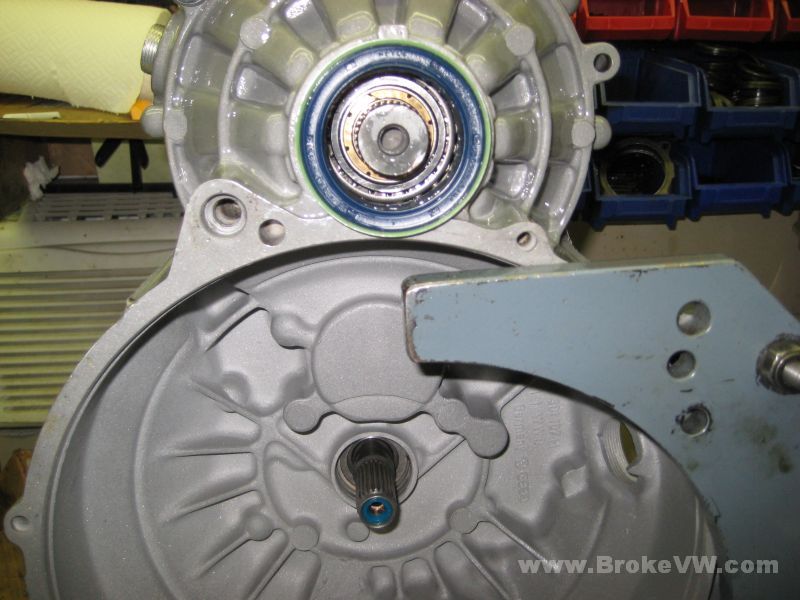
Time for the passenger green seal sleeve, new seal, and the flange to be installed along with the input shaft seal...
The VW green end cap is pressed into place, and because of the pitting in the aluminum on your 5th housing, I ran a layer of the VW sealant paste around the edge of the hole before plugging it up...
The last part to be installed... the new starter bushing.
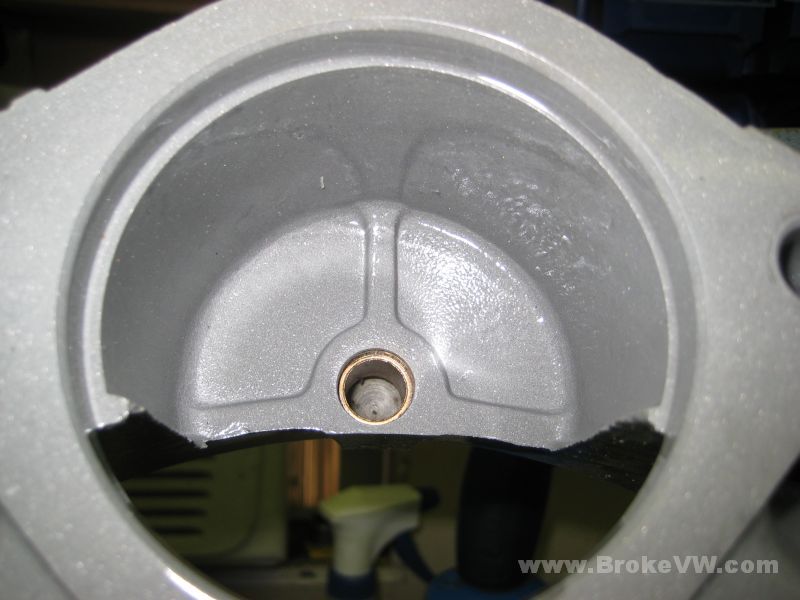
All done, and ready to be picked up... although these pics show the 5th detent bolt not installed, as I had to go inside to double-check the install and adjustment of it on my site... but it is installed now and ready to go...