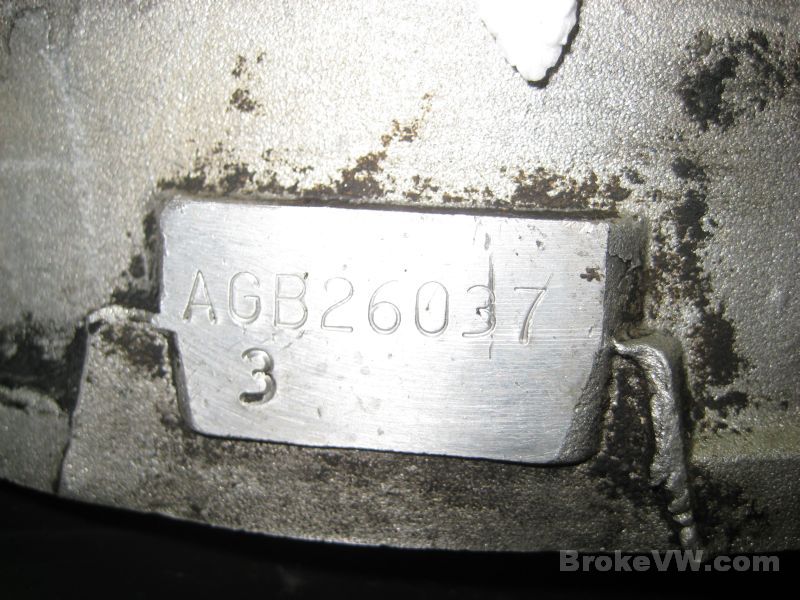
Les AGB
Arrived 10/18/11
Done 12/29/11
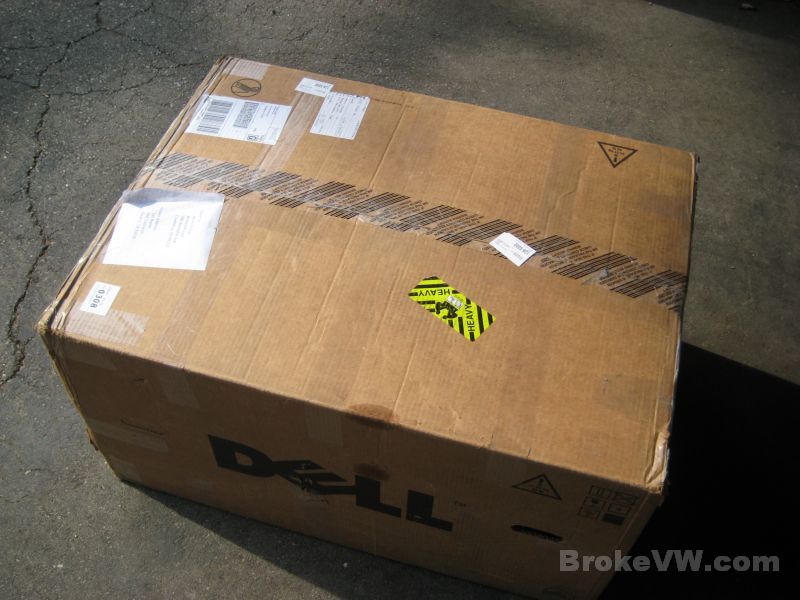
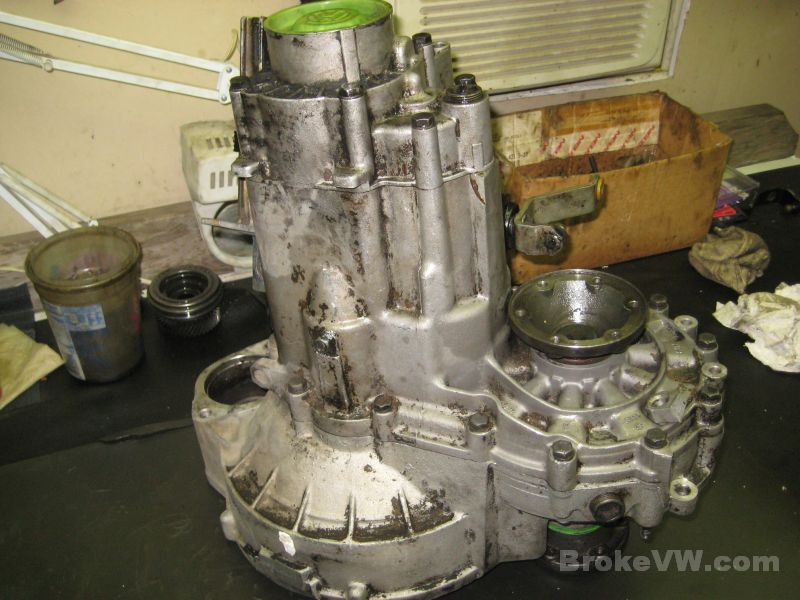
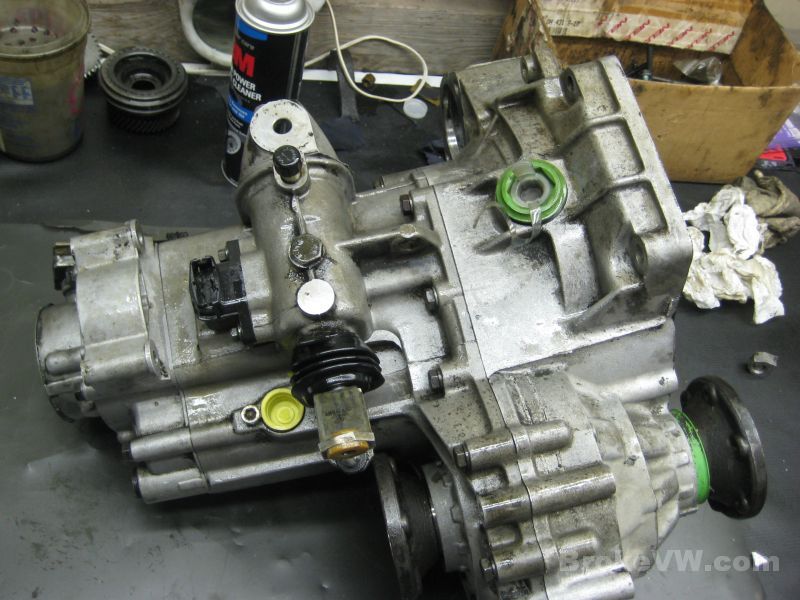
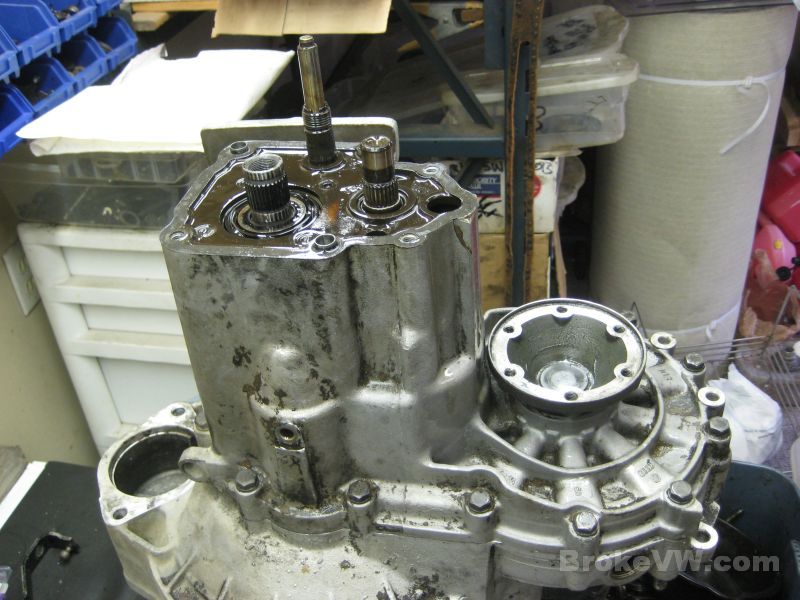
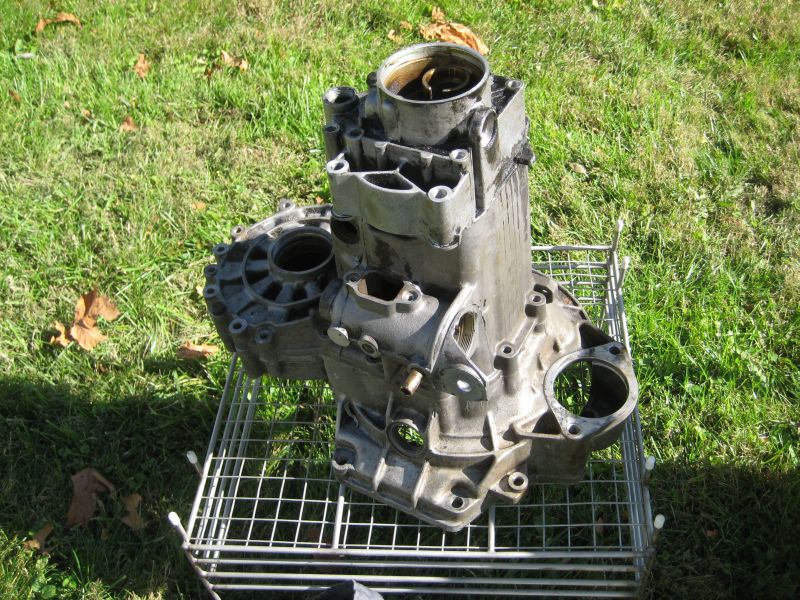
The trans arrived today and I was able to get it onto the
bench and get it partially stripped.
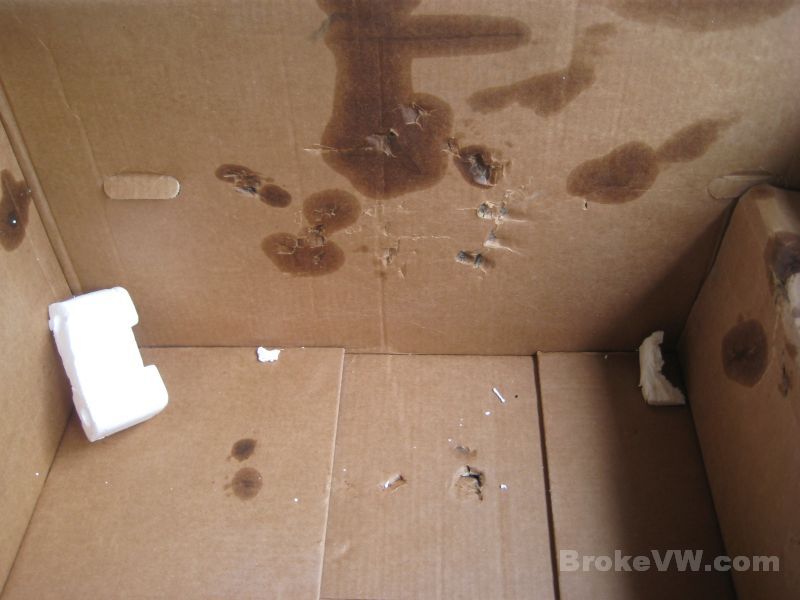
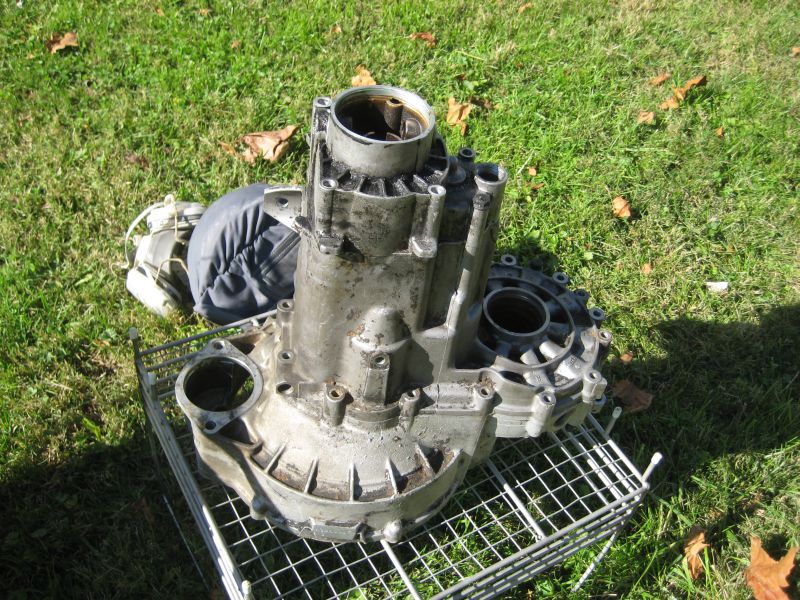
The box looks to be in good shape, and it seems like it made the trip well, although I could feel the trans moving around inside the box...
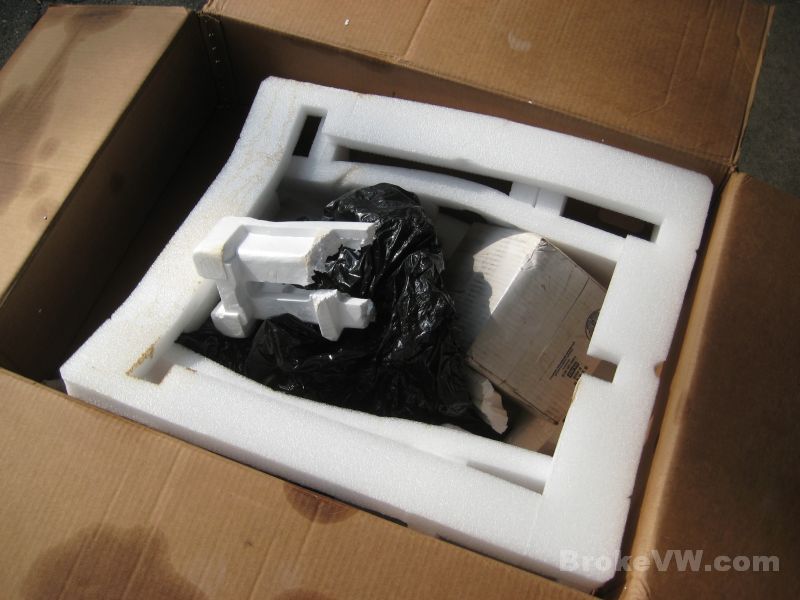
Checking the contents of the LSD box, it has a Peloquin, the bolt kit, and a nice set of SKF bearings made in Germany... I wish I could find those now!
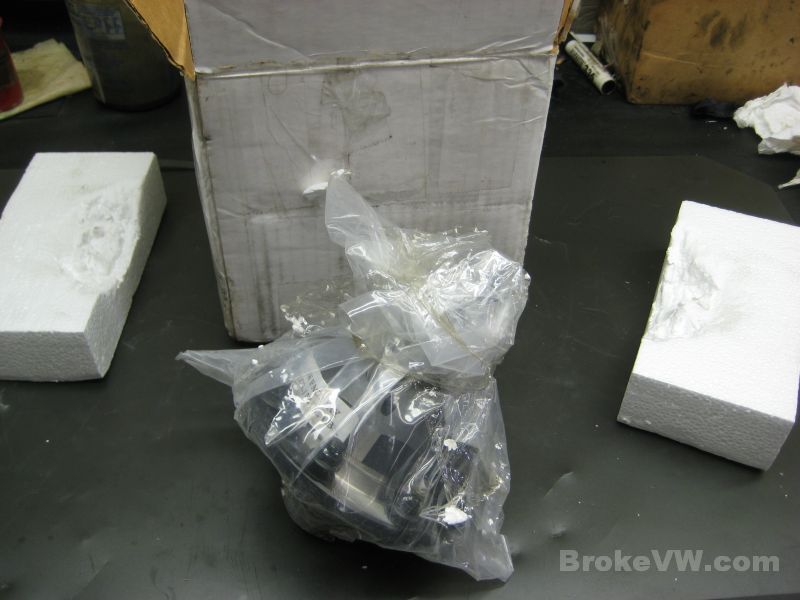
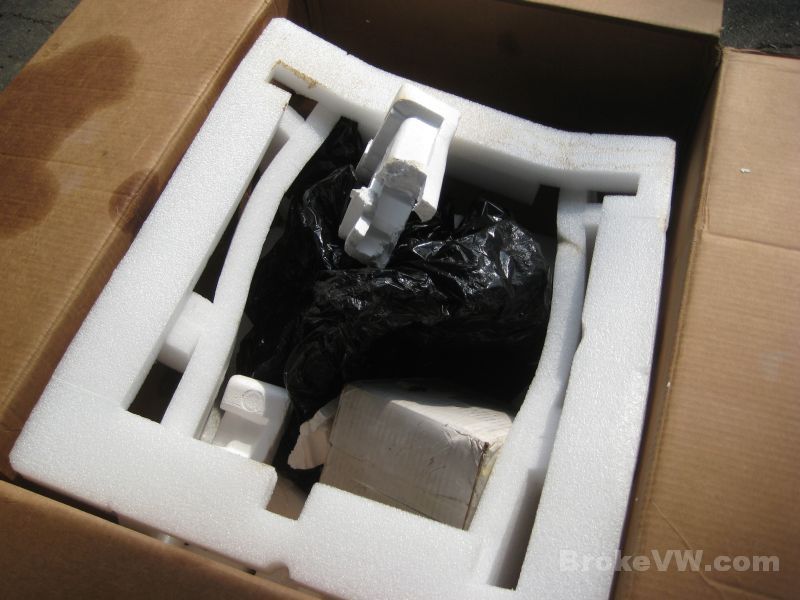
The bag was a little torn but nothing too bad. Some oil seeped out and got onto the box but I think it will be OK to use again...
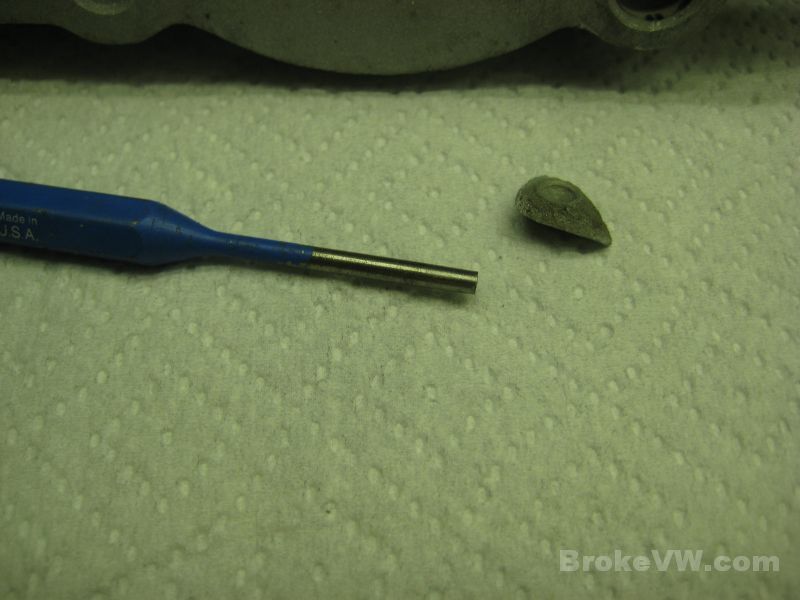
When I lifted the trans out of the box, I saw something alarming... that piece of metal in the bottom is a lug from the trans casing, which means this package has taken a pretty good hit at some point...
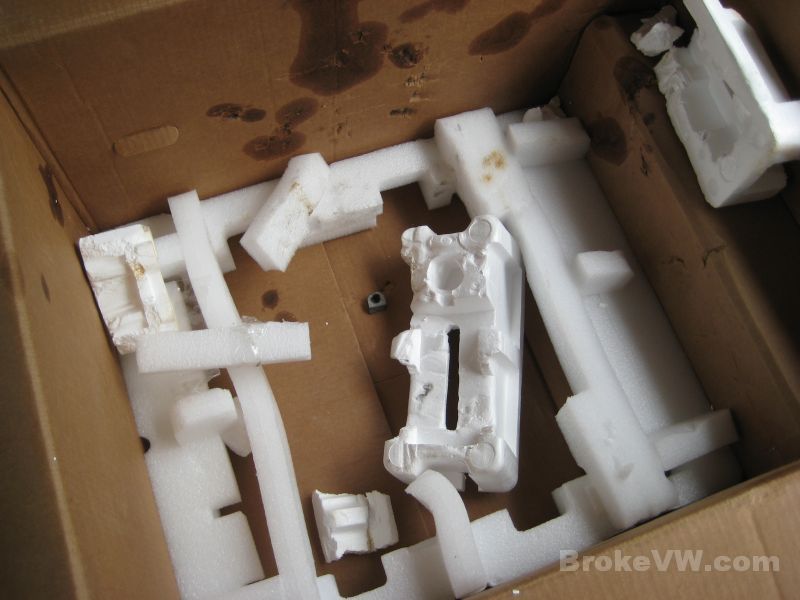
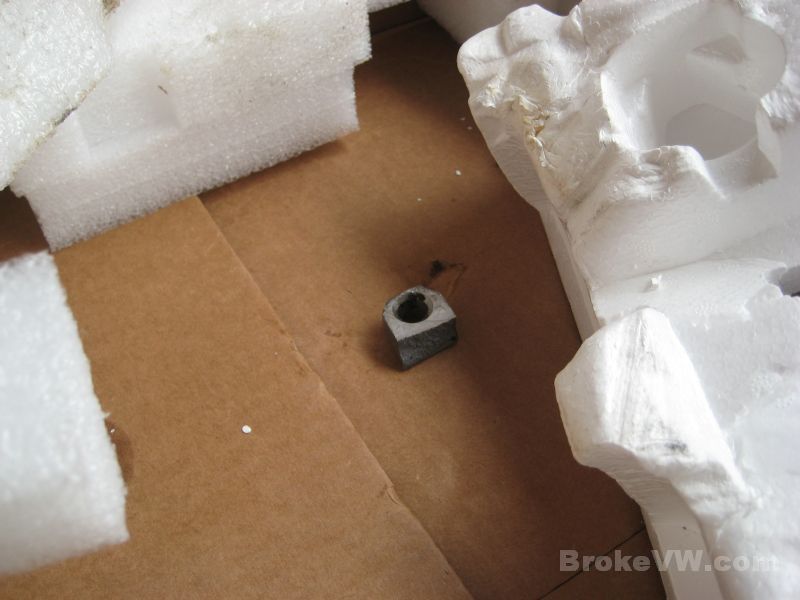
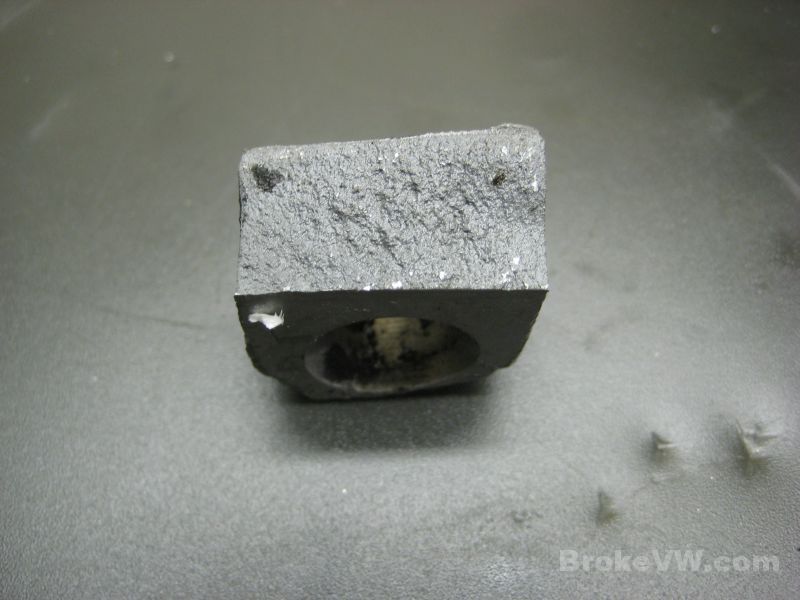
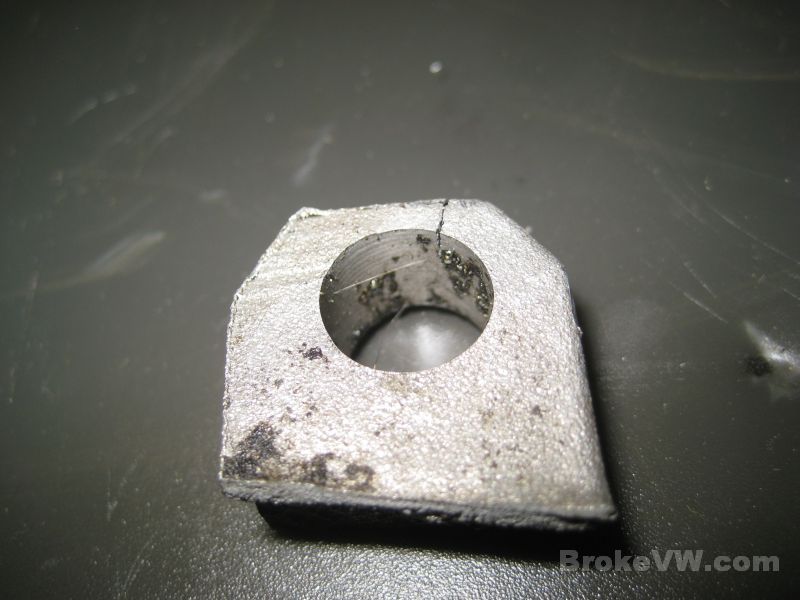
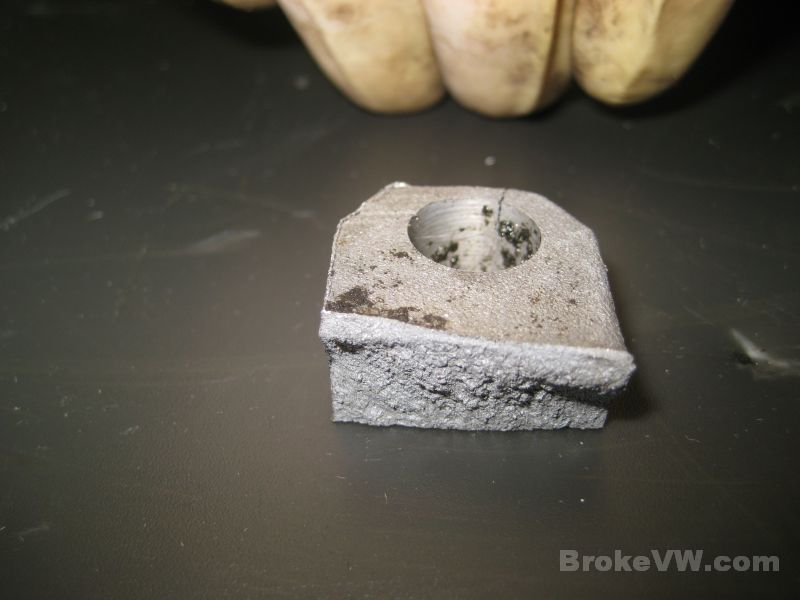
Other than that busted lug above, which is used to mount the casing to the VW special transmission jack tool, the rest of the trans looks like it is OK...

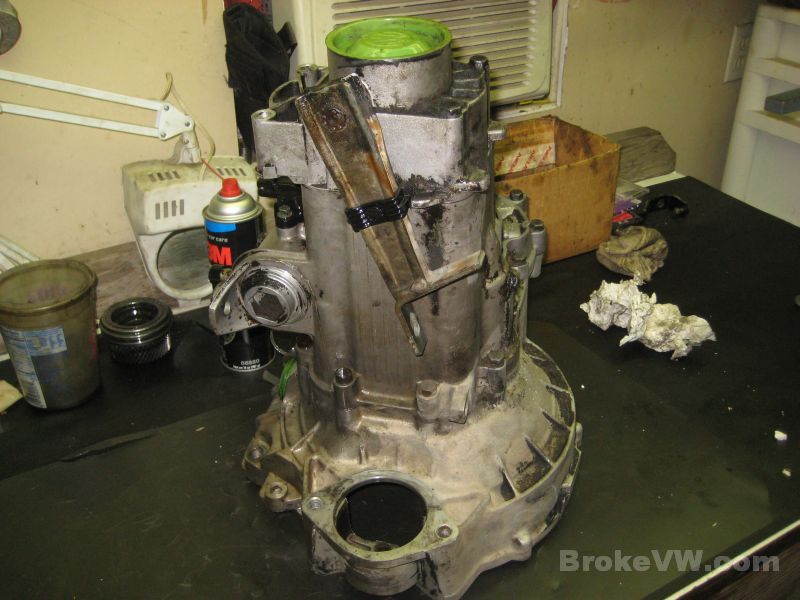
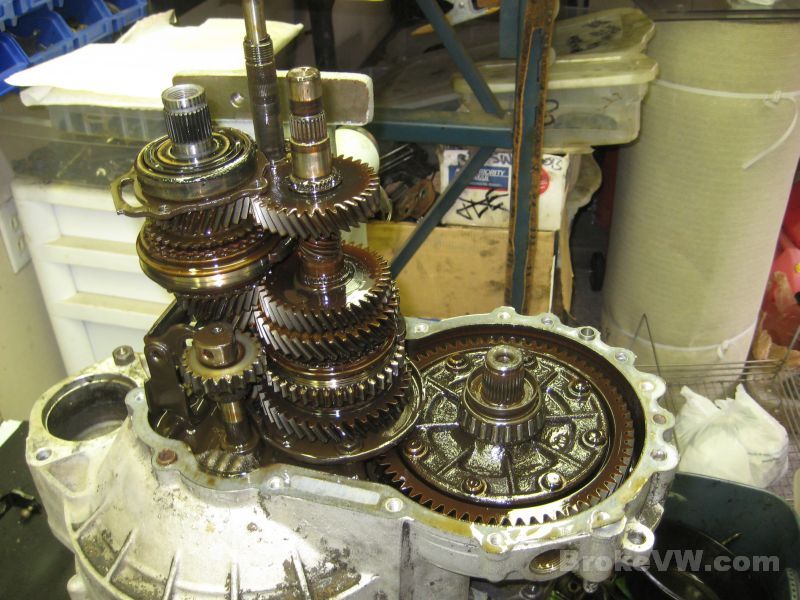
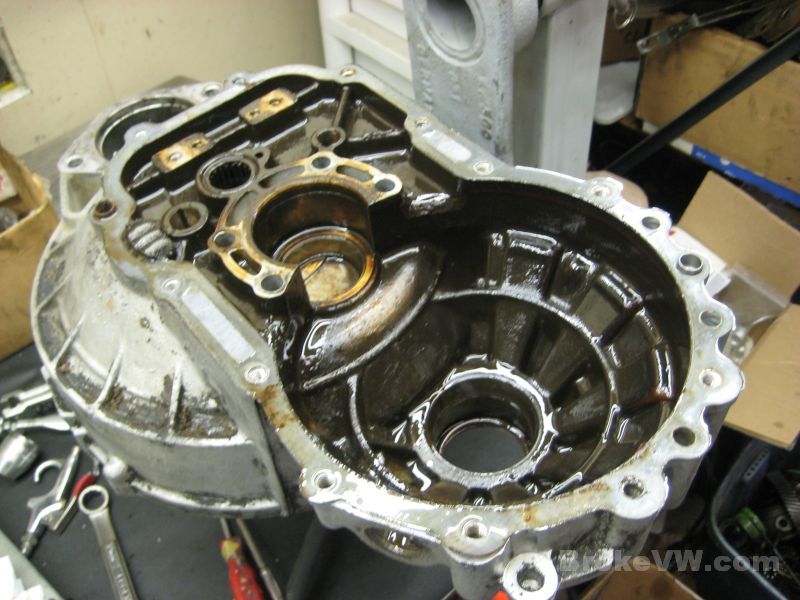
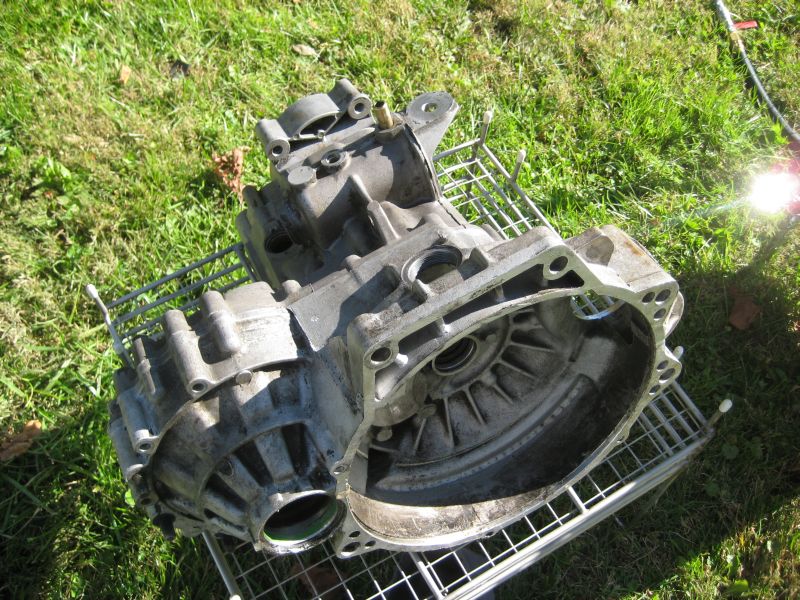
Taking it apart, the inside of the casing and all of the internal parts are stained very dark from old oil...
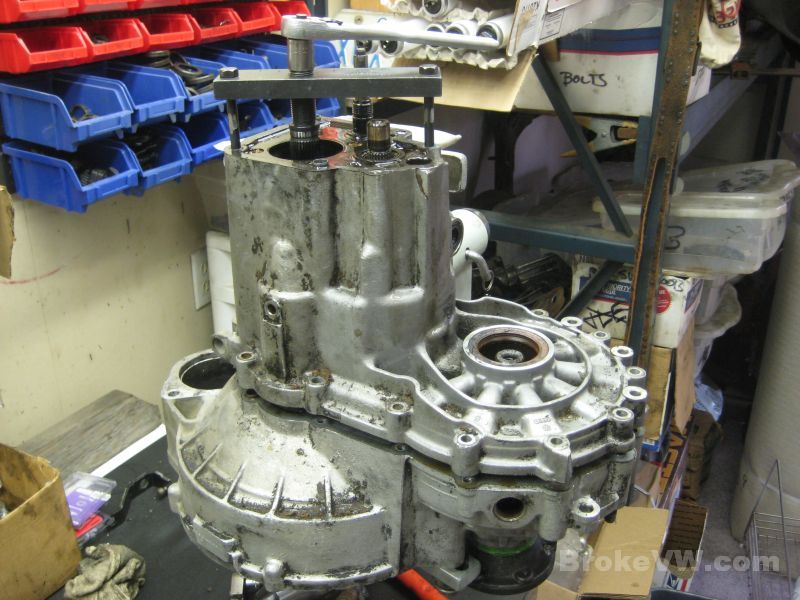
With 5th gears removed the casing can be split open...
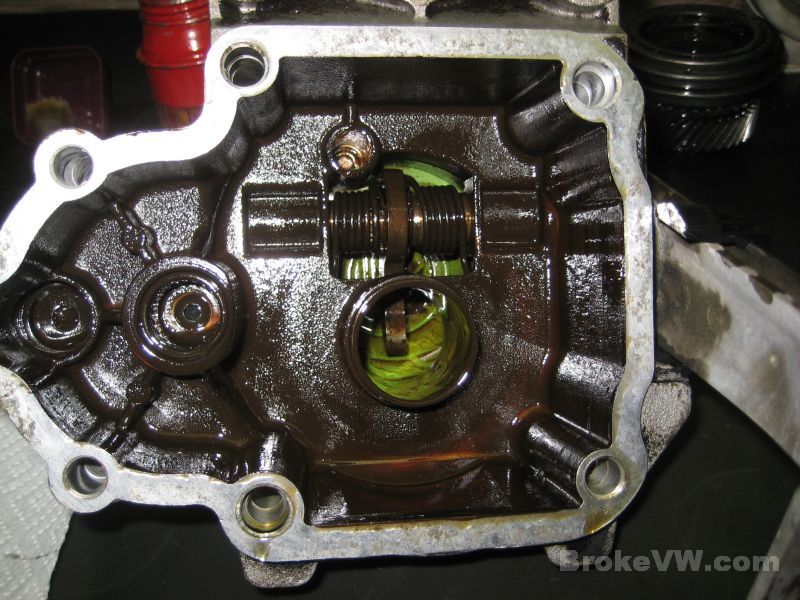
More very dark staining and a fairly thick film is found coating everything...

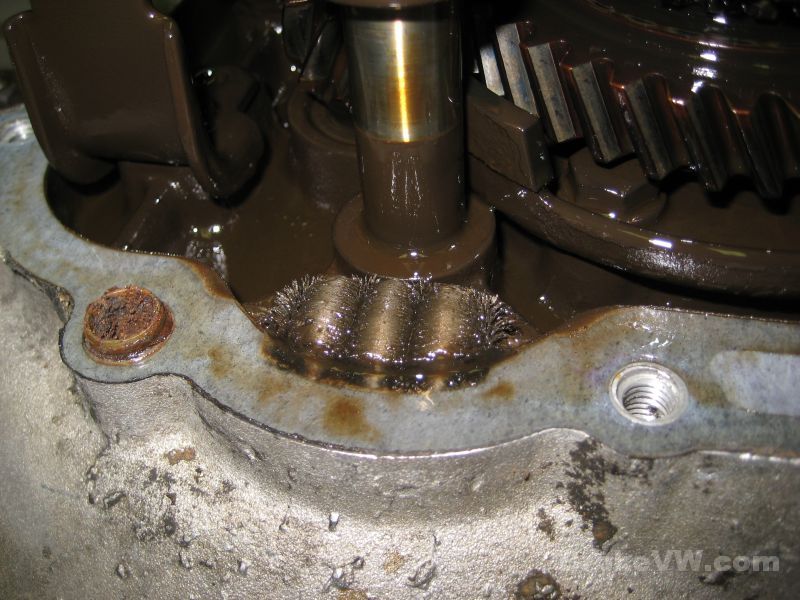
The magnet looks good, no abnormal shapes or lumps, just the nice rounded formation you get from fine steel particles...
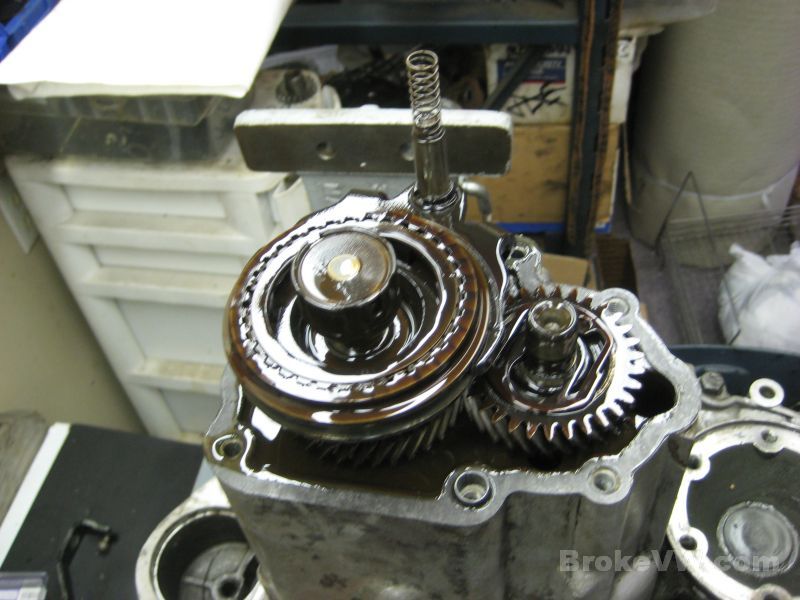
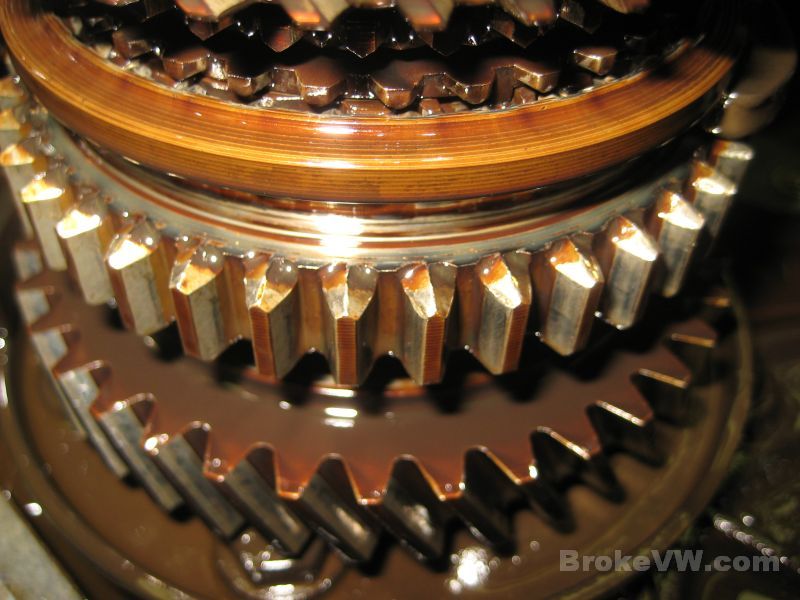
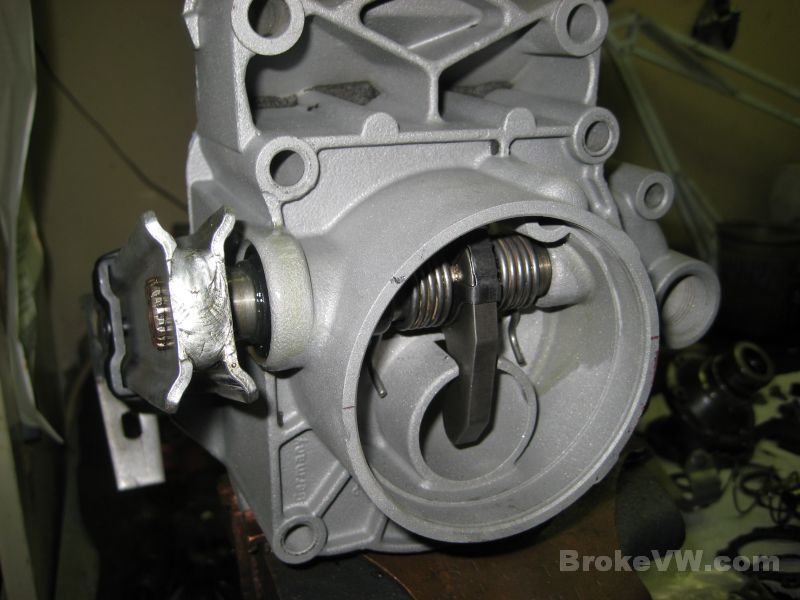
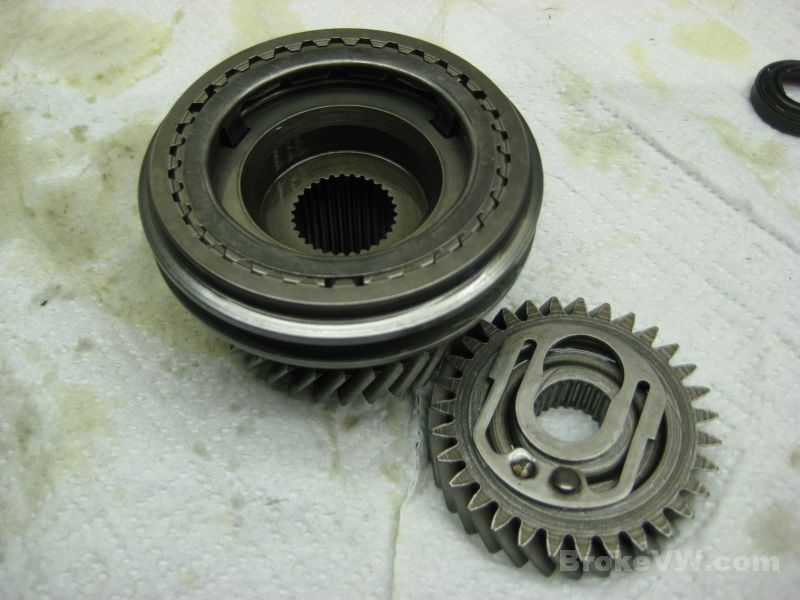
The reverse gear, other than having a few teeth pitted, is in very good shape. This trans was always connected to a properly working clutch, and reverse was never selected while the car was in motion as both the reverse idler gear and the 1/2 sync hub assembly teeth look to be in very good shape...
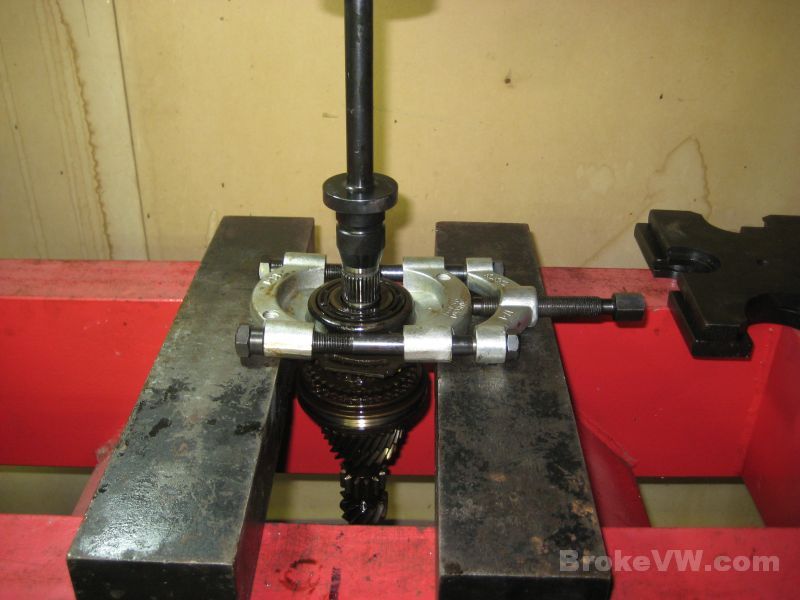
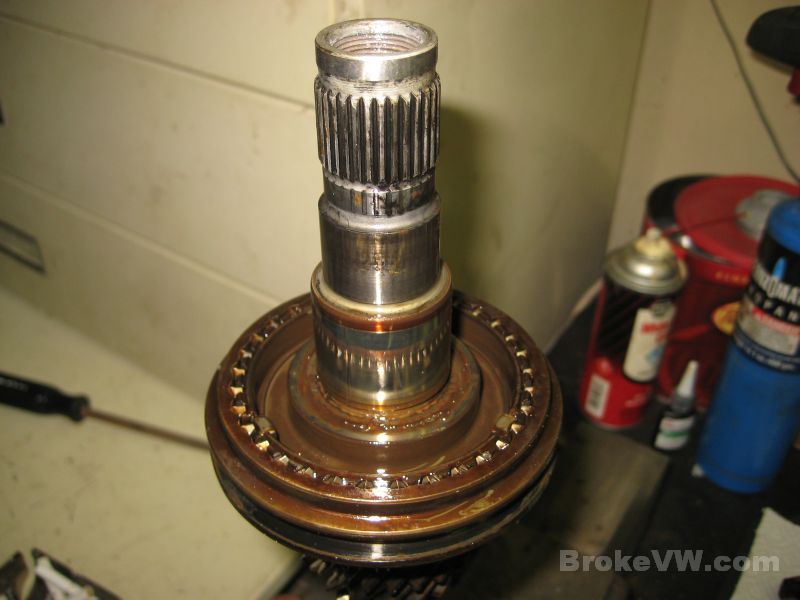
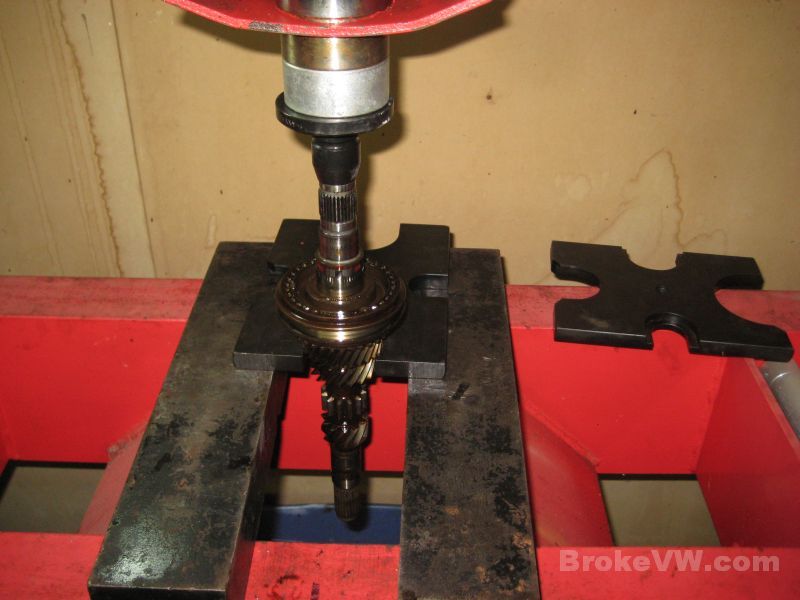
Stripping the output shaft so it can be removed from the trans...
With the input shaft removed the diff can be lifted free of the casing...
Some wear and pitting on the diff spider gears, but that won't matter now as it is being replaced with the LSD...
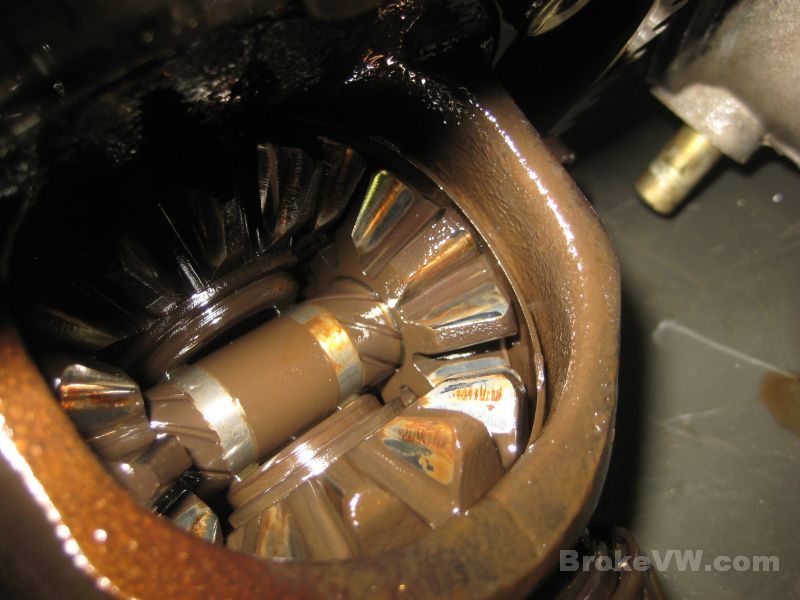
More staining and film covering everything that isn't contacted by another part...
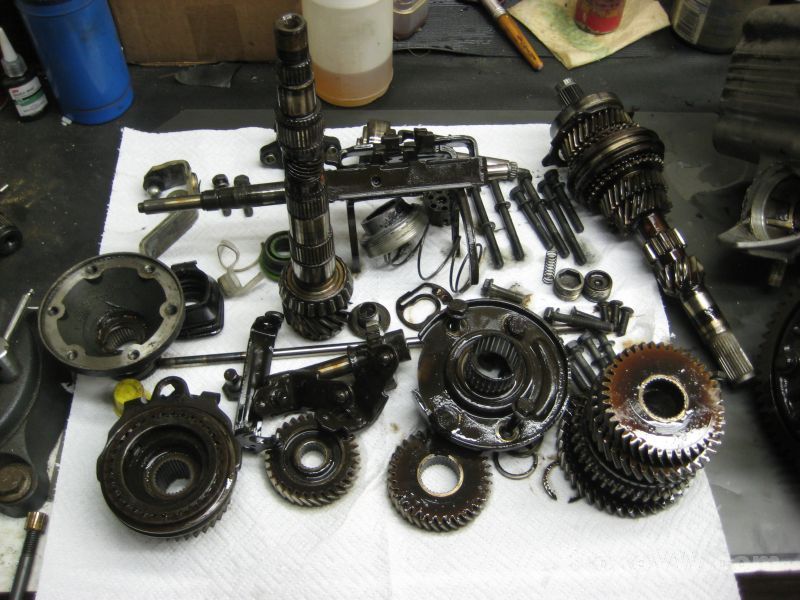
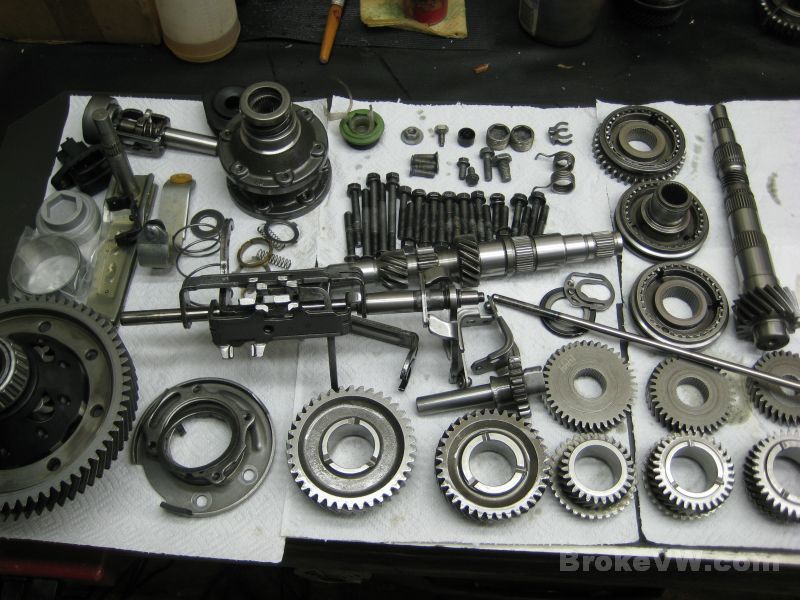
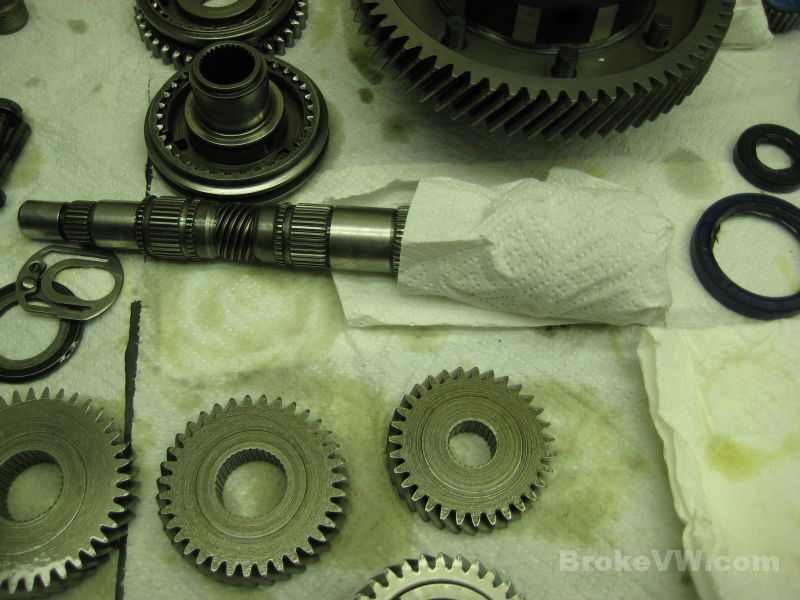
The internal parts out of the trans, they need stripped down further, cleaned fully, then inspected but right now nothing looks like it is in terrible shape.
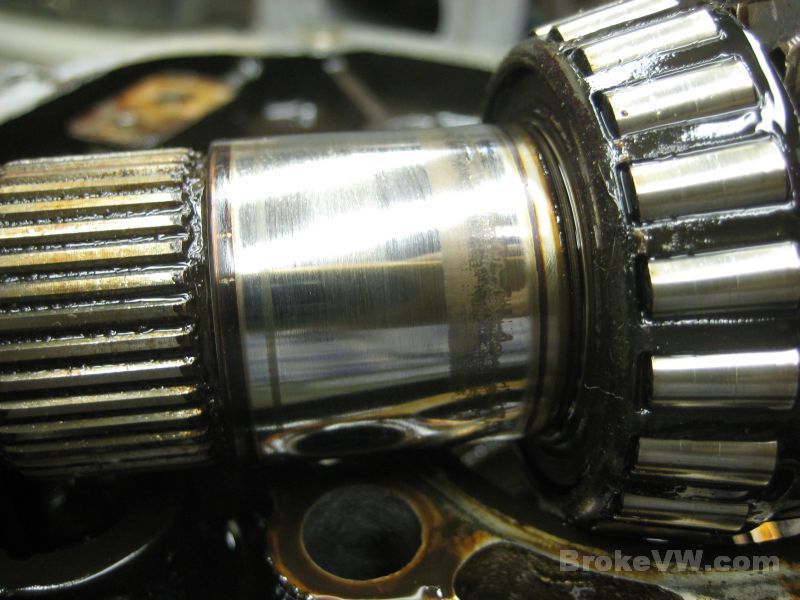
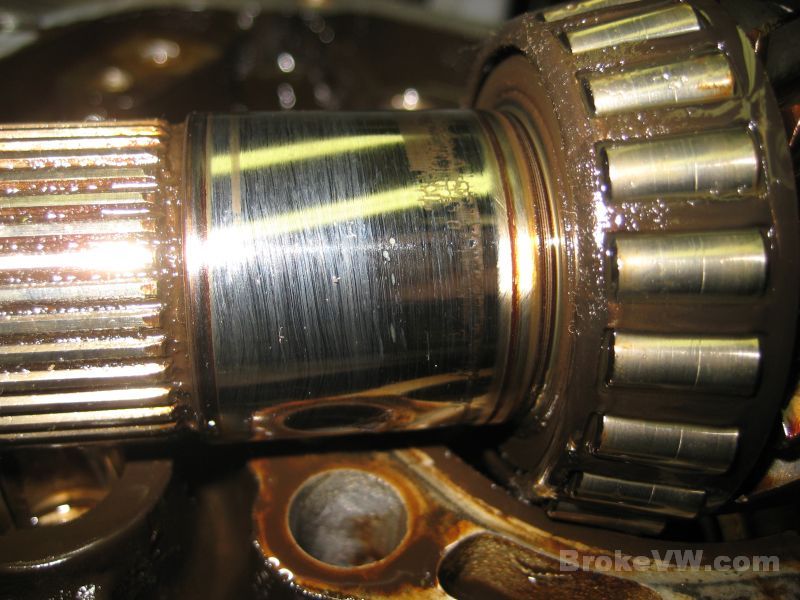
Some uneven wear on the output shaft where the 1st gear needle bearing rides. The wear is still smooth, and short of replacing the entire R&P set, there isn't much I can do with that. If it were chunks missing or grooved badly or something it would have to be replaced, but as long as it is smooth it is still usuable...
I'll carry on tearing everything down and will start cleaning things so they can be inspected.
Update 10/20/11
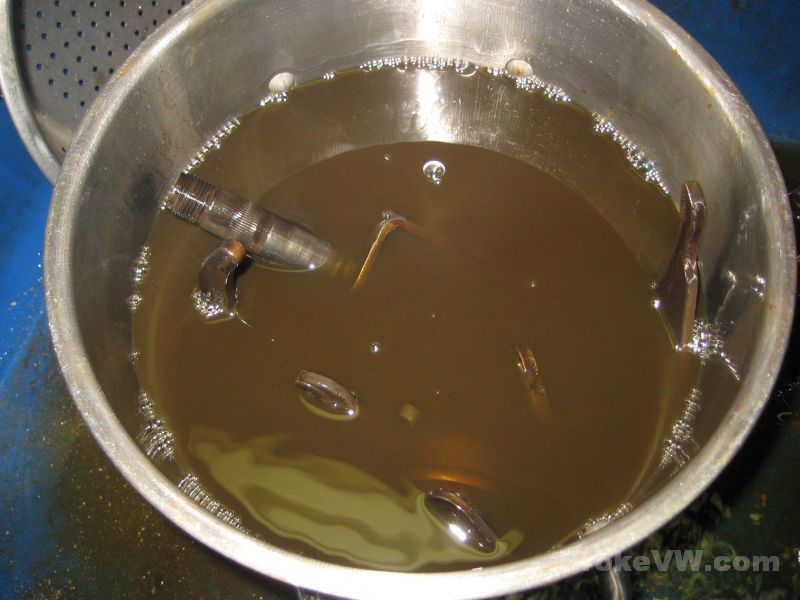
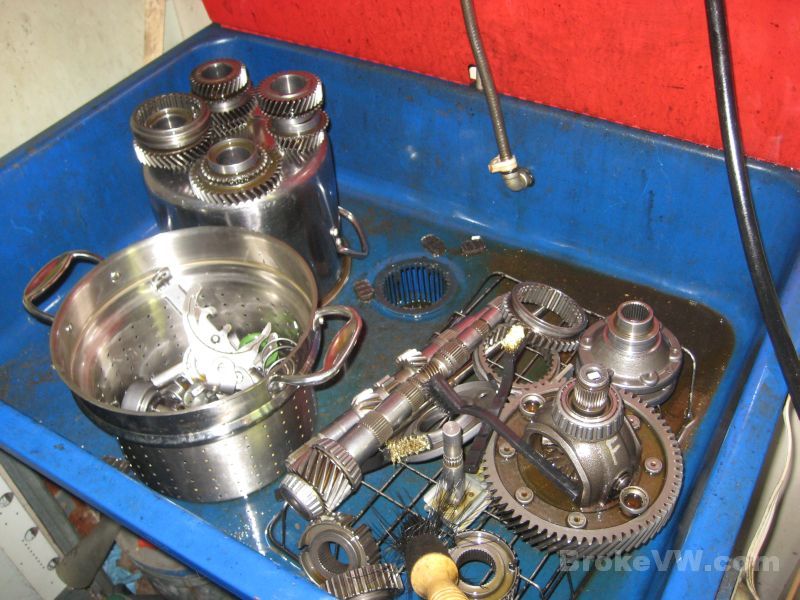
I've got the internal parts cleaned now and have began to inspect them. Prior to cleaning them I let everythign soak in the kerosene parts washer...

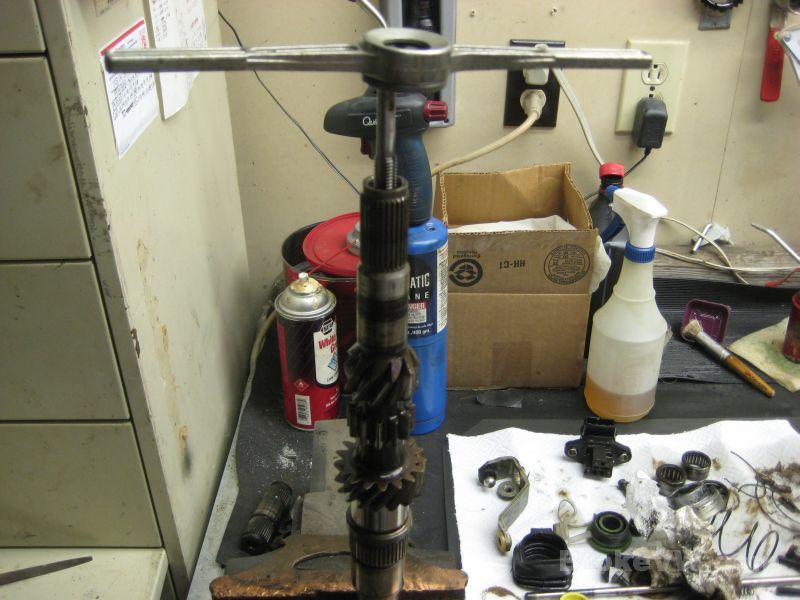
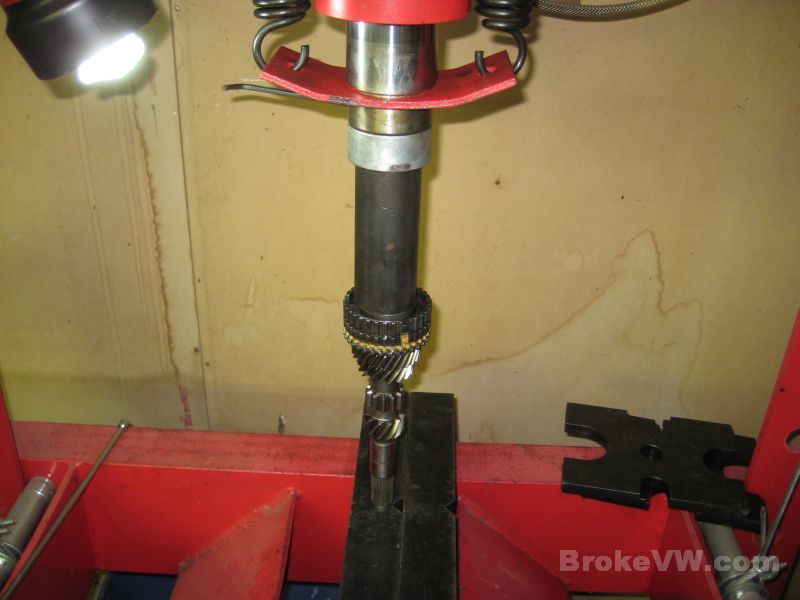
The input shaft being taken apart...
With the bearing removed, the circlip on the input shaft can be removed allowing the sync hub to be pressed free...
The bare input shaft has the pushrod seal and bushing removed, the bushing is tapped and threaded, then popped out of the input shaft...
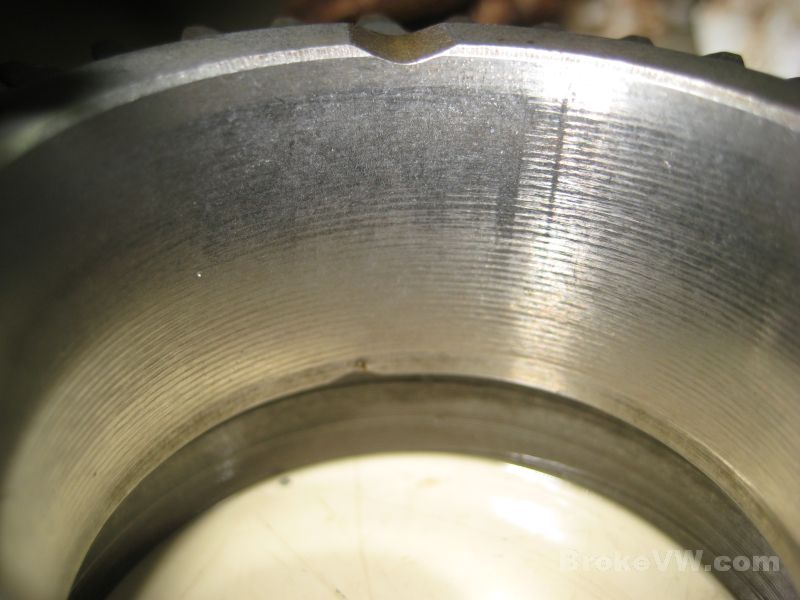
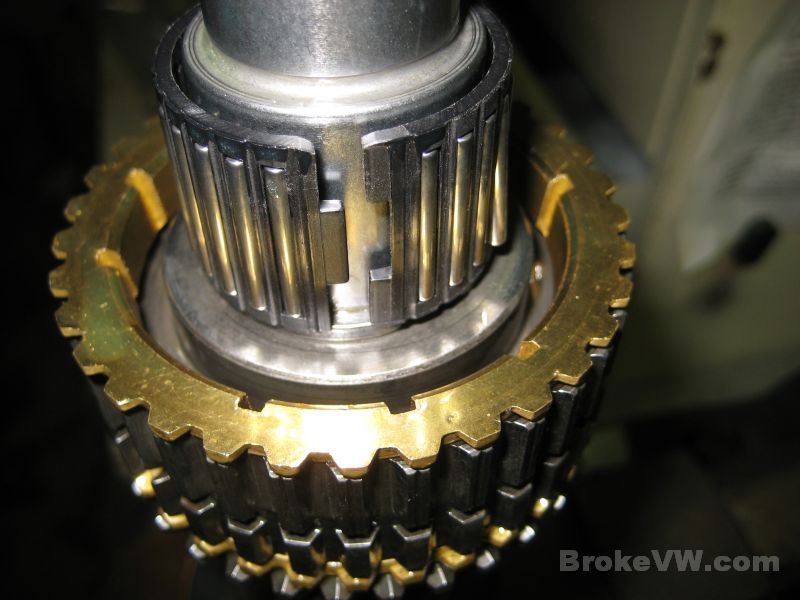
Inspection of the 3rd/4th sync hub showed clear signs of a common failure with these older hubs, the sync key cuts develop cracks at the corners of the cut that take off at an angle from the cut. In this pic, you can see a line in the hub starting at the corner and heading to the lower right...
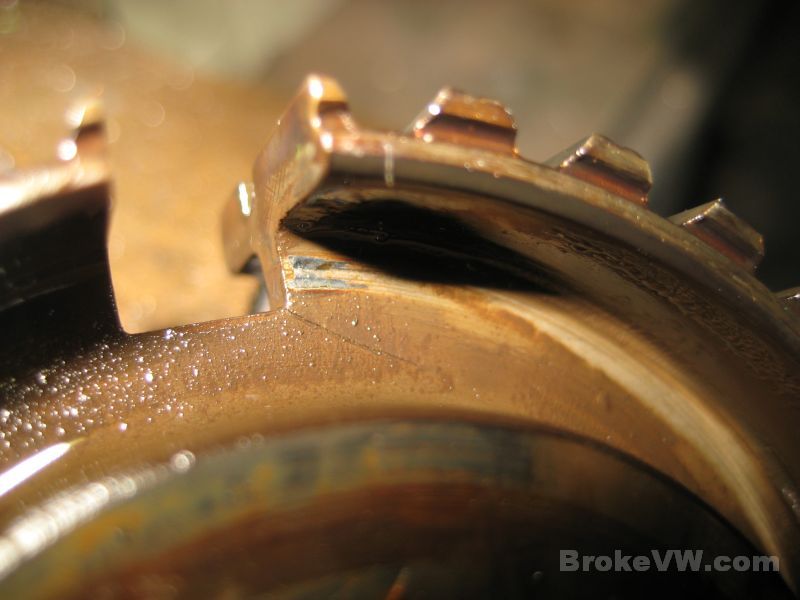
After cleaning the hub, if you let it sit a few minutes you'll see oil creeping out of the crack, if there is one, and bleeding over onto the now dry and de-greased steel around it.... you can see in the pics below there is surely a crack in the hub and it needs replaced...

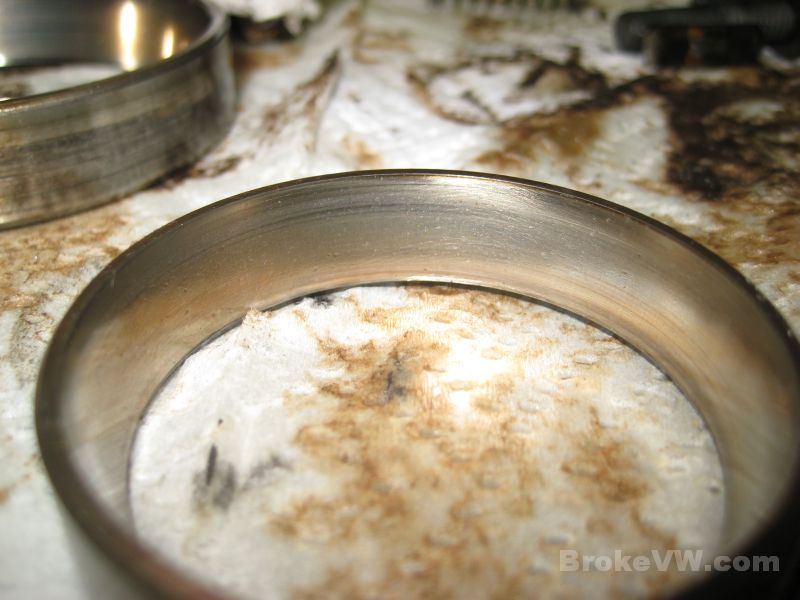
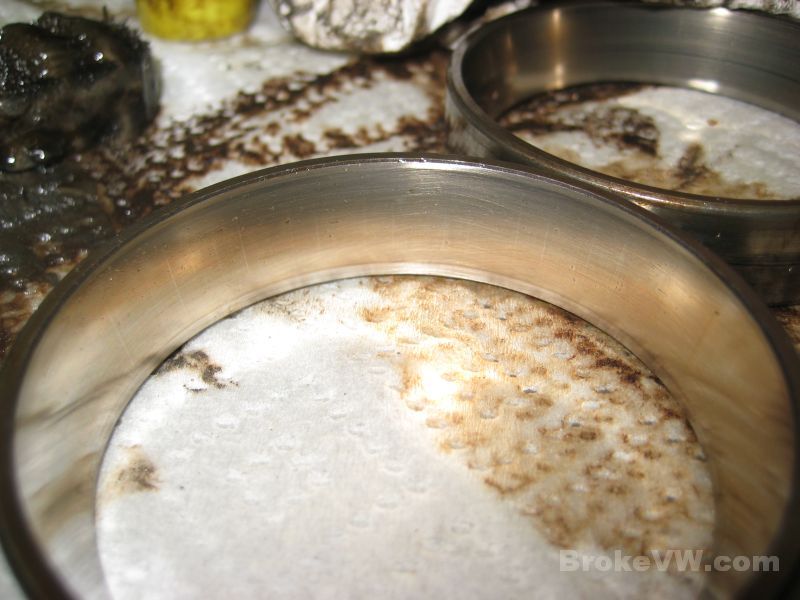
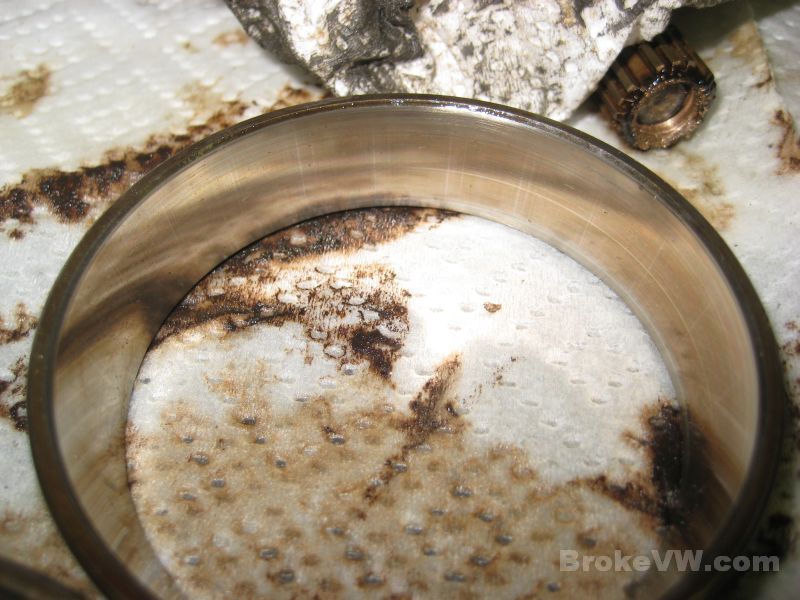
The taper bearing races look better than I expected, but they still show signs of wear and will be replaced...
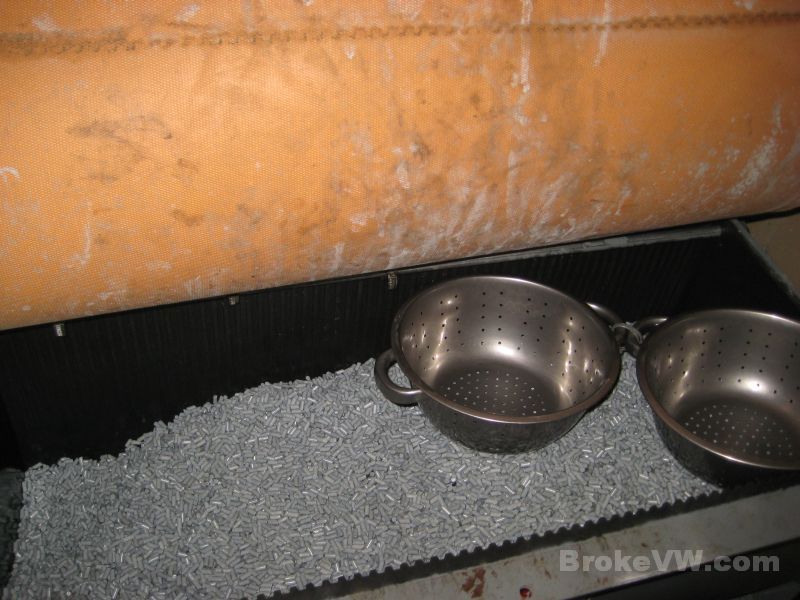
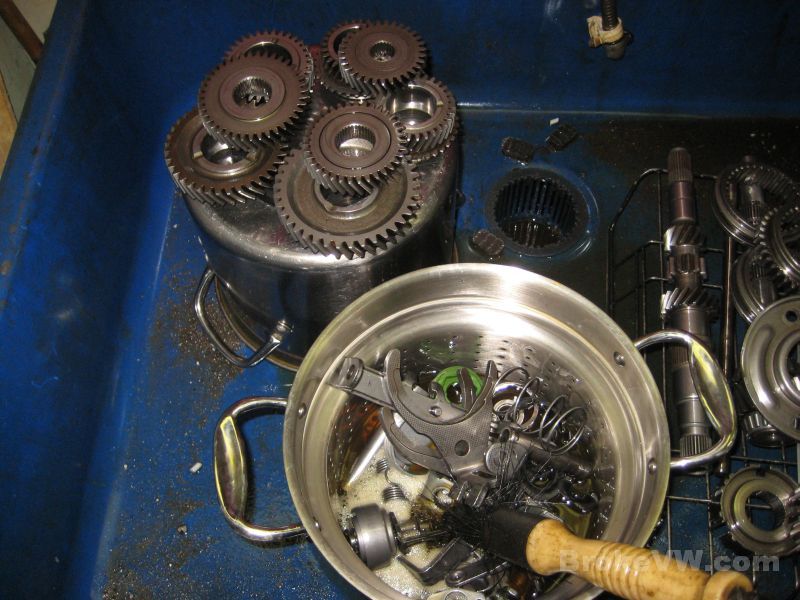
The nasty stained parts are dropped into a vibratory cleaner running kerosene solution through the ceramic media. Everything is vibrated quickly causing the media to start rolling, tumbling the parts over and scrubbing them at the same time as the kerosene carries the grease away. The 2 strainers I use to put smaller parts into with a few scoops of the ceramic media, zip-tie them together to form a ball, and let that tumble around in there. Trying to find a single bolt or washer inside several hundred pounds of ceramic media is nearly impossible!
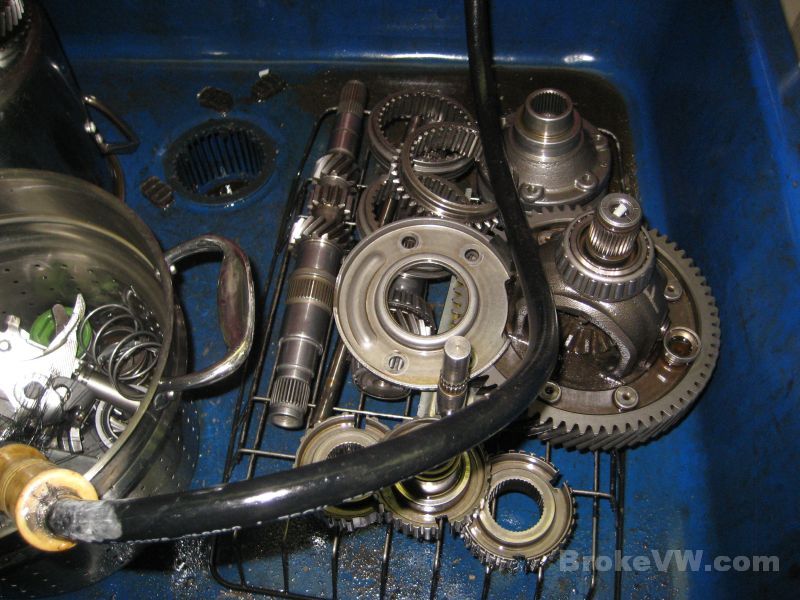
The parts come out looking silver and like metal again. The machine saves me a LOT of labor in cleaning... at one time I cleaned everything by hand in the parts washer below...
Here is some wear on the needle bearing races on the gears... and you have various types of wear. Ideally there would be nothing, but being they are low load and fairly low speed, and the elevated cost of replacement... I would retain them. This gear show some staining but is otherwise OK...
This gear has very small dimples in the surface of the race, along with a couple larger spots. I believe it to be a fault in the steel, but the rest of the surface looks OK...
This bearing has marks which I'm not sure if they are old machining marks under the surface coming through, a bad bearing has scored it or what, but they aren't raised and the surface still feels smooth. There is no cavitation or flaking of the surface, so I think it will be fine...

I'll email again when I update the page with more pics.
Update 11/02/11
I have the gears and shafts back from cryo, I was able to have them treated this weekend so they are done.
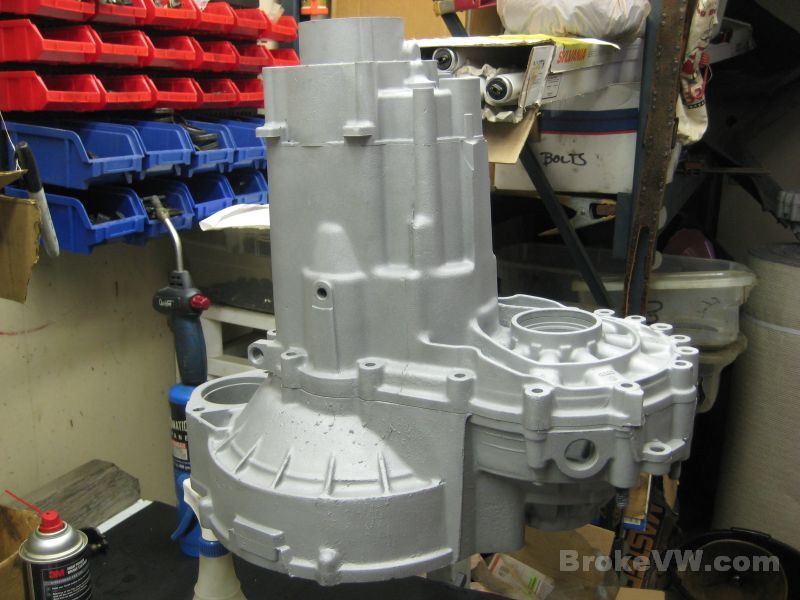
I also had a trans here that needed media blasting for powder coating later, so since I had the sand blaster out I decided to use up the rest of the sand on your trans to knock some of the grime away. I will probably go over it again just lightly with #80 glass bead to give it a nice finish but I was able to get most of the grime removed. I wasn't able to get into EVERY nook and cranny as it takes time and I was running out of daylight and sand!
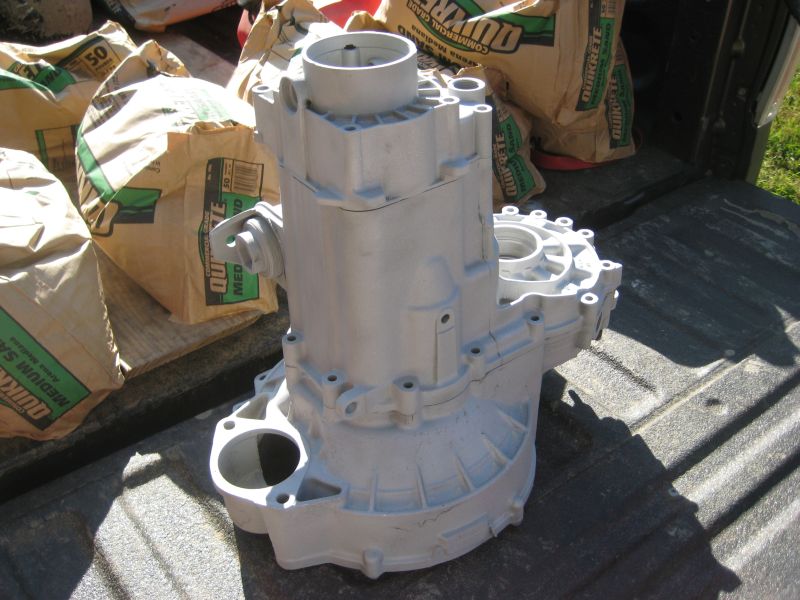
Before....
After...
The inside is also blasted clean, but it won't get a dusting
of glass bead if I end up using glass bead on the trans... it is expensive to
use and nobody will see the inside anyway so it will remain raw blasted
aluminum. The sand blasting causes the trans to look sparkly because of the
millions of little flat facets created when the sand hits the aluminum. Each
flat spot will reflect light so the entire thing seems to sparkle like quartz.
#80 glass bead is a round bead of glass, it hits the trans and will shatter, but
the initial impact will be a rounded dimple, not a flat spot as with a sand
grain. The result is a smooth matte finish to the casing that removes all the
sparkles.
I've got to unpack the cryo treated parts and get a pic of those (they don't look any different after cryo) and then I can get started on the build once the case is done and rinsed and so on.
Update 11/19/11
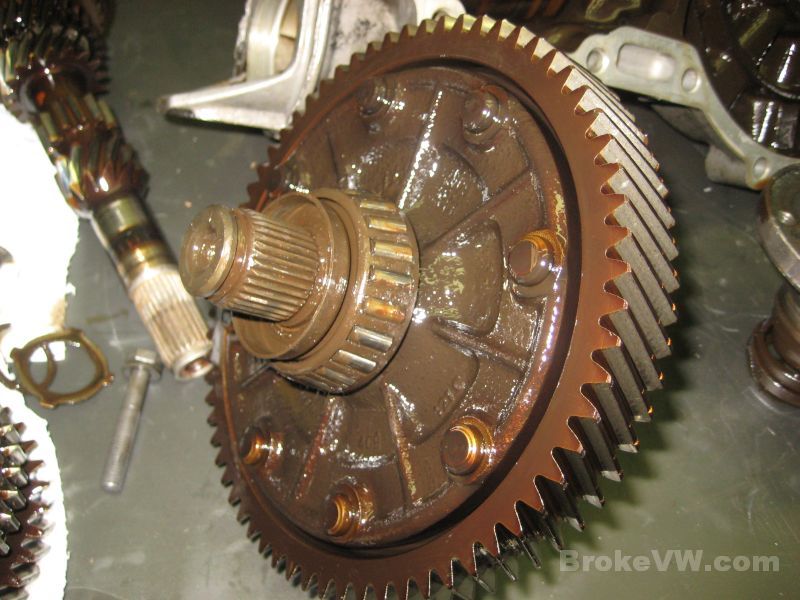
Some more pics, a few older ones from a couple days ago showing the ring gear being removed, then some from today showing the case being bead blasted...
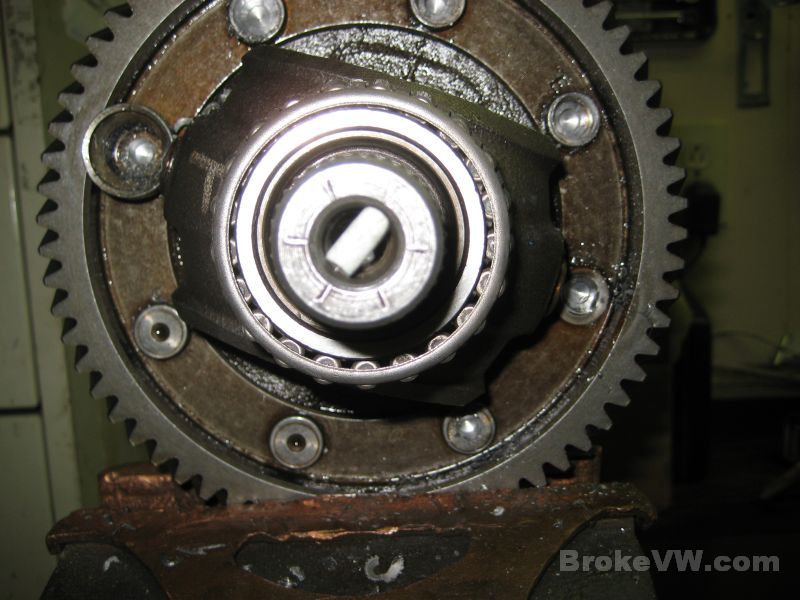
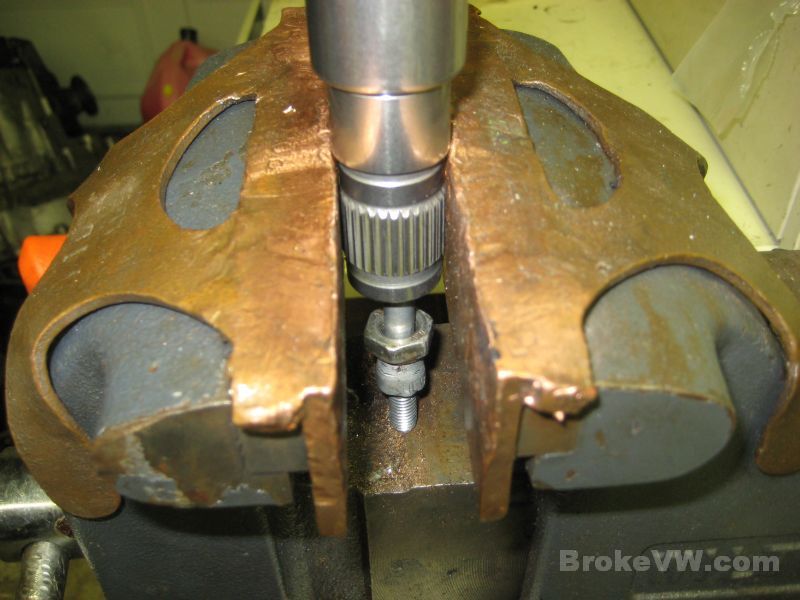
The diff is mounted into the vise using soft copper jaws. The rivets are then drilled with a 6mm bit, then a 12mm bit to remove the heads. The thing stuck in the end of the shaft is a piece of ceramic vibratory media...
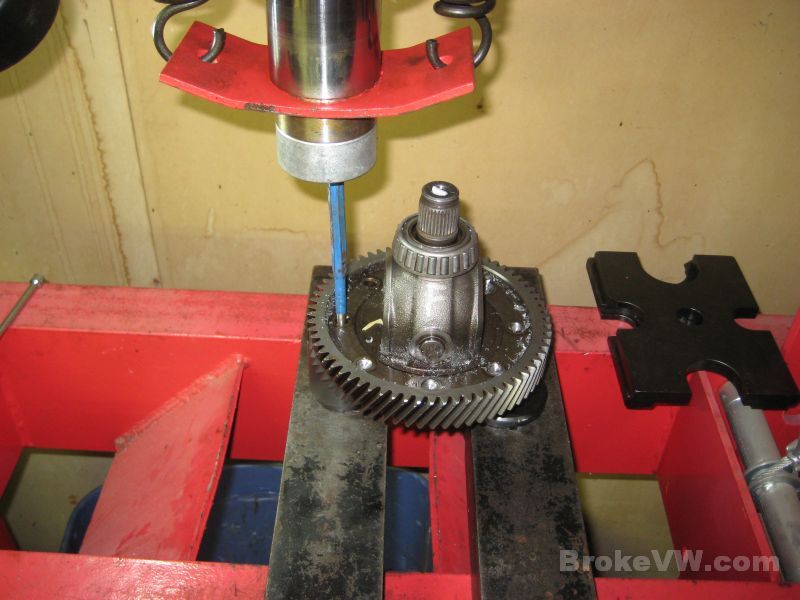
With the rivet heads removed, the rivets are punched out using the press...
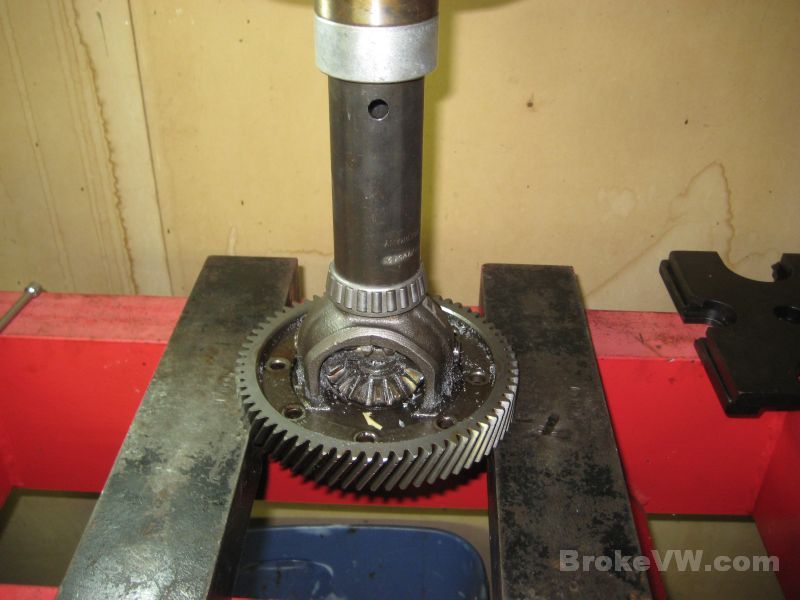
Once the rivets are removed, the ring gear can be pressed off...
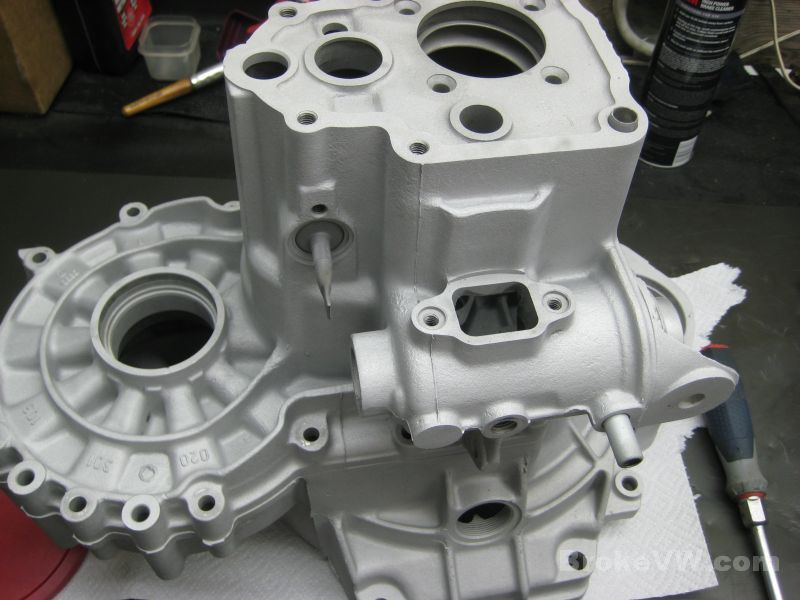
Here is the case again, this time sealed up to keep the glass from getting inside, so it is easier to clean up again. Old parts are used to seal everything up.. drain plugs, an old green end cap, old seals with rubber discs under them to seal the holes...
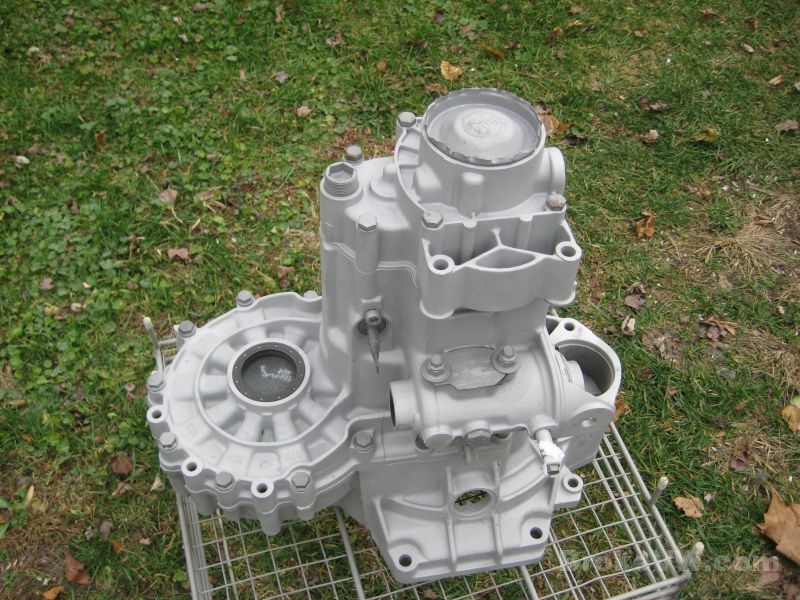
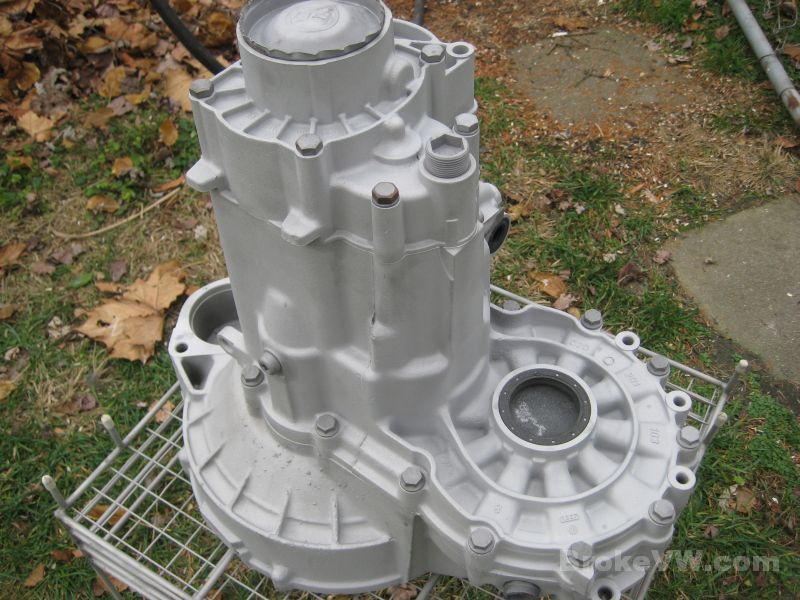
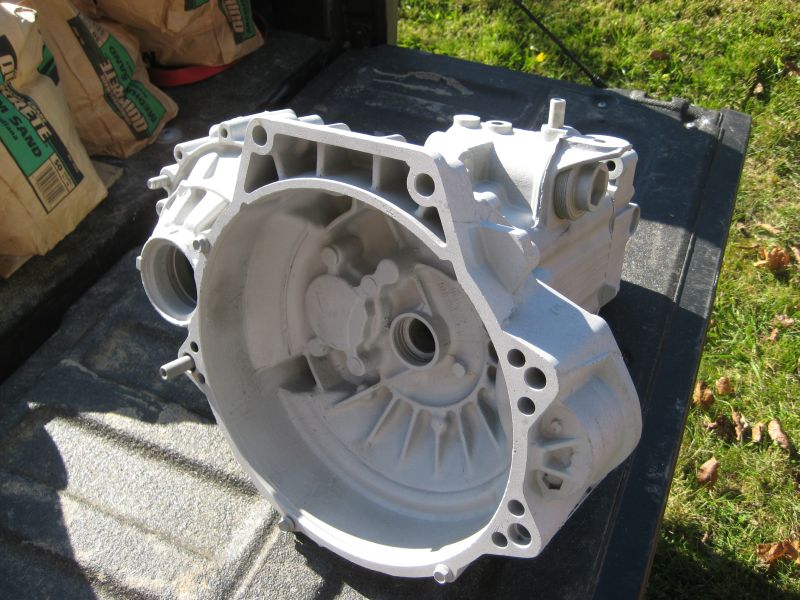
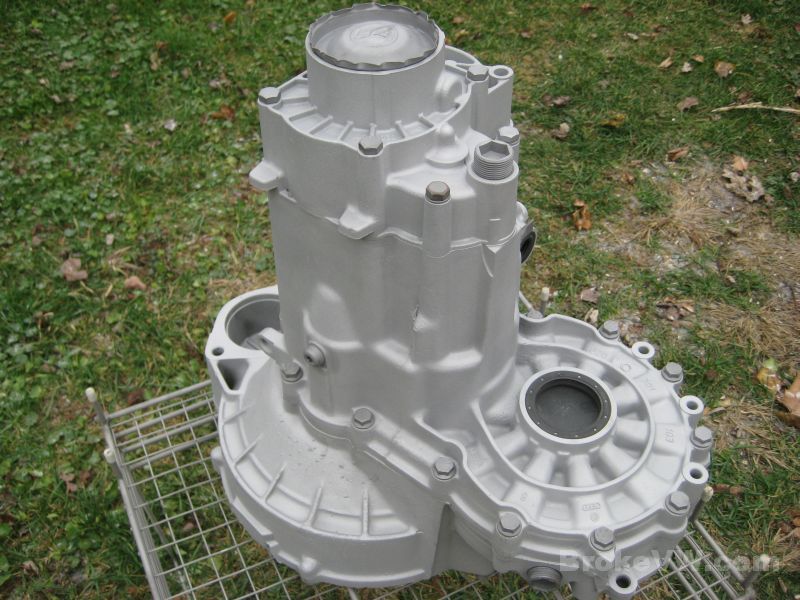
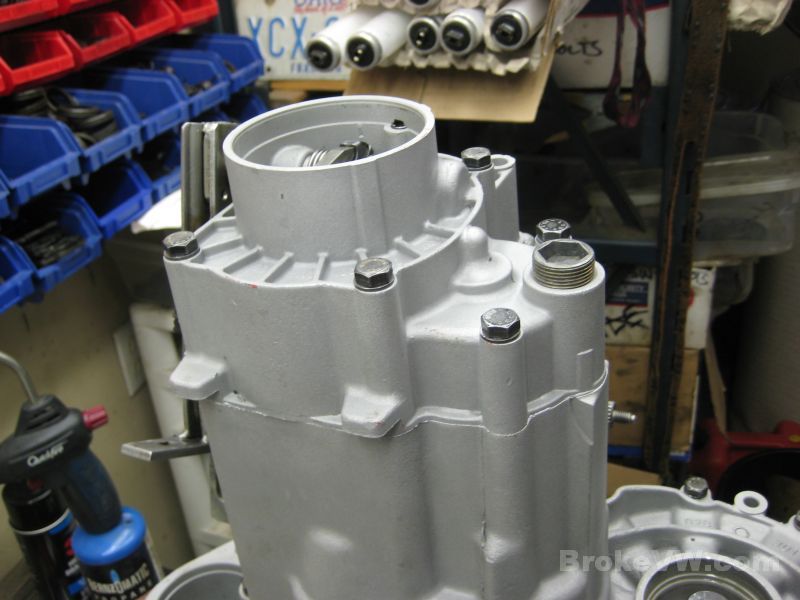
This is after blasting, the clouds were out so there isn't much of a difference in the pics, but there is a smoother matte finish on the casing now. I didn't do inside the bellhousing, so you might notice the clutch area looks more sparkly than the outside of the case when you get it in front of you. There will also be sparkly spots on the outside, because I only had so much of the glass bead left, and just dusted over the outside with what I had. It isn't a completely thorough job, but it looks decent enough...
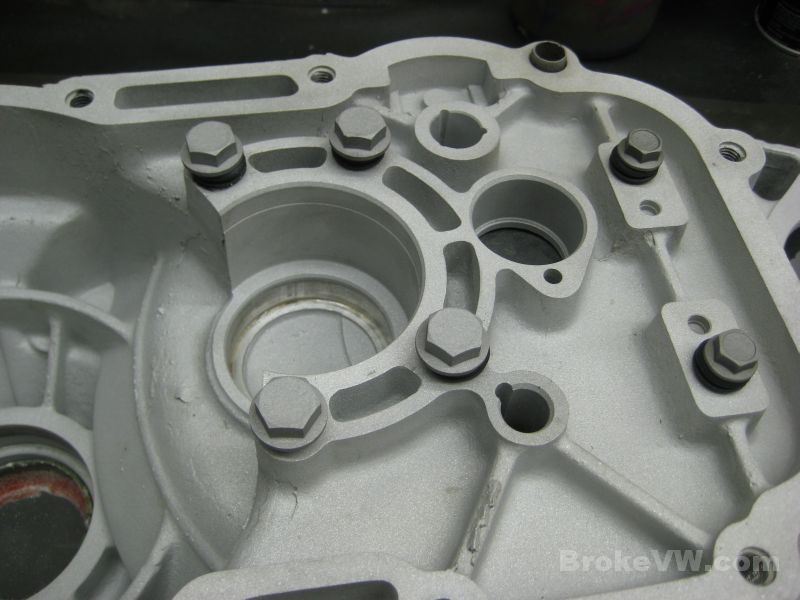
Inside the case, just to be sure that any glass that does get past the seals doesn't get into the bolt holes, the holes are sealed with bolts and rubber grommets...
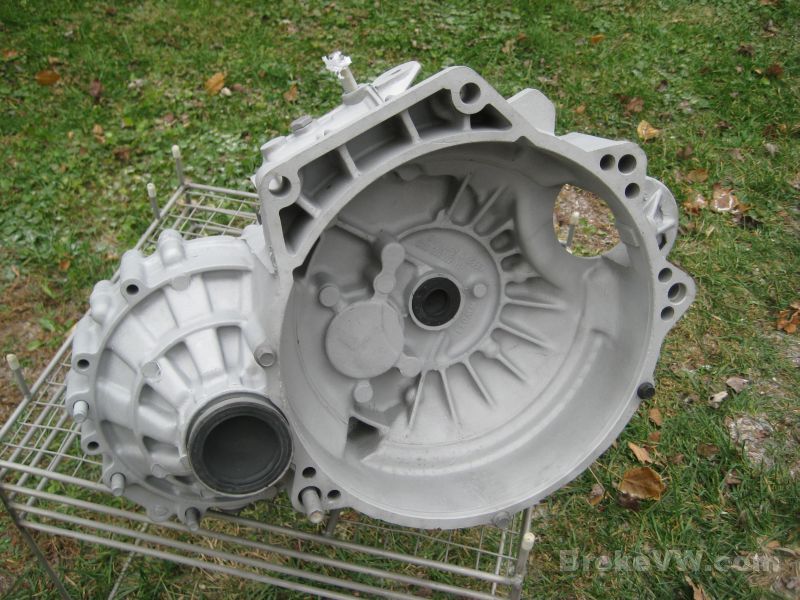
A blurry pic of the case, prior to being rinsed and dried. This is pretty much what it will look like when you get it. I will spray the outside down with WD40 so any dirty fingerprints that get on it when building it will wipe off easily, but it'll eventually evaporate away, then the casing will start to oxidize and corrode again. You can keep it wet with oil to keep it looking nice, or paint it when you get it....

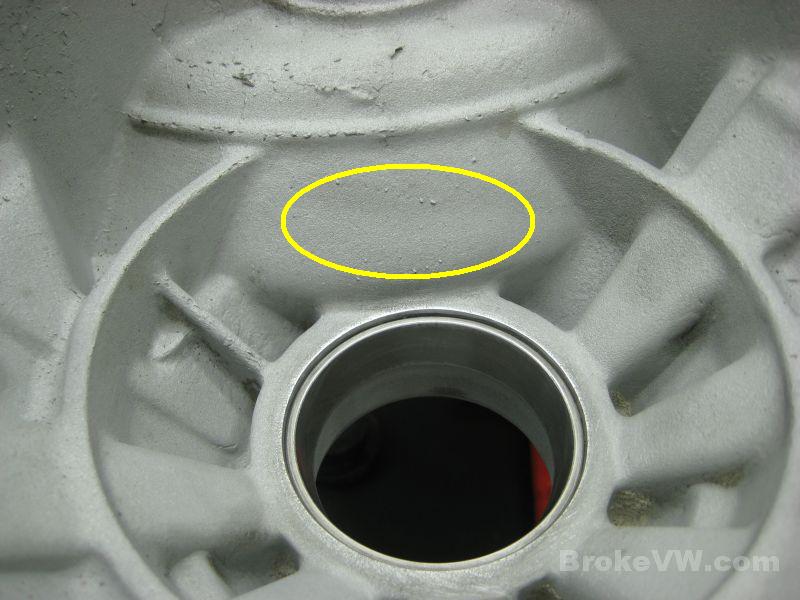
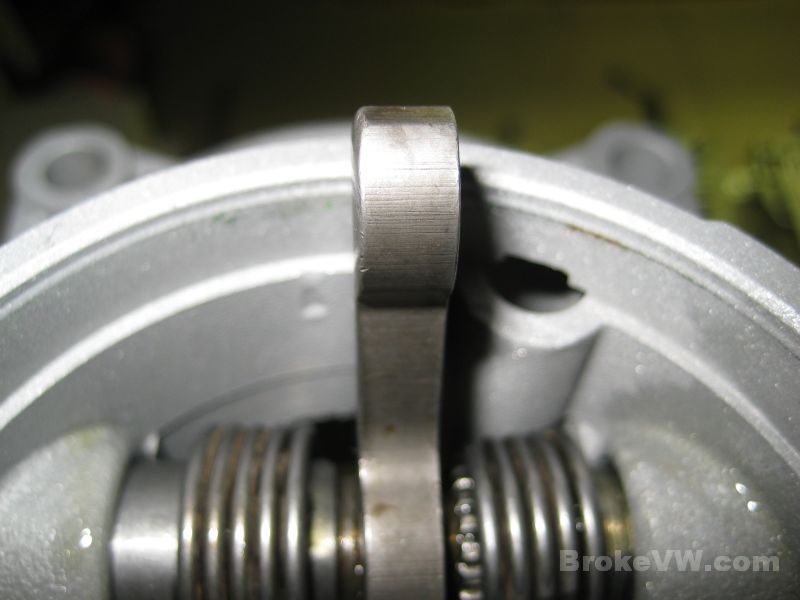
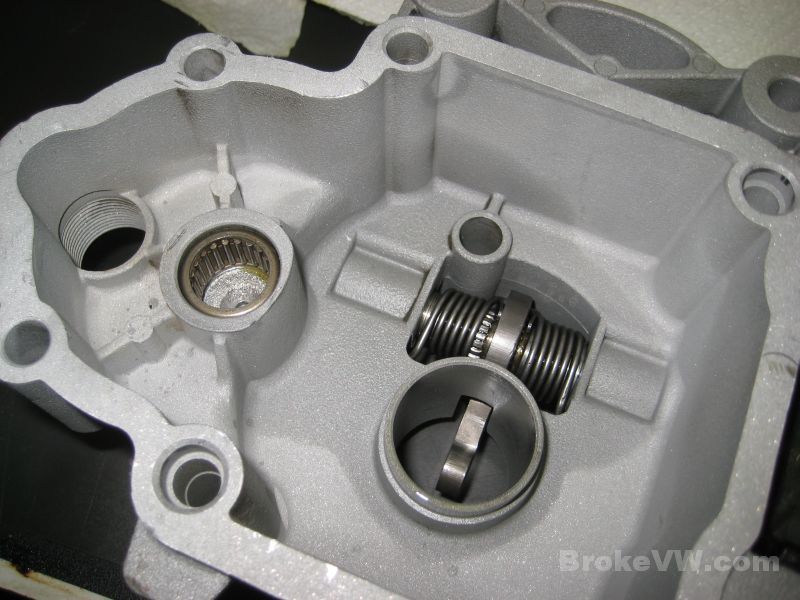
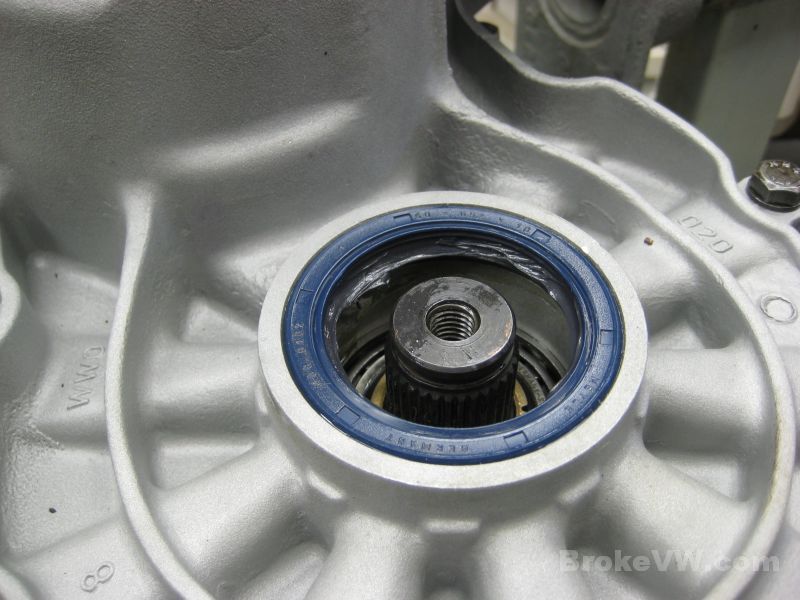
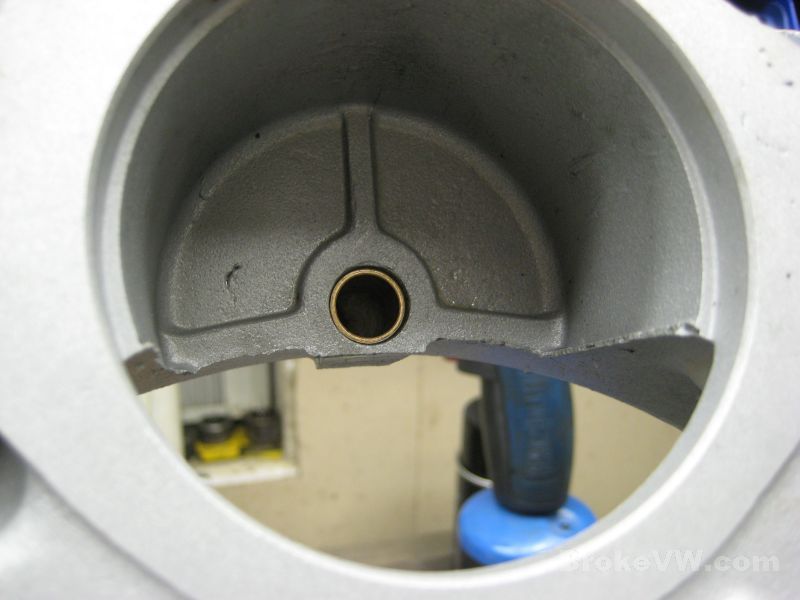
This is the area that the LSD will hit on some trans cases. They need hit with a grinder to remove enough casing to allow the side gears of the LSD to clear. Not all cases need it. Yours has a slight dimple there, which means it won't need fitting...
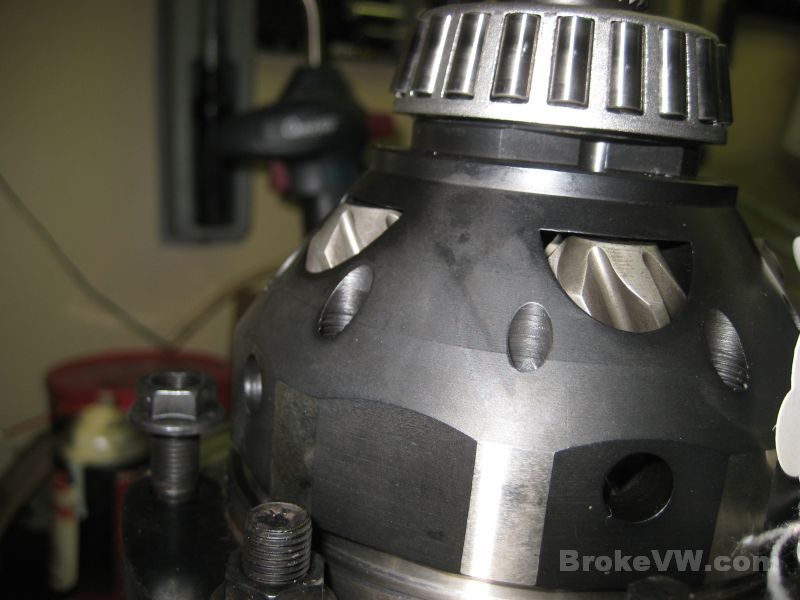
Here are a couple pics of the Peloquin LSD to be installed. The side gears exposed out of the side of the casing are what sometimes will contact the 020 casing....
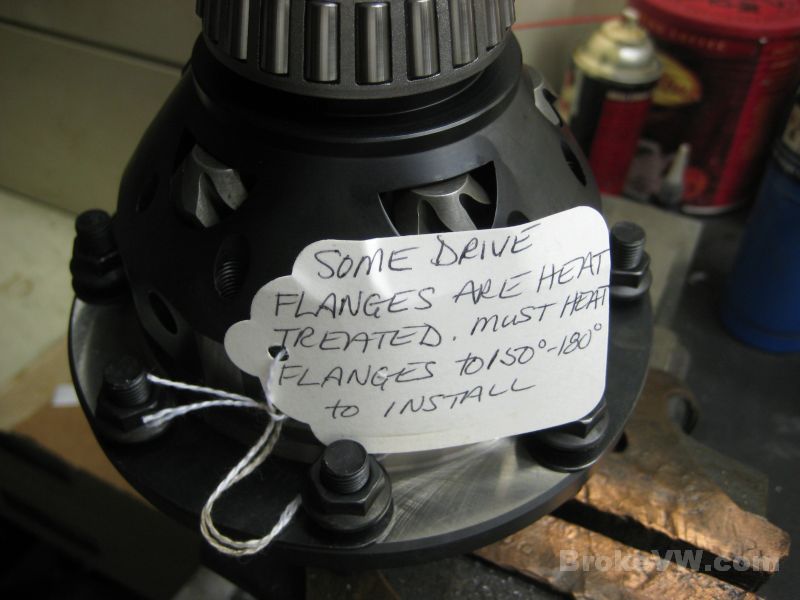
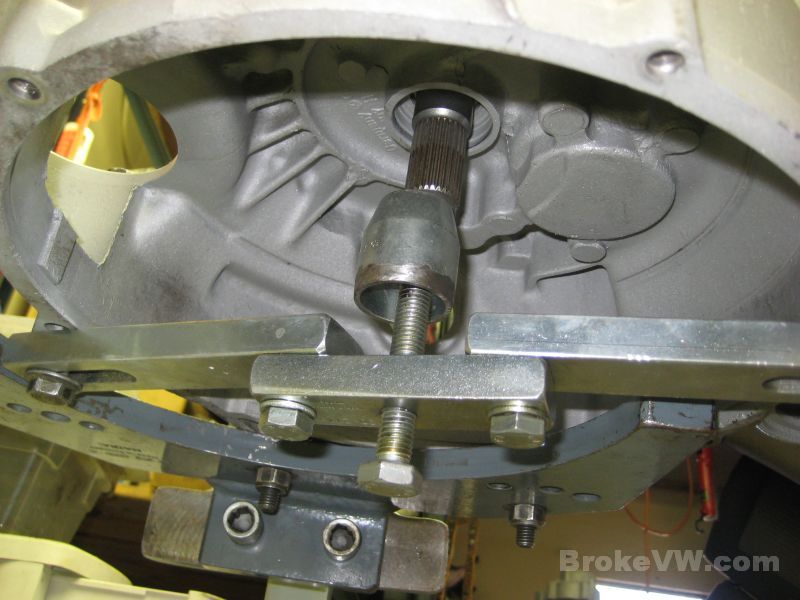
I fit an old bearing race to the case without any shim to ensure the LSD will sit lower than when installed, so if it is going to rub or contact the case, it will do it now...
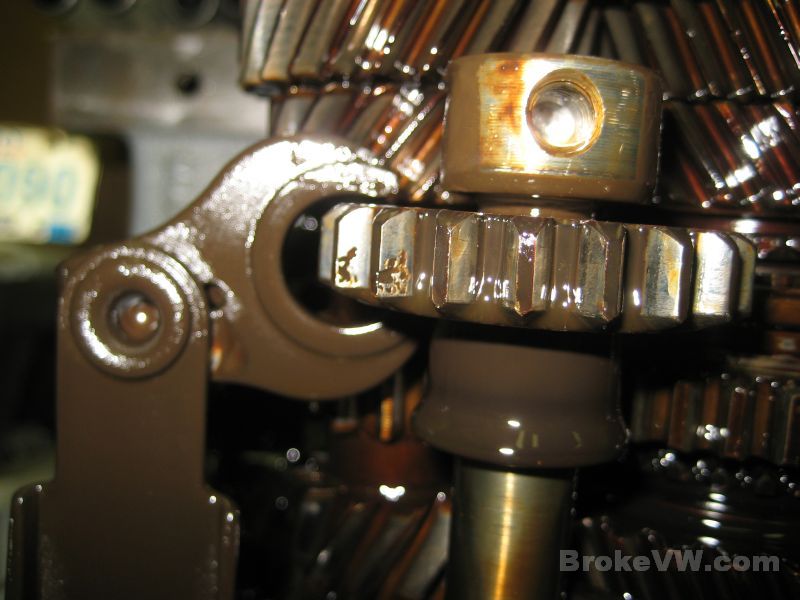
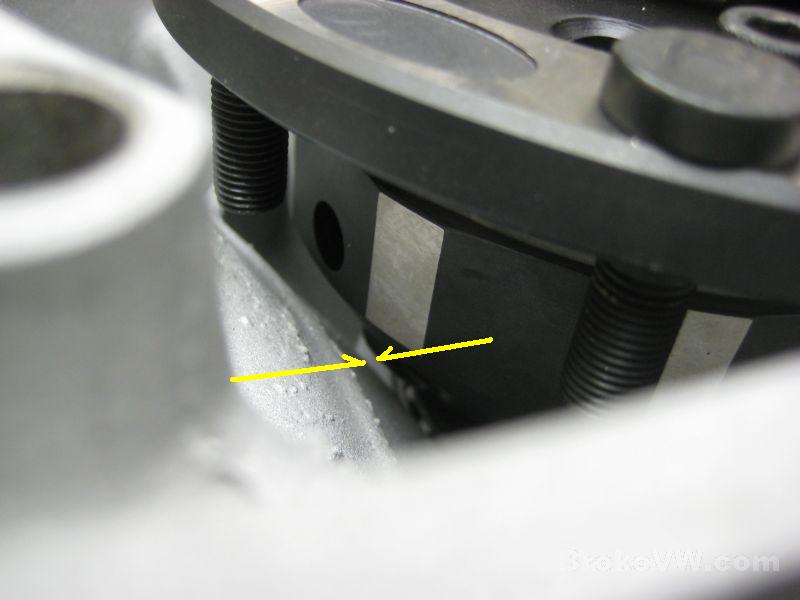
Spinning the LSD resulted in no contact, so the case is fine as it is. I just need to rinse it a few times, then start building. This pic shows, barely, the contact point that is found on some older trans... it was tricky trying to get the camera to show it, but the gap between the 2 yellow arrows is what we're looking for...
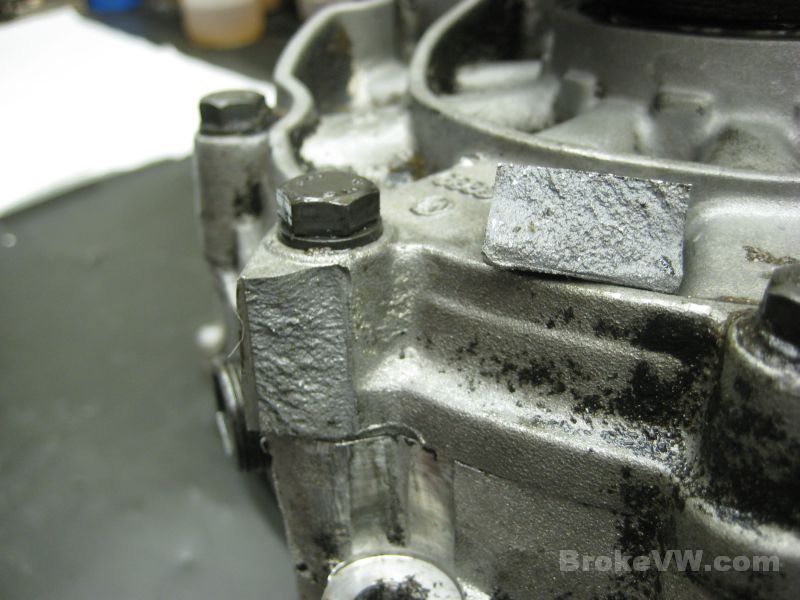
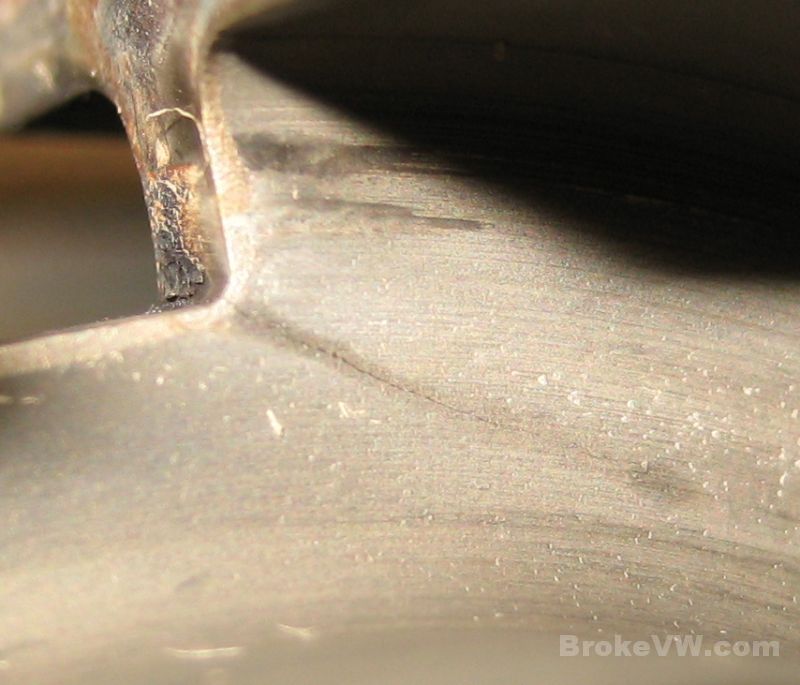
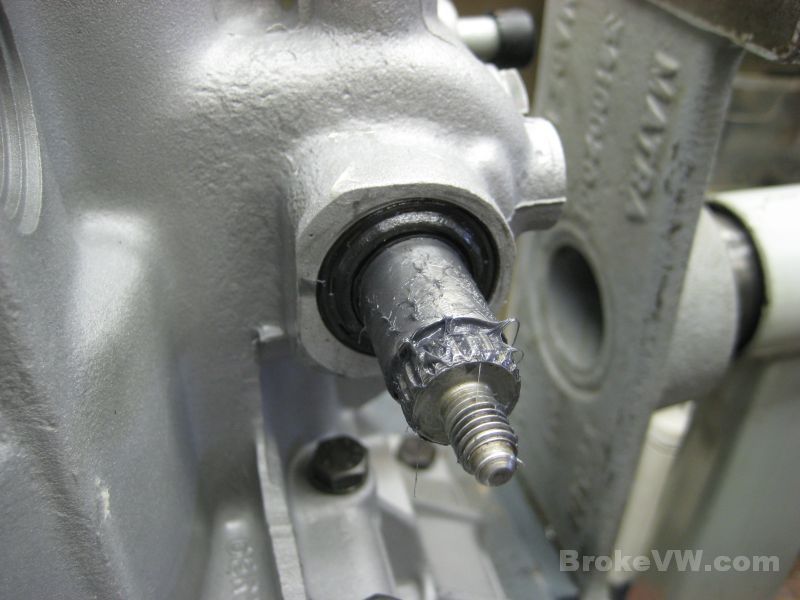
Right, here is the damaged portion of the case...
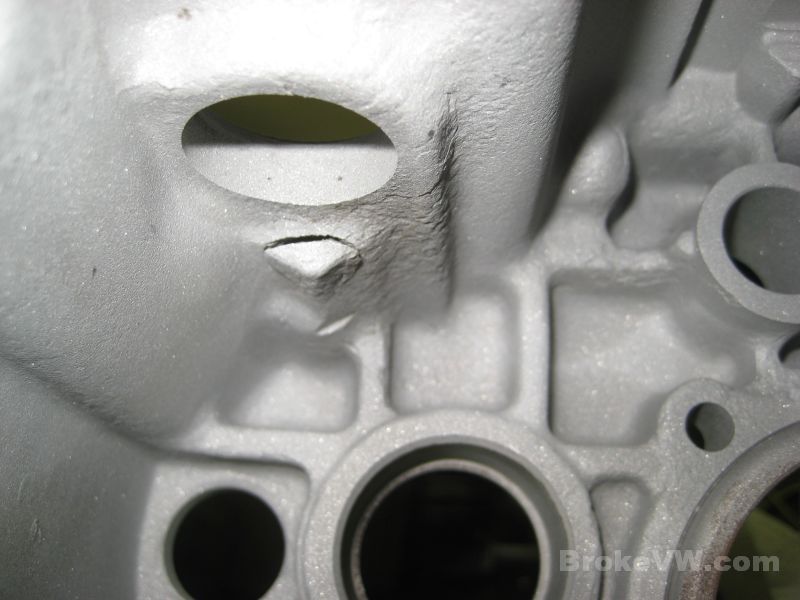
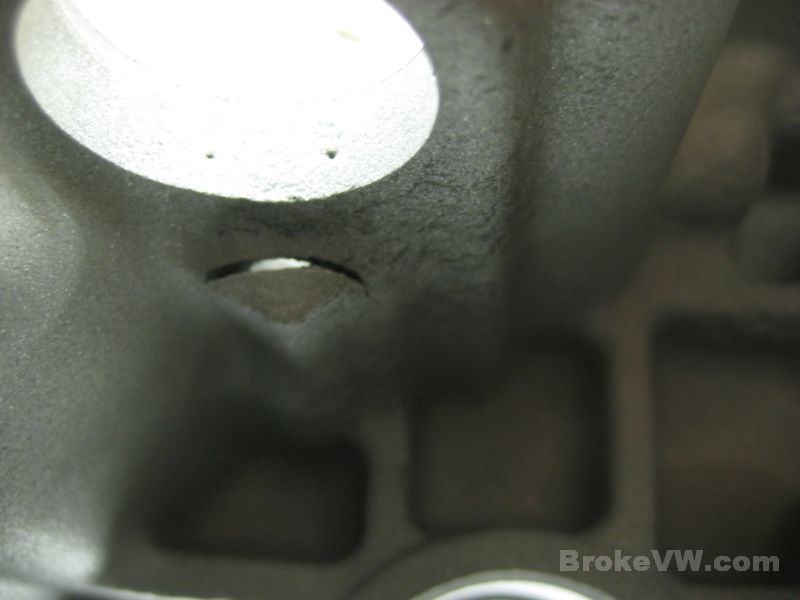
I gave it a better inspection this time, and gave it a more sound tapping with a small punch, it it popped free so there is no need to worry about it getting loose later...
I'll email again when I have more pics uploaded.
Update 12/07/11
I have all of the parts cleaned, rinsed, dried, and oiled. The rebuild can get started now.
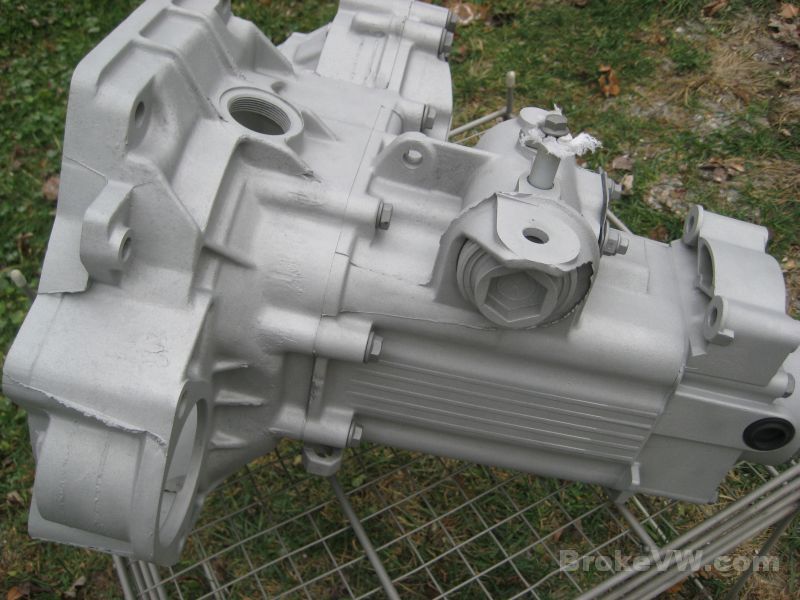
Here are the parts cleaned, rinsed, and dried, but not yet oiled...

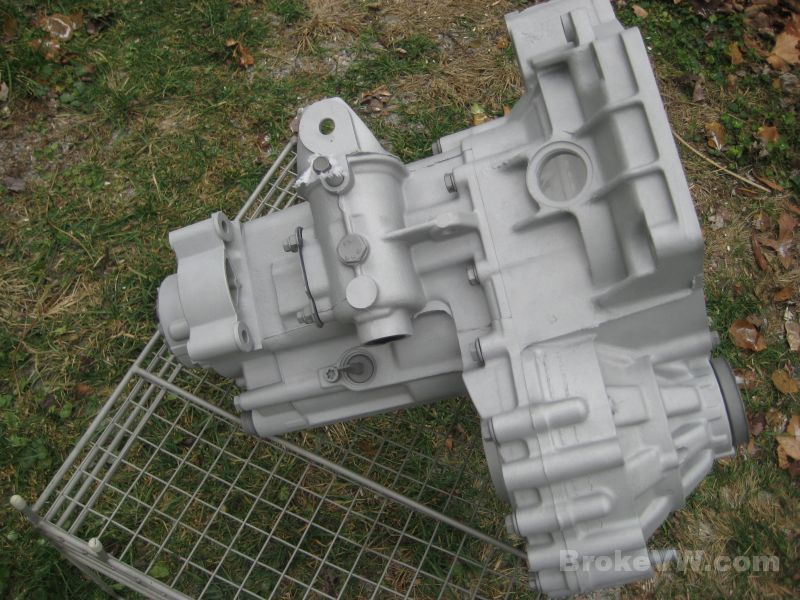
Here is the trans, and it might be difficult to tell but it is
wet with WD40 over the entire case. The bare blasted aluminum is very dry and
porous and will stain easily if you touch it with oily or dirty fingers, getting
into the aluminum where it is hard to remove it.
Spraying the case down with clean WD40 will prevent any dirty prints, oil, or
grease from sticking to the aluminum. It will be suspended in the WD40 on the
surface, and it is more easily cleaned by wiping it away. The WD40 dries fairly
quickly, so it isn't something that will stay on the trans for very long, but it
will stay wet enough during the build to keep it looking nice and it can be
sprayed again if needed....
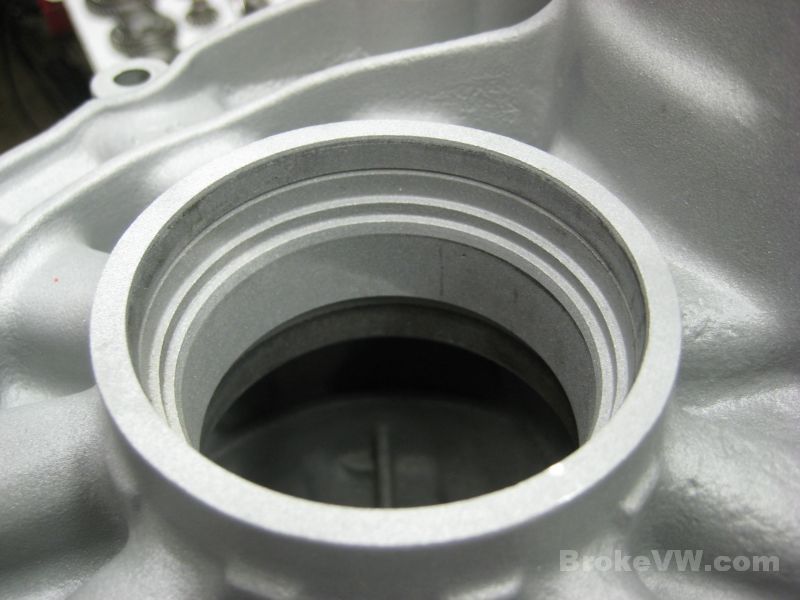
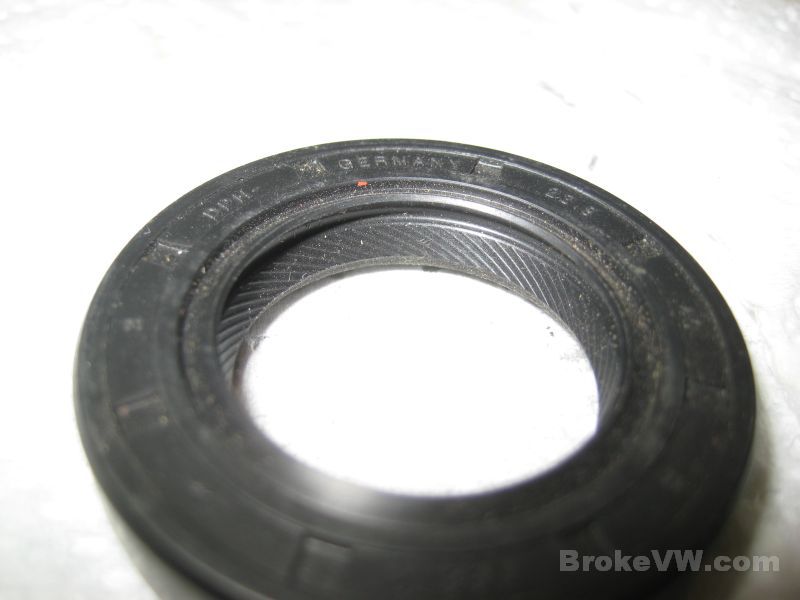
You can see and oil line inside the flange seal bore, where the WD40 didn't make it... it just makes it a bit darker until it dries up...
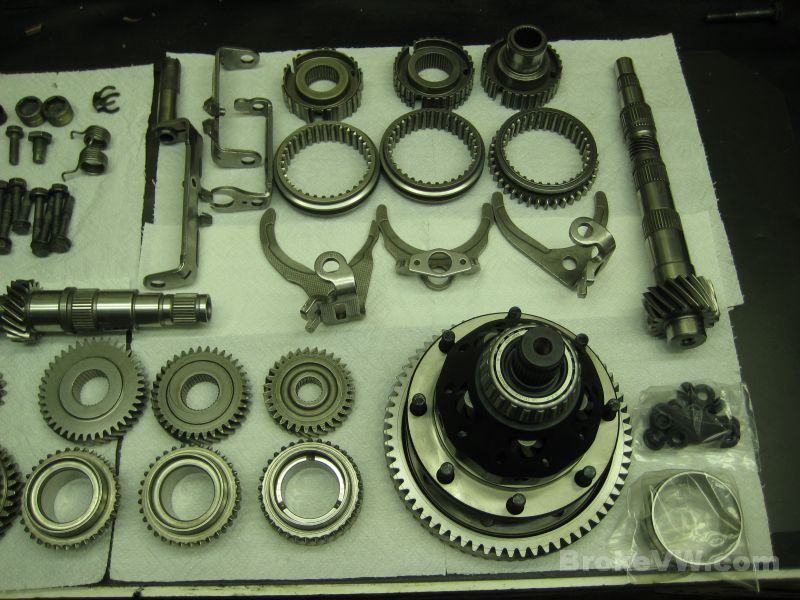
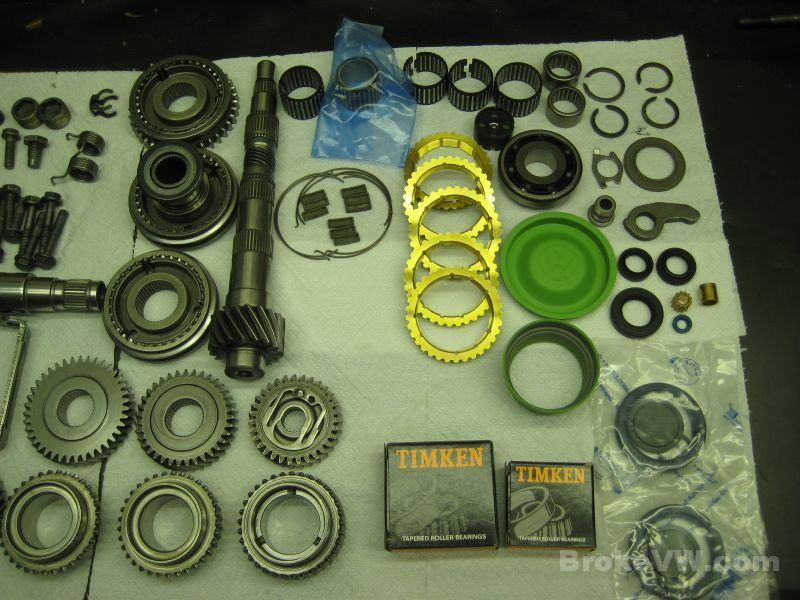
The new parts. Needle bearings along the top, then the 2 shaft rollers, under those are the TO and input shaft bearings, circlips and thrust pieces to the right. Seals under those, 2 Timken bearings for the output shaft, above those are the green sealing pieces, then the sync rings, keys, and springs to the left...
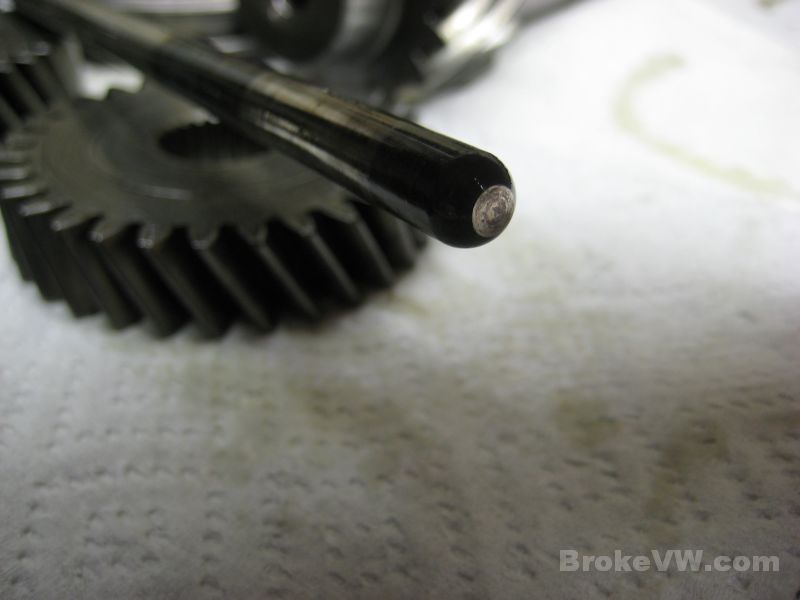
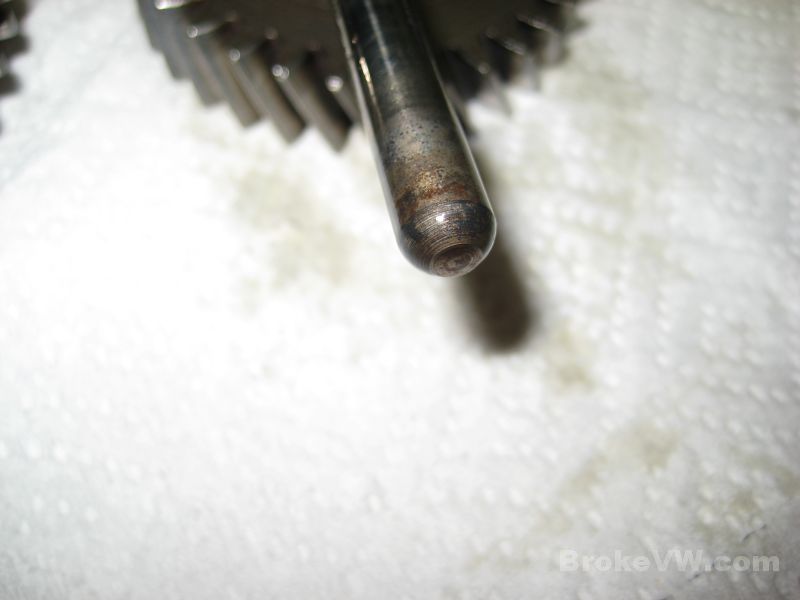
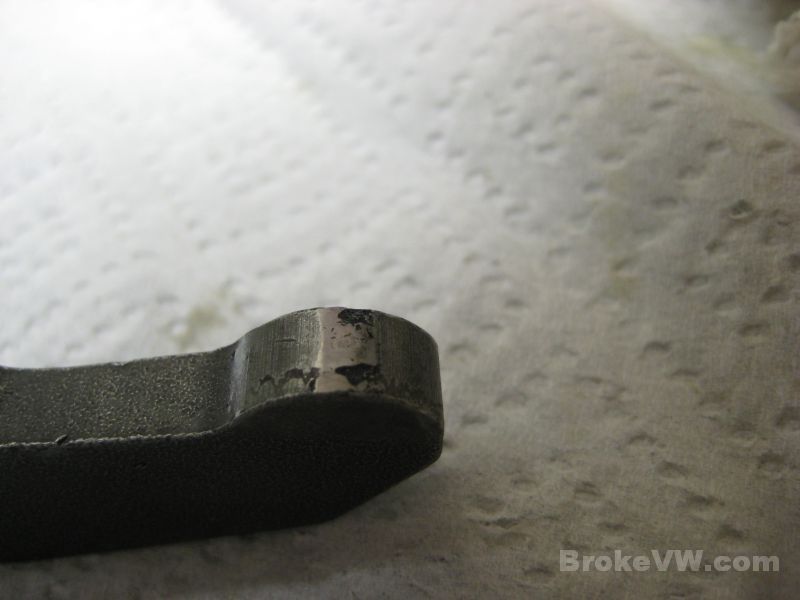
Your pushrod is showing some wear. Flattened rods don't want to stay centered on the thrust plate like a rounded rod will with a smaller contact point. The larger contact area will make it want to walk or wobble on the thrust plate which can not only wear the plate but can wear the pushrod bushing, causing the seal to leak....
The parts wet with oil, ready to start assembling them into the various assemblies that will end up in the trans...
When not being worked on, everything stays covered so it remains clean. The are wiped down once more as they are installed though, just in case anything does get on them...
I'll update the page with more pics shortly.
Update 12/11/11
The build process has begun and you were looking forward to seeing the build pics, so I took plenty :)
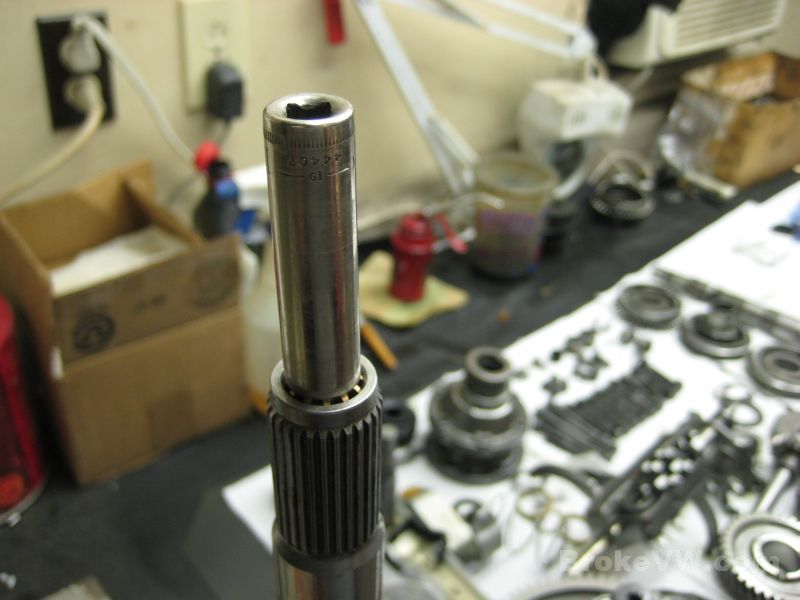
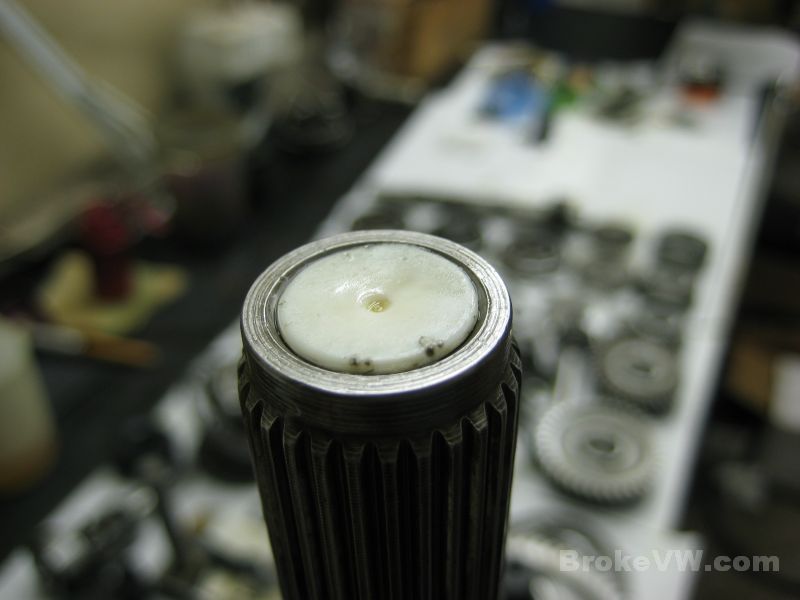
Starting with the input shaft, the pushrod bushing is installed. I have an old pushrod I made a tool from for this job. It supports the inside of the soft bushing during pressing to prevent it from distorting. I start by driving the bushing in flush with the tool...
Then I insert the tool in from the other side so it is poking up through the bushing, continuing to support it as the bushing is driven in until seated with a 10mm deep socket. The pushrod fits into the socket and the socket fits into the input shaft, so it is perfect tool...

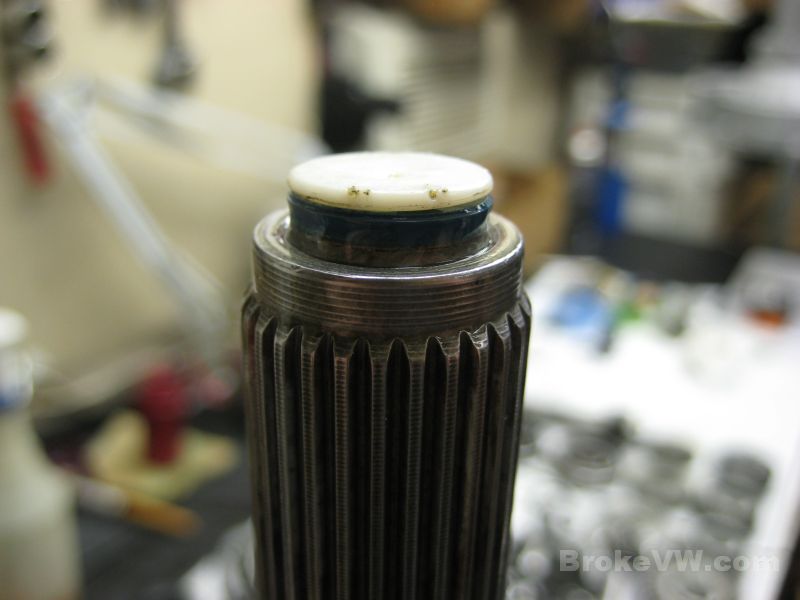
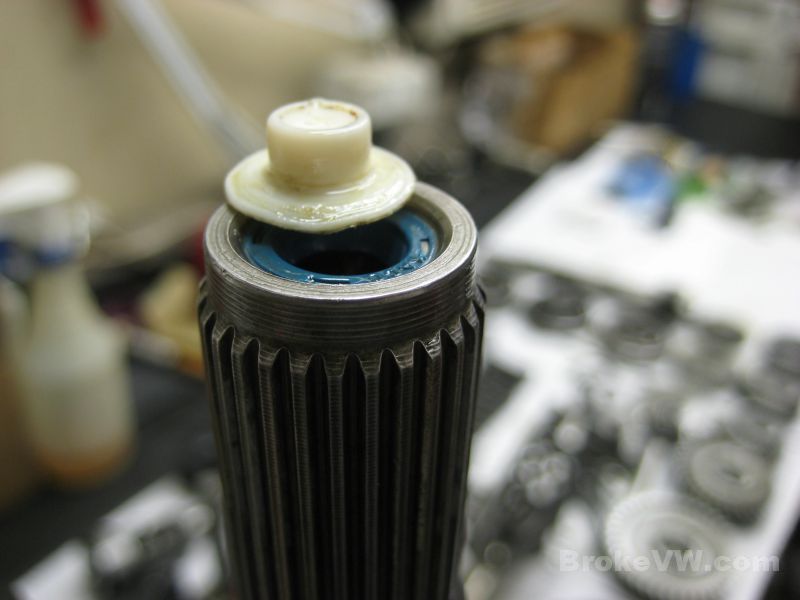
Next is the pushrod bushing. New seals sometimes come with an installation plug tool. Many people think it is just a plug and toss it, but it is the install tool. Spec from VW is to install the seal 0.8-1.3mm below flush with the end of the input shaft. There is a small chamfer on the inside of the shaft and they want it just under that. The plug is about 1.3mm thick, so you drive the seal and plug flush, pop the plug out, and the seal is left perfectly installed...
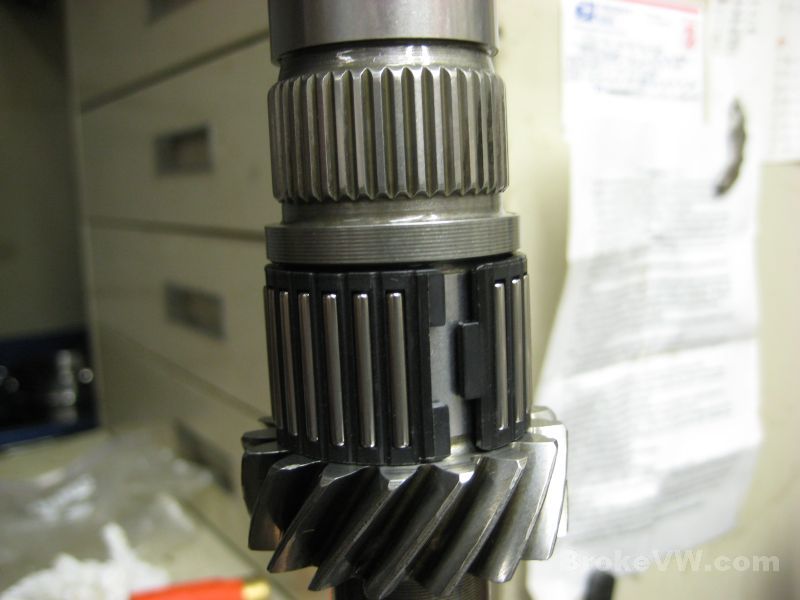
3rd gear needle bearing, 3rd gear, and the sync ring are installed now...
The 3rd/4th sync hub and ring gear go into the over at 210F to heat up...

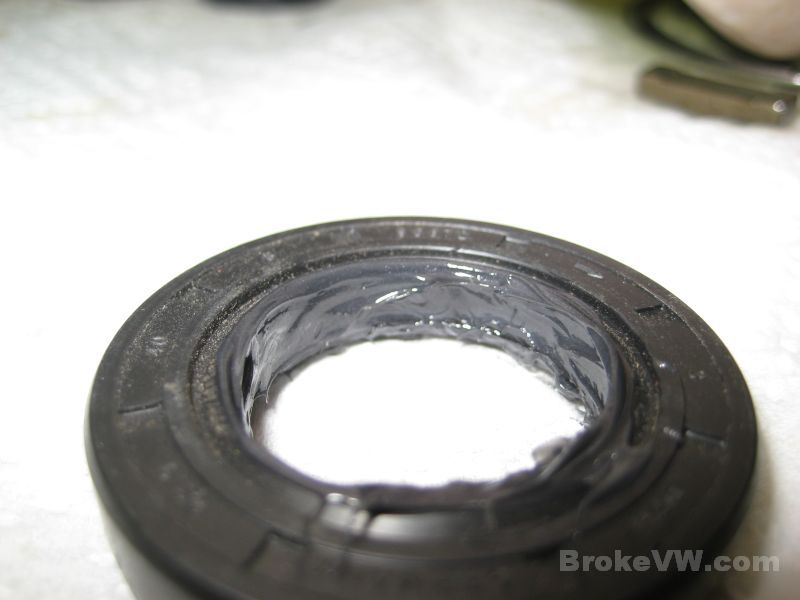
While waiting, the seals are all greased. All oil seals should be grease between the dust lip and the seal lip, as shown here...
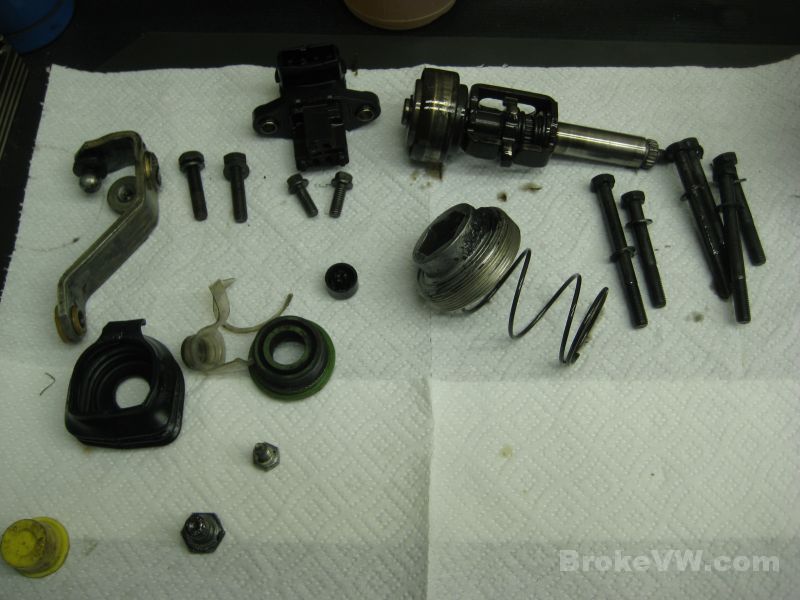
Here is a pic of the old actuation finger, and then one of the new replacement finger....
The 5th housing assembly is built, which is just the one release arm seal, then feeding the release arm, spring, and new finger into place. Secure the finger with the clip and install the black plastic stopper onto the arm, and the 5th housing is done for now...
With the parts out of the oven, the 3rd/4th sync hub is installed with one sync key spring, then the other spring is installed and the hub secured with a circlip...

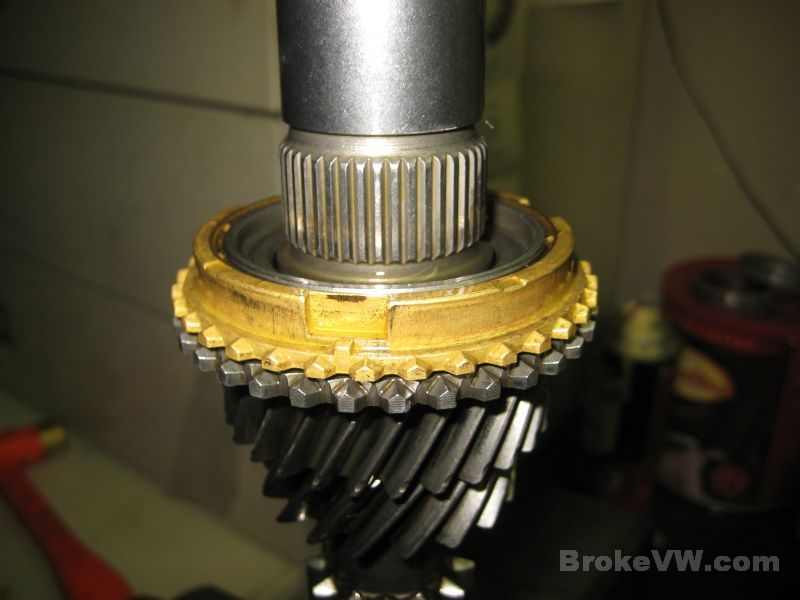
Time for the 4th gear needle bearing and sync ring, followed by the install of the 3 sync keys and the slider sleeve, then 4th gear itself. You can see on roller tipped out of the cage in the pic below, they just pop in and out and it was taken care of...
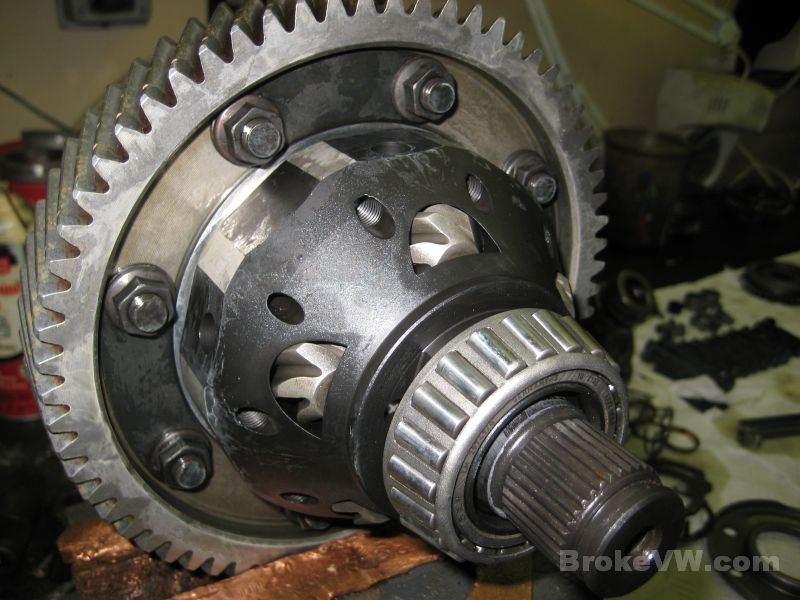
With the input shaft done for the time being, the heated ring gear can be pressed onto the LSD now....
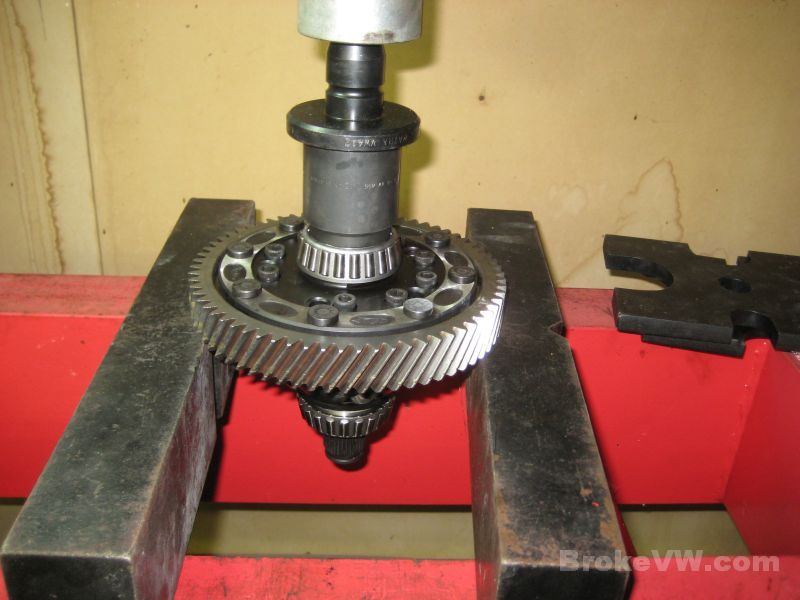
Also heated with the ring gear and sync hub were the 2 taper bearings for the output shaft which are then installed. Once heated they sometimes drop right on, but I give them a little shove to make sure they are seated fully. Once the shaft has the bearings it is wrapped up for later...
With the ring gear cooled, the nuts are installed and tightened to 52 ft-lbs...
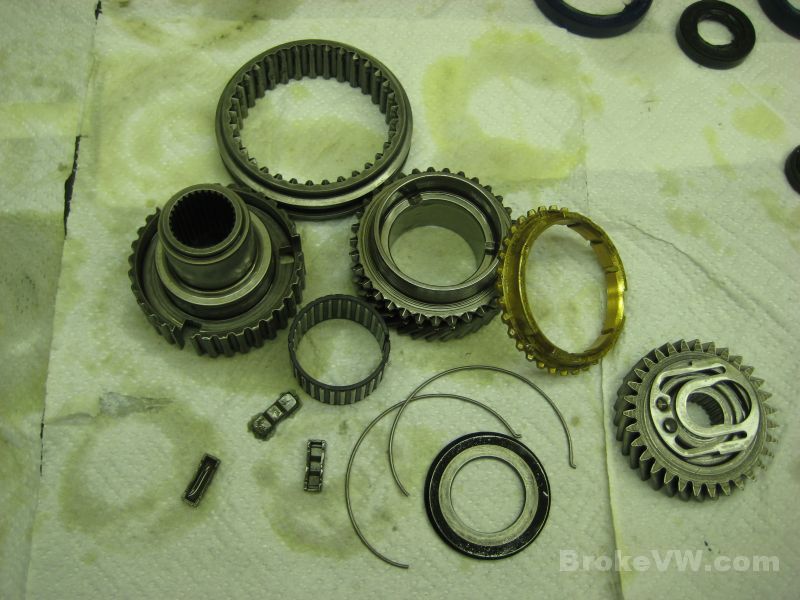
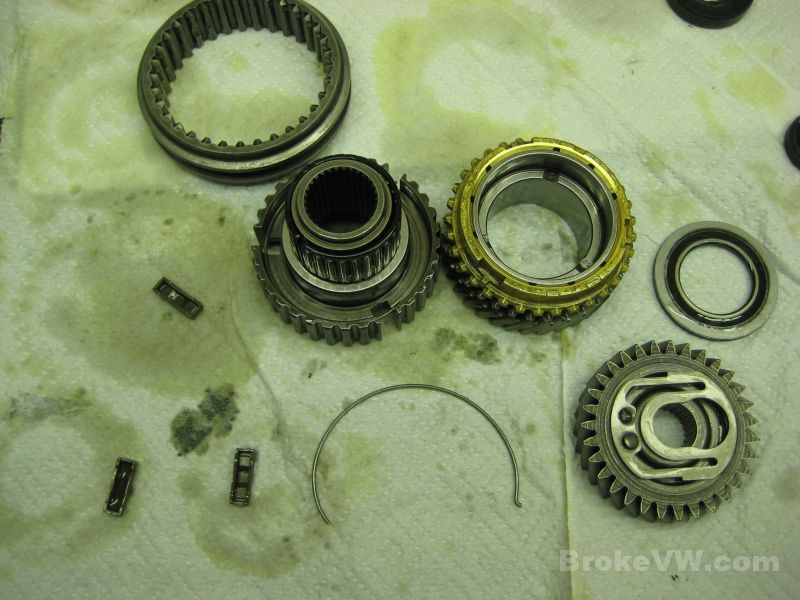
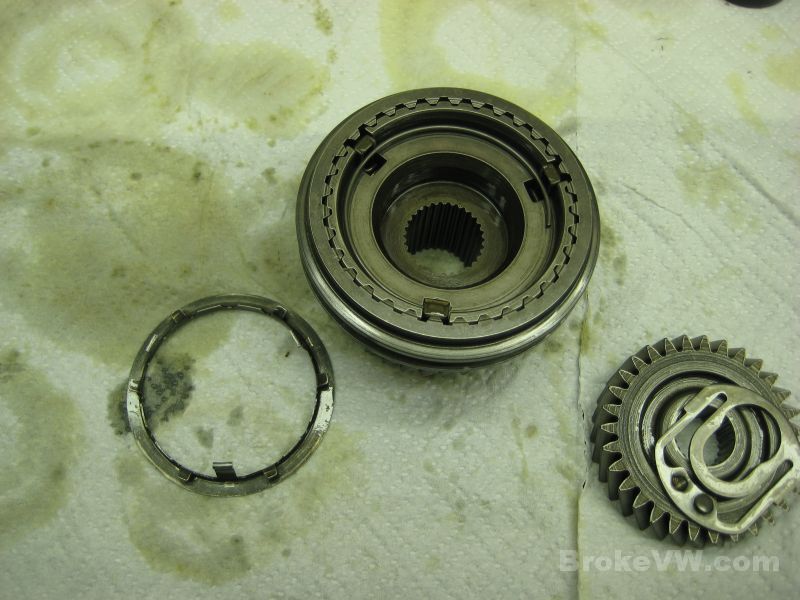
Time to build the 5th gears. These are the parts that will be turned into the 5th gear assembly...
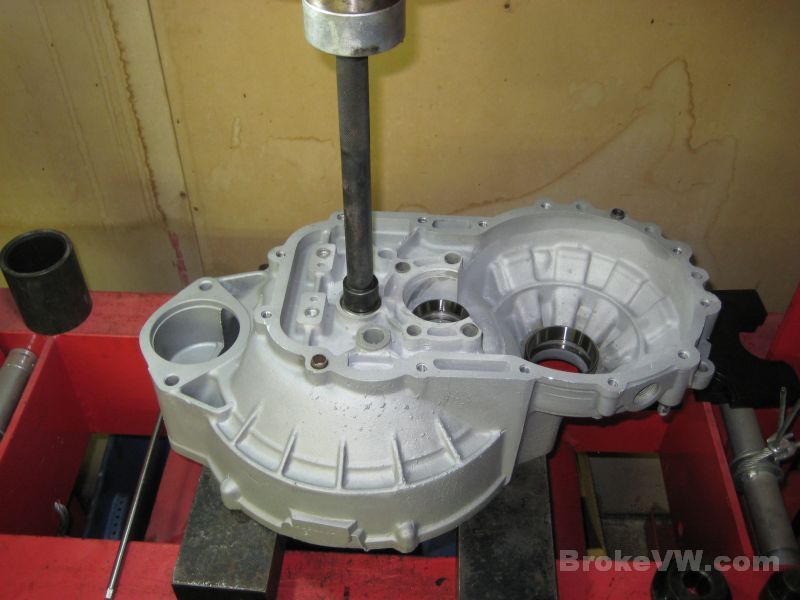
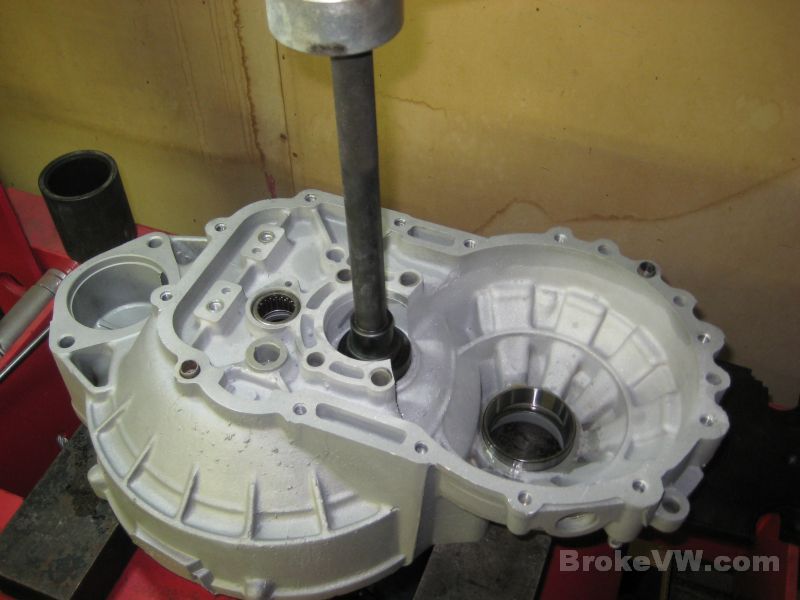
Time to work on the casings now, pressing in the bearings in the gearbox half of the casing. After doing so many, you get an idea of what shims will likely be needed so I basically guess for the output shaft shim in this step. Your trans has a 1.0mm shim installed. The input shaft ball bearing and output shaft roller bearings are also pressed in....
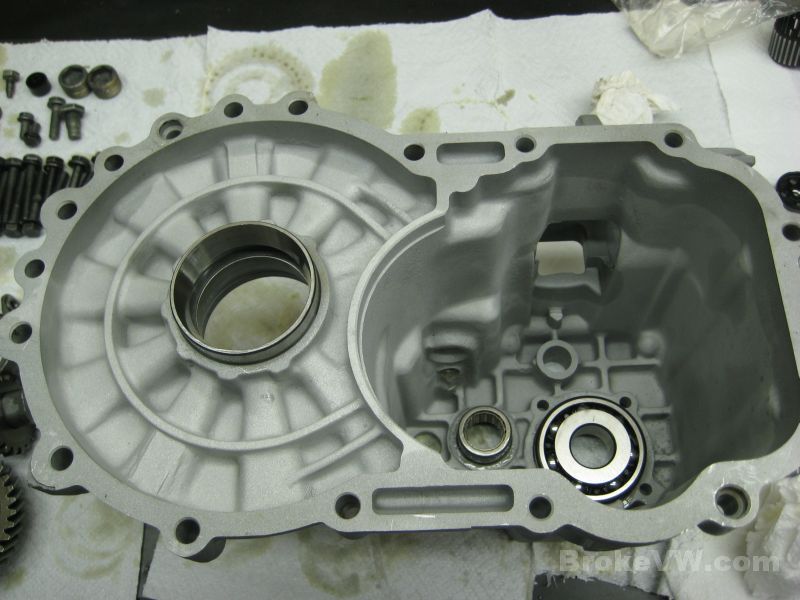
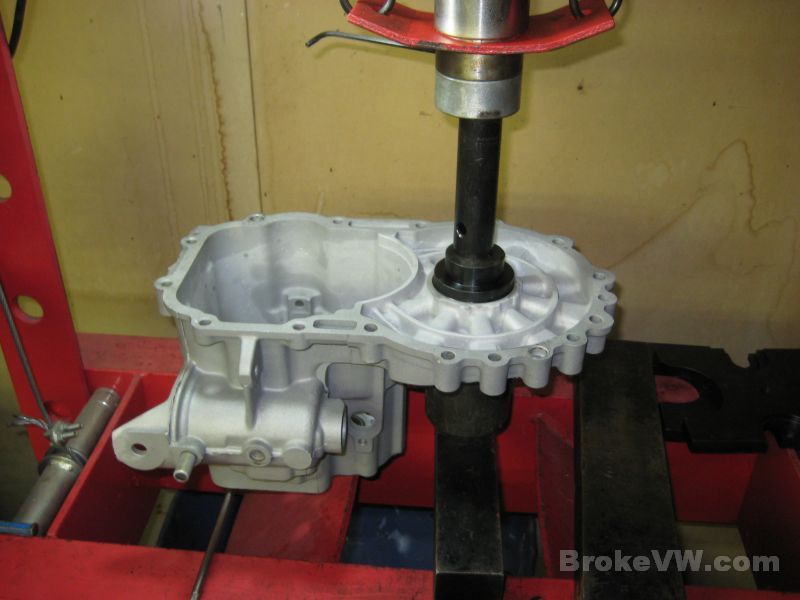
The retainer plate for the ball bearing is loosely installed at this point...
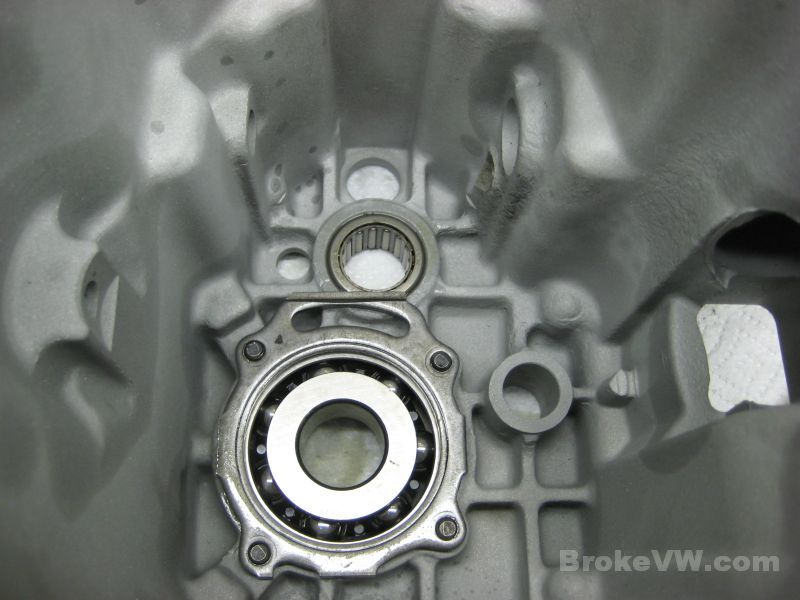
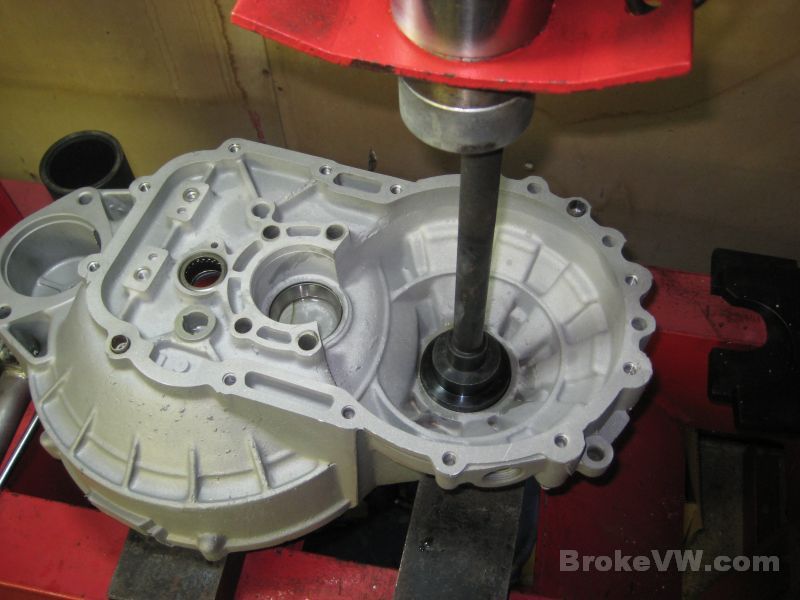
Same deal with the bellhousing... I'm using the old output shaft shim and hoping it brings it back into spec for the preload. The input roller and other diff race are also pressed in. There is a standard 1.0mm shim behind the diff race in the bellhousing...
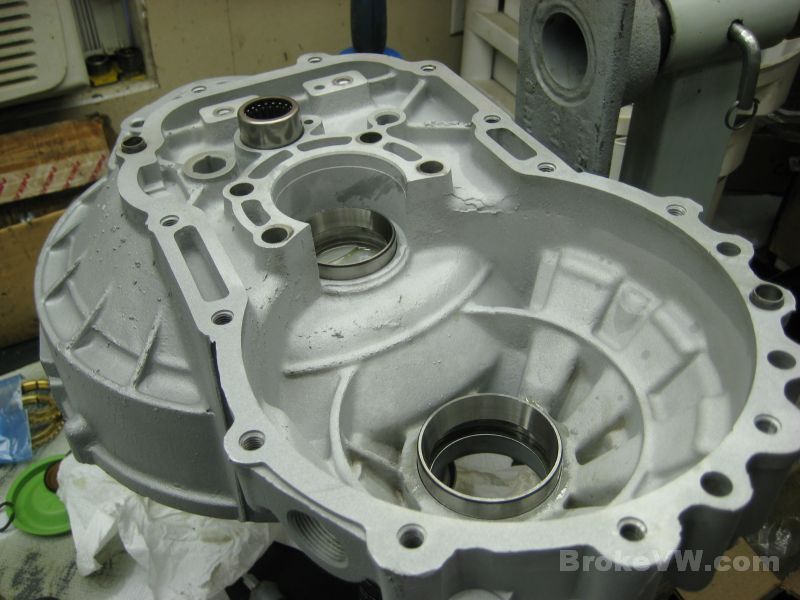
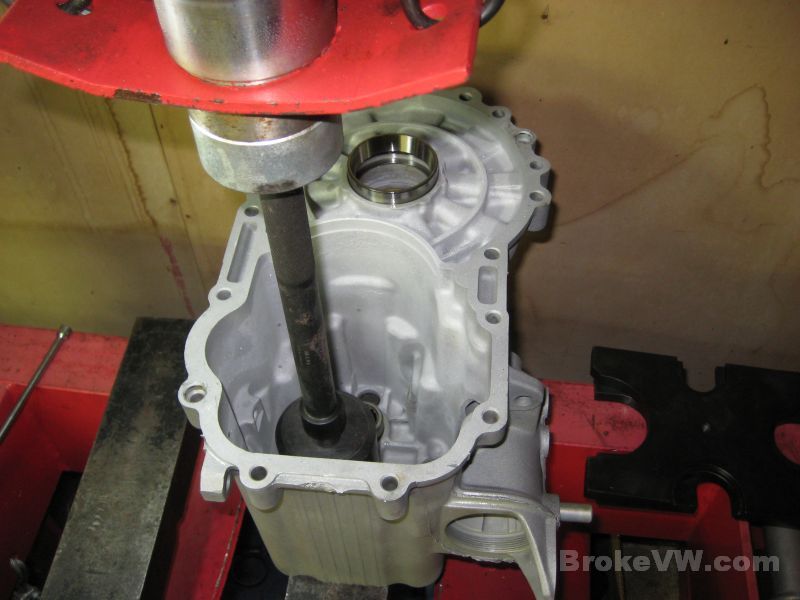
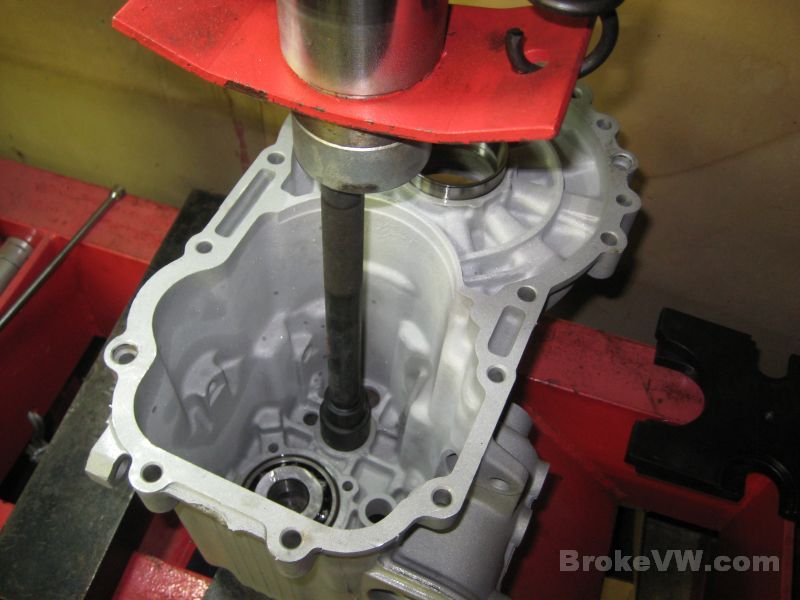
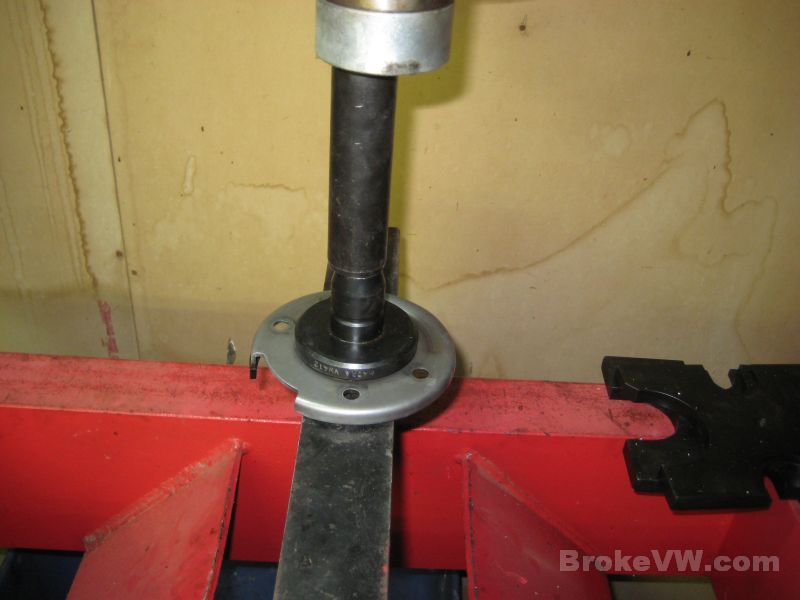
Pressing in the race for the large taper bearing on the output shaft bearing retainer plate...
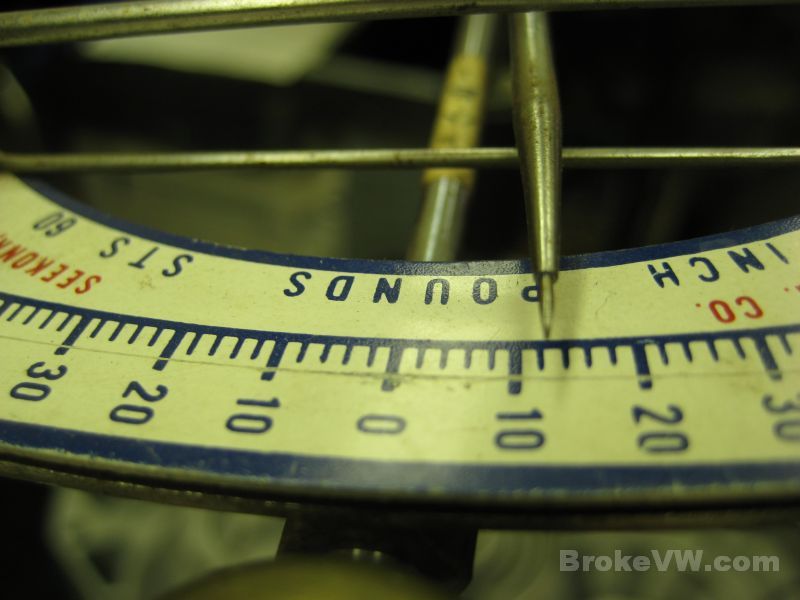
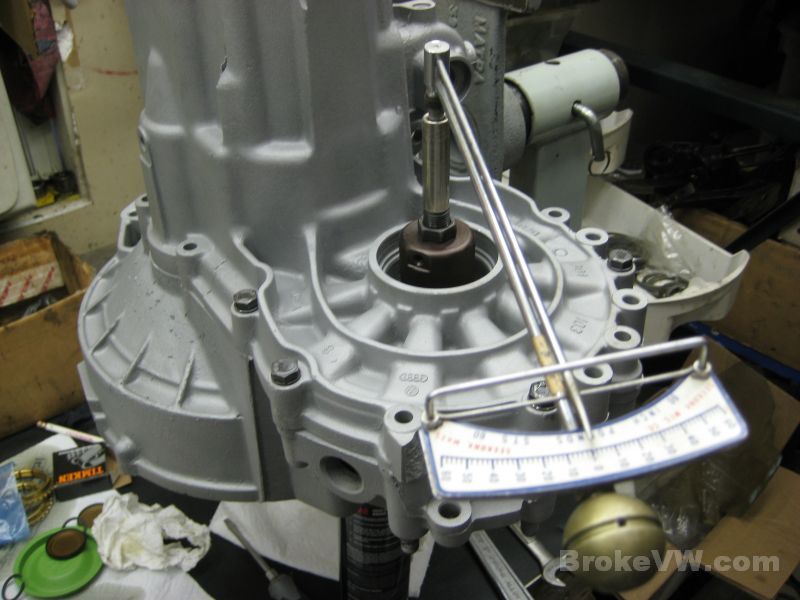
The output shaft turning torque is checked to make sure the preload is correct...
Spec is 4.4 to 13.3 in-lbs, and this is RIGHT at the top of the range. It is in spec, but it is too close to the limit for me... so I need to use a smaller shim....
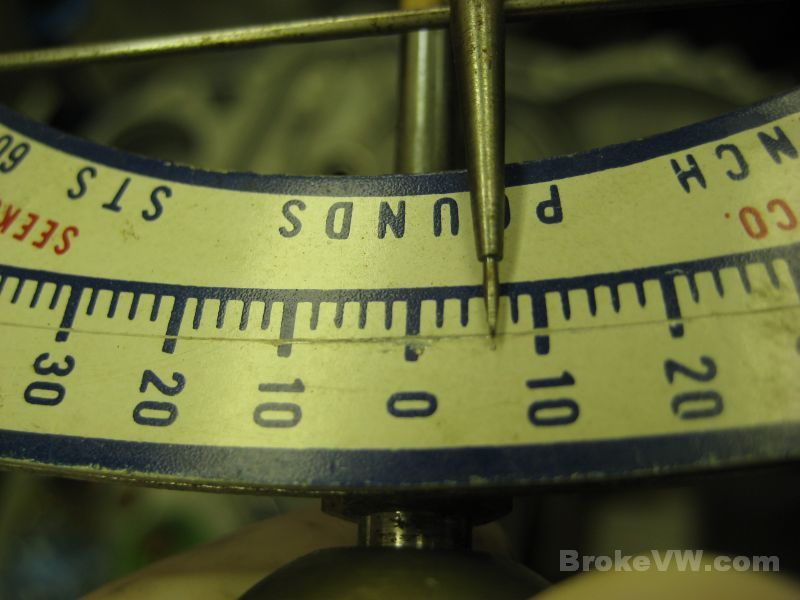
The new output shaft shim brings the turning torque down to within spec from VW at about 5-6 in-lbs, which is closer to the light end of the limit, but not as close as it was when it was right at 13+ in-lbs, so I'm happy with this preload...
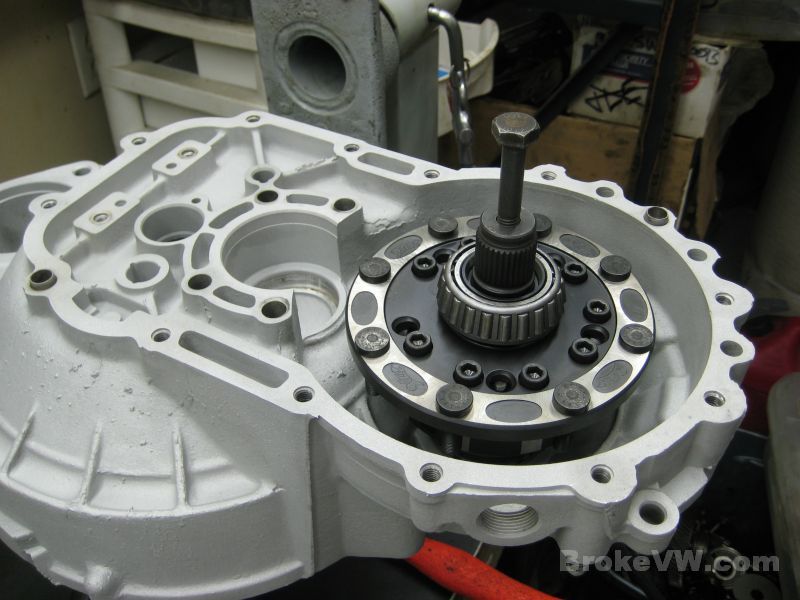
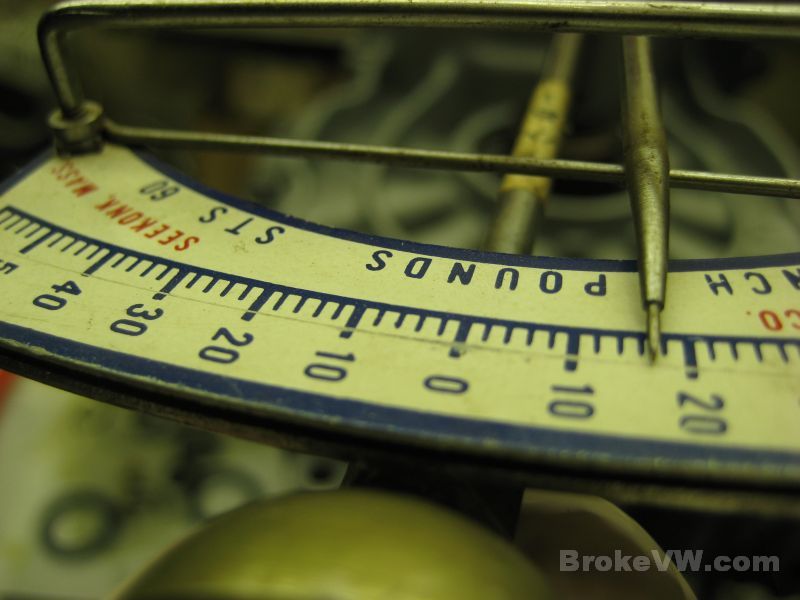
The diff is dropped in and the case tightened up with 5 bolts around the LSD, then the turning torque is checked....
It is reading between 16-18 in-lbs, and spec is 11-31 so it is good to go, I guessed correctly on the shims for the LSD. I normally guess right for the output shaft, but that's why they make inch-pound torque meters :)
With the preloads done, the input shaft is bolted in on top of the LSD and the parts are stuck into the case... the spring for the shift fork rod, the magnet is bonded in place with a dot of RTV silicone, the reverse relay levers are bolted in, then the new thrust washer, 1st gear needle, and 1st gear are installed onto the output shaft...

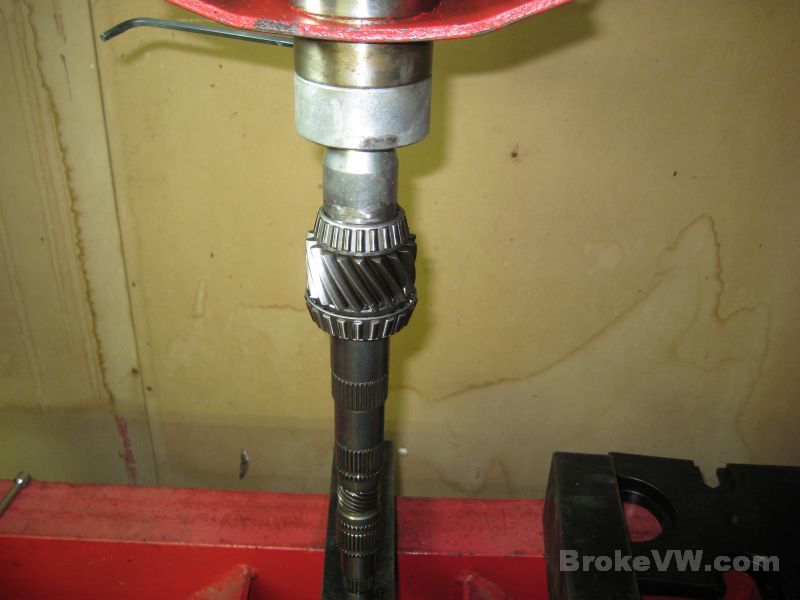
After heating the 1st/2nd sync hub, it is pressed onto the shaft, followed by the bearing race for the 2nd gear needle bearing...
The hub is assembled with the new keys and springs, and the sync ring for 2nd is installed followed by the 2nd gear needle bearing and then 2nd gear...
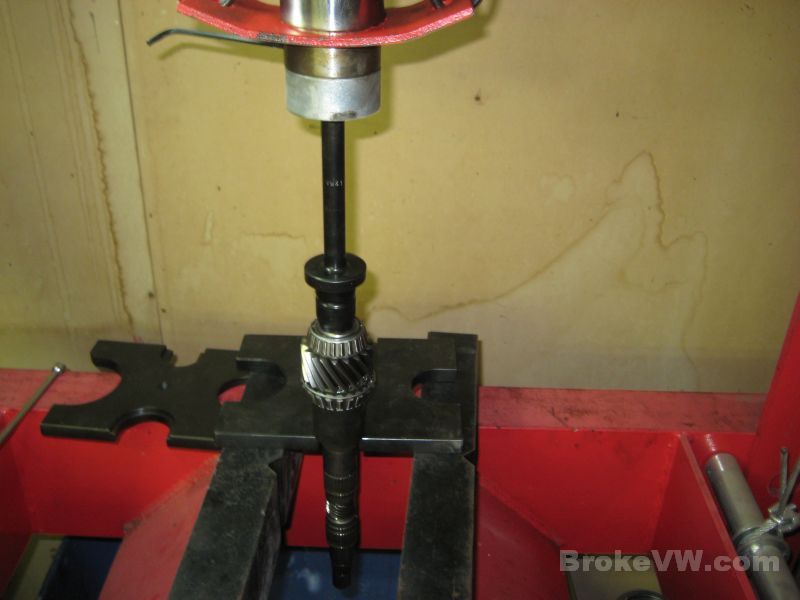
3rd gear is heated and installed...
Once cooled the adjusting 3rd gear circlip is used. VW offers them in various sizes, with most trans accepting the largest 3.0mm thick circlip. Some require only a 2.9mm or more rarely a 2.8mm but your trans accepted the 3.0mm circlip. With 3rd secured, the bottom circlip for 4th is installed, and the input shaft built earlier is dropped into place...
The shift forks are added now...
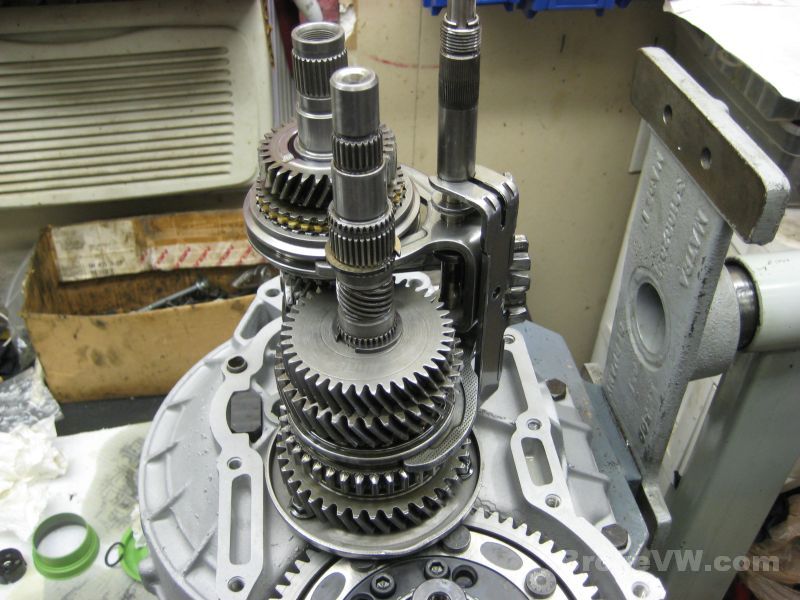
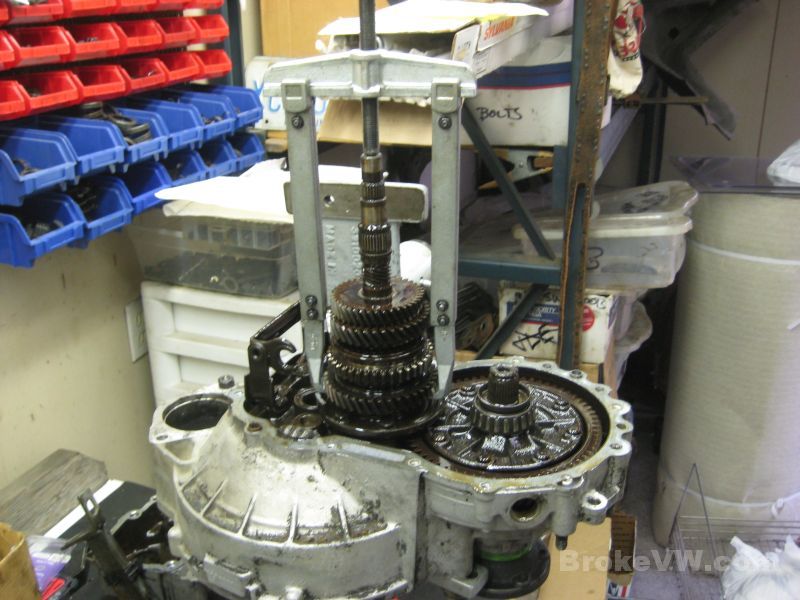
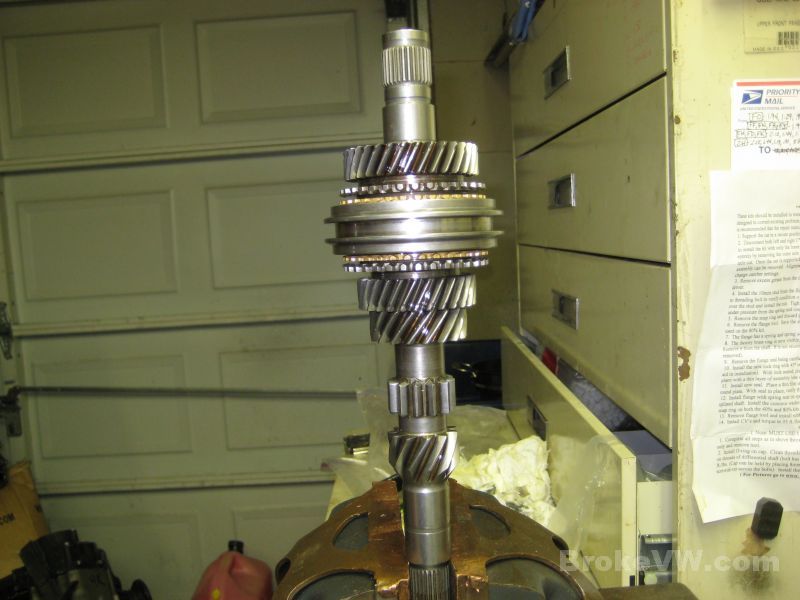
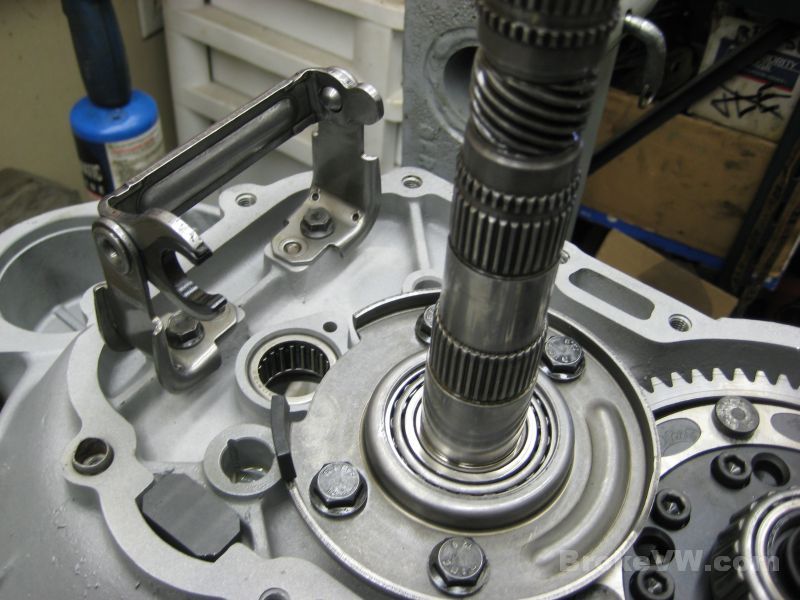
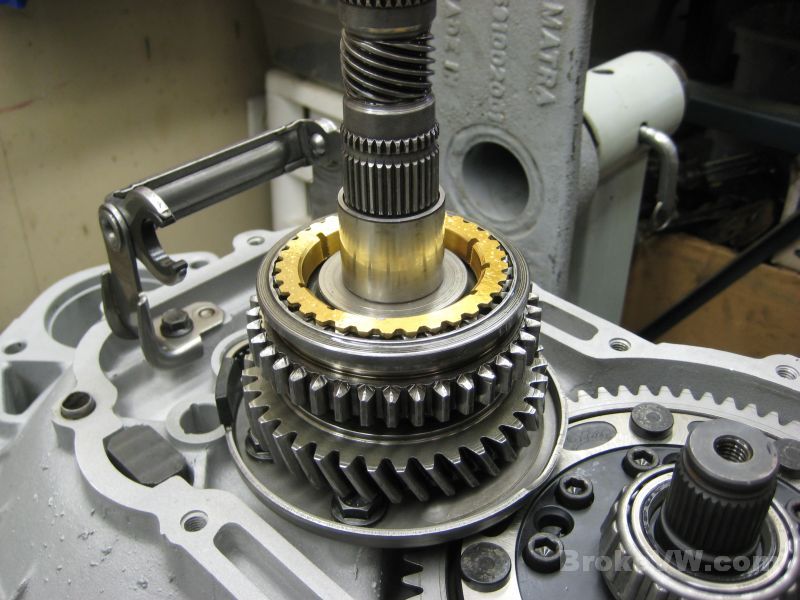
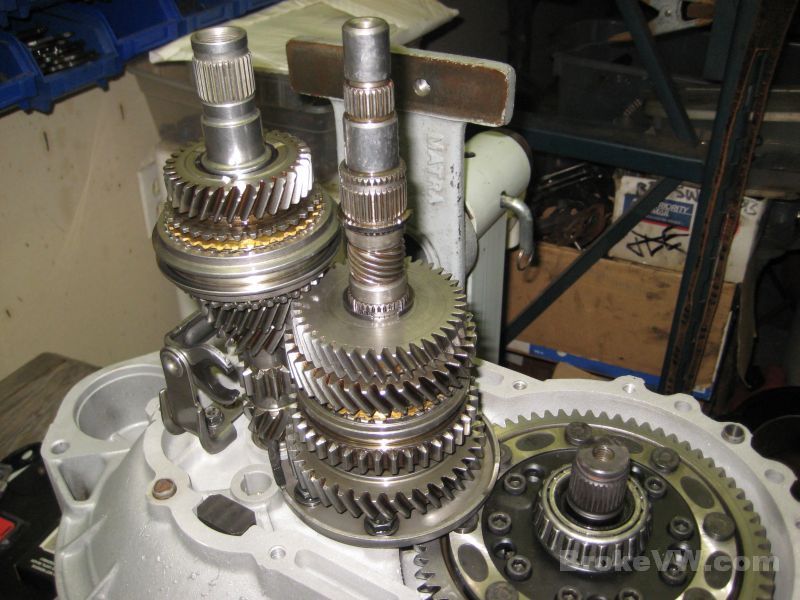
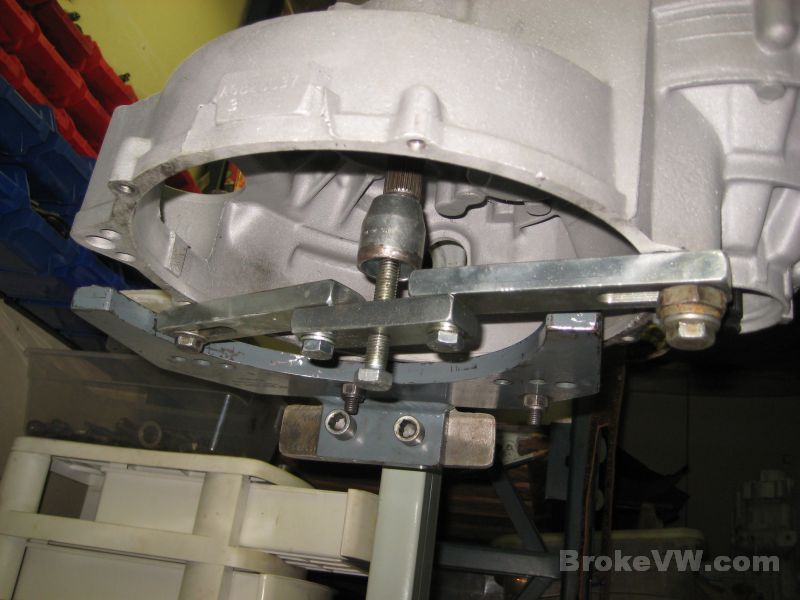
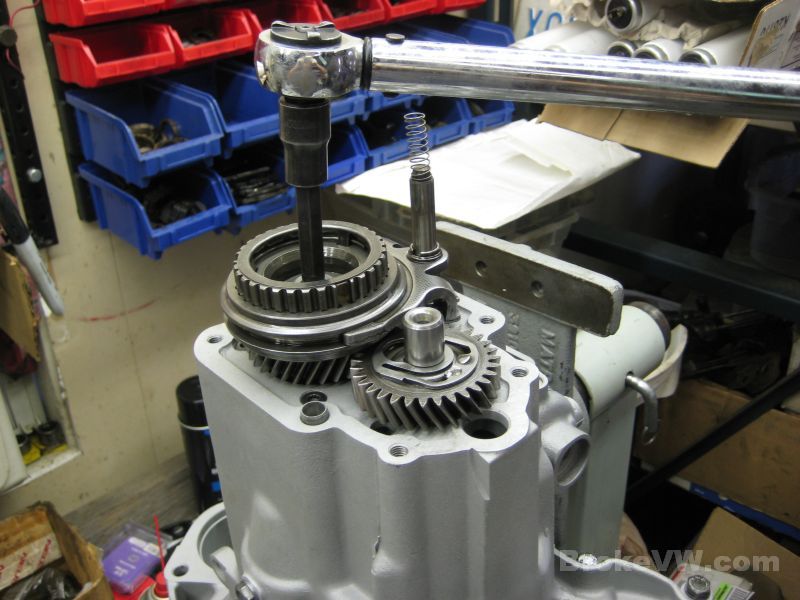
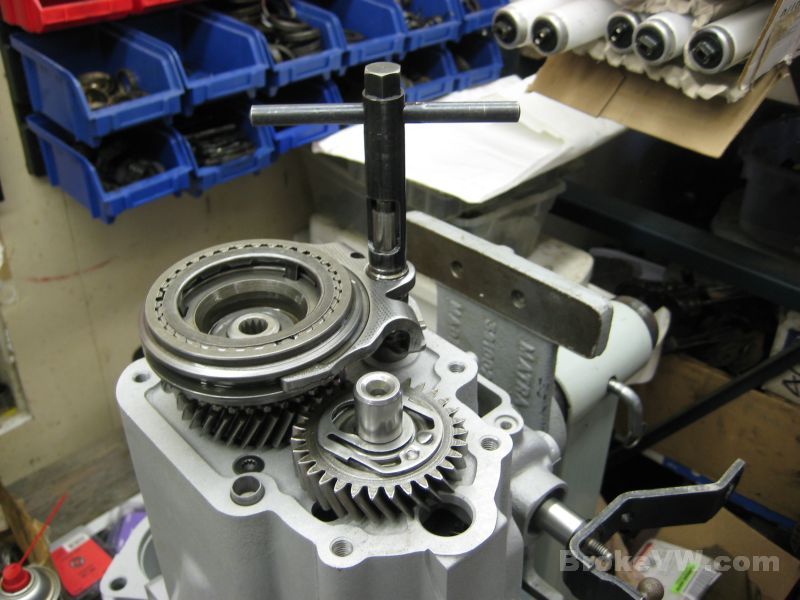
This is the alignment of the gears at this point. As you can see, it isn't very good. This is how a lot of people assemble their trans because of skipping the step of this next tool, which is pretty important. It is a support bar which is VERY heavy duty and stiff. It allows you to hold the shaft in one place, which is important when the time comes to press the casing together and shove the bearing onto the shaft. You don't want the press forces to go into anything but the shaft, then the HD support arm bolted across the bellhousing. This ensures no gears or bearings see any press forces that shouldn't....

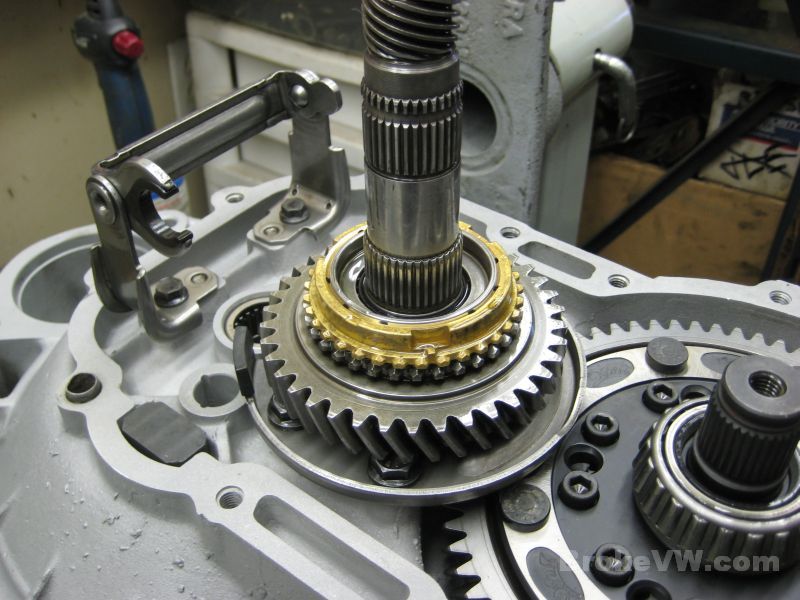
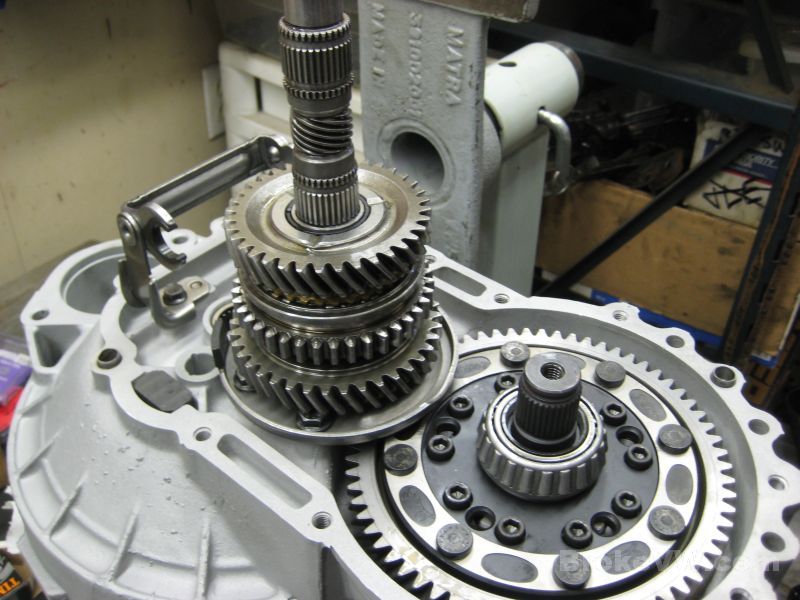
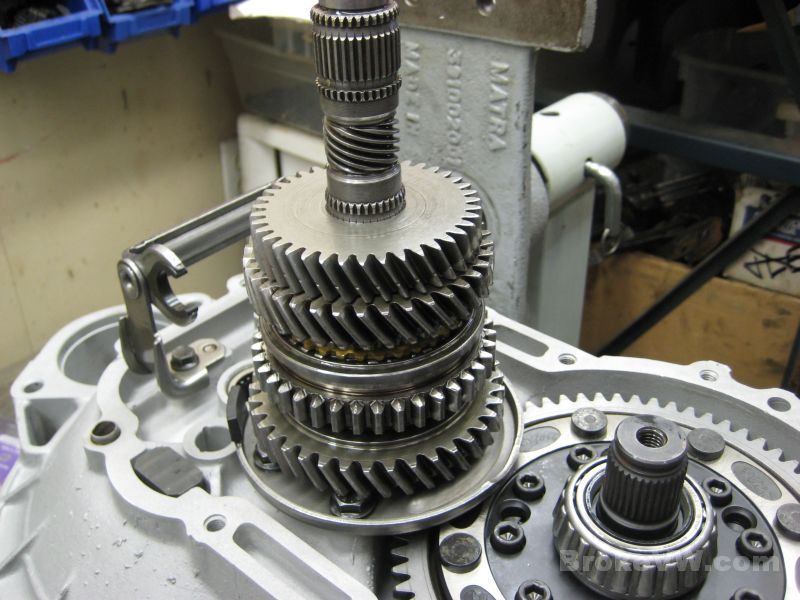
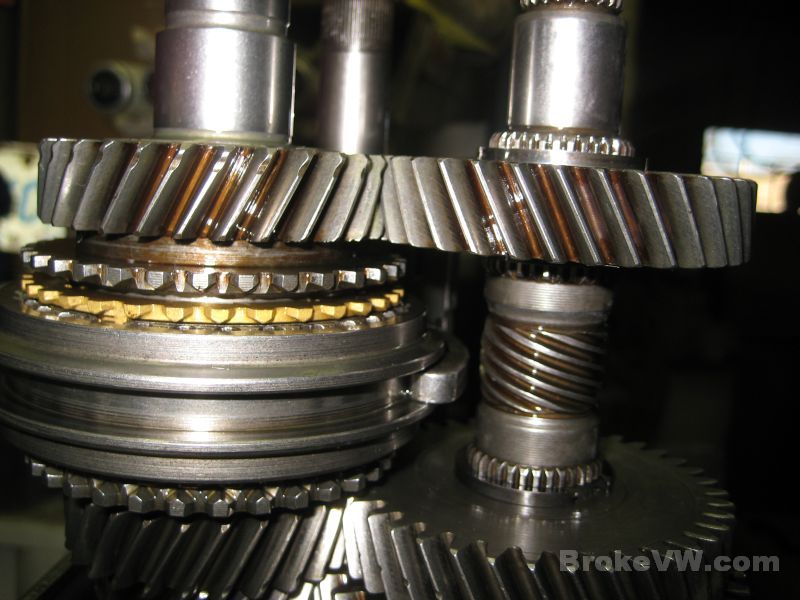
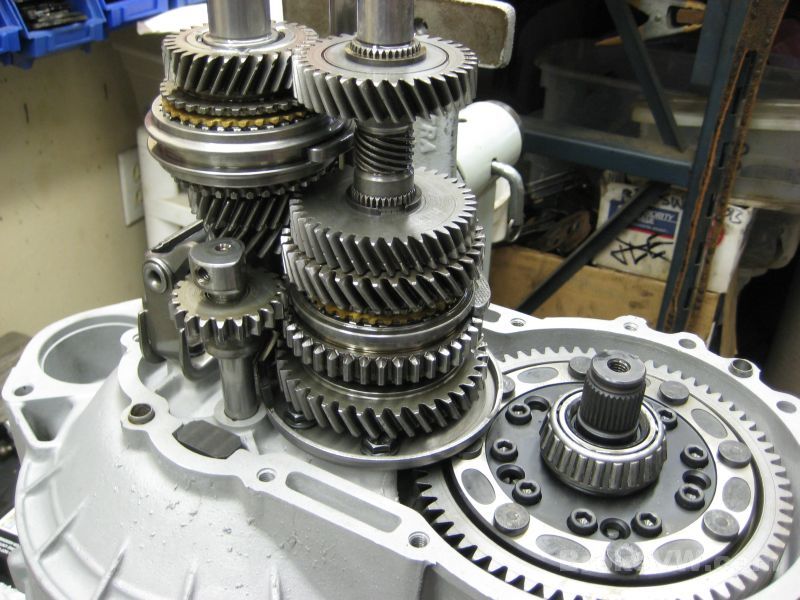
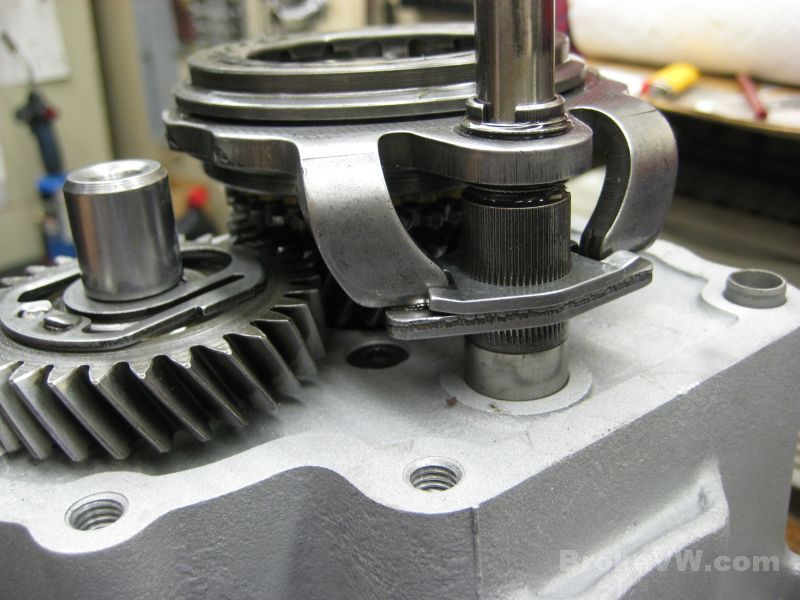
With the shaft adjusted, the gear alignment is much better...
The reverse idler gear and shaft are now installed...
The trans is ready to be closed up and sealed, but I've stopped working on it at the moment and will pick back up on it later. I'll email when I update the page again.
Update 12/26/11
I have the trans casing closed up and 5th gears on. I had planned to get it finished today but have ran into a small snag with the axle flanges.
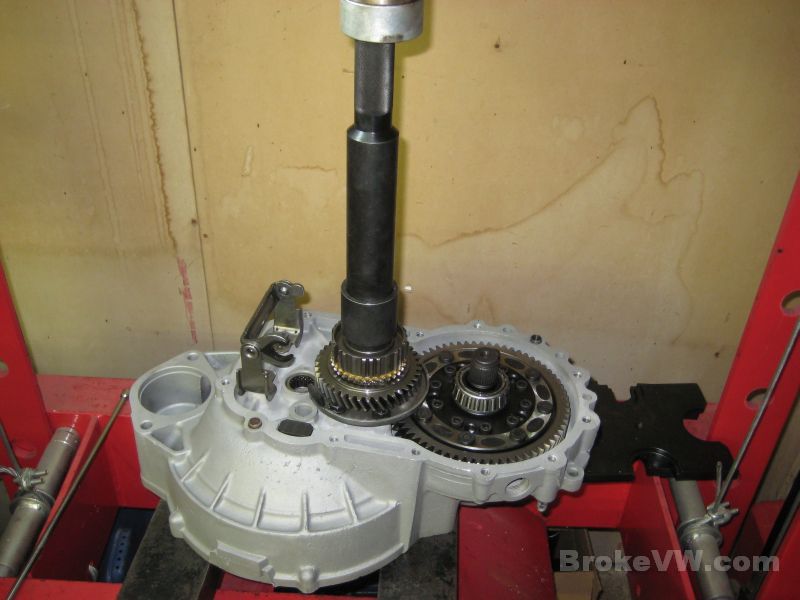
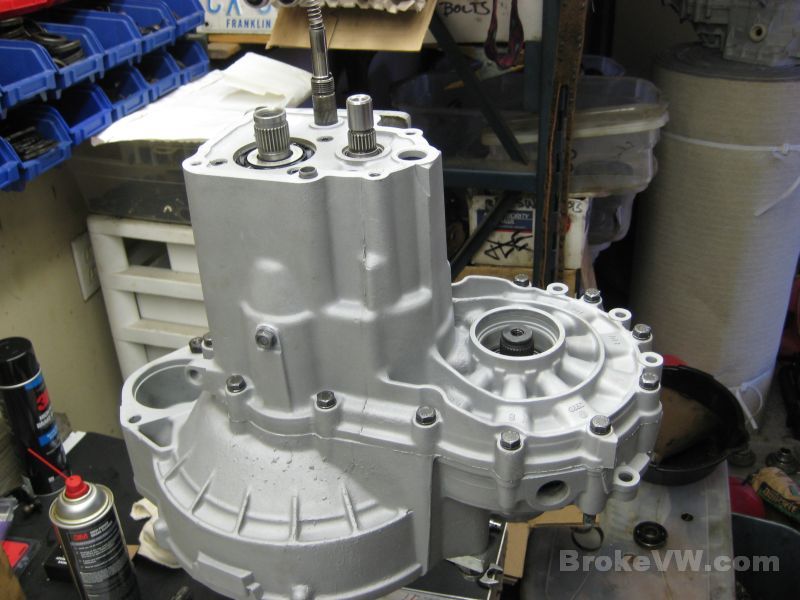
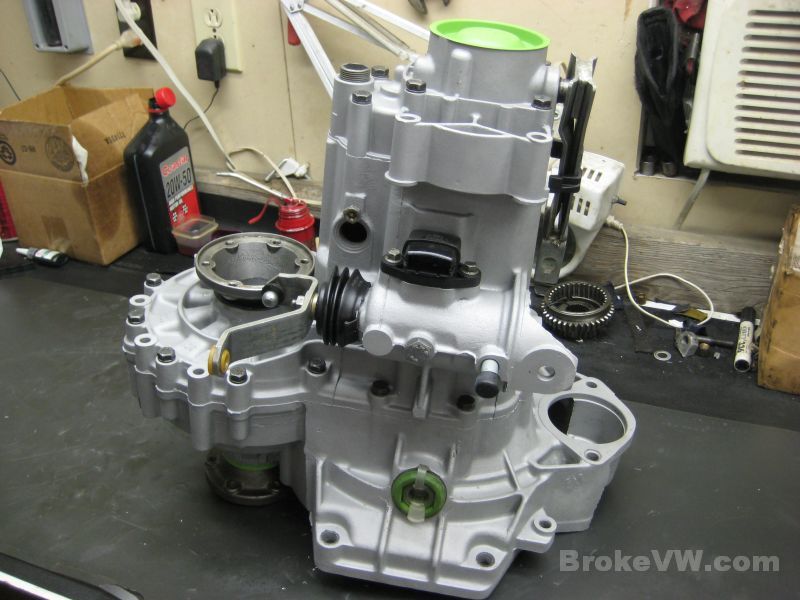
I don't have any pics of pressing the casing together because it is heavy and awkward to carry from the rotisserie to the shop press and back, and I don't have a lot of time once the case sealant is applied, so here it is pressed together...
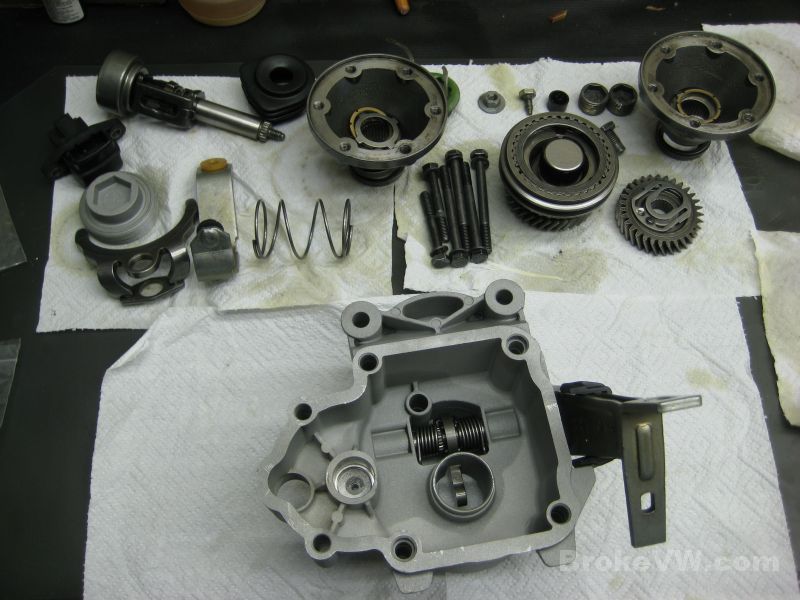
This is what's left to install...
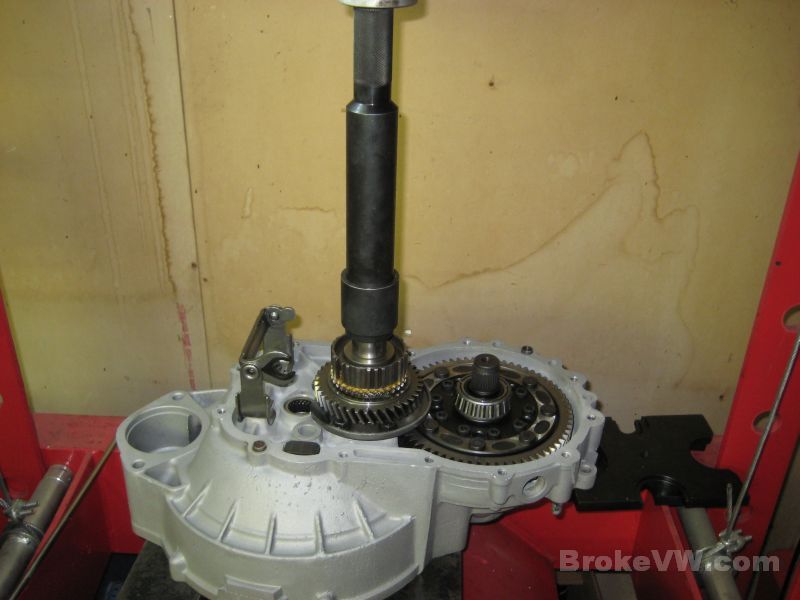
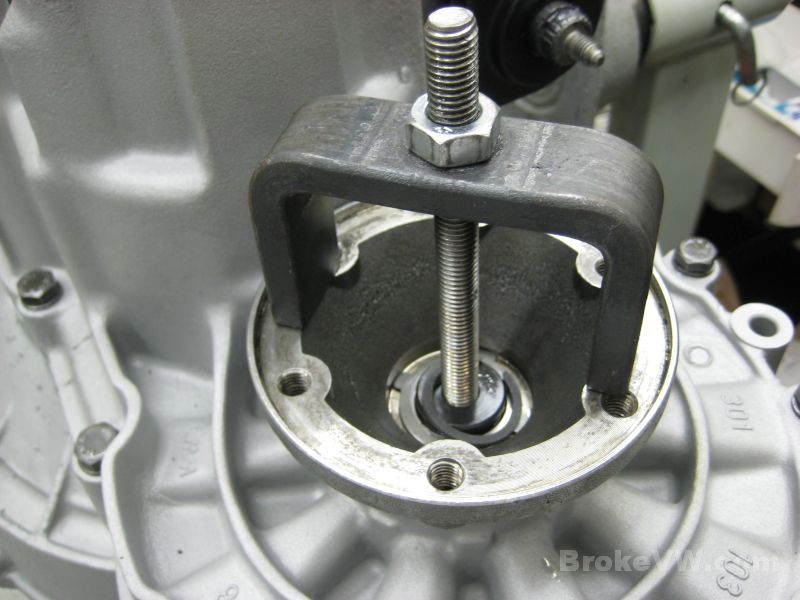
Installing the 5th bolt to 111 ft-lbs, it is what holds the input shaft in place. The trans is locked up so no shafts can move by selecting 2 gears at once, reverse and 5th.... once the shaft is locked up, the bolt can be tightened fully...
Once the 5th bolt is tightened up, if everything goes correctly, the support for the input shaft shouldn't have any pressure on it, or very little. You can see the support has slipped to one side because it loosened up like it should once 5th was tightened up...
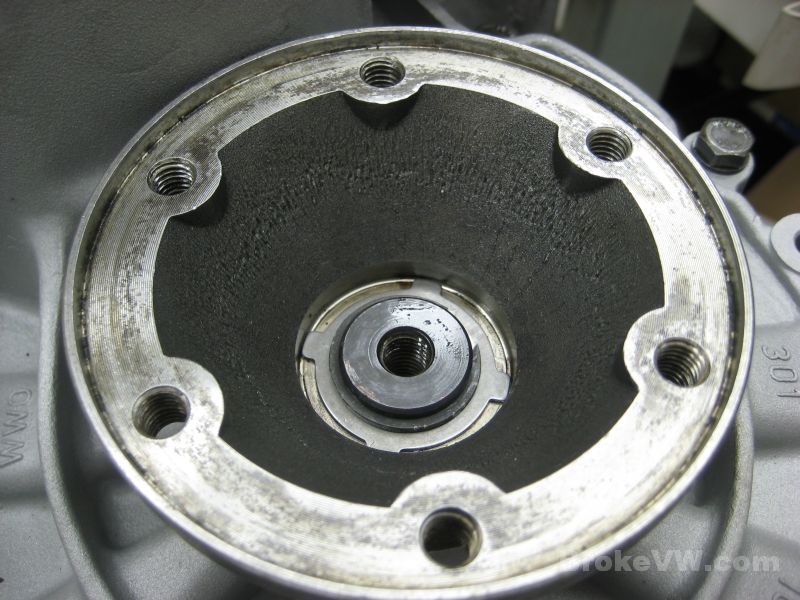
Adjustment of the 5th fork is needed to ensure it fully selects the gear, and also to prevent the fork from rubbing on the sleeve when in or out of gear...
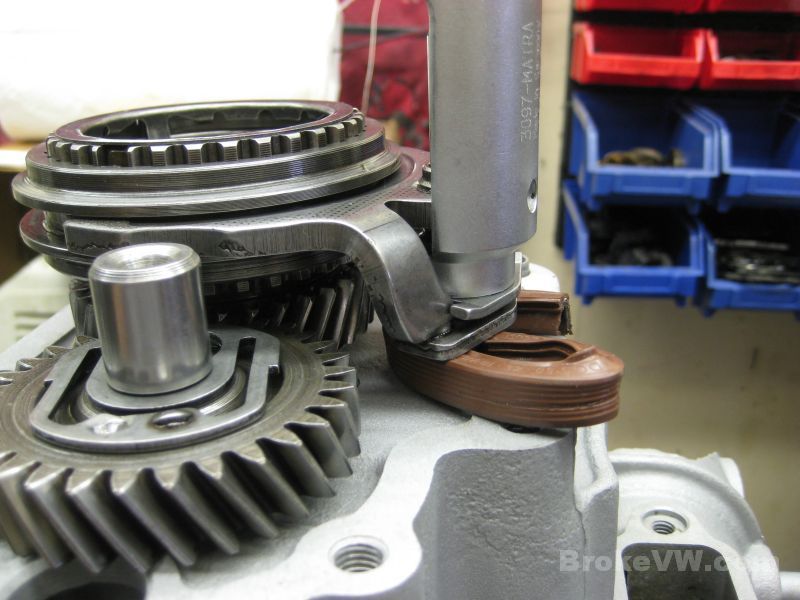
The fork is locked in place with a press-on lock plate. To install it, VW states to put 19mm of support under the fork and on top of the case but they specify not to damage the sealing surface so I made a tool for the job that works really well...
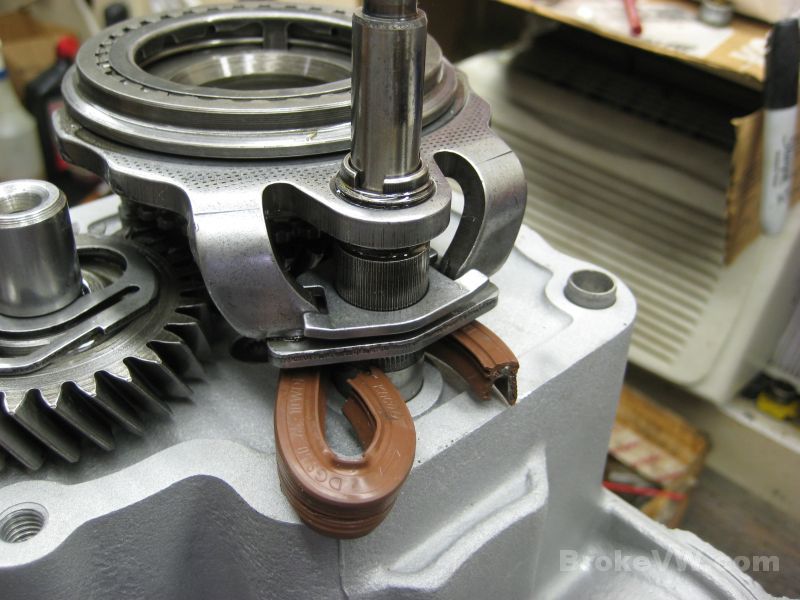
The tool is an old axle flange cut and folded to hook around the shift fork tube, under the fork, and the rubber coating protects the casing. The steel inside the seal does the supporting so the hammering to seat the lock plate isn't sent into the fork or selector assemblies. The VW special tool fits over the plate and presses it flat to the fork...
I've installed a support bearing in the 5th housing. VW procedure calls for the old bearing to be removed and discarded if faulty, they no longer require that bearing to be used. As a result, the original mfg. (FAG/INA) in Germany quit making it. I looked and located another bearing made by the same folks in Germany, but it isn't a drawn cup that is retained with a bolt. This bearing is an open end roller bearing pressed into the 5th housing. It is also cryo treated...
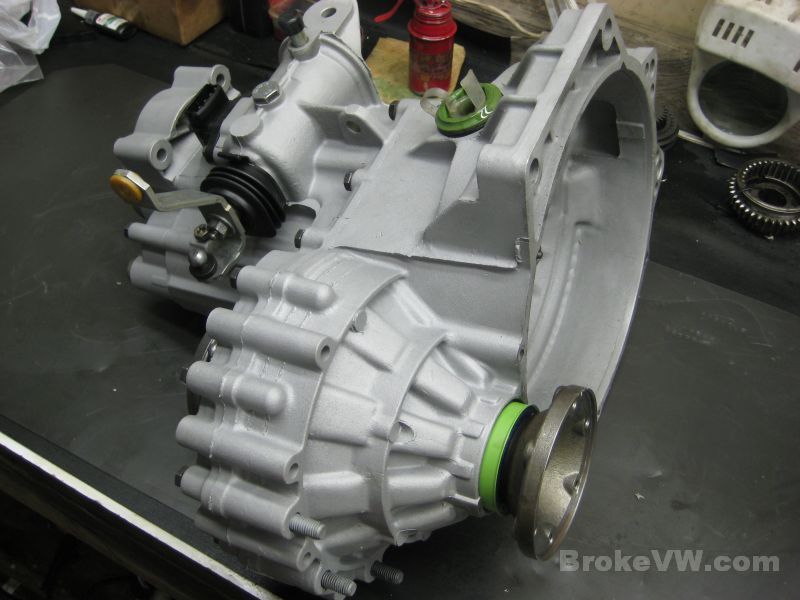
The 5th housing installed and bolted into place...
The selector shaft seal installed, along with the shaft being greased per the VW procedure before the boot is installed...
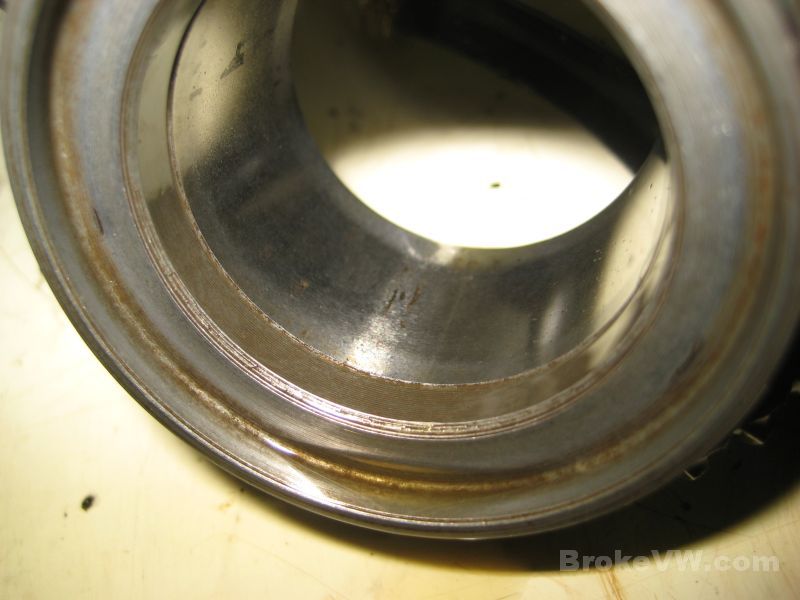
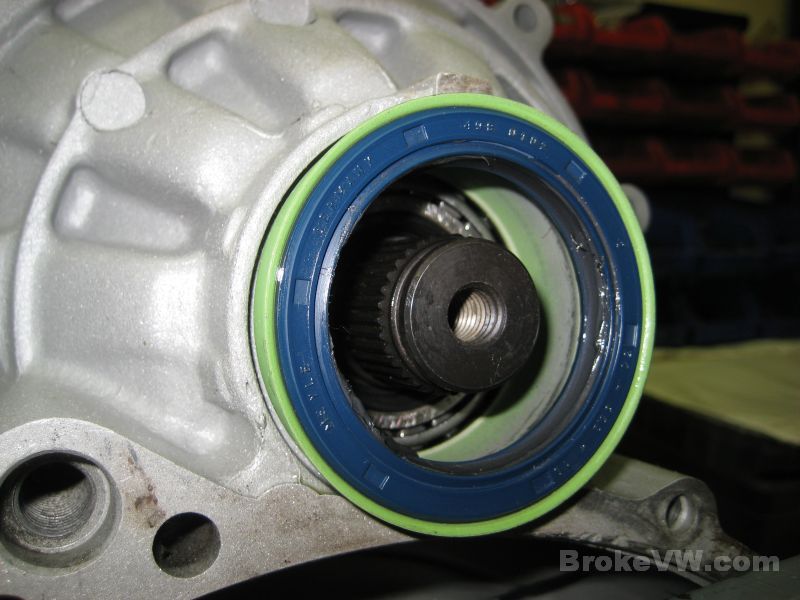
The drivers side flange seal installed, and that is where I ran into the snag...
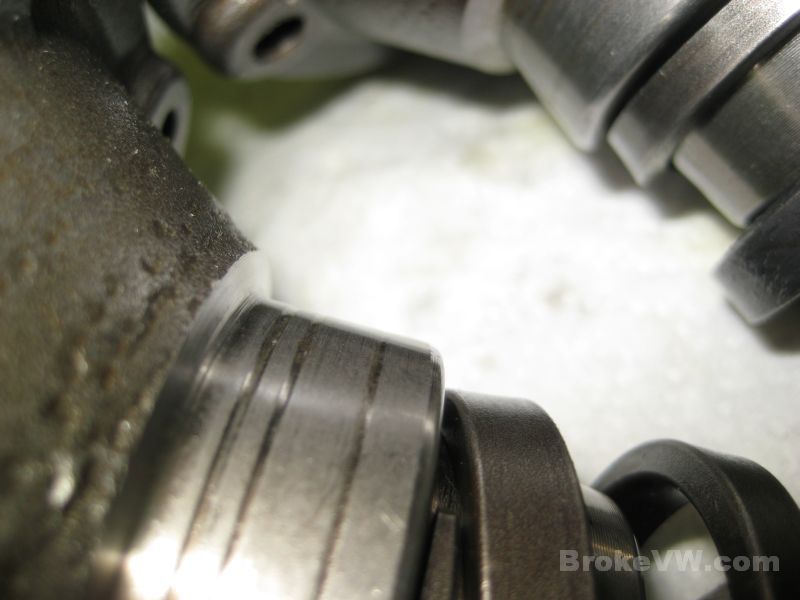
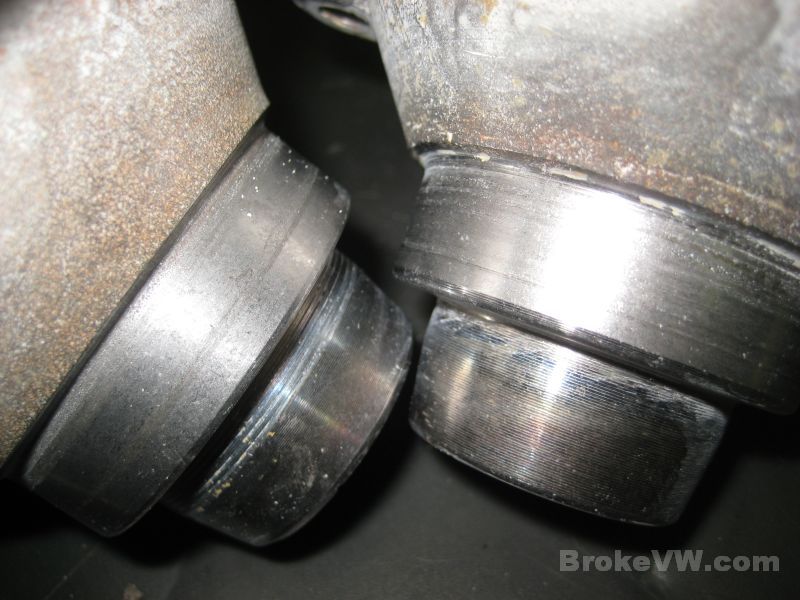
These are your flanges... the one on the right looks fine to use, the other has some fairly deep groove wear from the seal lips...
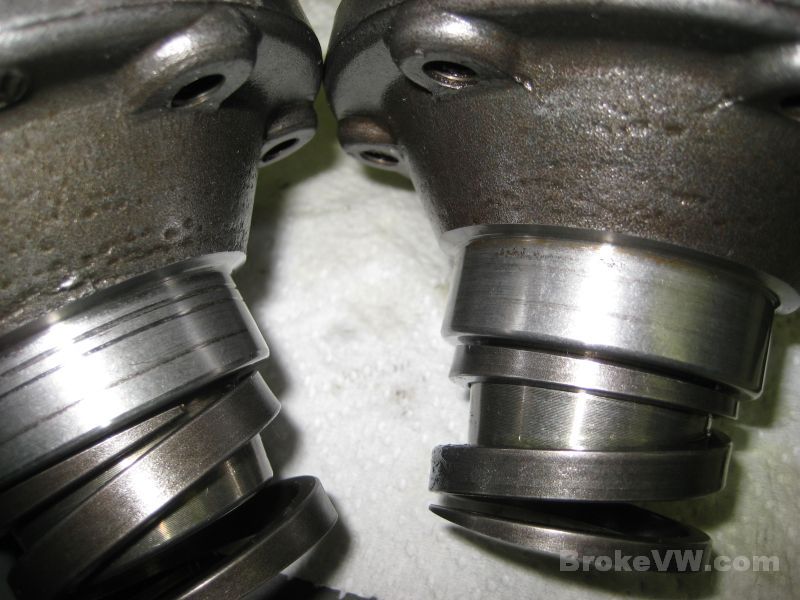
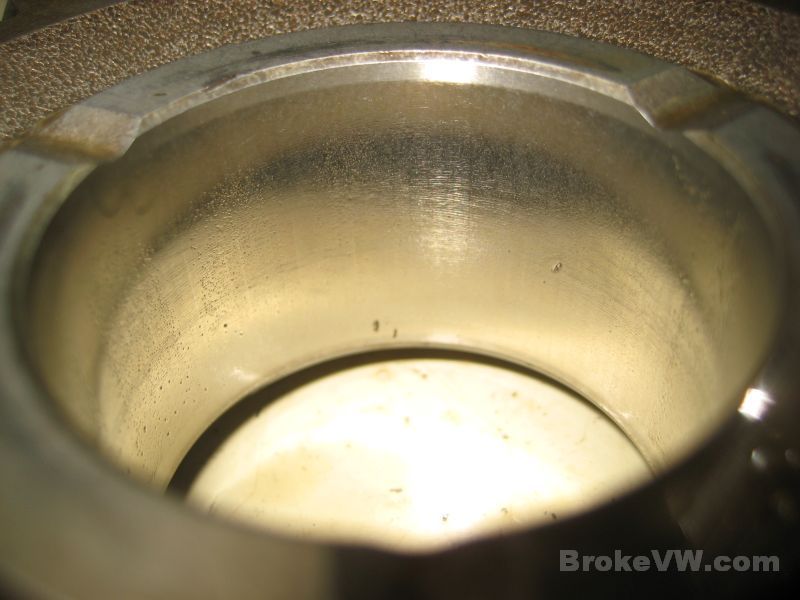
Here are a couple used flanges I have handy that look to be in better shape...
Update 12/29/11
The trans is done, I've installed a good used flange and have everything built. I still need to box it up securely so I'll take care of that in the next few days.
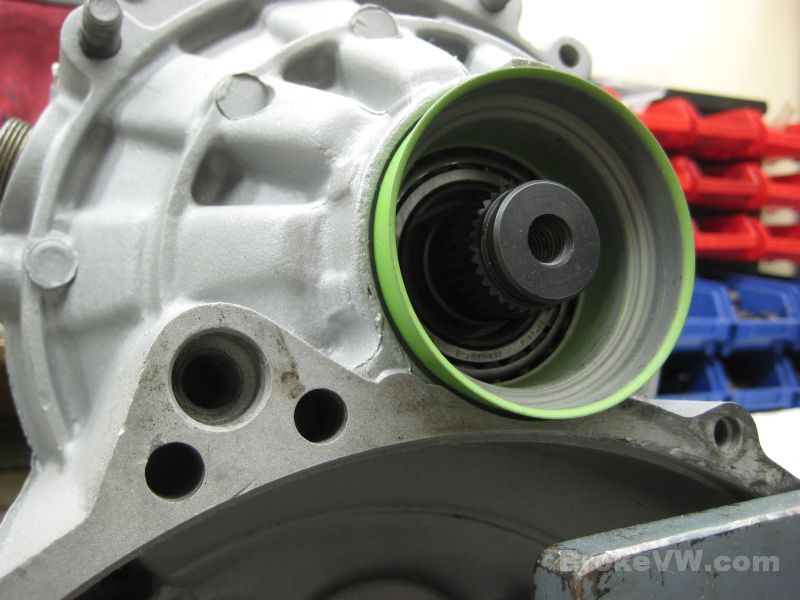
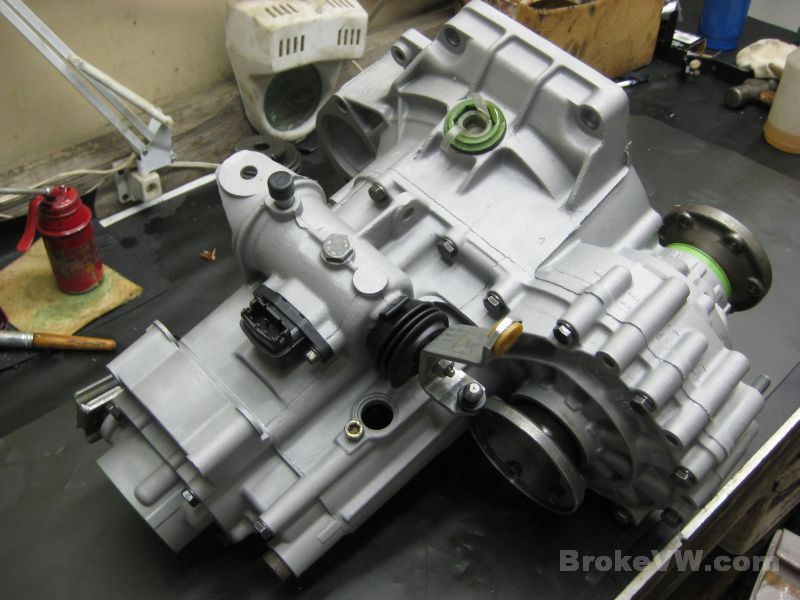
With the flanges heating up in the oven so they can be installed, the flange seals can be installed, starting with the green seal sleeve on the passenger side then the flange seal...
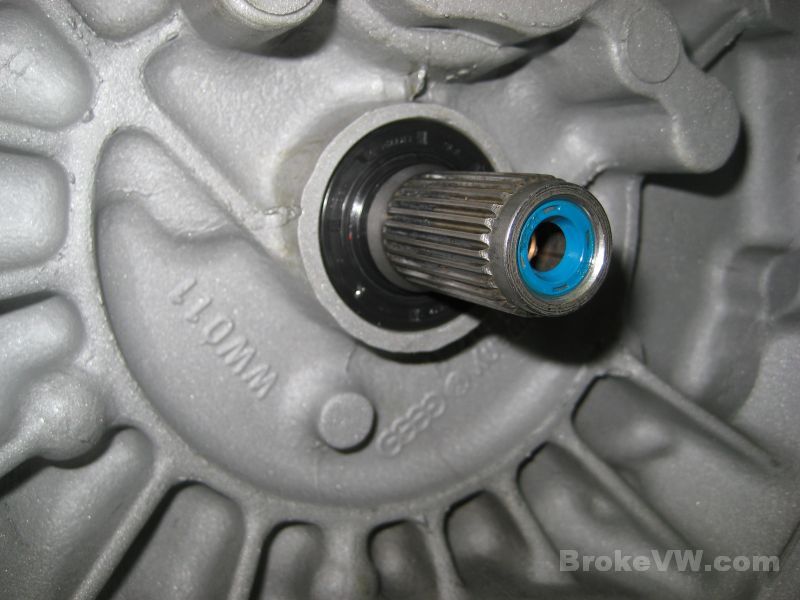
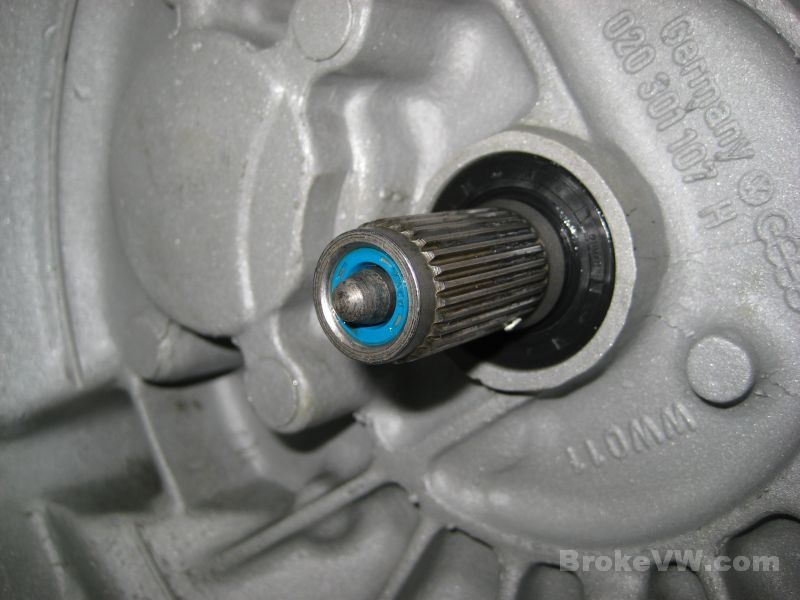
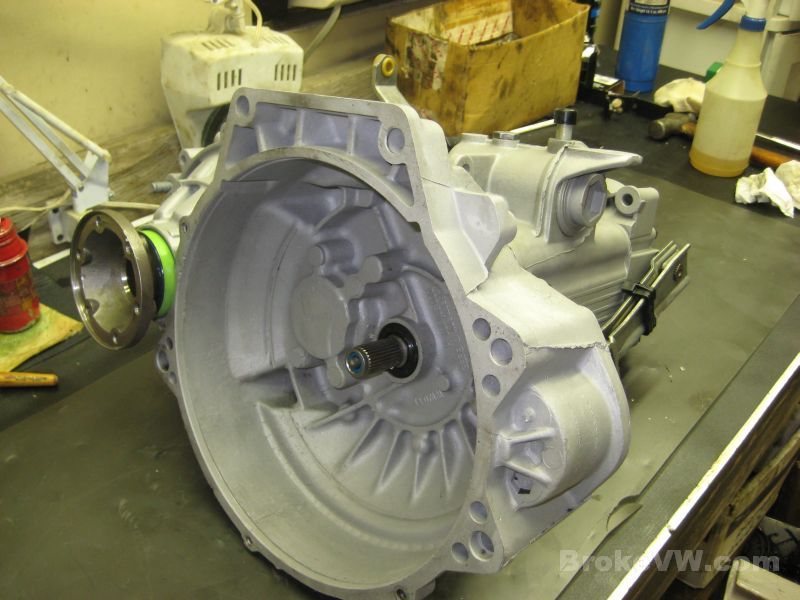
The input shaft seal is installed and the pushrod slid into place...
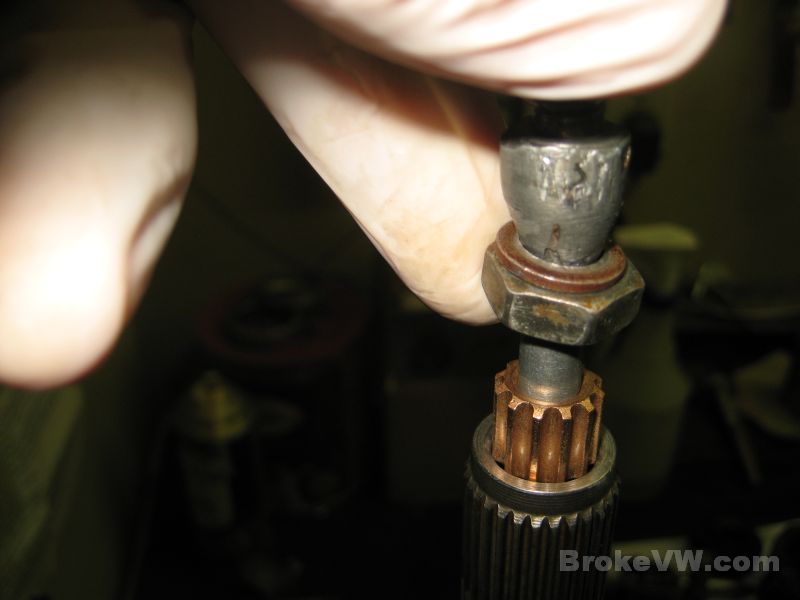
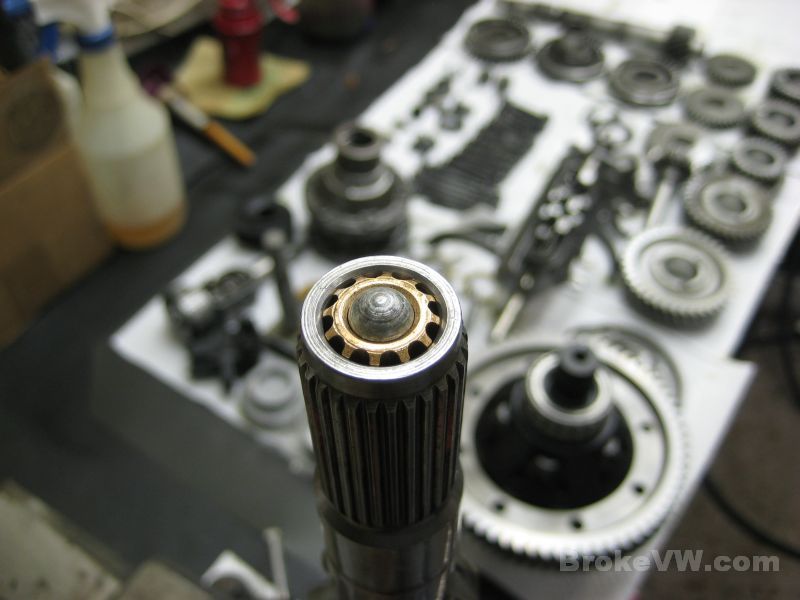
The starter bushing is installed with my old rusty ebay tool... it works wonderfully though, supporting the diameter of the bushing during the install so it doesn't distort. A neat trick for porous materials like this bronze bushing is to pre-oil the metal by impregnating it. Hold the bushing on your thumb so you cover one end of it. Fill it with oil until it is completely full. Put your finger over the other end of the bushing, and squeeze hard. Your finger and thumb will squish into the bushing a bit... since it is full of oil, and liquids do not compress, you end up forcing the oil through the bushing walls. It will 'sweat' the oil out in ultra tiny droplets as it passes through the metal, then it'll converge on the other side but you can watch it sweat the oil as you squeeze. Dump the oil out, wipe it down, and the bronze (which is used because it is a self-lubricating metal) is now oil impregnated and even more self-lubricating than when dry.

Installing the heated flanges, which turned out to be a lot easier than I expected. They gave a small bit of fight at first, then went on fairly easily, so after a few hundred miles on them they'll be easier to get on and off if you ever need to do so...
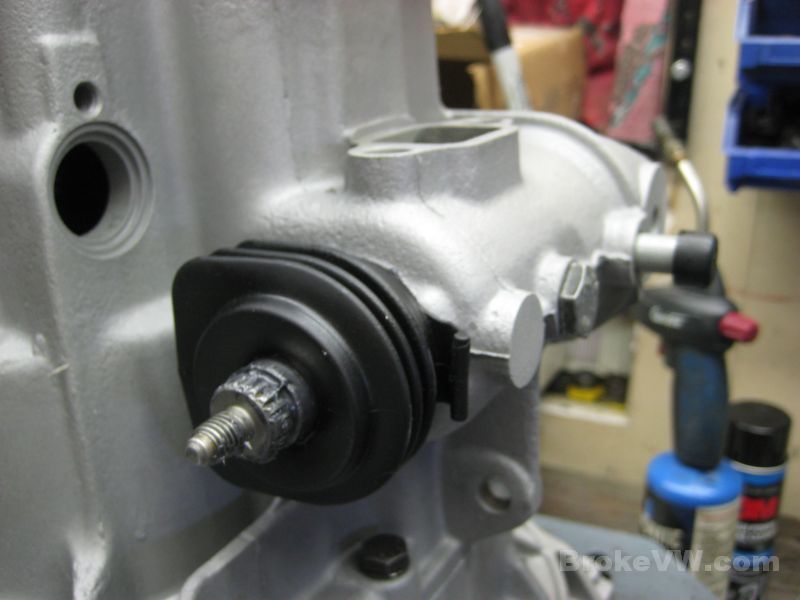
The flange is secured with a concave washer and a new circlip, then it gets sealed with a center cap seal...
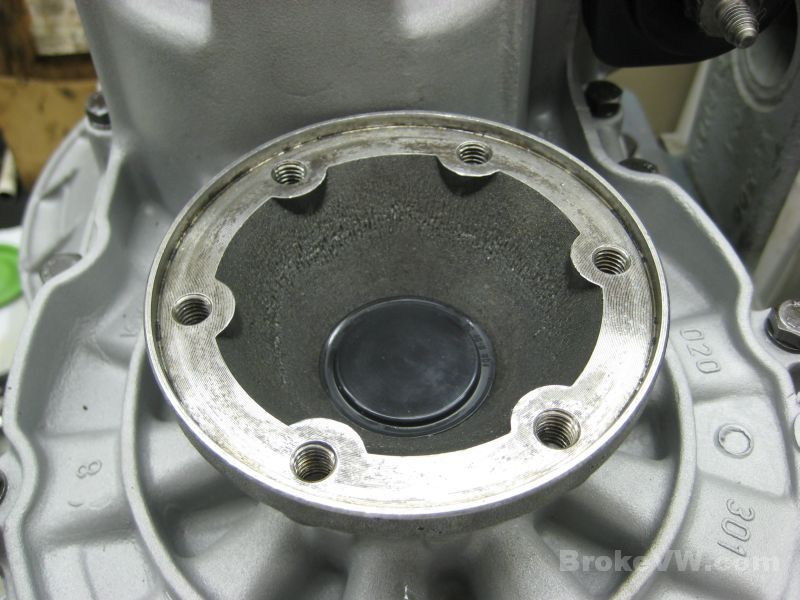
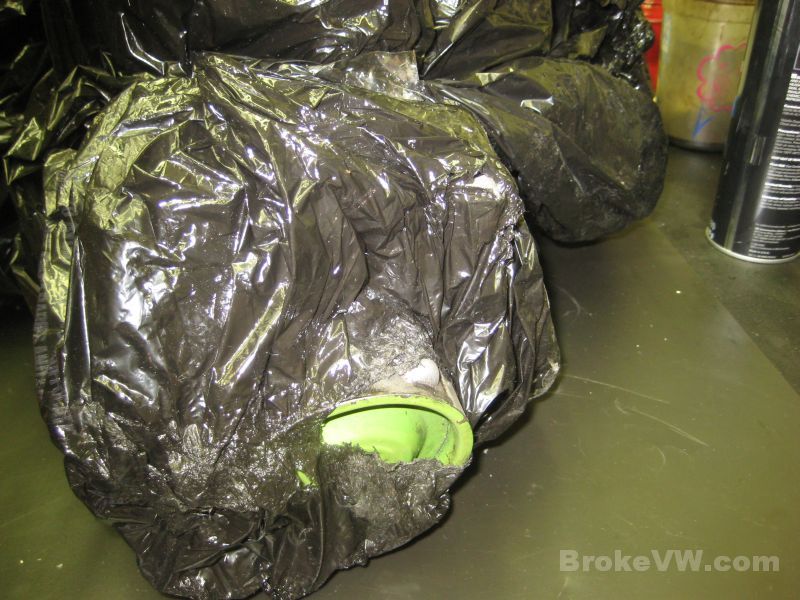
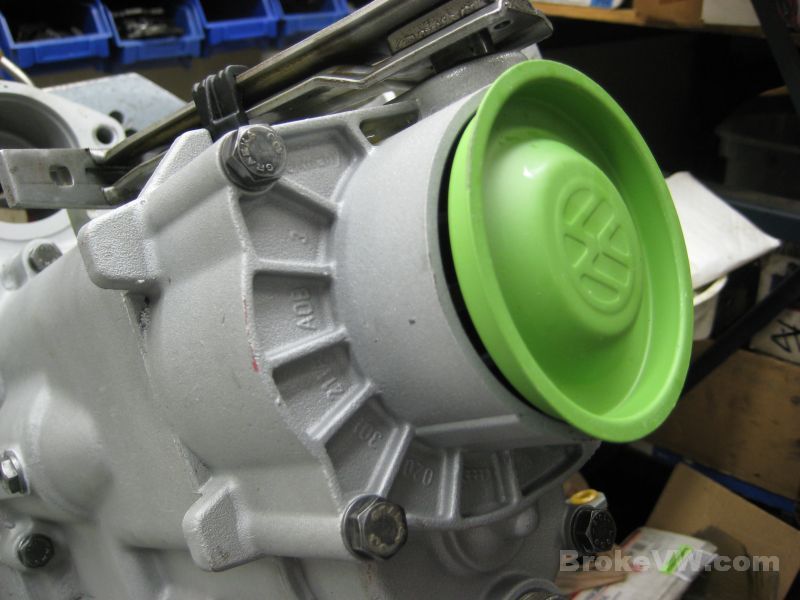
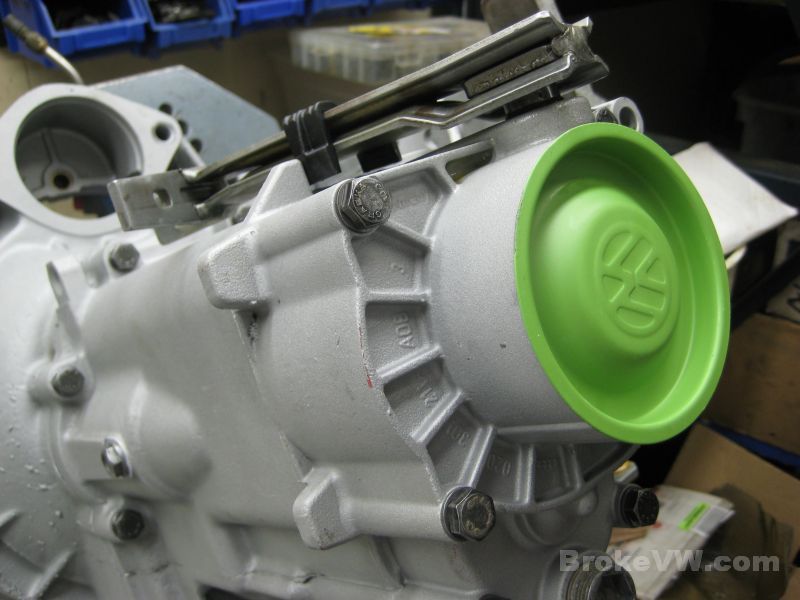
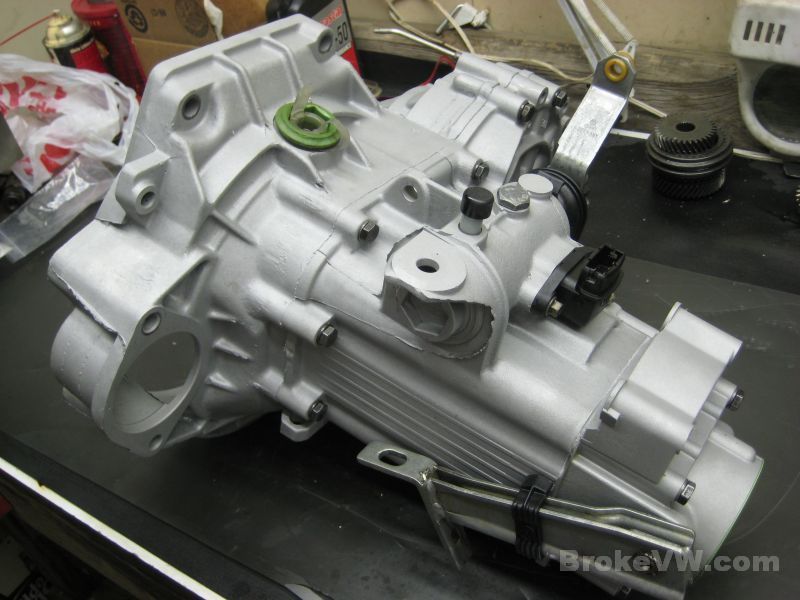
The last part to install would be the green end cap, and the trans is finished...
Almost finished. Someone bought me a 1/8" stamping set for
Christmas, and was quite eager to see it used 'for real' and wasn't happy with
my stamping everything in the garage, so... I've stamped your trans.
It doesn't look so good. Sorry about that :)
Apparently one sharp strike isn't enough, they tend to move when you try to hit
them more than once, and trying to keep them lined is more difficult than it
looks..... so there is my explanation/excuse!
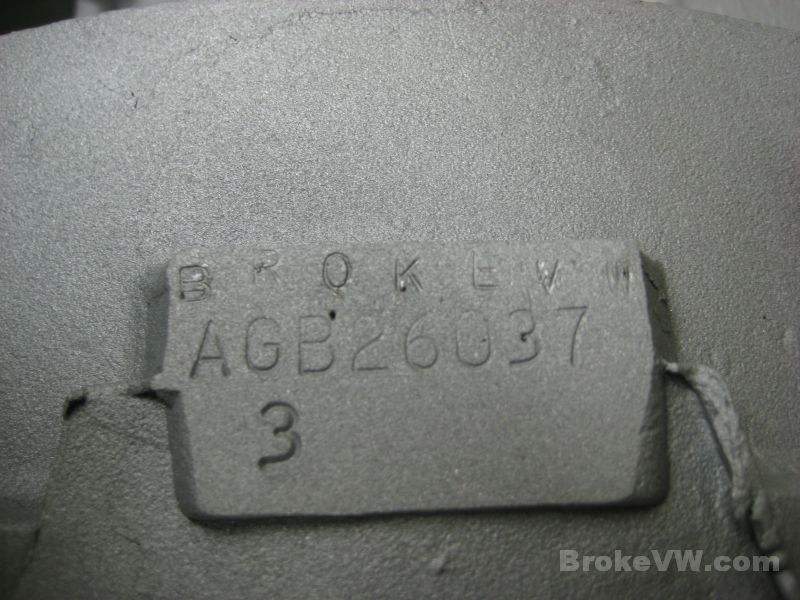
And here is how it turned out...
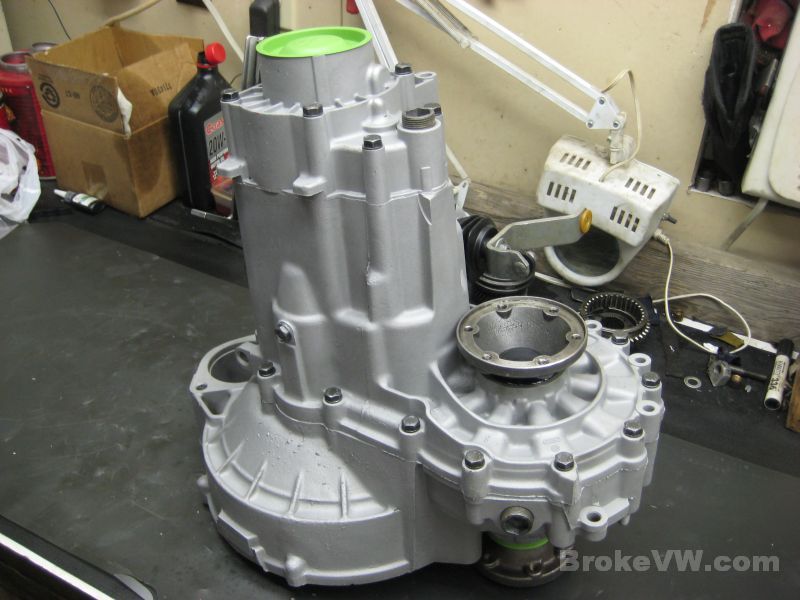

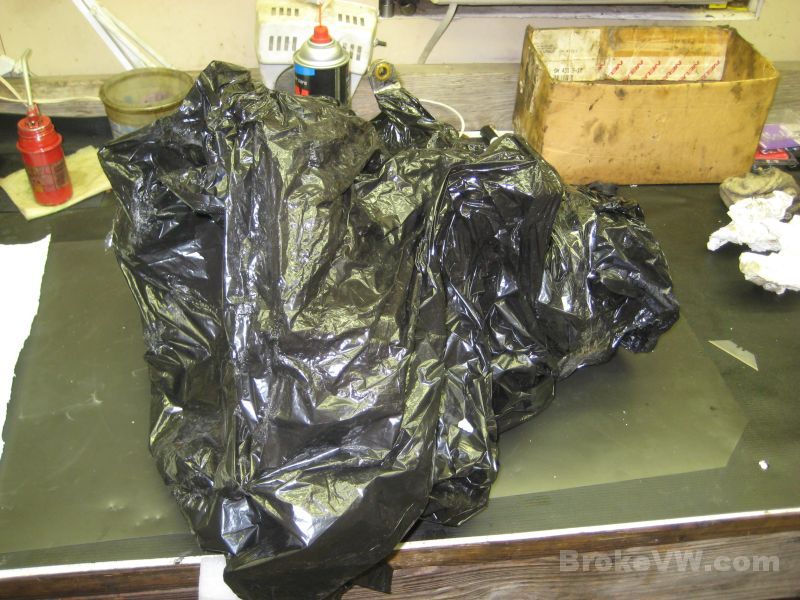
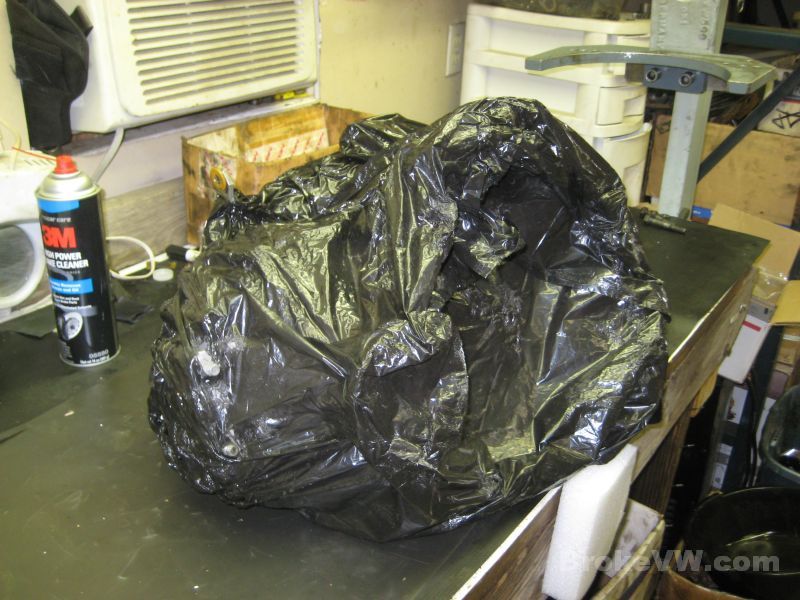
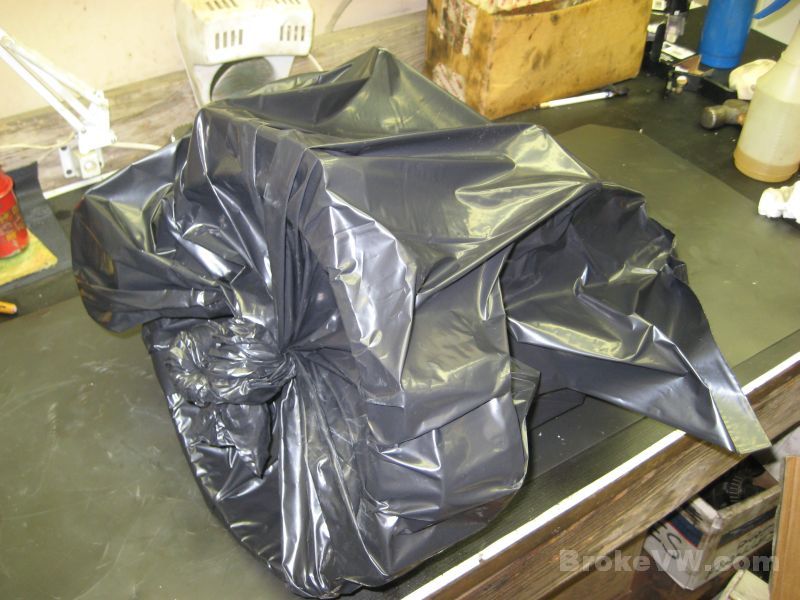
Bagged up and done, I'll work on getting it boxed up in the next few days.
The drain plugs are both just hand tight. Snug the bottom one, add oil, and then give it about 500 miles or so of easy shifting. Slow into each gear, steady moderate pressure on the shifter, and don't shift at high RPMs until the new sync rings have a chance to seat and bed-in fully with the gear faces.
Don't be surprised if you find a lot of gold or yellow glitter in the oil when you change it. That would be the brass rings inside wearing in. Any silver is bad. Magnetic silver is steel, non-magnetic is aluminum, and either one shouldn't be in the oil in any noticeable amount. You can change it out between 500-1000 miles.
Stick with a GL4 rated fluid, something in the 75 to 90 weight range. Any brand is fine, synthetic or not is fine also. Synthetics tend to retain their weight over a greater temp range, but either is fine. If one oil feels notchy, or makes the shifting feel sluggish, or just doesn't feel good, try another oil. There is no rhyme or reason to why one trans will prefer one oil over another, but what works great in one might not in another, so experiment with the oil until you find something that works well and stick with it.
VW states the oil is lifetime, in my experience, oil that is changed regularly leaves a very clean trans inside. No staining, no build-up of film on the parts, etc... trans with original oil are horribly filthy inside. I think I would suggest regular oil changes... I'm not sure how regular, maybe 5K miles or something, but I would change it out if it were mine.
Thanks and let me know if you have any questions!