Lucas AGS 3.67 R&P swap
Arrived 5/17/10 - Done 06/19/10
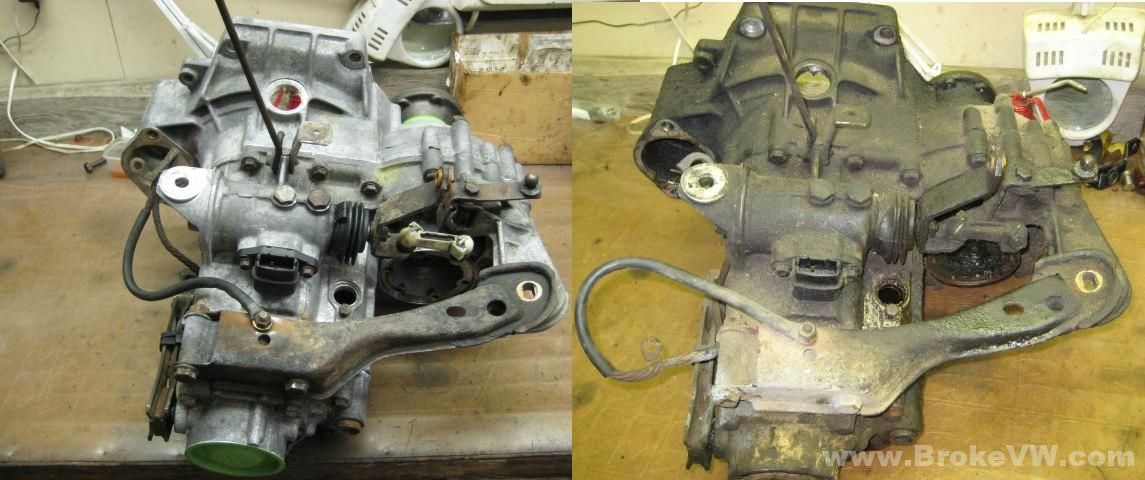
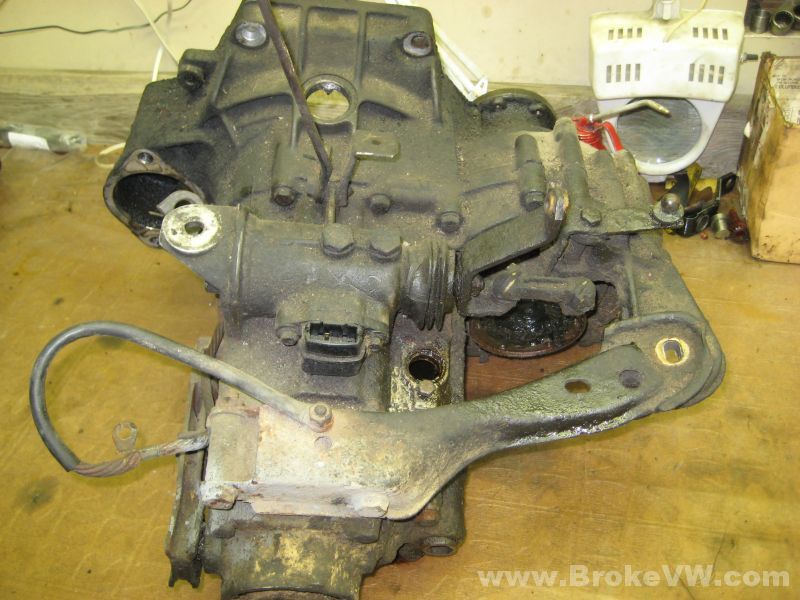
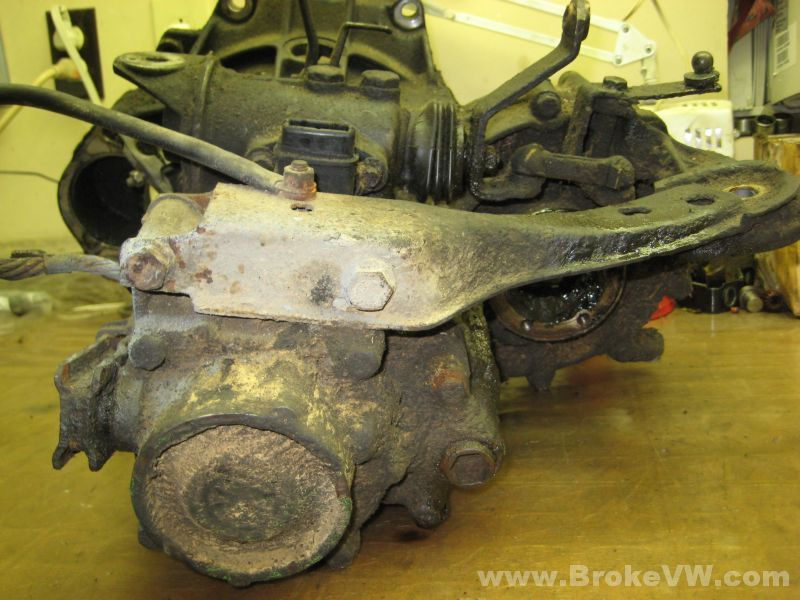
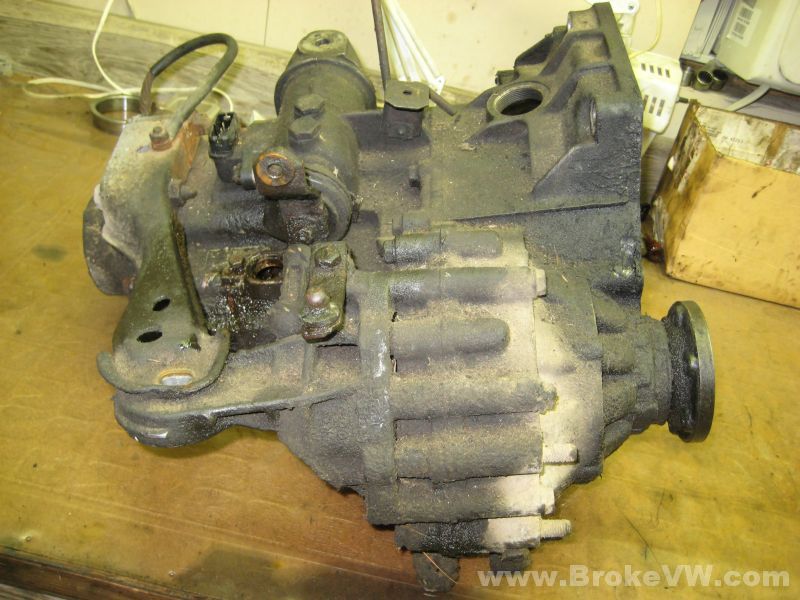
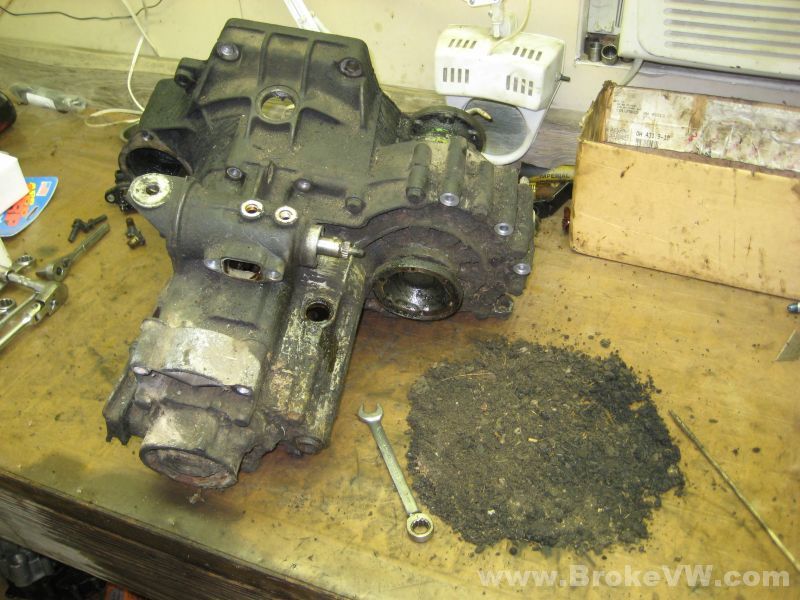
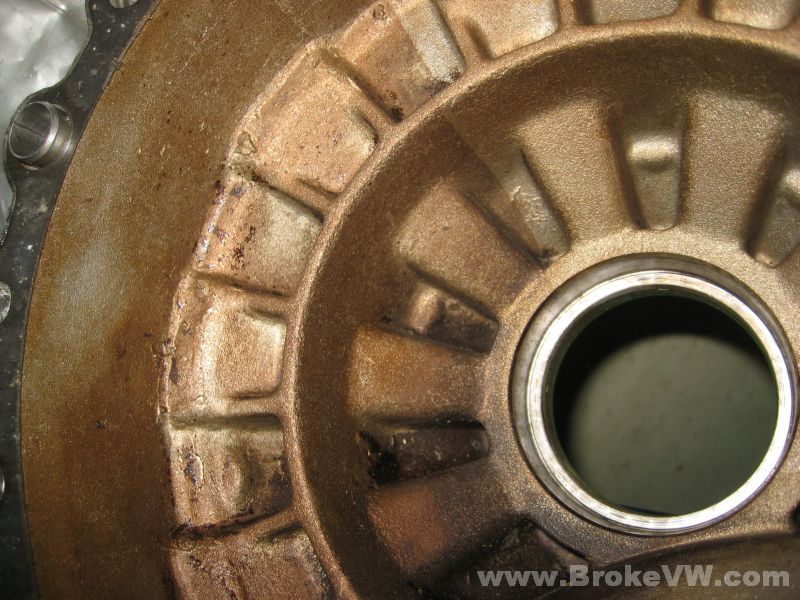
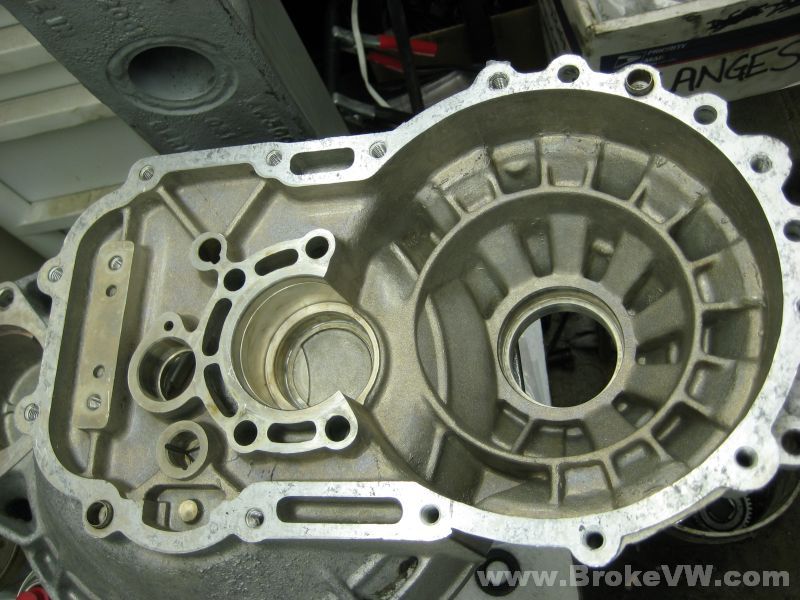
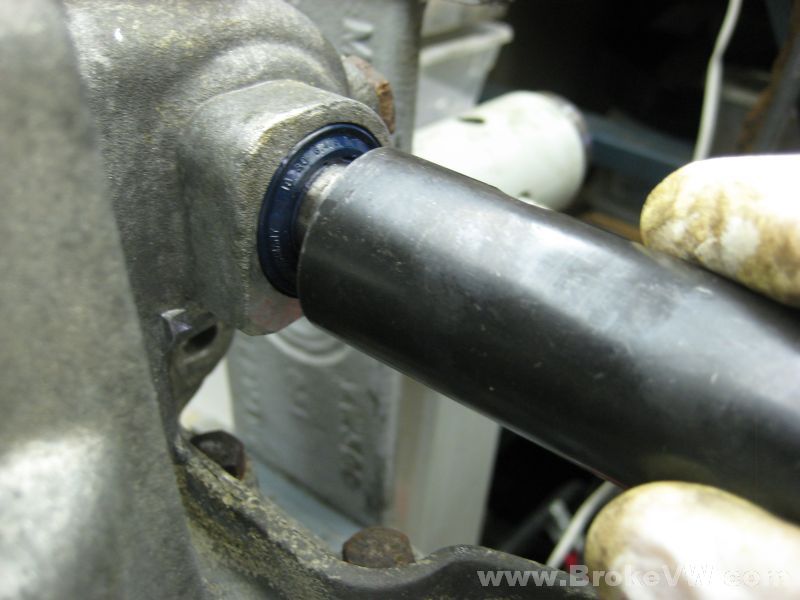
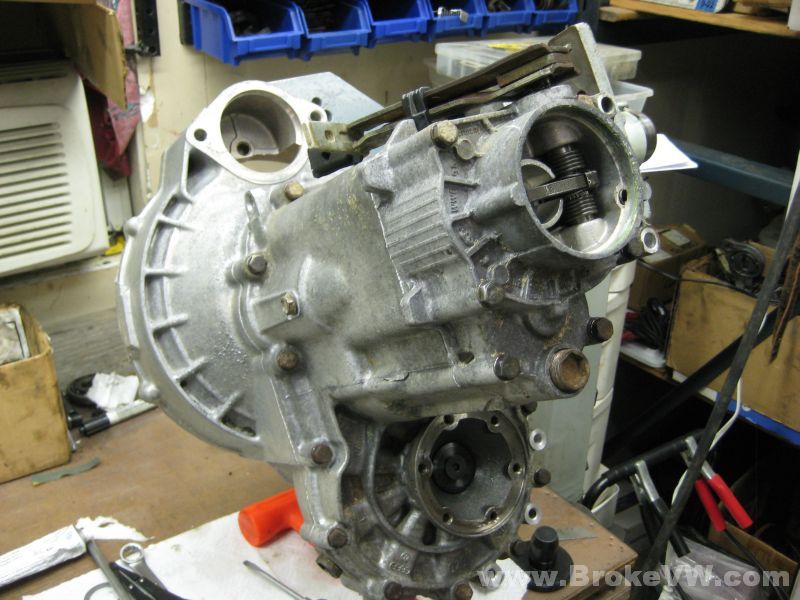
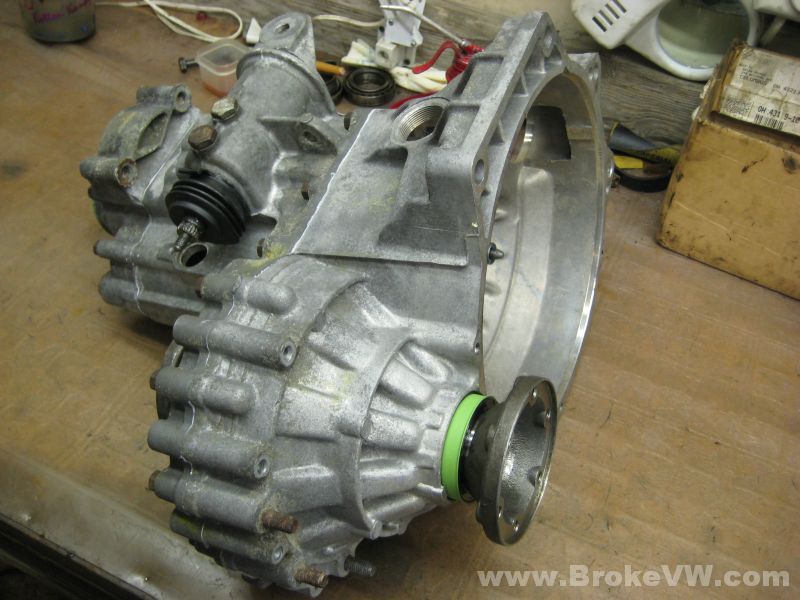
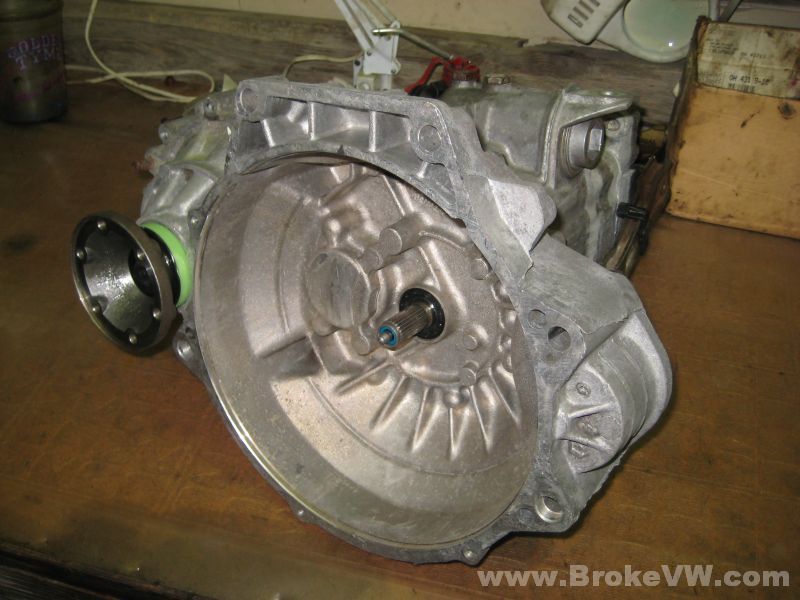
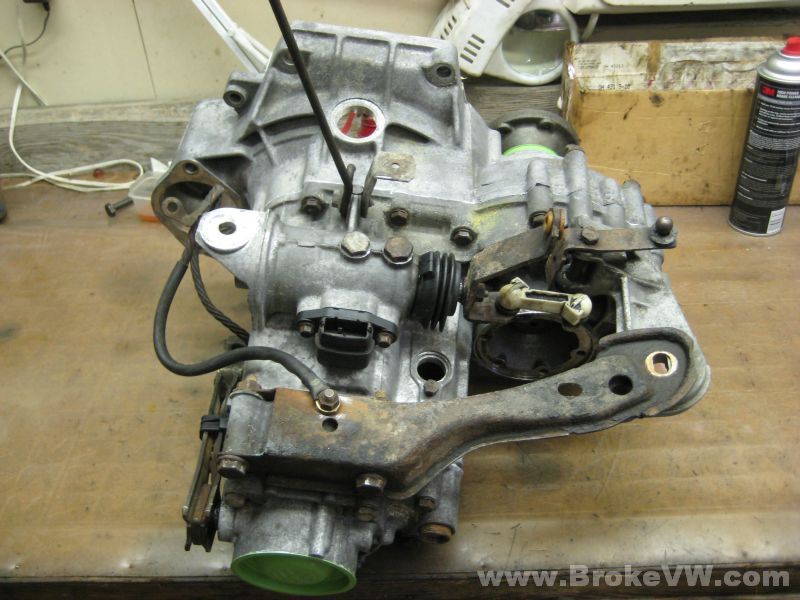
As it arrived...
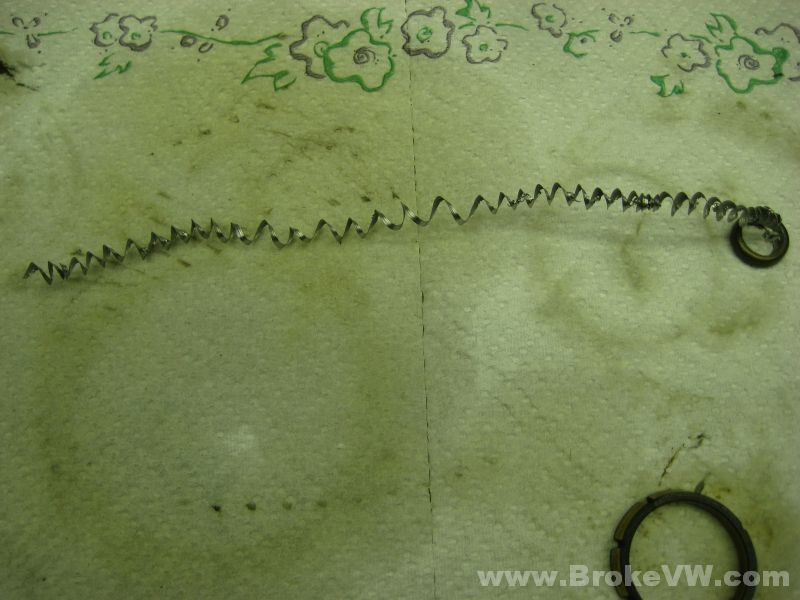
This is the pile of grime I chipped away with a wooden dowel, it made quite the impressive pile. There seemed to be a lot of grass or hay captured in the grime as well...
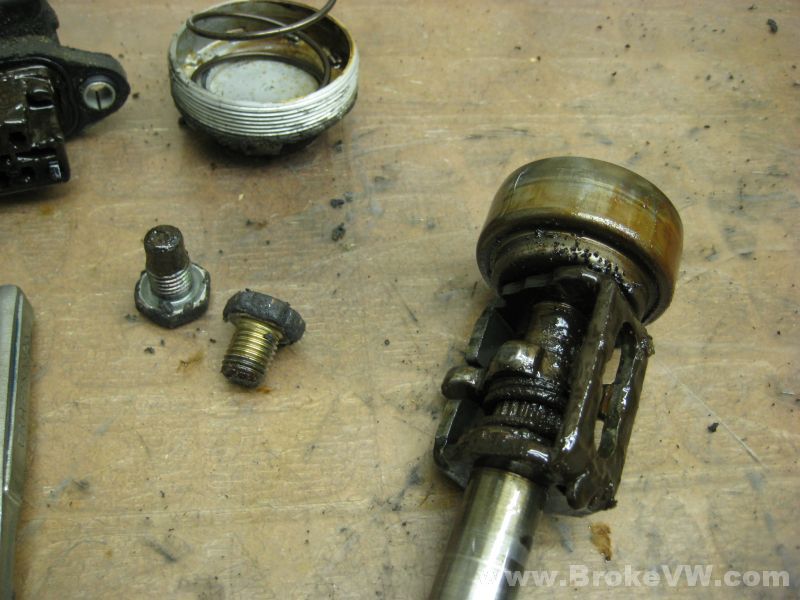
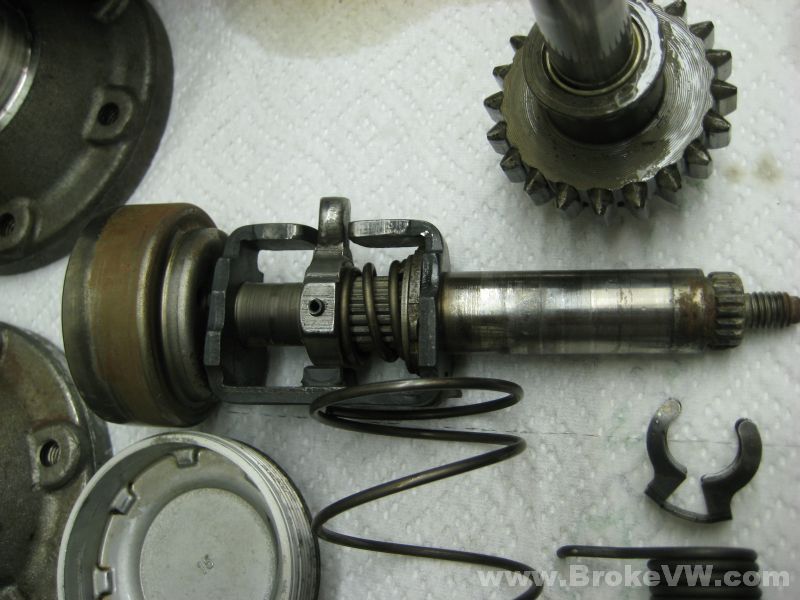
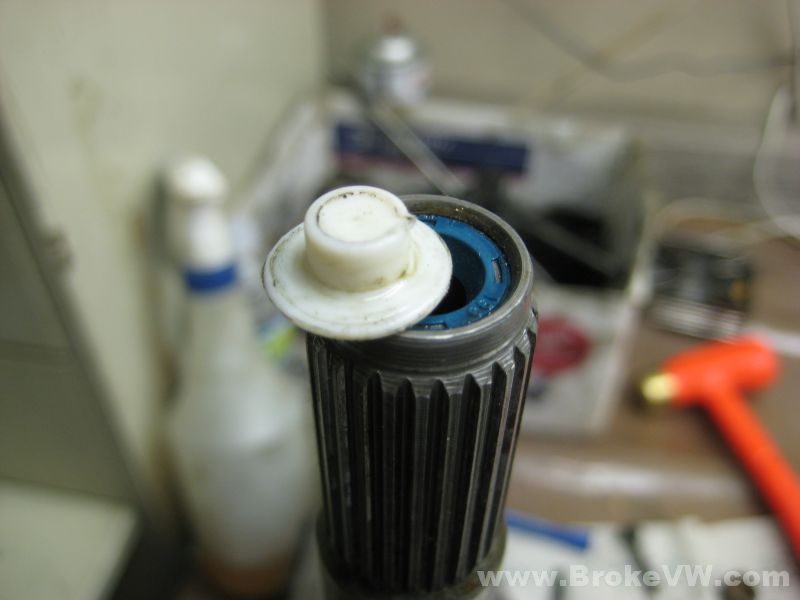
The selector removed, and there are signs of debris on it. Small hard chunks of something I've yet to identify...
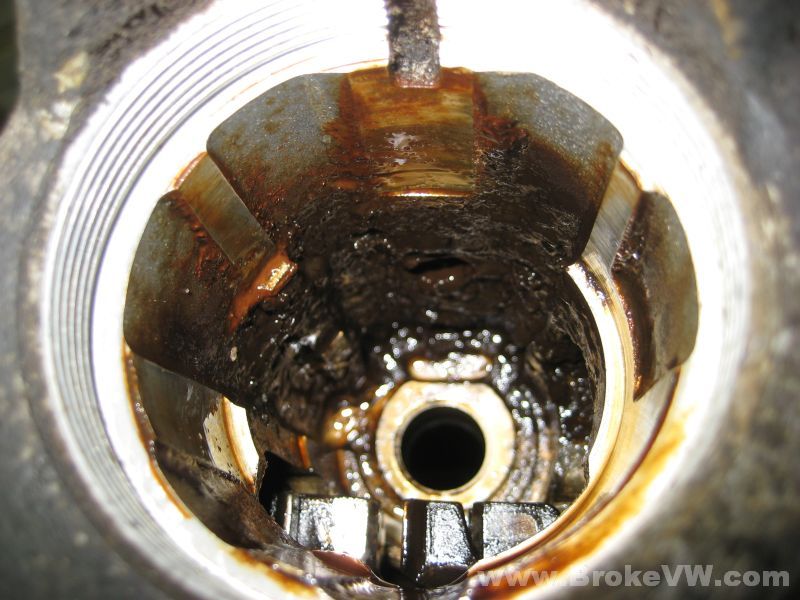
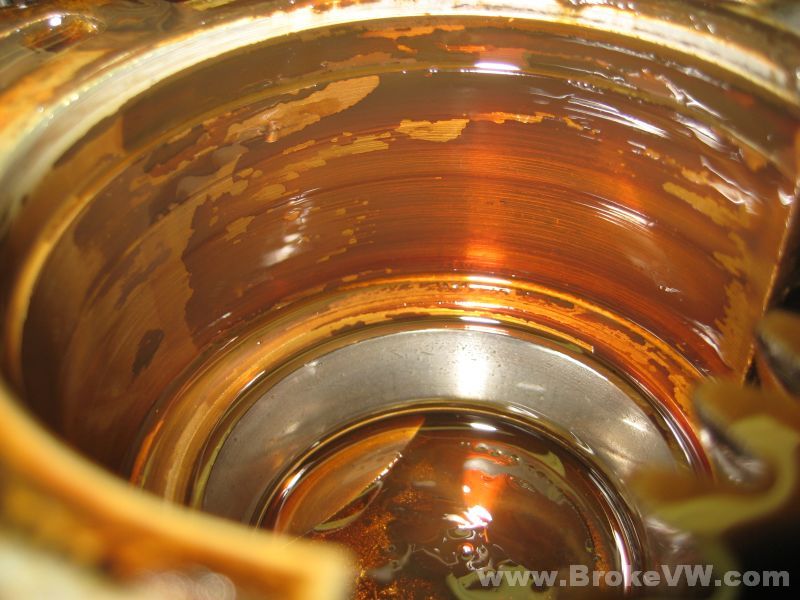
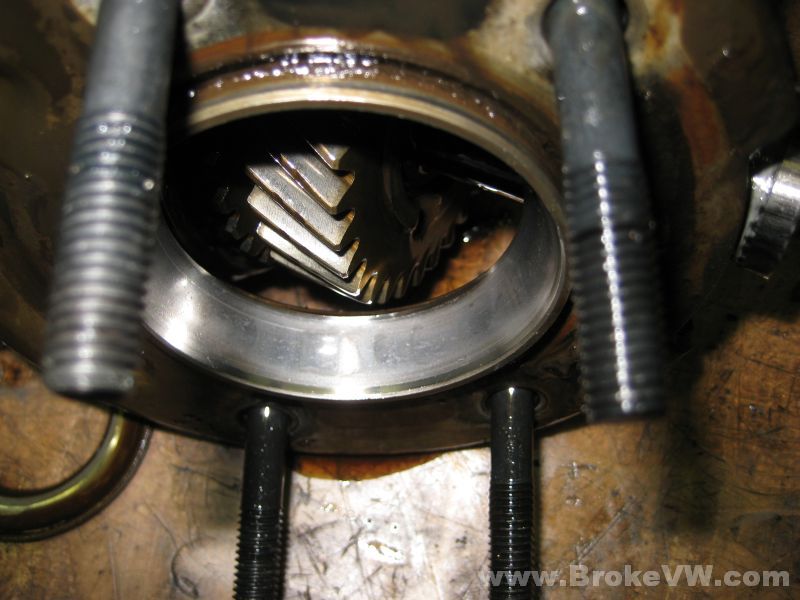
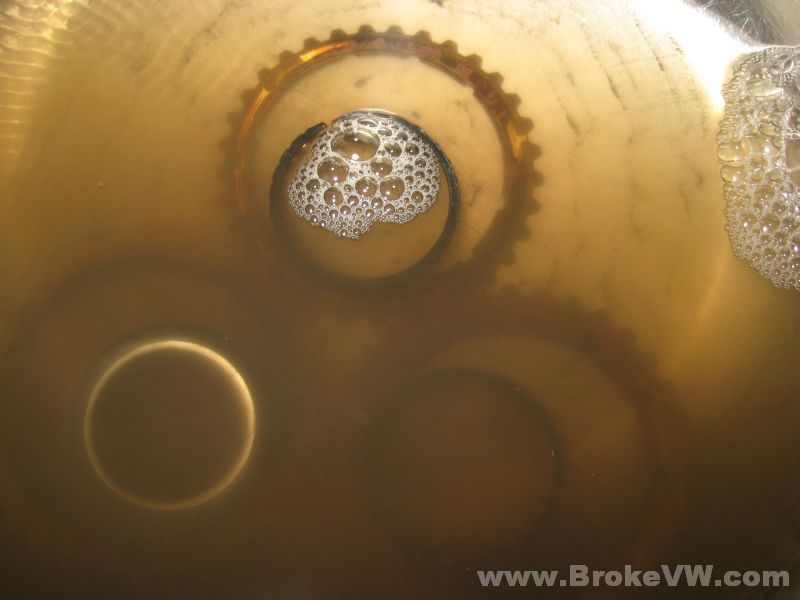
A look down into the selector hole shows heavy build up of debris and grime inside...
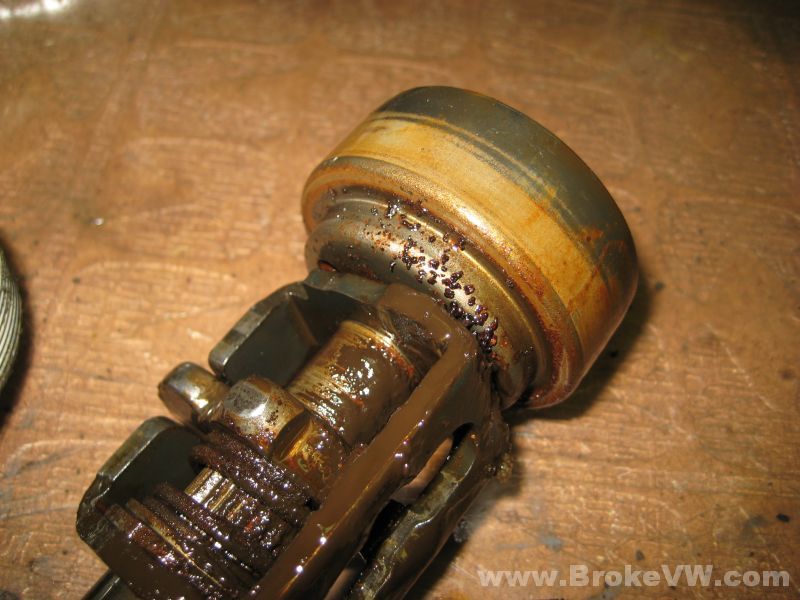
The same tiny hard chunks are found on the flanges. They wipe away, but leave a dot where they were, and they feel gritty...
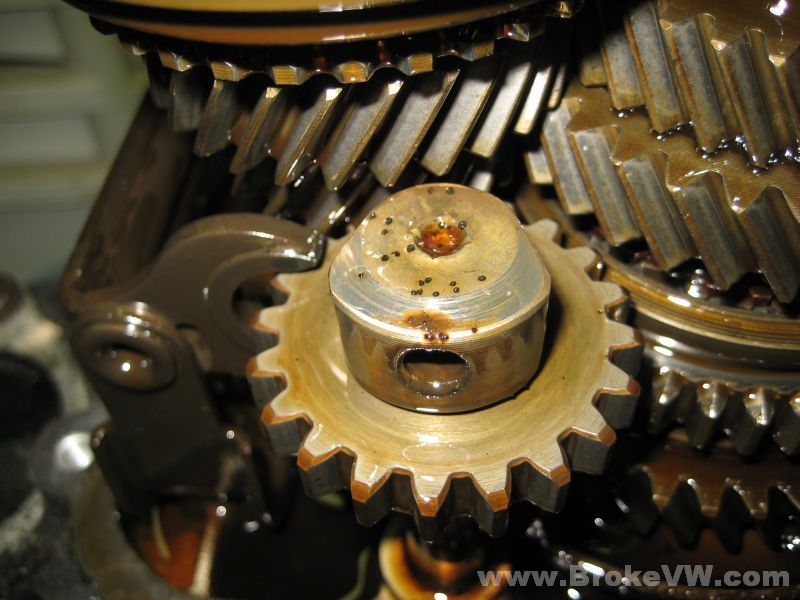
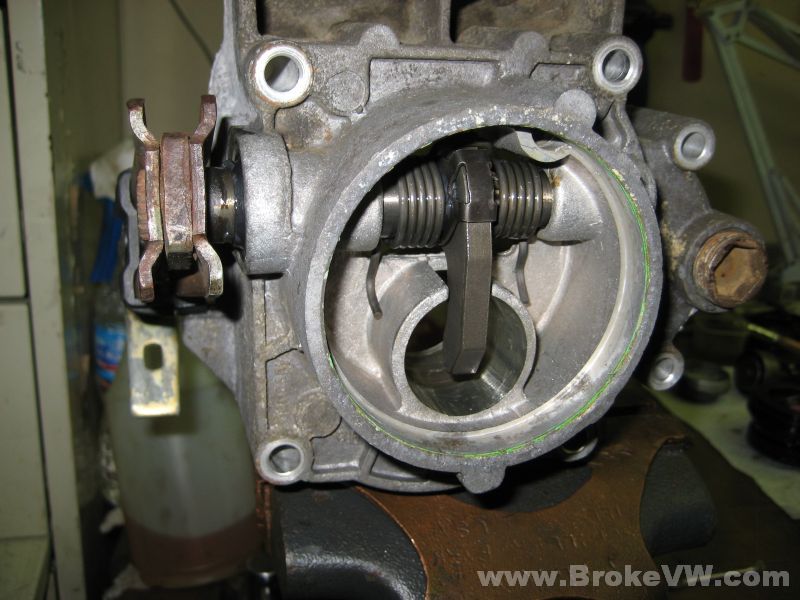
A closer look at the selector...
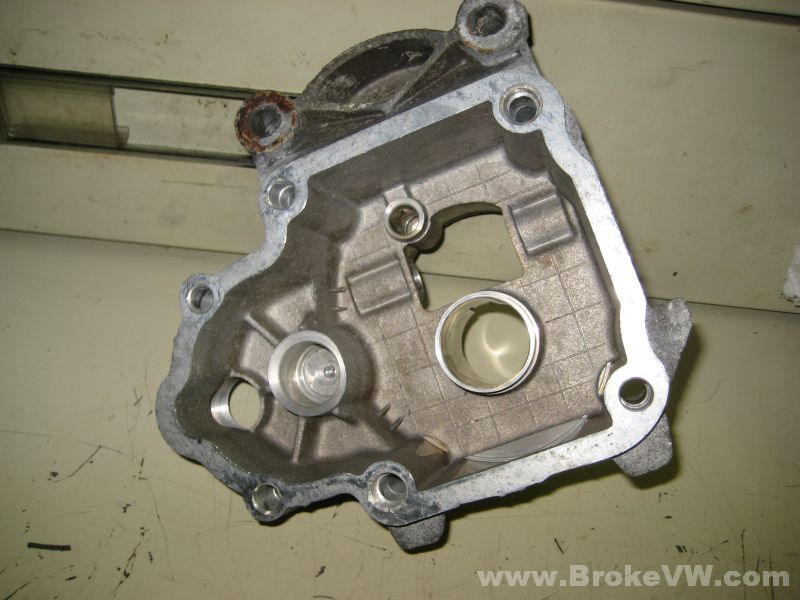
The inside of the 5th housing isn't too badly stained, but the TO bearing did fall apart when the cover was removed, it needs replaced...
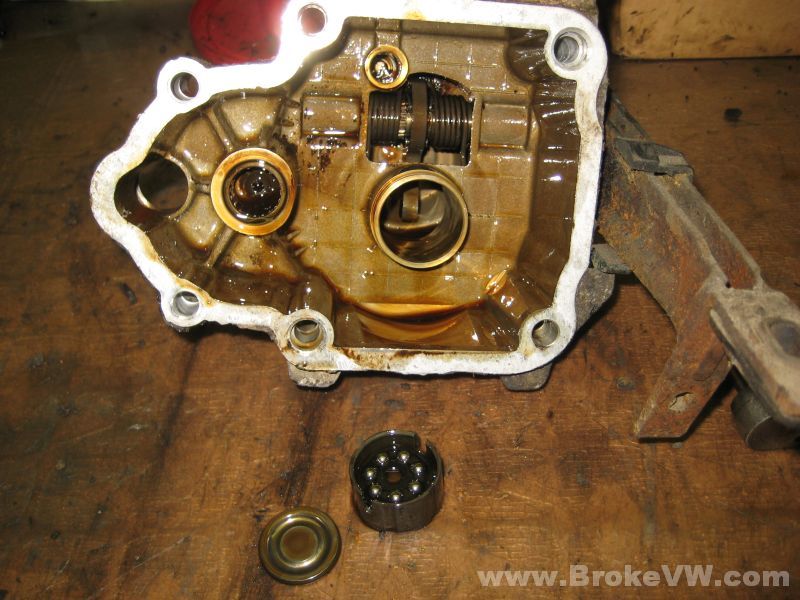
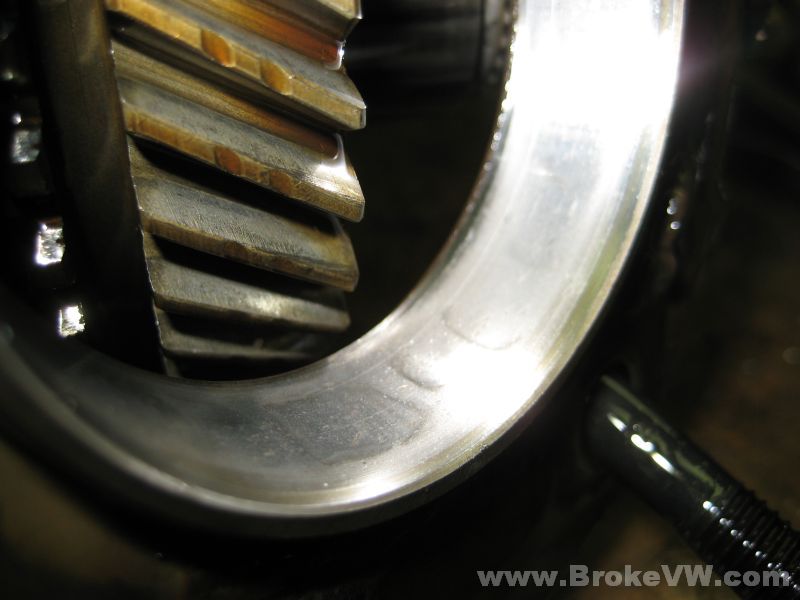
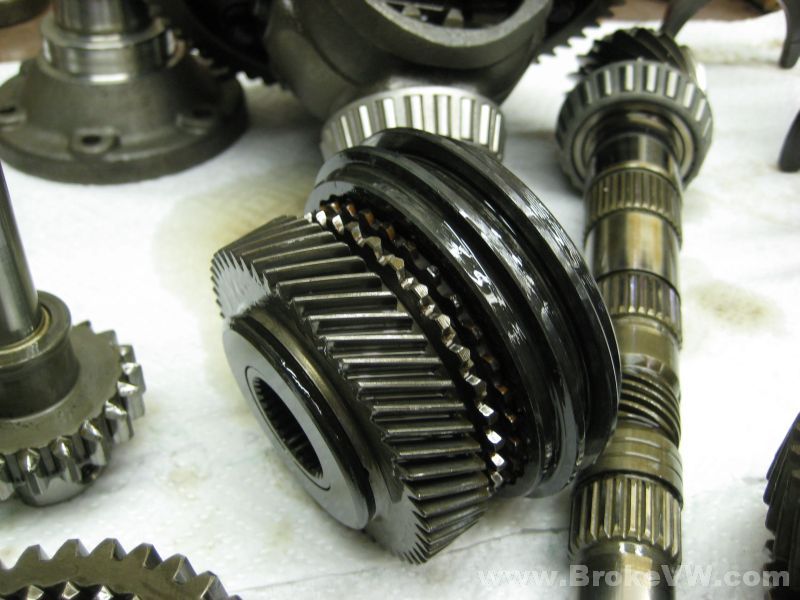
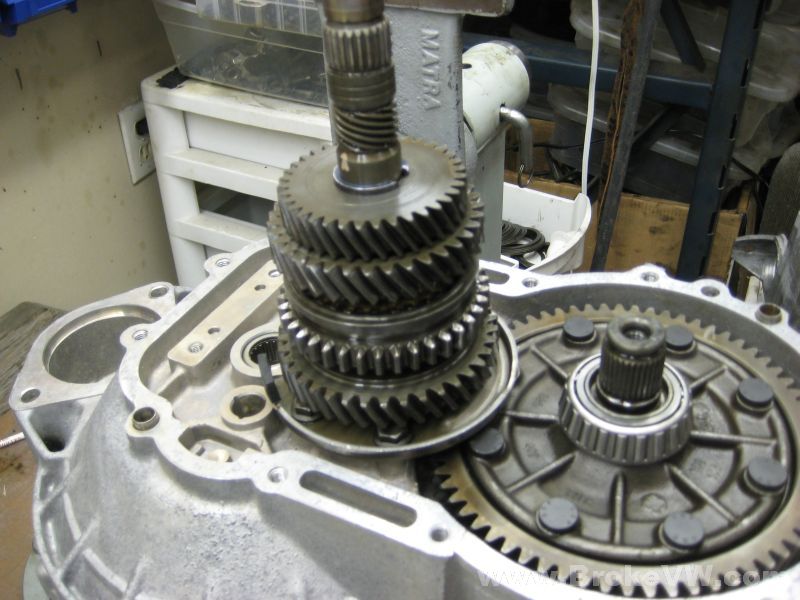
The 5th gears exposed...
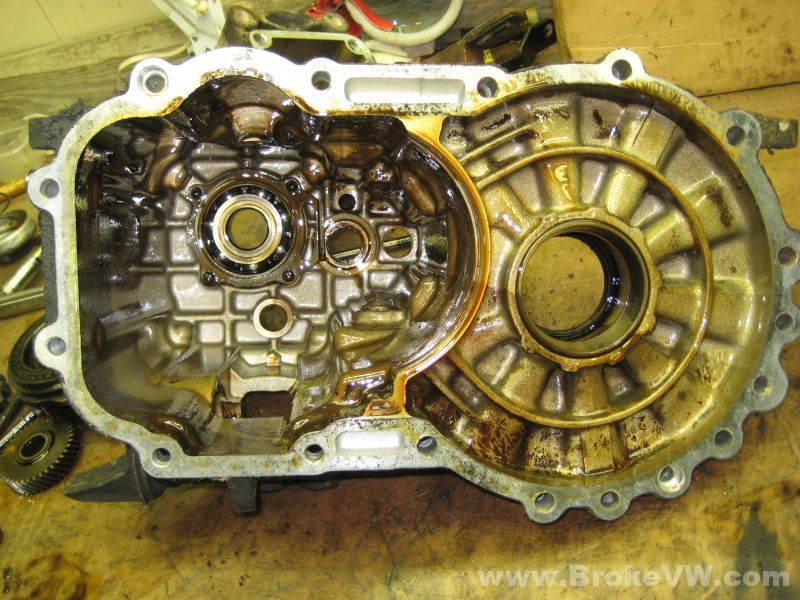
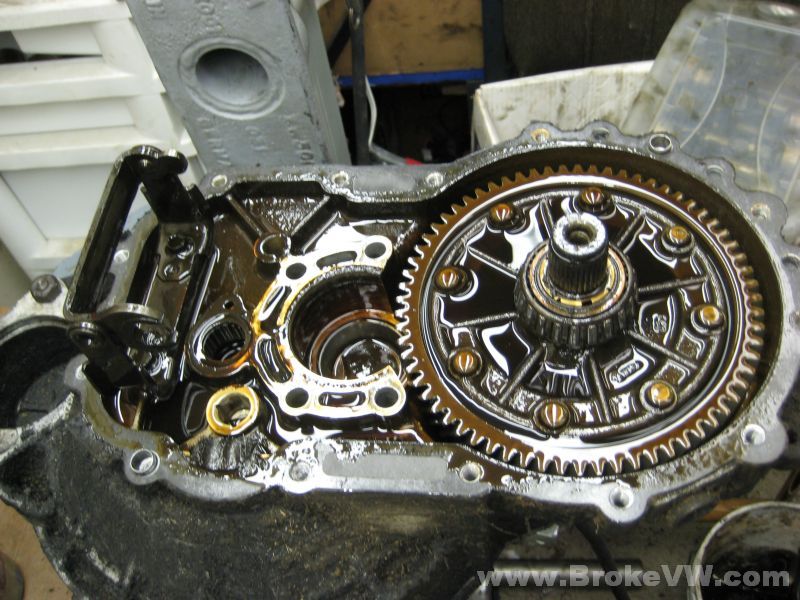
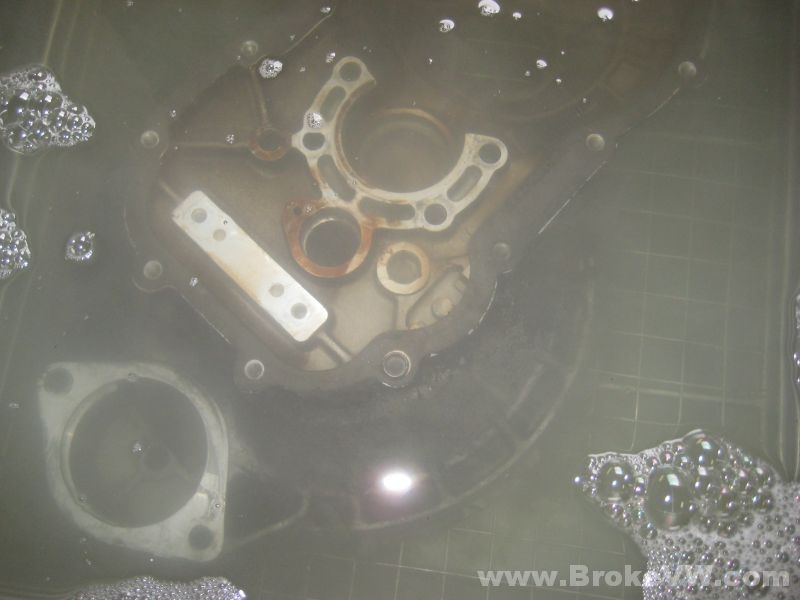
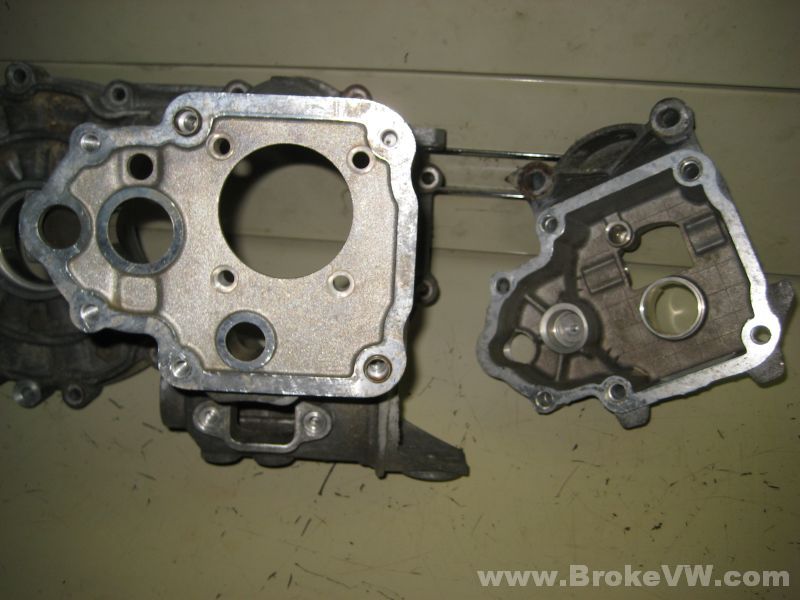
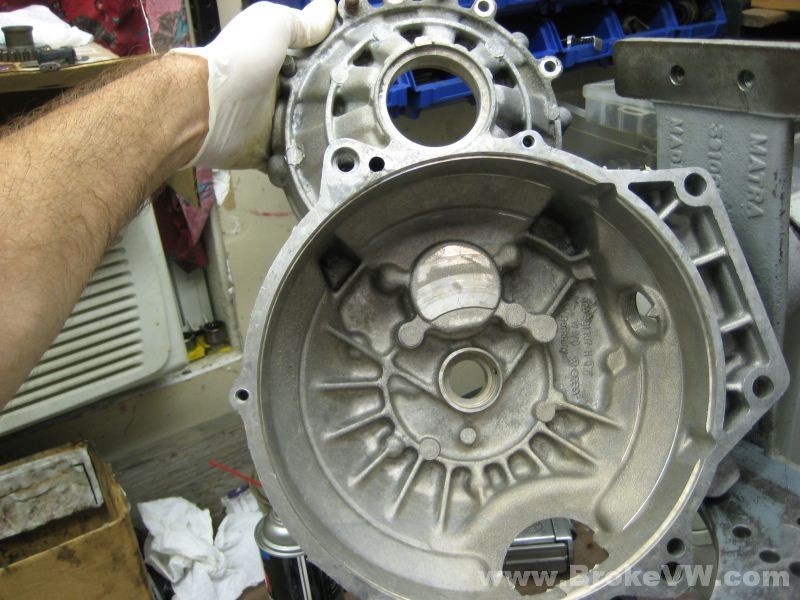
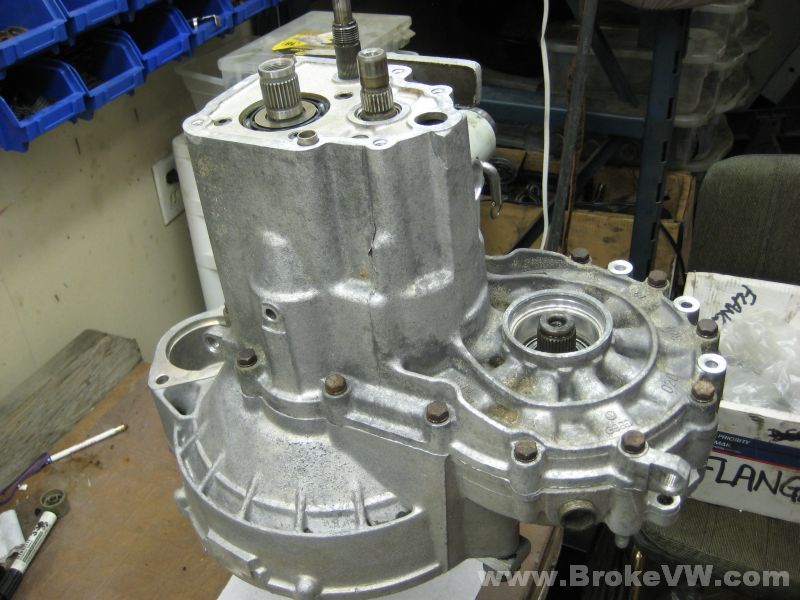
The trans split, the inside of the gearbox half of the casing doesn't look too bad either...
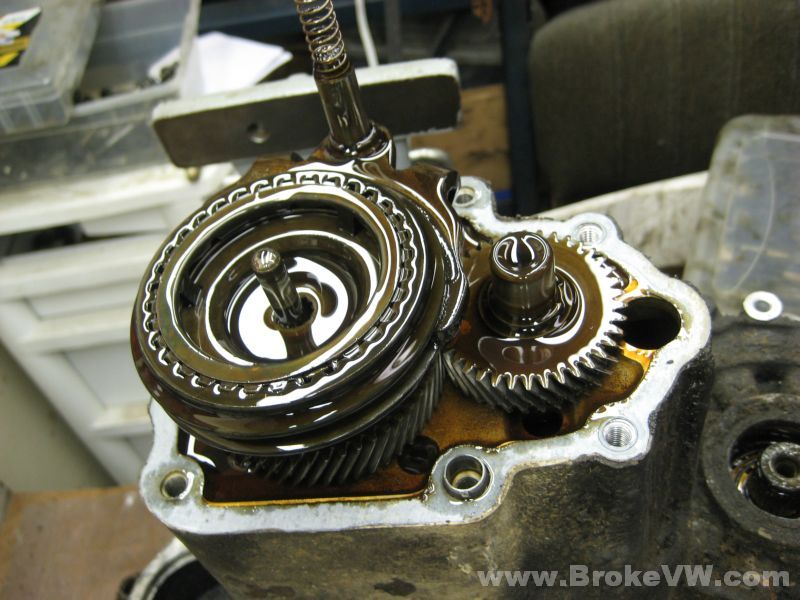
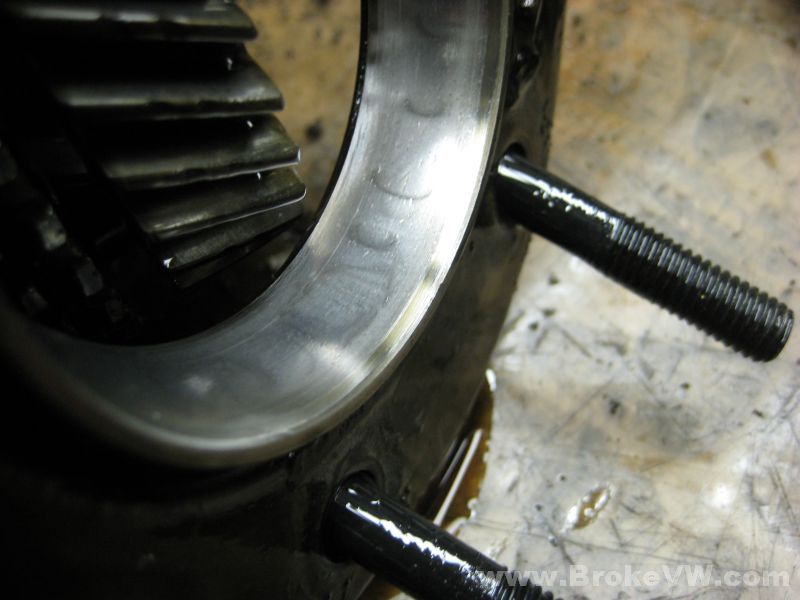
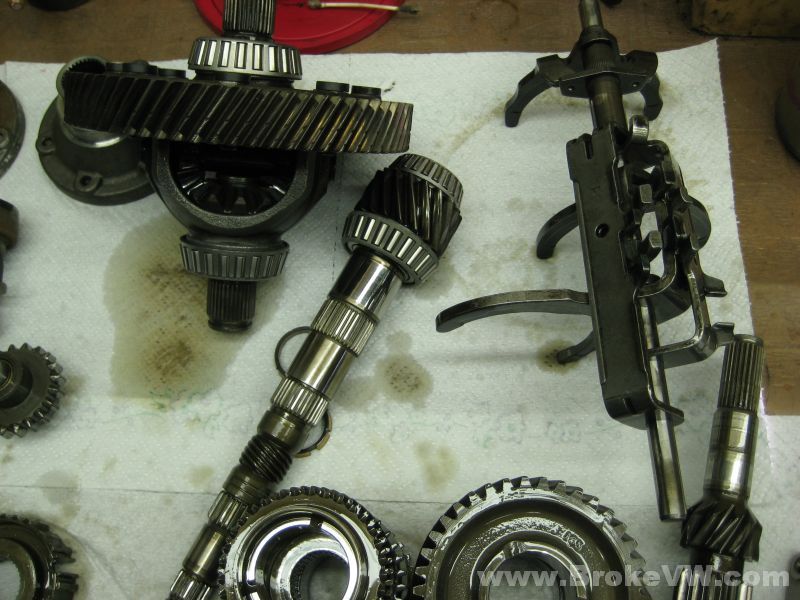
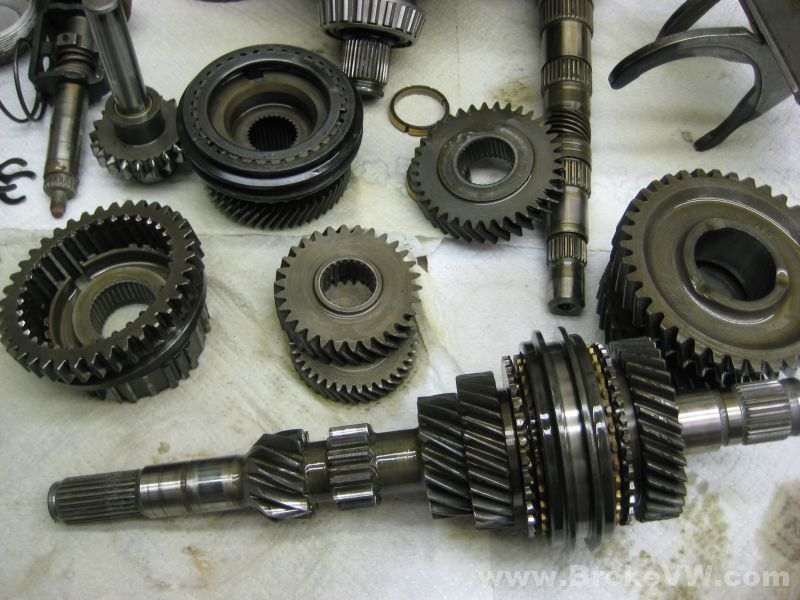
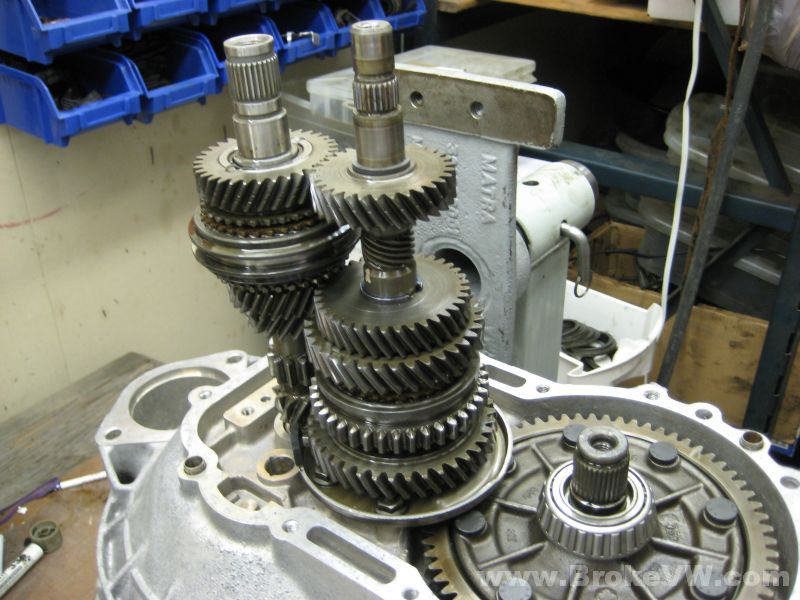
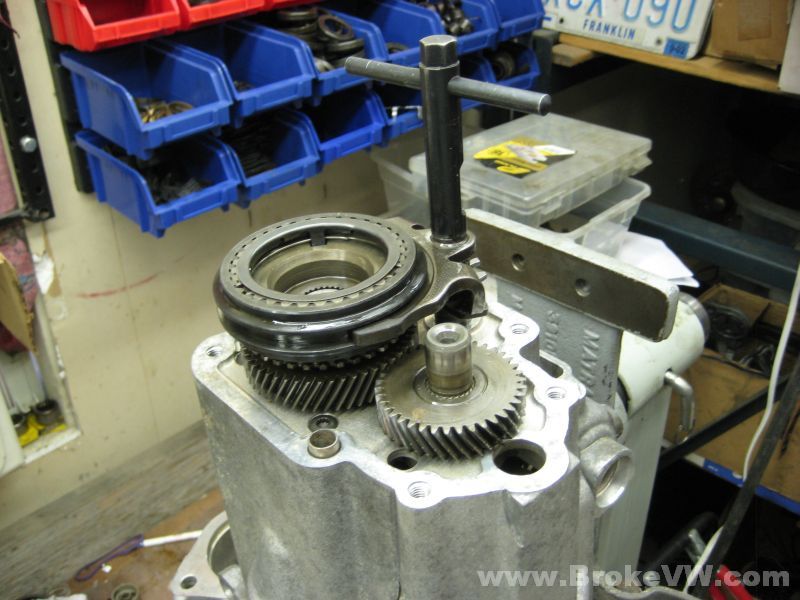
The exposed gear stacks...

More of that grit found on the reverse idler shaft....
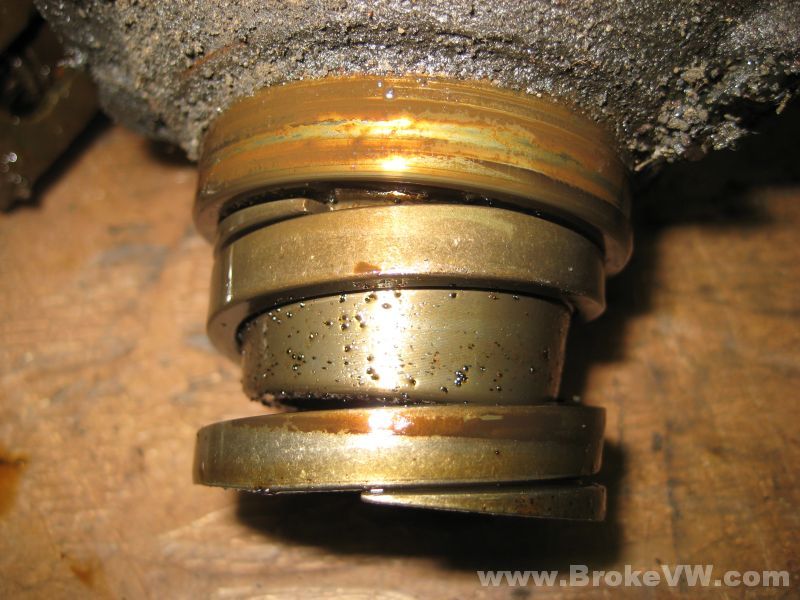
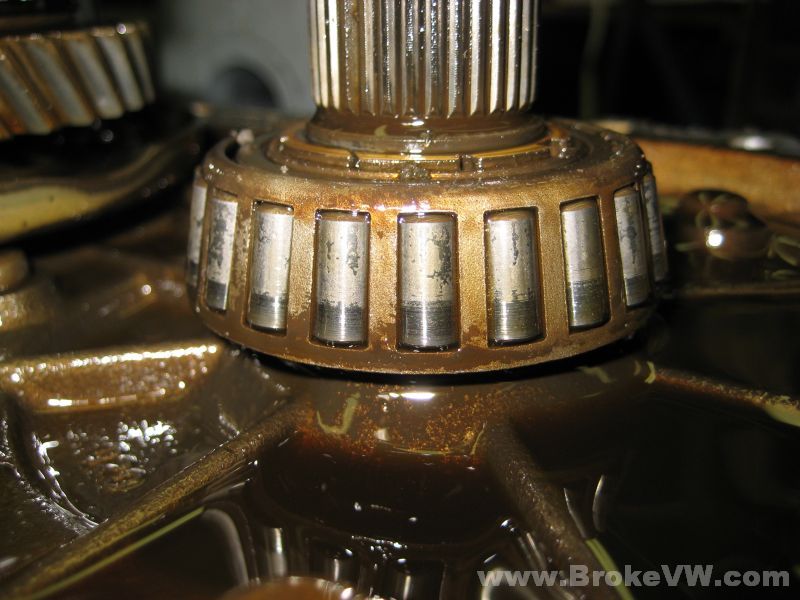
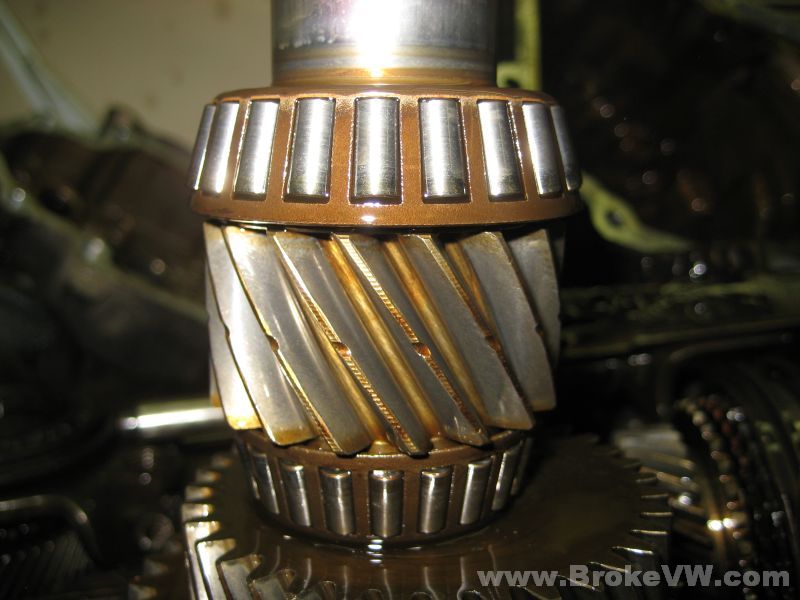
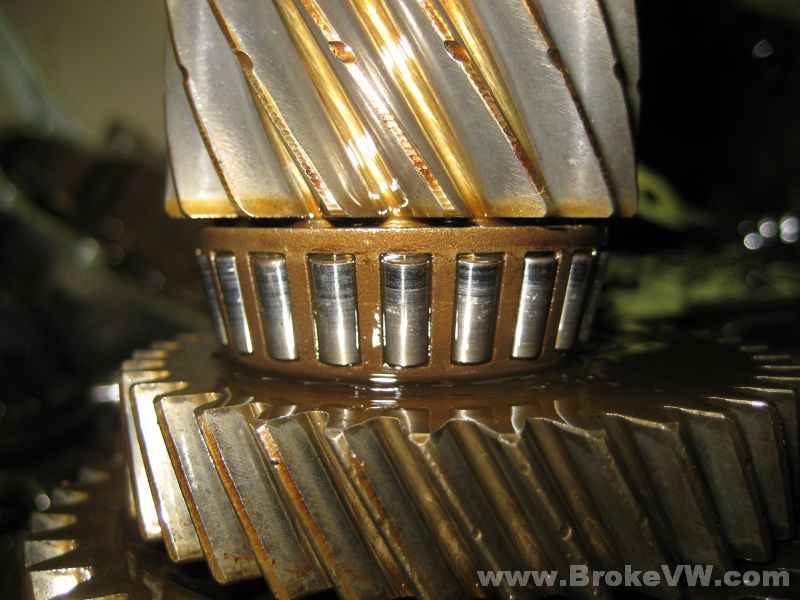
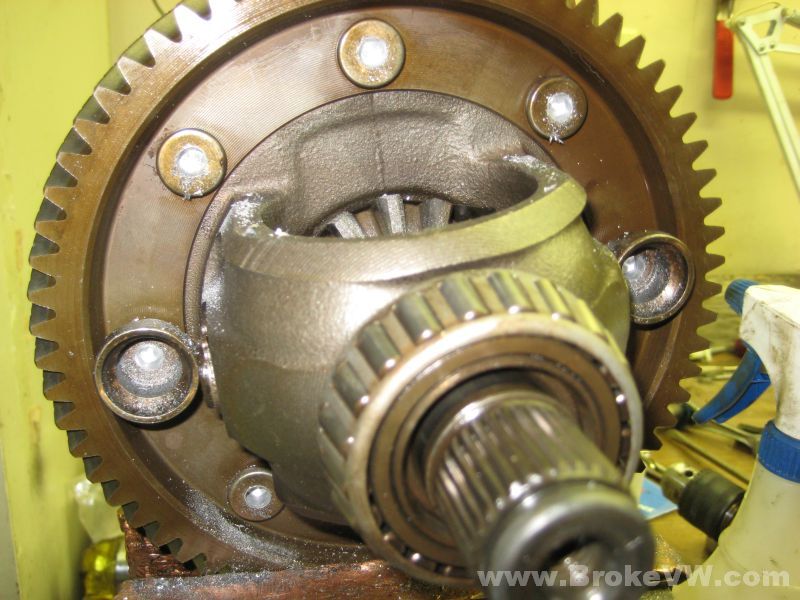
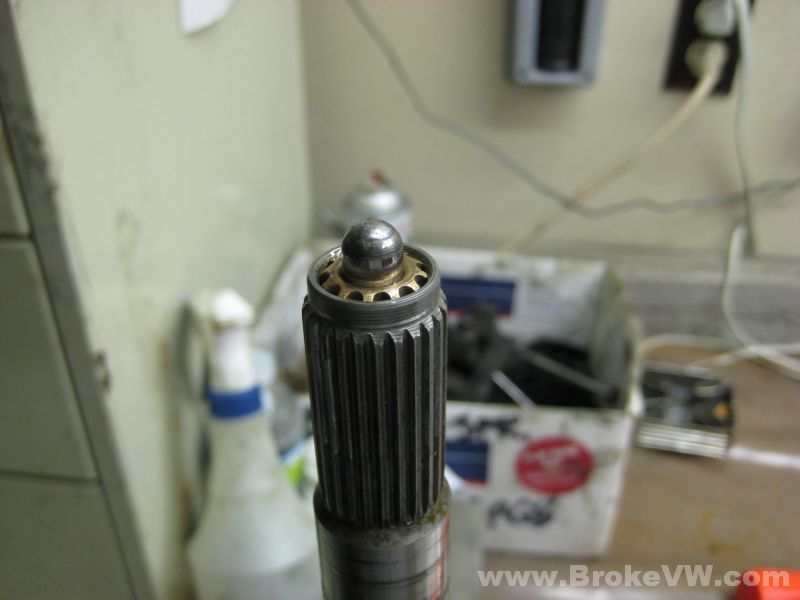
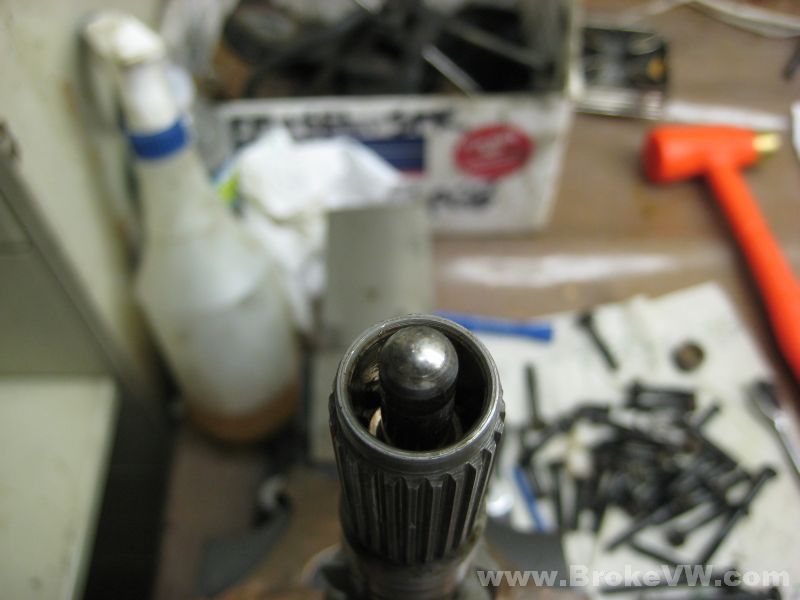
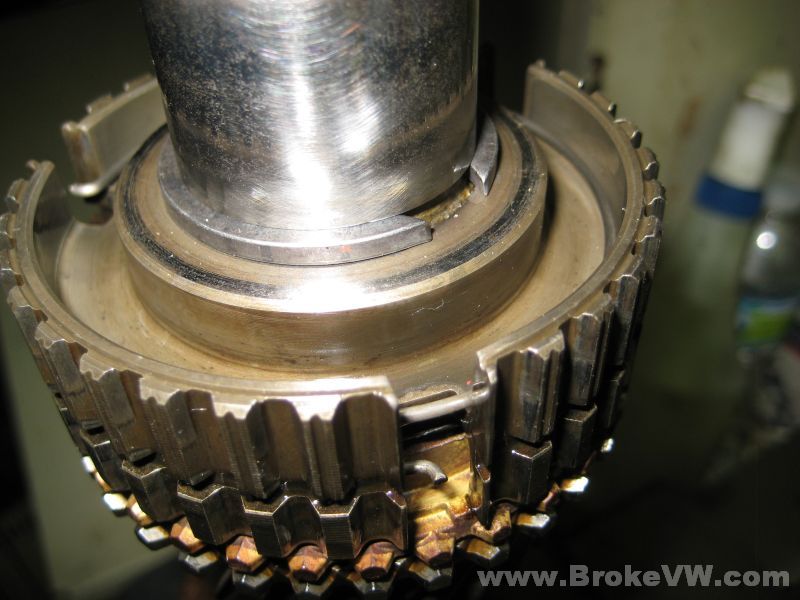
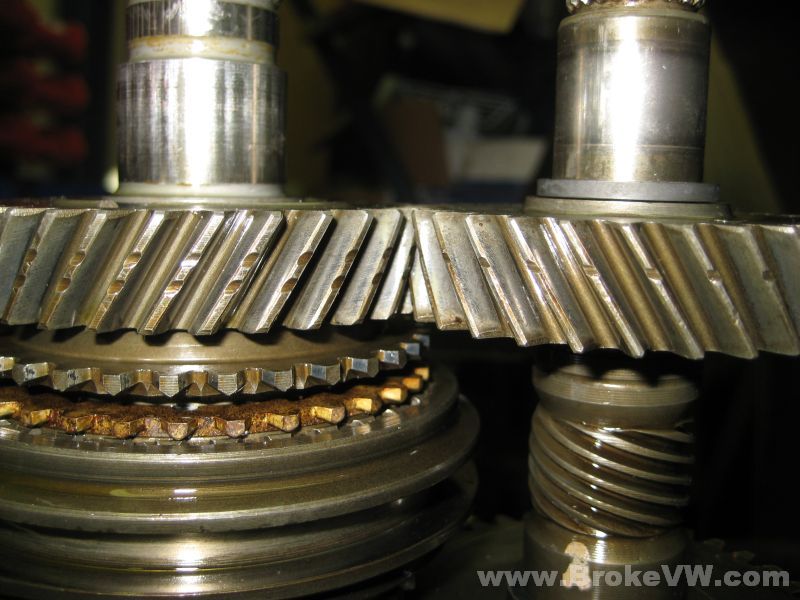
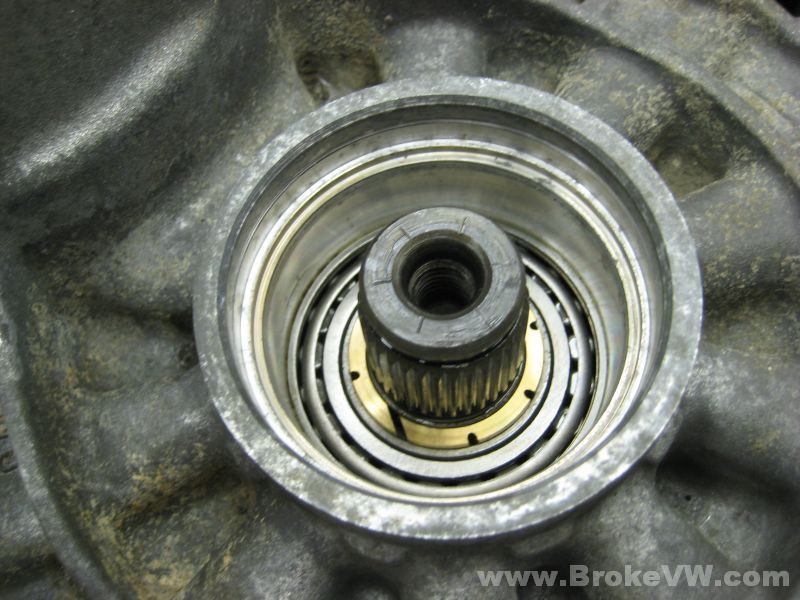
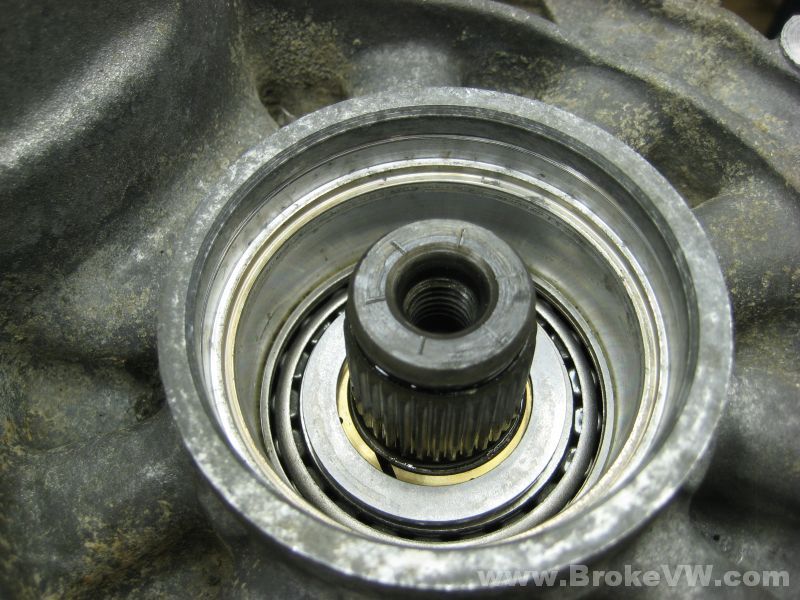
A shot of the diff bearing, and you can see the wear on the rollers quite clearly...
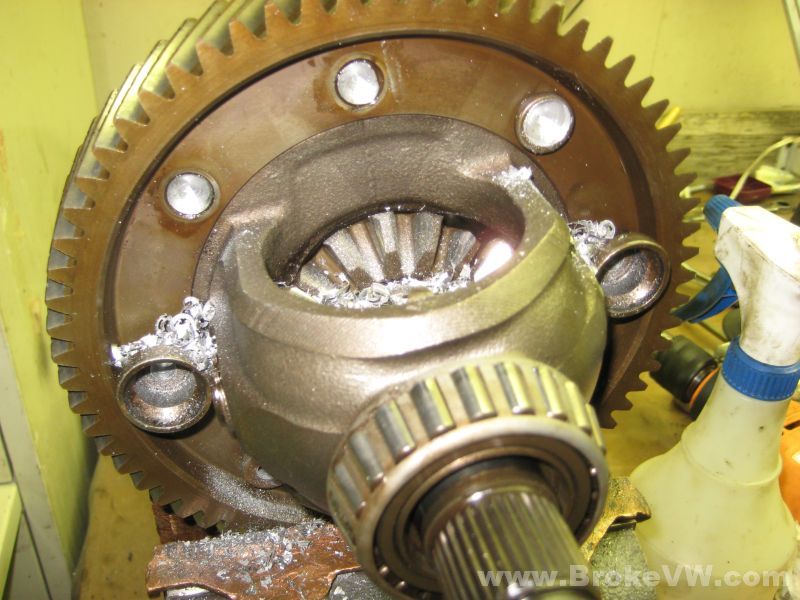
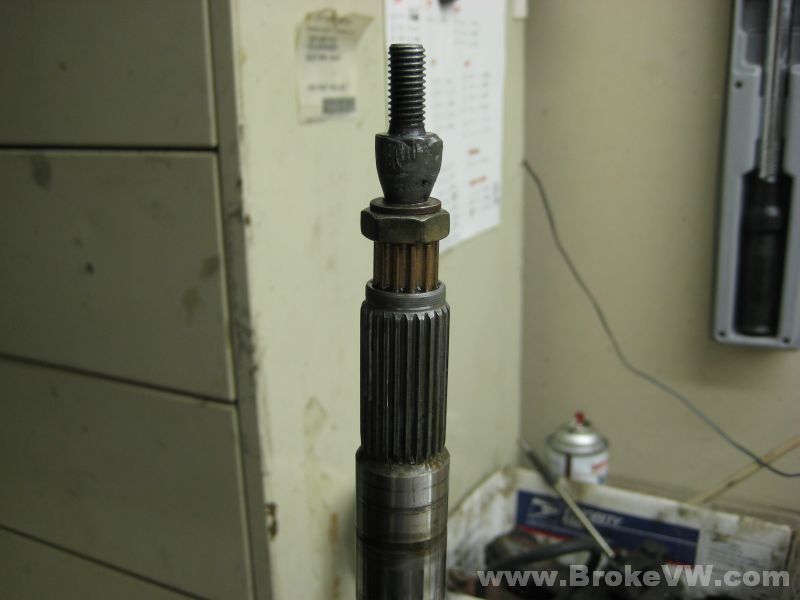
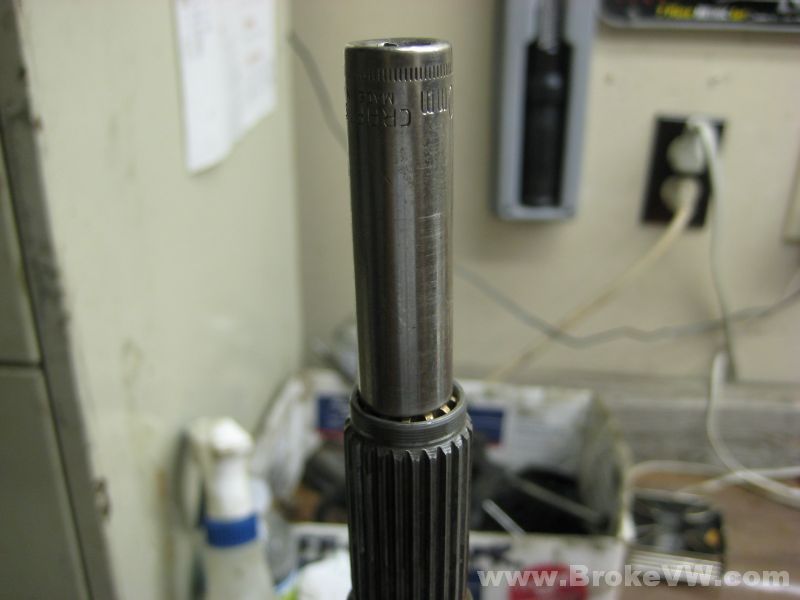
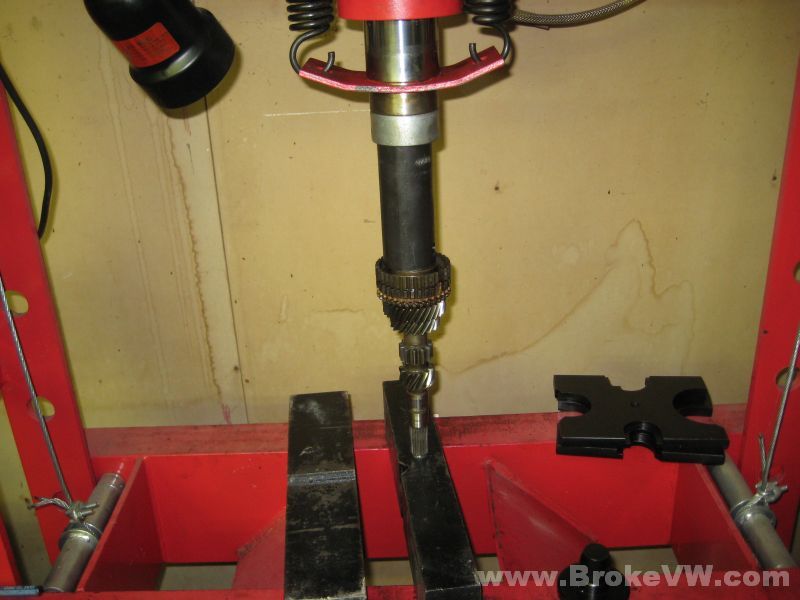
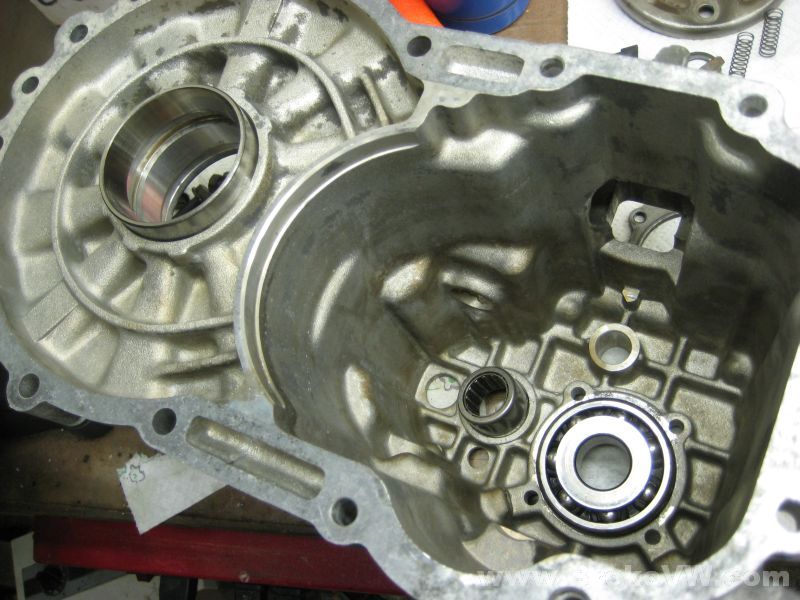
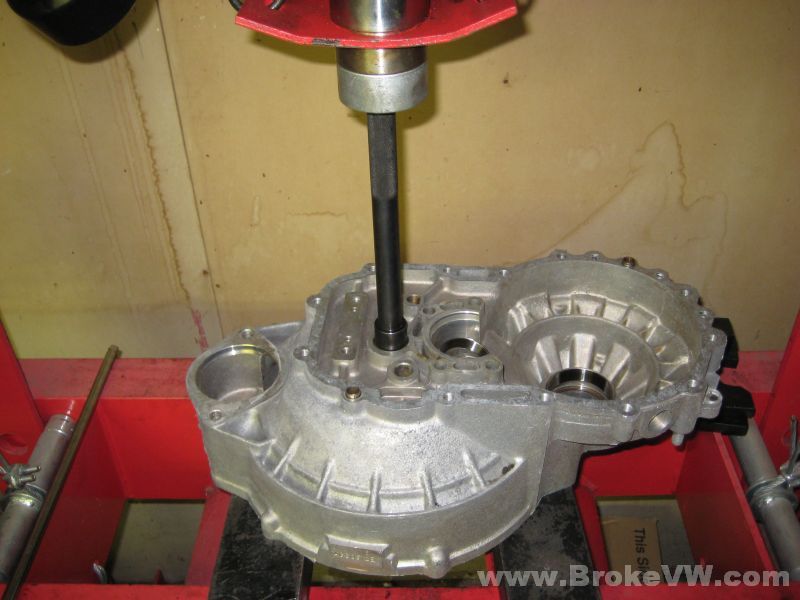
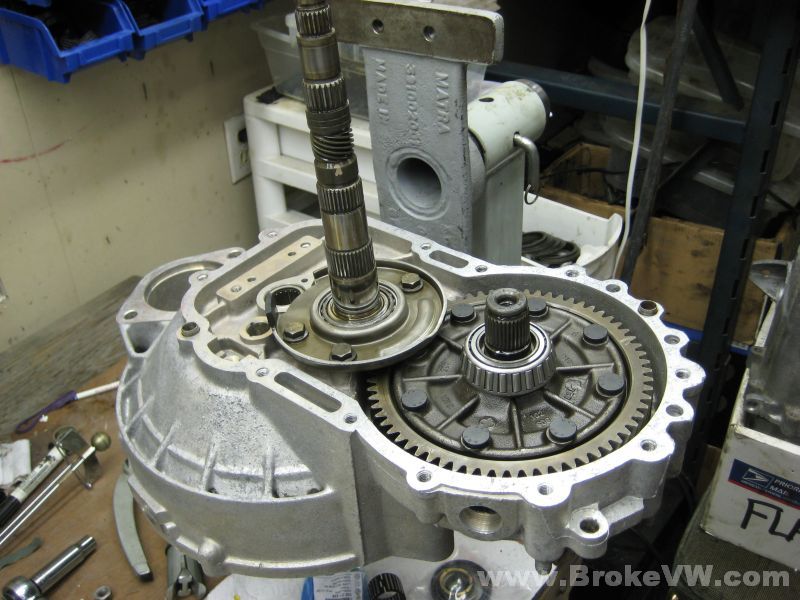
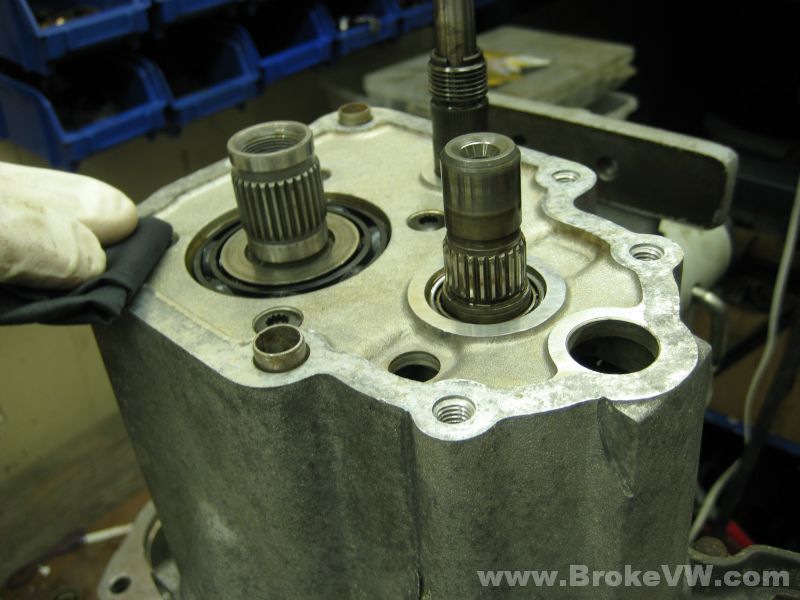
The input and output shafts removed, the diff is now exposed...
A look down at the small taper bearing race for the output shaft shows pitting and cavitation of the race...
A few pics showing the larger taper bearing race for the output shaft, it has pretty substantial wear, and an odd wear pattern as well...
A few pics of the taper bearings on the output shaft, you can see they are also worn, but not as badly as the diff carrier bearings. Since this is getting a new output shaft, I would replace the bearings on the shaft, and the diff bearings as well since they are badly worn...
I'll carry on with the stripping of the parts and the cleaning so I can inspect everything further, but no major damage jumps out at me... no chipped or broken teeth on the R&P set, no damage to the reverse idler gear, etc., so I think it would be a good candidate for a rebuild.
Update 5/18/10
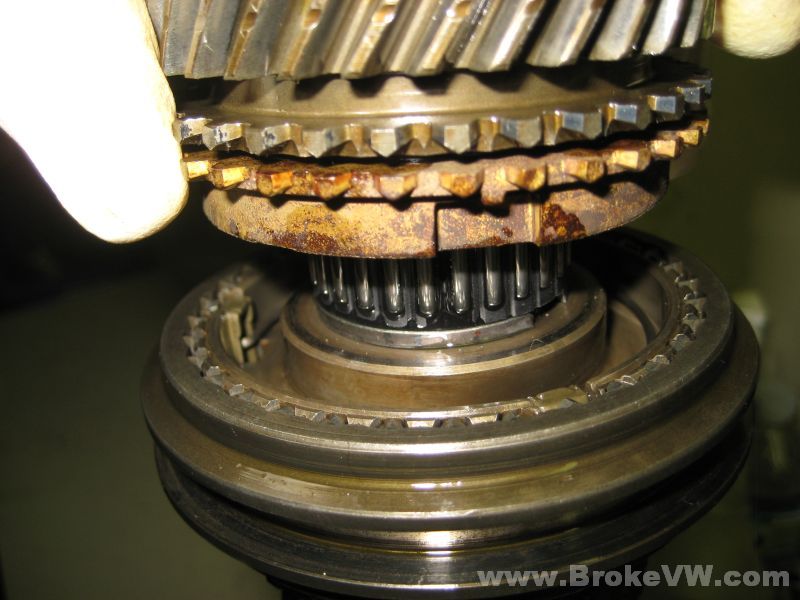
I have everything stripped down and in the parts washer now, letting it soak to make cleaning easier. Once it is a little more cleaned off, I'll pull the bearings, drill the rivets, and swap the ring gears over. The spider gears in your trans look good, they sometimes have bad pitting on those gears, but yours look to be in good shape, so the diff will get a new plastic thrust washer behind the spiders, the pair of 2.3mm snap rings, and the 80% kit installed along with the 3.667 ring gear....
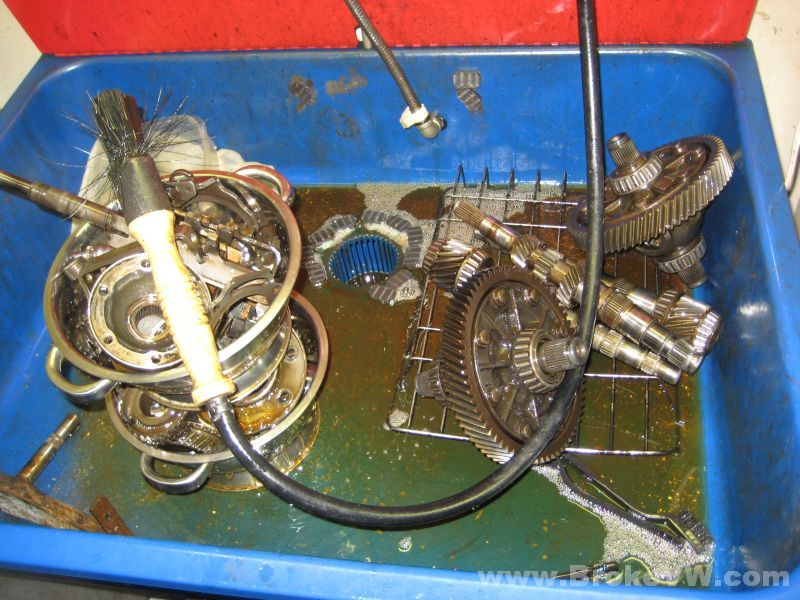
The case is funky enough that I am going to try something new and use a powerwasher on it, just to knock the majority of the grime off, and then I'll put it into the parts washer tank here and clean it the rest of the way...

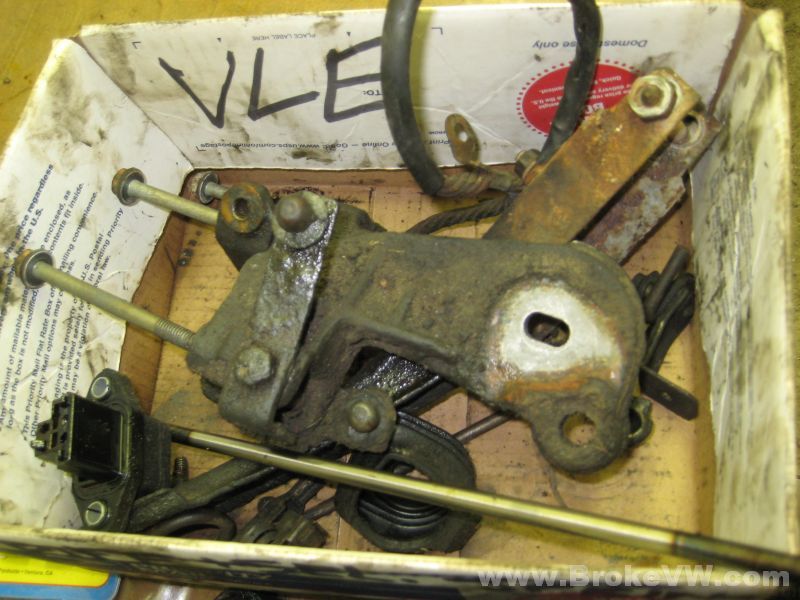
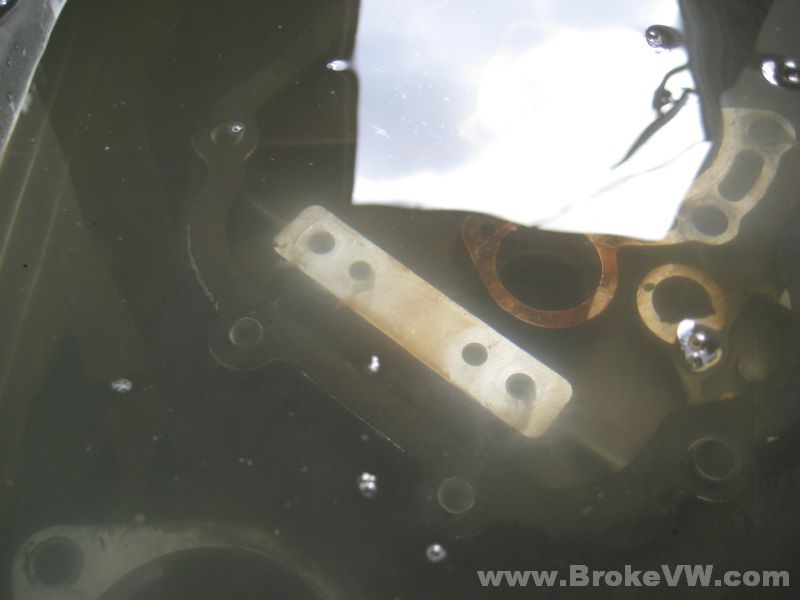
This is the box of attachment parts like the mount arm, the bits of shift linkage, etc., and your pushrod is worn on the end, it is something you'll want to replace before installing the trans so the chances of the pushrod drilling through the release plate is reduced. When new, the rods are rounded on the end, and have a small contact area, so they don't try to walk around with the spinning clutch parts. As they wear, they flatten out on the end, and this causes them to want to walk, which in turn wears the pushrod bushing, can cause the seal to leak, and if the wobbling is too bad, it'll punch a hole through the release plate and the clutch pedal will drop to the floor...
I've got some work to do this afternoon and evening, so I won't get much more done with it today, but will email again when I have new pics loaded. The next thing to check on is the sync hub assembly for 3rd and 4th gears. The old style uses square cut slots for the sync keys, and this causes a stress riser in the corner which leads to hairline cracks in the hub. The new style VW changed mid-production, and it uses rounded slots which remove the stress point, and these don't crack. You have the old style hub in this trans, but it has to be cleaned and checked closely for cracks before I can say if it is good or not. I use a cheap 60x-100x magnifier to examine the corners of the slots to look for cracks. If it is cracked, a used hub would be installed in place of the old hub, and it is $25 for the hub, but it may not be needed.
The old input shaft ball bearing I think will be OK to use again. I've cleaned it fully and have inspected it and don't see anything wrong with it. I've oiled it up and it feels smooth and good, so it can be used again, but the next time around, I would consider replacing it, because it is original, and is started to add the miles up, so I'd probably not risk it again with the same bearing.
Update 05/26/10
The ring gears have been removed from the diff carriers now and are ready to be cleaned and swapped.
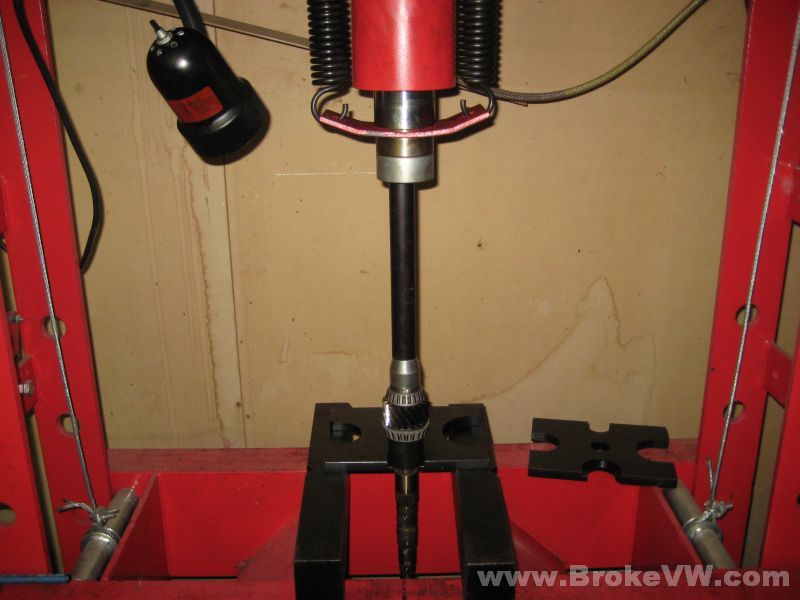
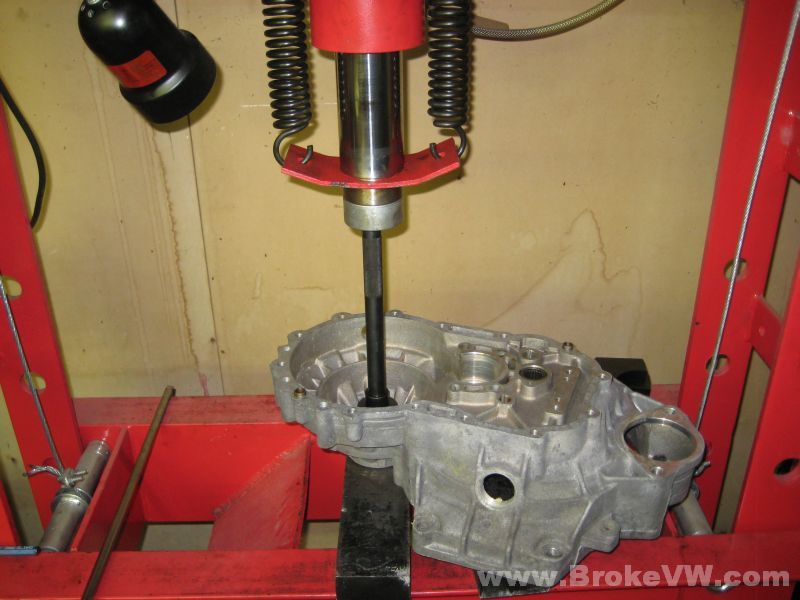
Pulling the bearings from the output shaft...
Drilling the rivets with the 6mm bit...
The 12mm bit is next, drilling the rest of the rivet head away until it spins off...
The drill bit, if it is good and sharp, will spin out long strands of swarf making the job go a little more quickly. If the bit is dull it just sits and chips away small pieces and heats up, cutting very poorly and ruining the end of the drill bit. This one spun out nice and long and even stayed attached to the rivet head when the head spun off.
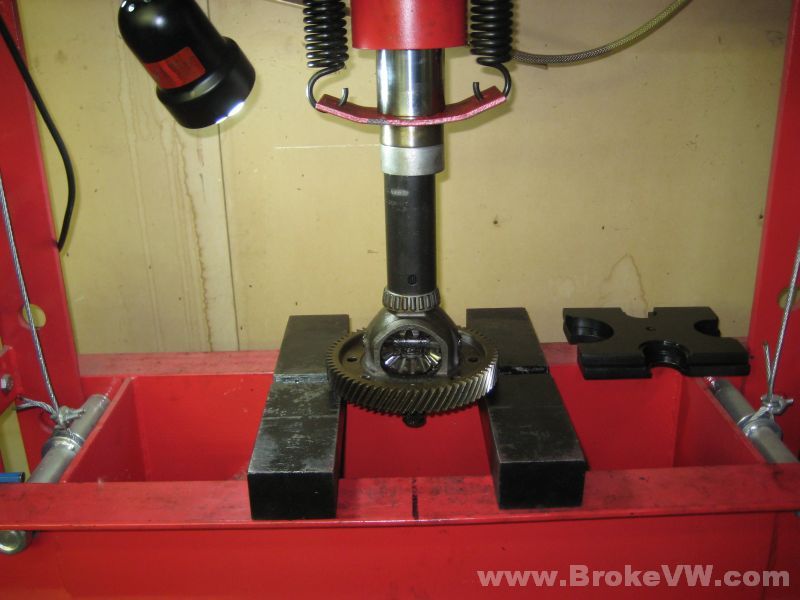
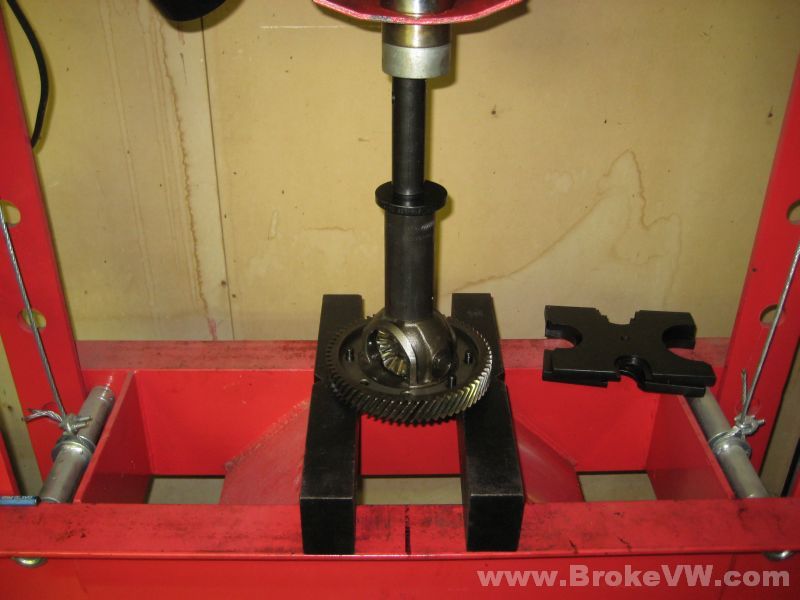
Pressing the ring gear off the diff carrier...
Update 06/02/10
I've started assembling some of the parts inside the trans,
getting those bagged up and ready for when the case is cleaned.
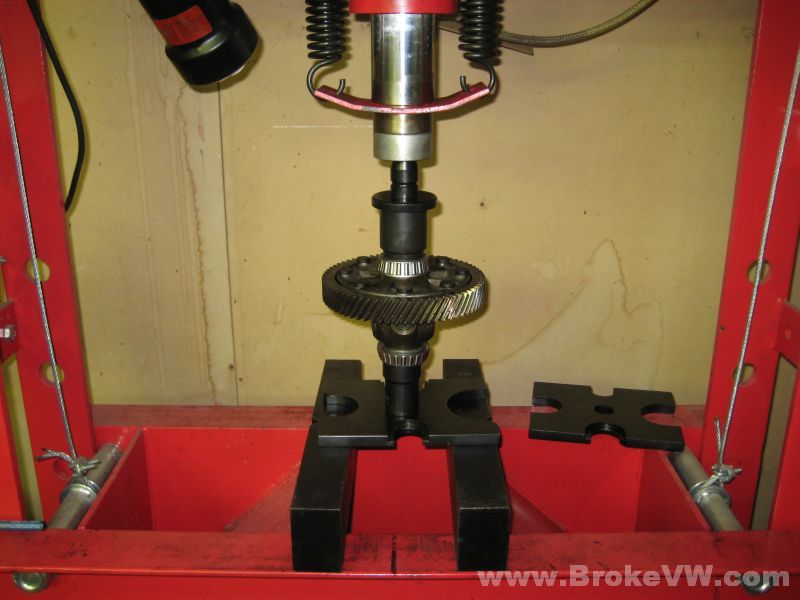
Pressing on the new tapered bearings, both at the same time, after heating to
210F...
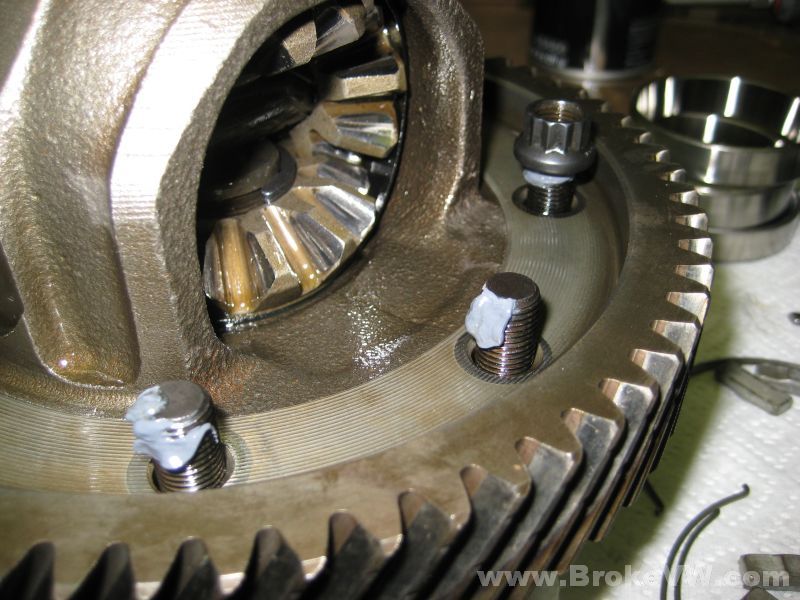
The ring gear has already been pressed on, and I'm now installing the bolts from the ARP bolt kit...
Pressing on both diff bearings at the same time after also heating them to 210F (the ring gear was also installed at 210F)...
ARP's special moly assembly lube is used on the bolts and the nuts are torqued to 40 ft-lbs without washers.
The diff is built with new 2.3mm rings, new thrust washer behind the spider gears, and the 3.67 ring gear. The ouput shaft has the new bearings pressed on, which is as far as I can take piece for now. The shift forks are assembled and oiled and can be bagged up along with the diff....
This selector is rusted pretty good, I'm going to replace it with another one. I have enough of them I'll just give it to you and scrap this one. You were right about the spots earlier being rust, once out of the parts washer after being scrubbed, the hard bumps were gone leaving pits, so it must have been rust where the oil ran off the parts in those places while sitting. Other than the selector, flange cone and reverse shaft top, there wasn't much inside on the other parts, but this will be replaced...
The 5th assembly is also done and can be bagged up...
That's it for now, next will be building the input shaft with 3rd and 4th, then the case needs cleaned and the bearing preload procedure can start and from there the rest of it can be built into the casing.
Update 06/17/10
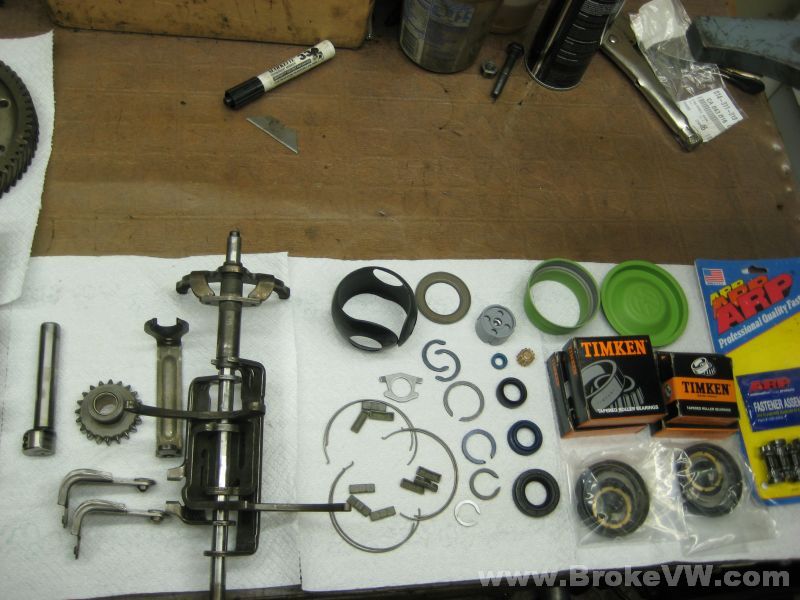
A couple older pics I forgot to upload to the page showing the parts laid out prior to partial assembly...
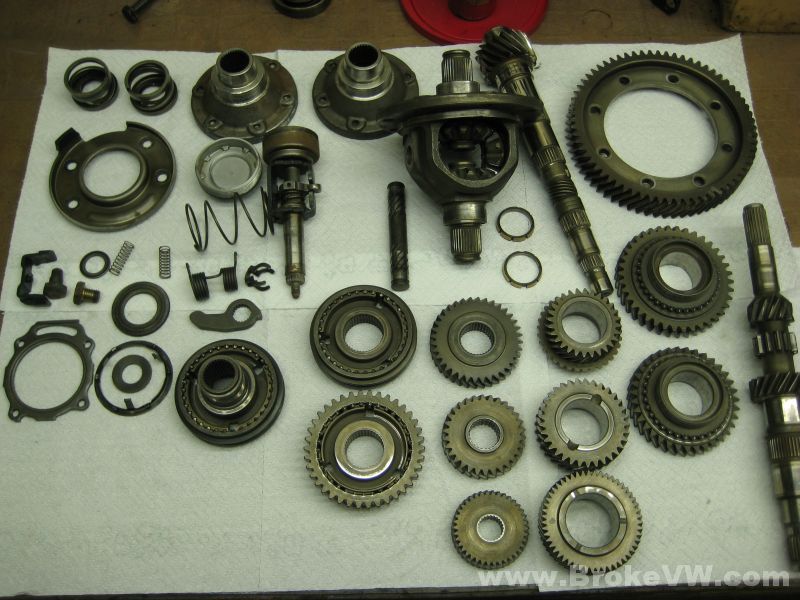
The new parts as well, but I just realized I forgot to take the new shaft roller bearings out there, so they're not in this pic...
Update 06/18/10
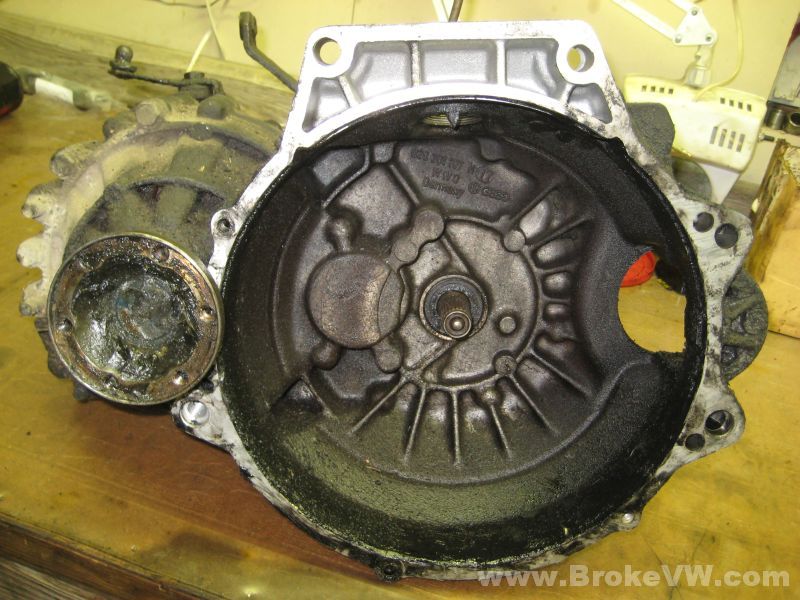
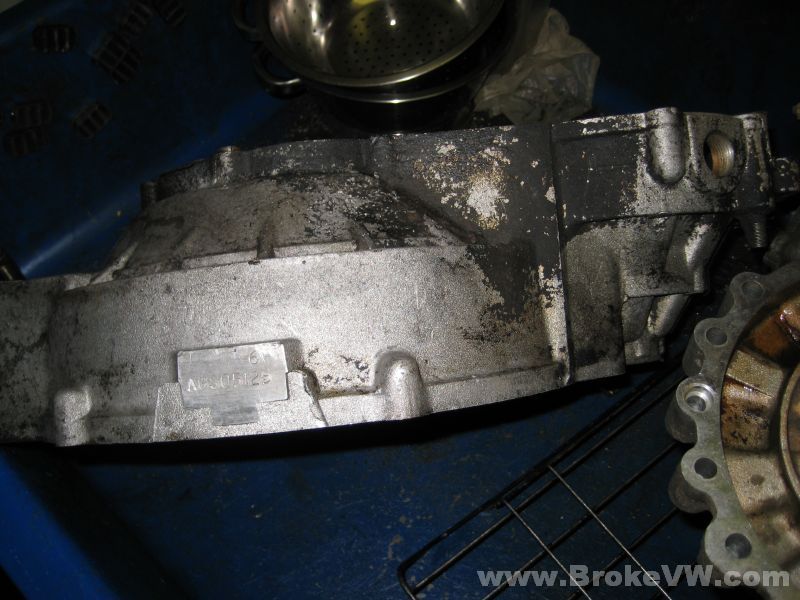
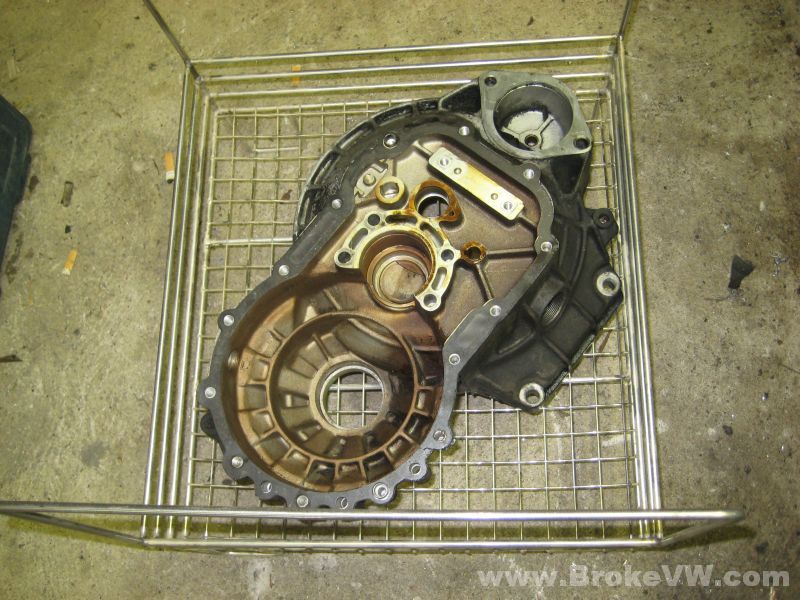
Pics, and lots of 'em! Here are a couple shots of the bellhousing prior to cleaning...
Here is the bellhousing sat into a stainless steel basket. With the amount of grime on your trans, I decided to make a purchase of a piece of shop equipment I have wanted for some time now.... an ultrasonic cleaner....
It is a 1200W, 20-25 gallon tank and while it is plenty large, I think it might be underpowered for the size. I think 1200 watts would be better suited to a 10-15 gallon tank, but I'll see if I can make this one work for my needs...
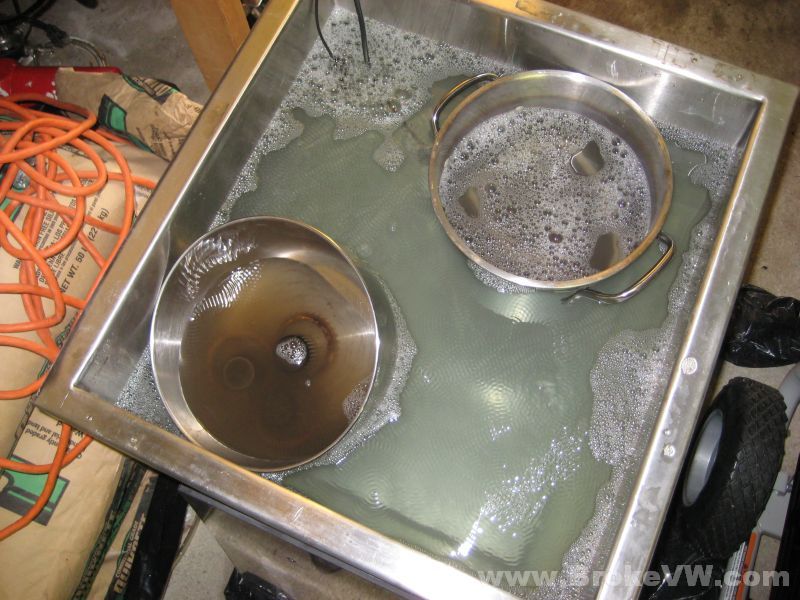
You can see the ripples on the surface of the solution (tap water and Dawn Ultra), inside the water the molecules are being ripped apart by high frequency energy waves, which then leaves a small vacuum bubble in the space where the water WAS.... the next wave hits this bubbles and implodes it in on itself. The forces are massive, but on a microscopic level, so it gently cleans, but using a great deal of very localized force.
I've read they have measured pressures equal to the center of the Earth (several thousand PSI) and temps as hot as the surface of the sun (5500K I think) next to one of those bubbles as it implodes, so it is a lot of force, but a very tiny amount of it. The good news is that the bubbles are formed by the trillions inside the water, and they will get into any bolt holes, crevices, etc. to clean.
I think I need to sort out a better cleaning solution, but for now, it is OK enough...
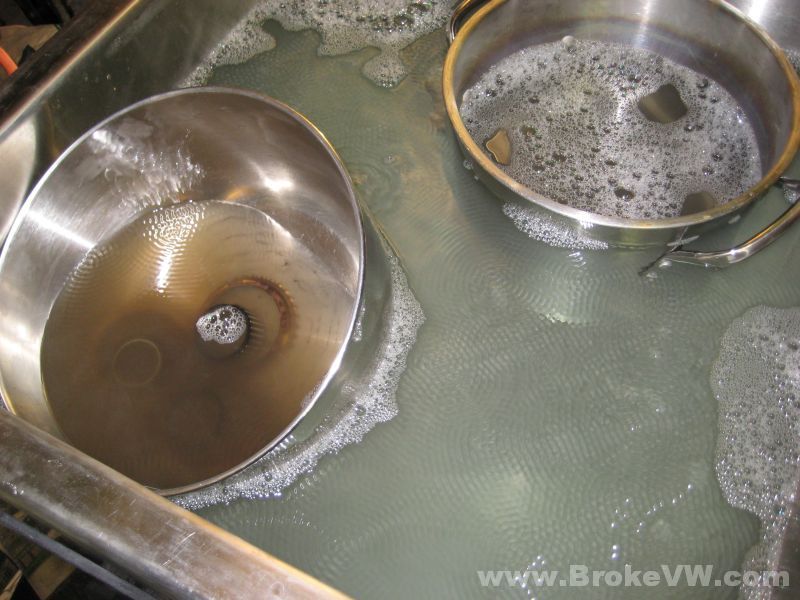
The dirt collects in circular patterns as the bowl vibrates at around 38-40 KHz...
Here is the bellhousing in the tank...
Looking closely, you can see what looks like smoke coming out of the 4 bolt holes there. That is dirt being removed. When you turn the machine on, the part will "smoke" like that with the dirt swirling off into the solution...
Right, onto the build.... installing the pushrod bushing into the input shaft. I use a modified pushrod to press the bushing in while supporting the inside bore, as it is soft and can deform under the pressure needed to drive it into the shaft...
I then flip a pushrod over and insert it from the other side, so I can finish driving the bushing in fully with a 10mm deep socket...
The bushing was always supported inside, so the pushrod glides in an out effortlessly. If you ever deform one on install, don't drill it out so the pushrod is smooth, leave it alone. The soft bronze will soon loosen up... if you drill the bushing, it'll have slop and can let the pushrod seal leak...
Installing the pushrod seal. There is a small plastic cap that sometimes comes with the seals, it is an install tool. You drive the seal and the cap in until flush with the end of the input shaft...
Then you pop the cap out, and the seal will be left 0.8-1.2mm below flush with the end of the shaft, which is exactly where it should be...
Installing the 3rd/4th sync hub....
The new input shaft circlip installed...
The sync ring for 4th gear.... it looks nasty, but that is just stain on the brass that didn't come off in cleaning. Notice the shiny new german needle bearing there, FREE! :P
The completed input shaft...
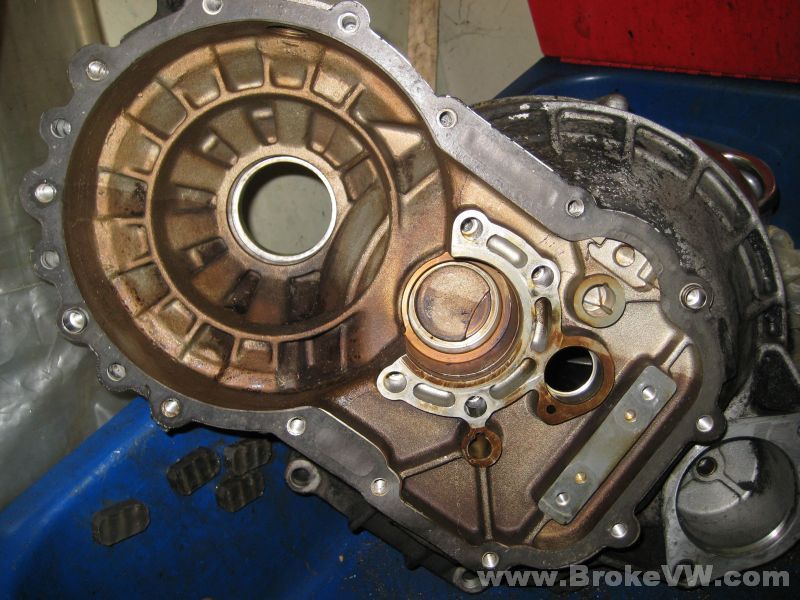
A couple pics of the casing after cleaning. To be honest, I'm
not overly thrilled with the ultrasonic cleaner just yet. I might need to run
the solution at a higher temp, I might need to purchase a store-bought solution
($275 for a 5 gallon bucket, yikes!), I'm not sure, but I'm still messing with
it, it is brand new to me so I need to learn what works best with it.
It did remove a good bit of contamination and stain from inside the case, but
I'd like better.
The 5th housing looks OK....
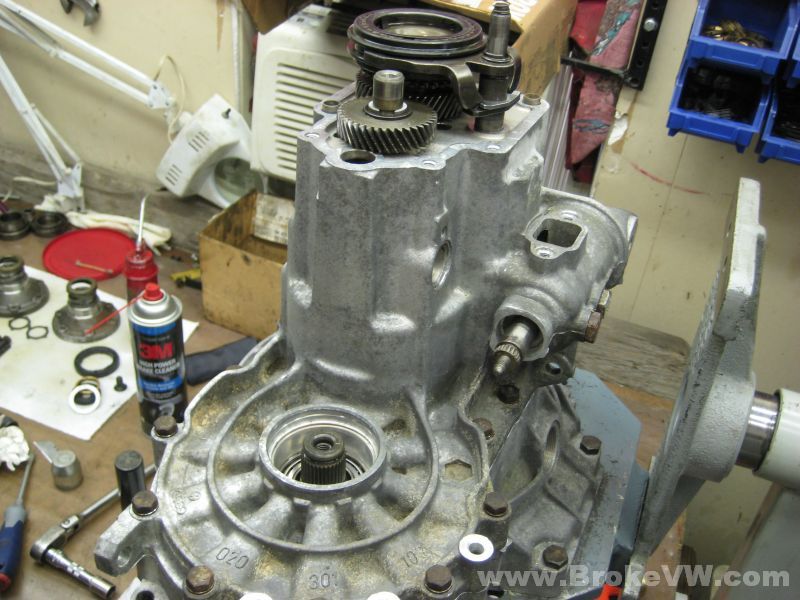
The gearbox half looks OK on the 5th gear side...
I'd have liked to see those stains get removed, but if they're not coming off now, I'm not worried about them coming off later after the trans is built... they're really in there!
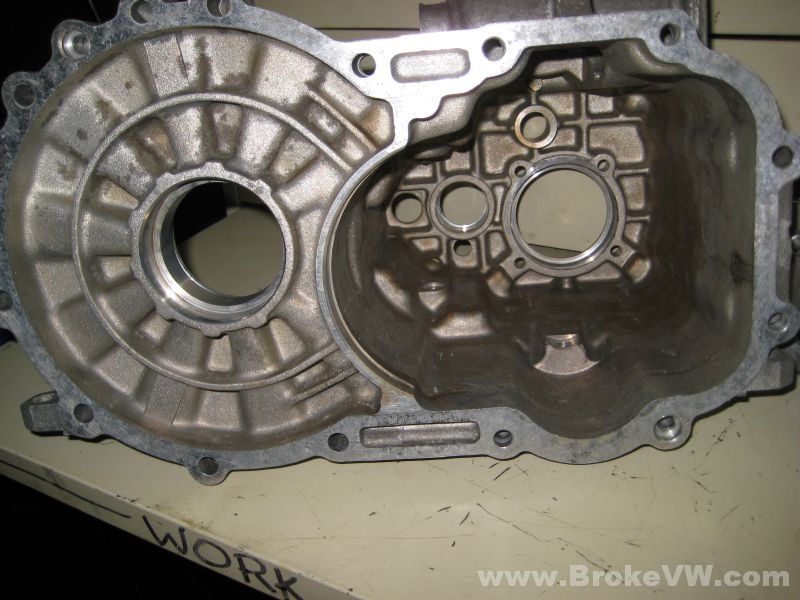
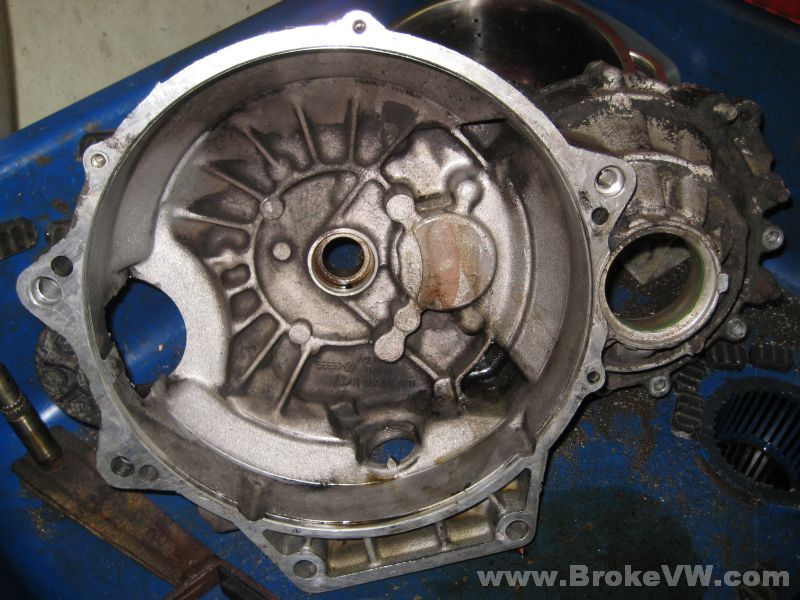
The bellhousing from before turned out OK, I'm happy with it. I learned the ultrasonic cleans from the outside in... so those chunks of horse poop and road grime that was built into thick layers was being removed slowly, but it didn't remove it all.... so before painting, you might need to sit and dig the gunk out of a few nooks and crannies on the casing...
The new bearings ready to be pressed in...

Pressing them into the gearbox half...
Now the bellhousing....
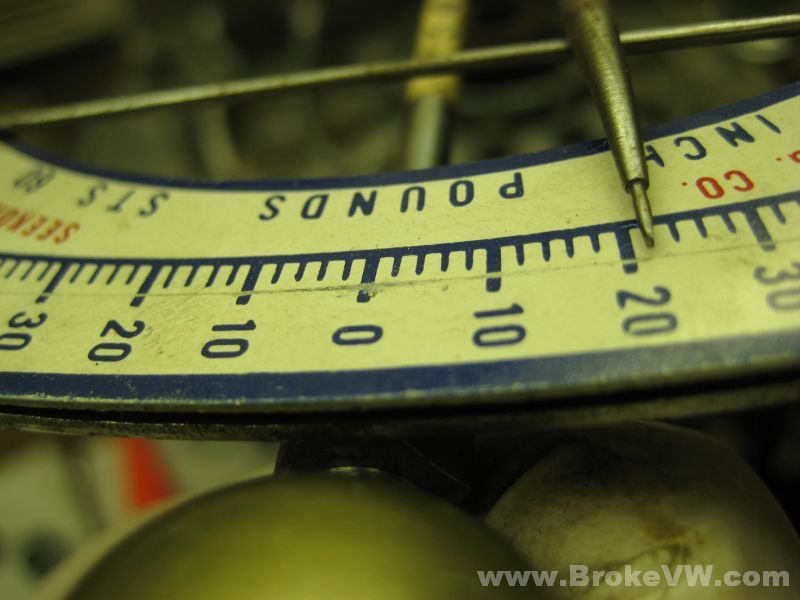
With the races finally installed and the casing clean, I can begin the bearing preload procedure. Here is your trans with the dial set-up to measure the bearing play.... I measured out 0.87mm of slop. Adding the constant of 0.40mm to that gets us 1.27mm of shims needed. I only had to use one shim, a 0.30mm, and your trans had a 1.0mm inside already, so you needed one diff shim to bring it into spec...

Spec is 11-31 inch pounds, the middle of the range being 21, which is where I like to aim for.... this is perfect in my book....
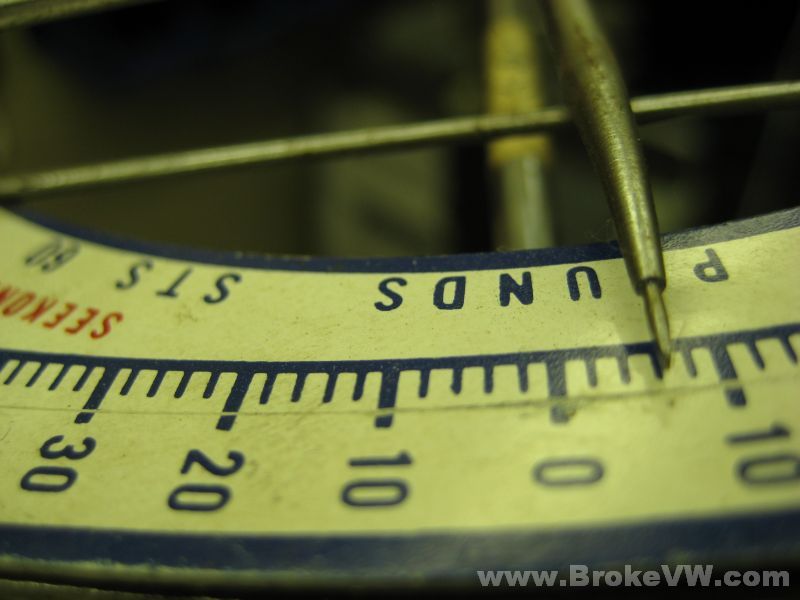
The output shaft isn't as perfect as I'd like, but it is still in spec. The range is 4.4-13.3 inch pound so just under 9 in-lb is where I'd like to be, yours came in between 6 and 7, which is in spec, so I'm leaving it...
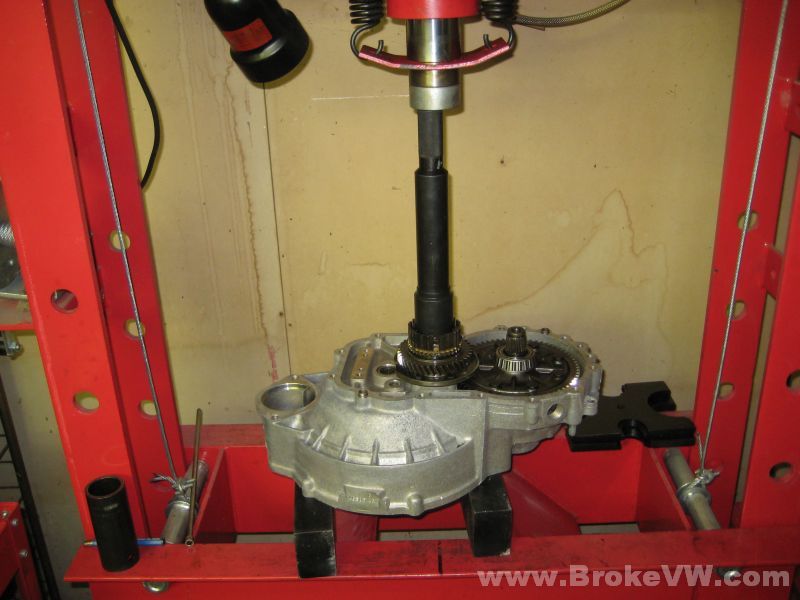
With the preloads done, the built can commence. The diff and output shaft are bolted into place...
Pressing on the 1st/2nd sync hub....
2nd and 3rd gears installed. I had to shave the 3.0mm circlip for 3rd down to about 2.9mm to get it to fit. Normally they accept the 3.0mm, but sometimes they are a little tight and it will take a 2.9mm, more rarely a 2.8mm circlip....
4th gear installed onto the output shaft and the input shaft installed....
Notice when the input shaft is installed that it will sit too low in the trans if not properly supported from below. This is a step a lot of people skip, and then they wonder why it feels tight when the case is pressed back on. If the input shaft isn't supported, all of the press force will go into the shaft, mash into the front roller bearing, and then the gears won't line fully...

This is the big German support bar used for various transaxles, you adjust it so the input shaft is where it should be, then it will hold it there until the trans is built, ensuring it doesn't move...
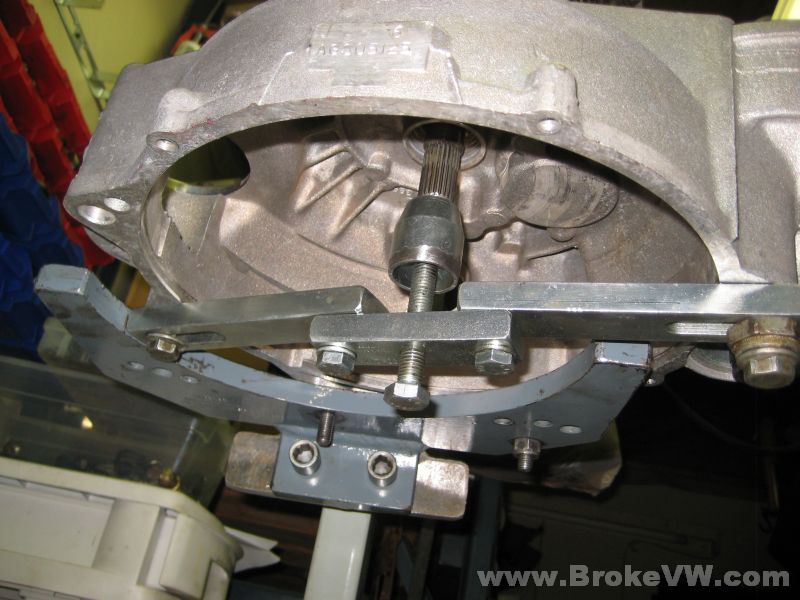
Once lifted, the input shaft gears now align with the mating gears on the output shaft...
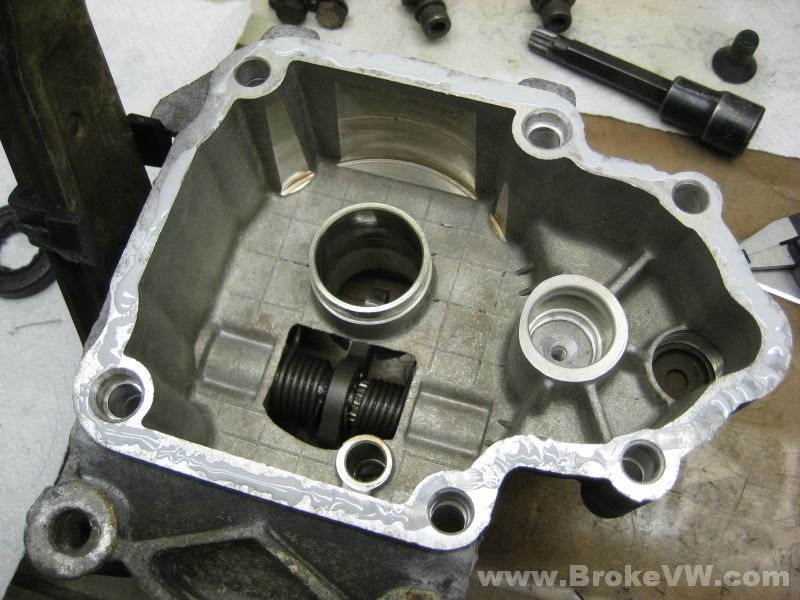
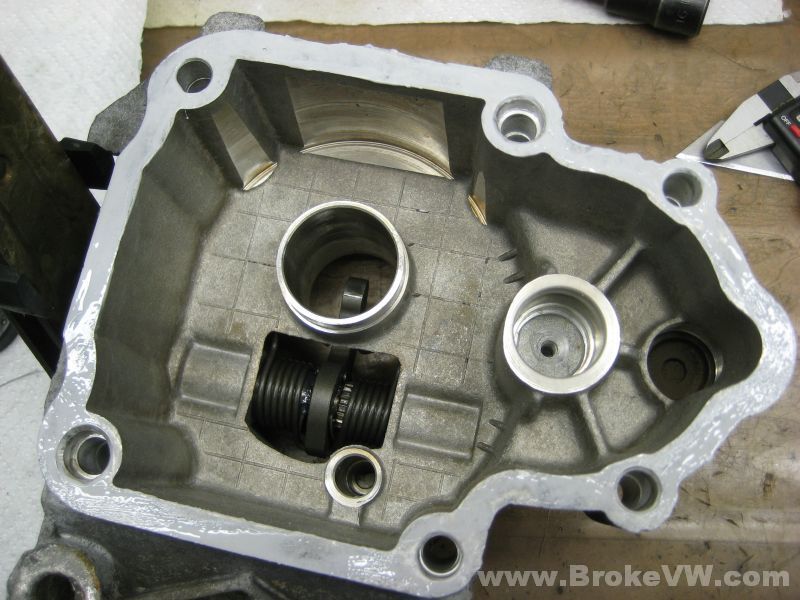
The shafts installed, the shift forks installed, reverse gear and relay brackets installed. The case is ready to be sealed up...

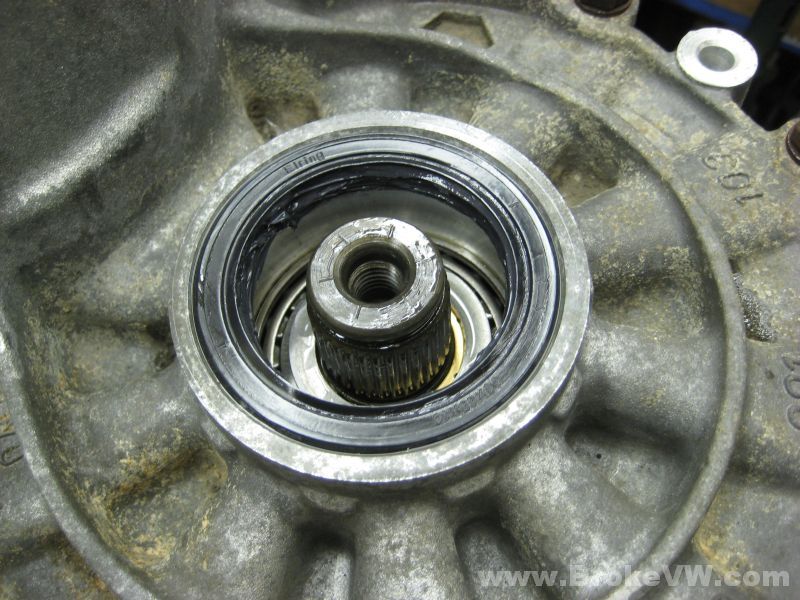
The new release arm seal in the 5th housing...

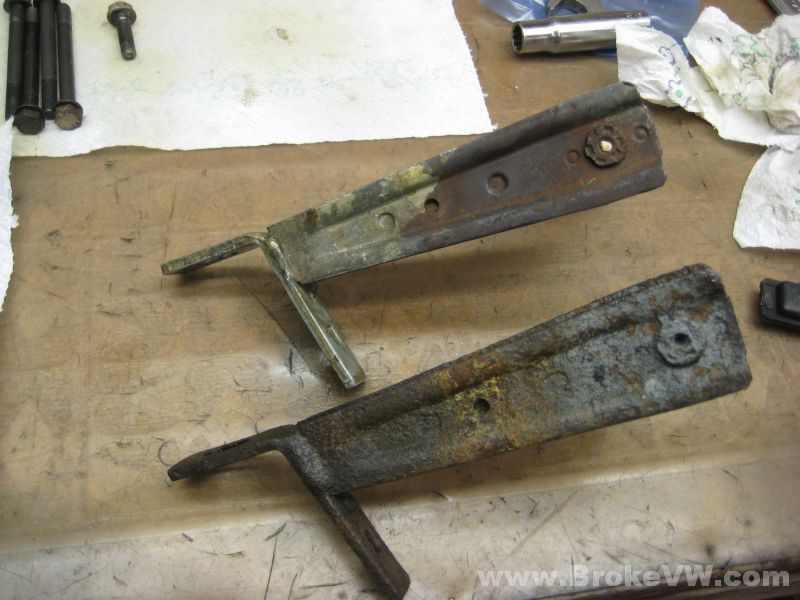
I replaced your release arm with one I had here, it is in just slightly better shape, but it is a little better, so I'm using it. Yours would have cleaned up with sand blasting and plating, but because of time and money I just swapped it out with another one in a slightly less craptacular state.... (yours is the bottom one, the replacement is on top)...
The parts left to install. I also replace the selector assembly with one from my supply, it has no rust on it like your old selector...

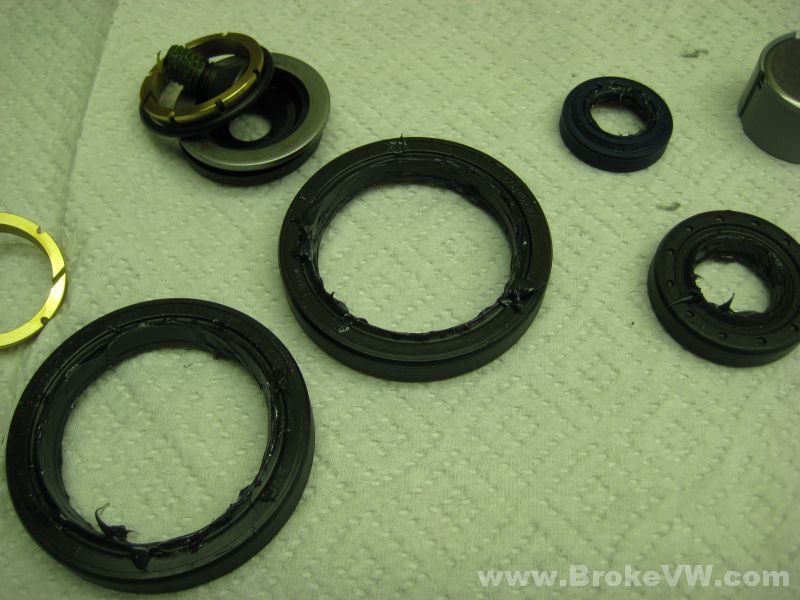
The seals all greased up... anytime you have a radial shaft oil seal like these, it is a good idea to take axle grease or other thick grease (I use moly axle grease) and pack the are between the dust lips and the sealing lips inside the seal. This helps trap any contaminates before they reach the sealing lips, and keeps the seal lasting longer. The outside of the seal is wet with oil when they are pressed in, but the inside is packed with grease...
The 5th housing with the release arm and actuation finger installed...
More pics to follow later this evening. I plan to have the trans built at some point tonight, and it should be ready to be picked up tomorrow morning.
Update 06/19/10
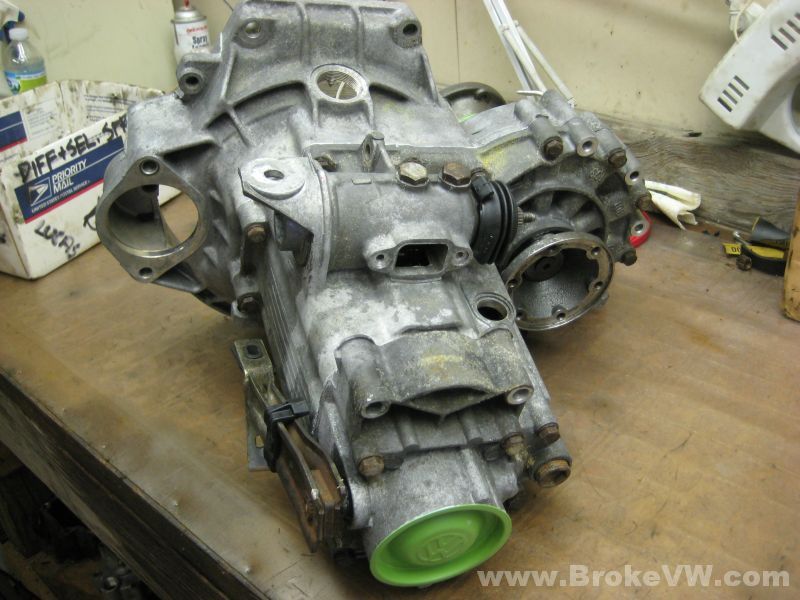
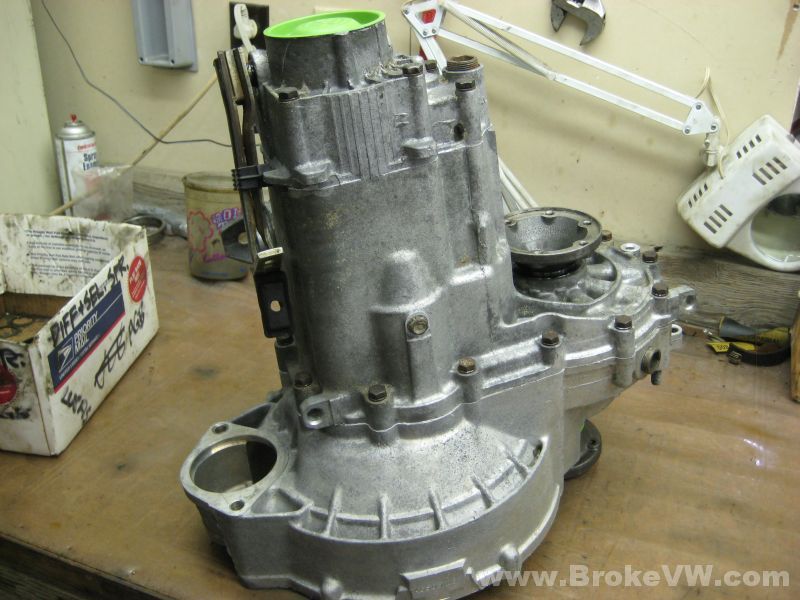
The case sealed and bolted up...
5th gears installed and the 5th shift fork being adjusted...
The selector installed...
The selector seal being installed. It is installed after the selector, so the selector doesn't catch the sealing lips as you press it through...
Installing the Peloquin 80% kit. There is the new bronze conical thrust washer, then the spacer washer, and finally the new flange seal...
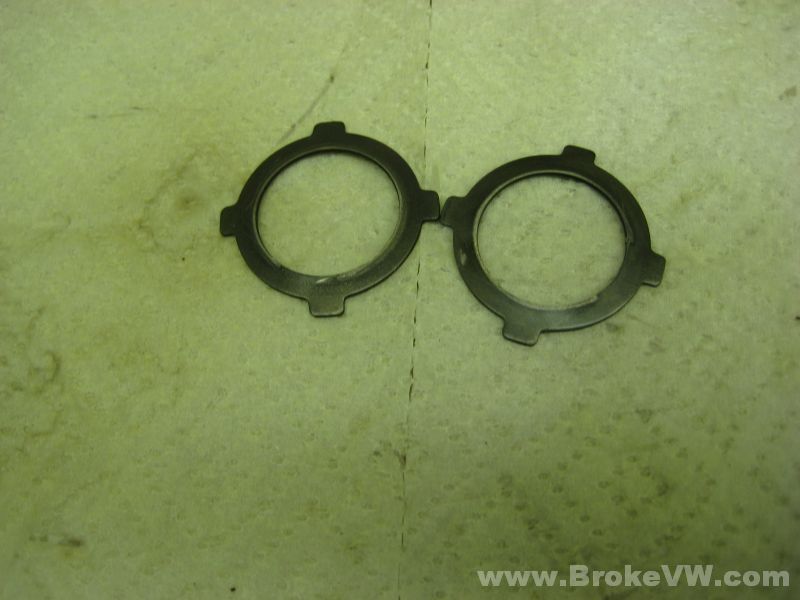
The 80% kit requires you to delete the concave washer under the circlip. Only the circlip is installed...
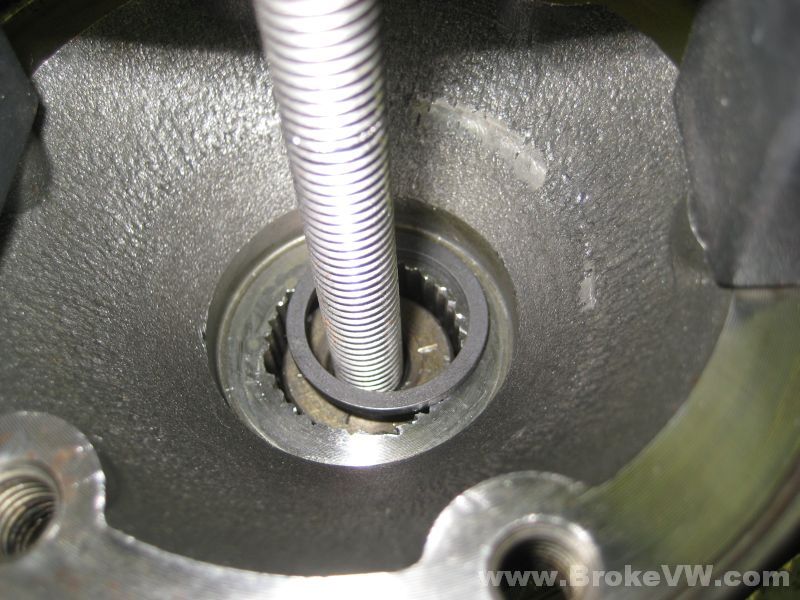
These concave washers are what you don't use, they'll be returned to you with the trans in case you need them later...
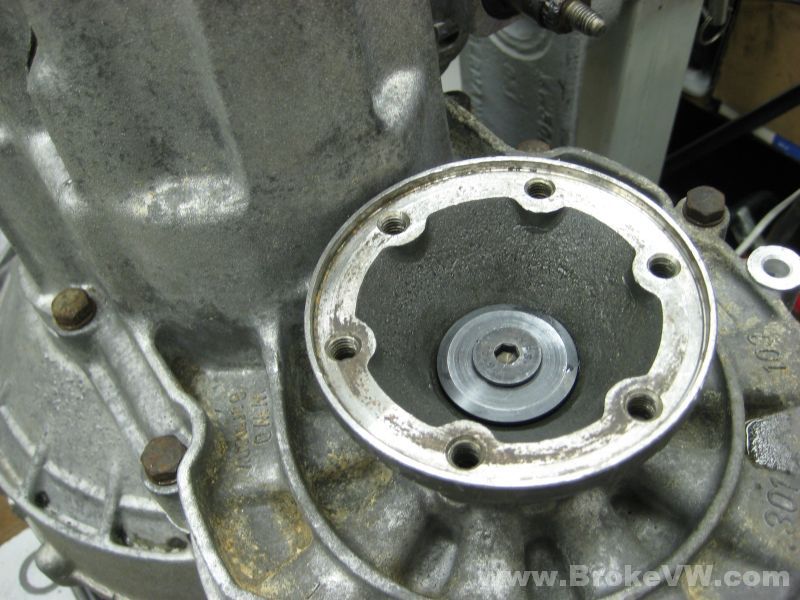
The steel sealing cap and bolt are installed, torqued to 33-35 ft-lbs....
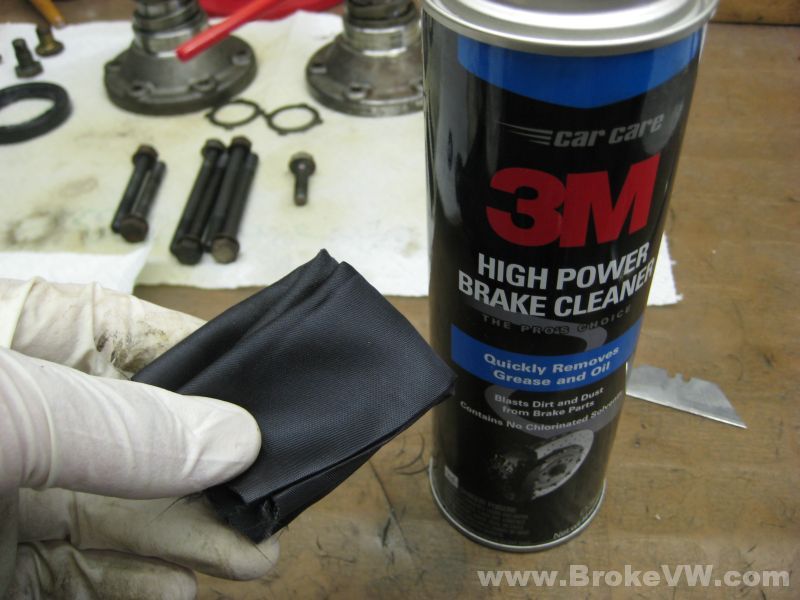
Cleaning the sealing surfaces with scrap lint-free rags, they don't leave fibers if they snag on the casing...
The VW sealing paste.... it was about $45 for that tube shown there, about a month ago they raised the price to around $100...
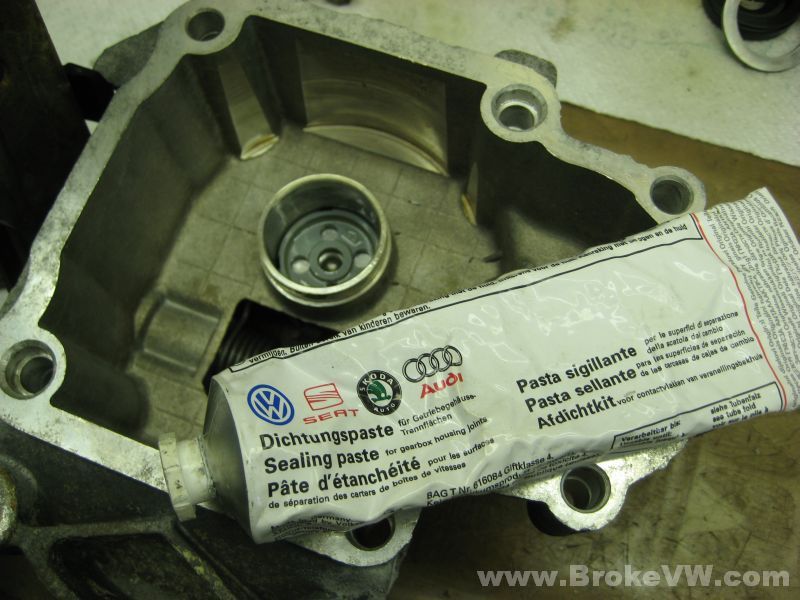
It is thin and runny like a paint, but seals quite well and self-levels after 45 seconds or so to form an even coating...
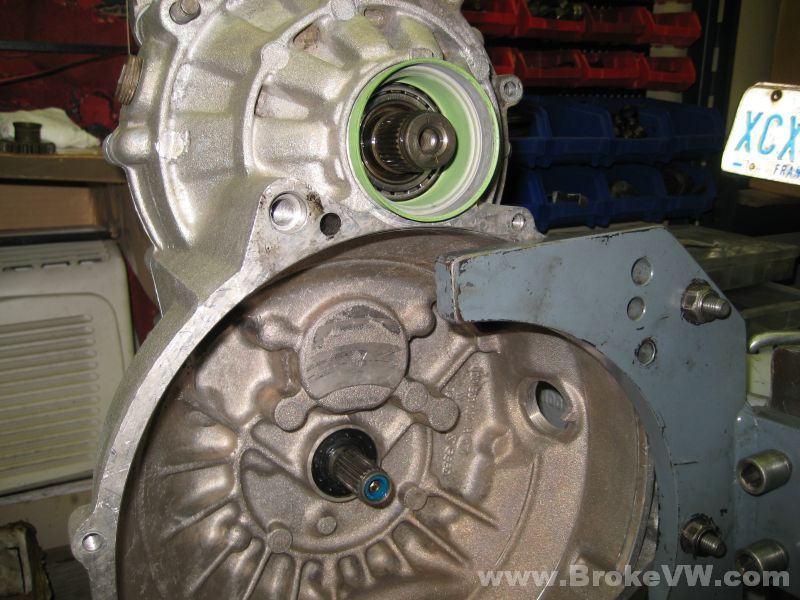
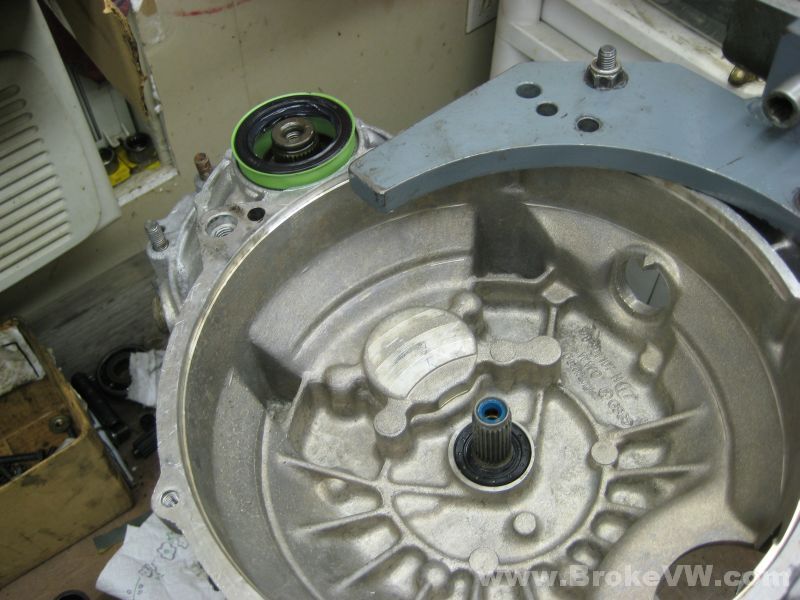
The 5th housing installed...
The green seal sleeve and the input shaft seal installed...
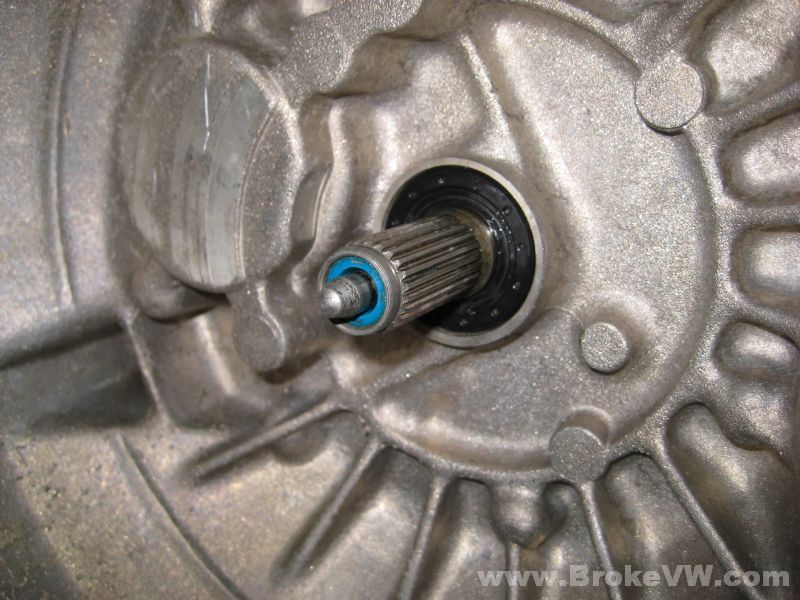
The passenger flange seal installed...
The new cryo treated VW pushrod...
All done...
The drain and filler plugs are loose, it needs 2.0L of GL4 rated fluid in the 75-90 weight range.