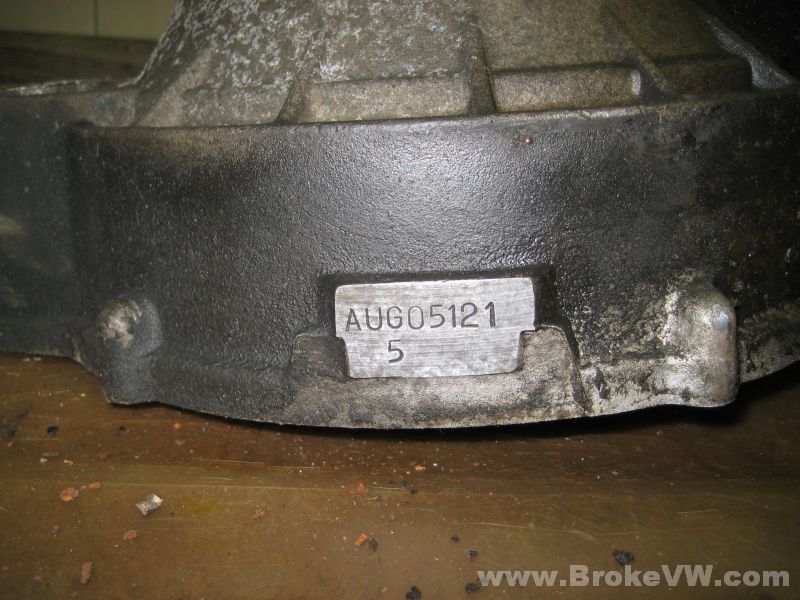
Mike AUG
Arrived 11/19/10 Done 03/04/11
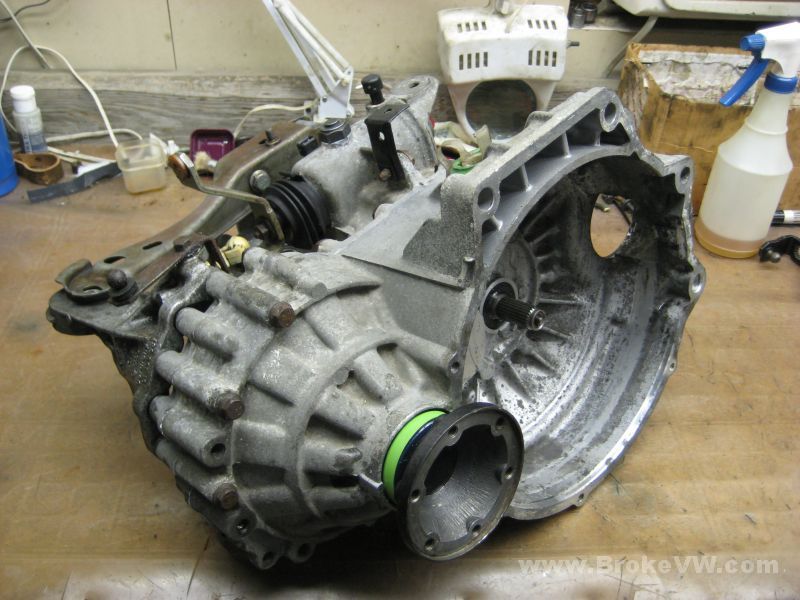
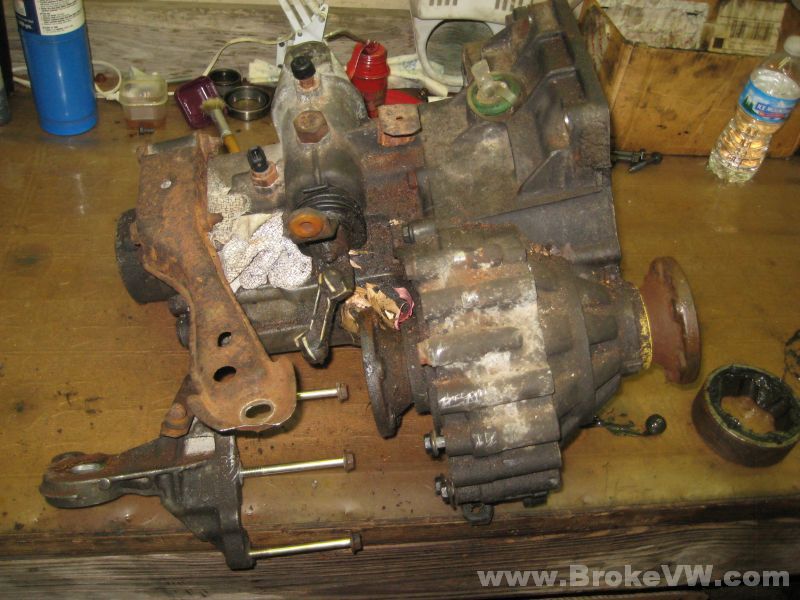
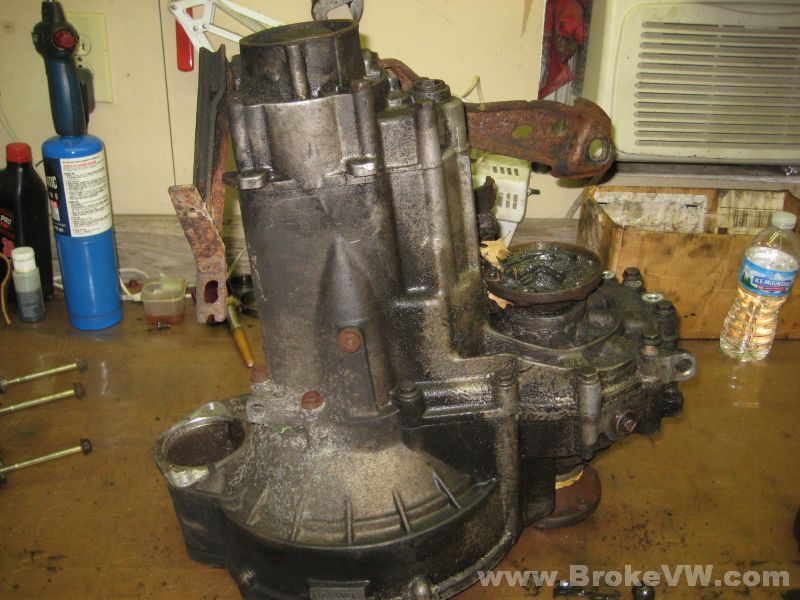
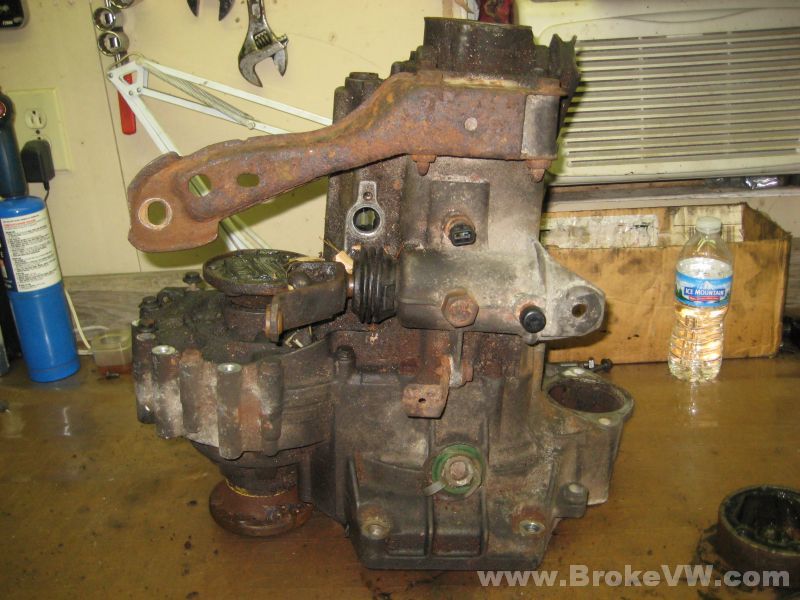
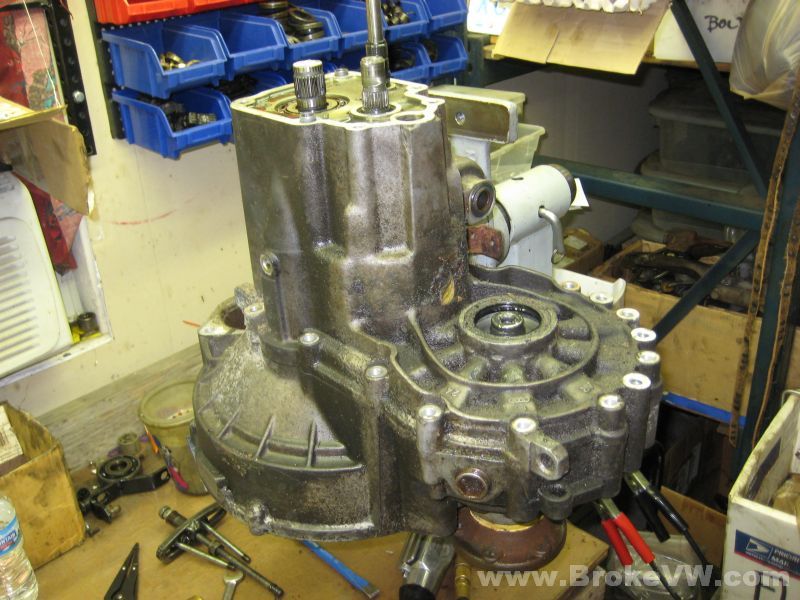
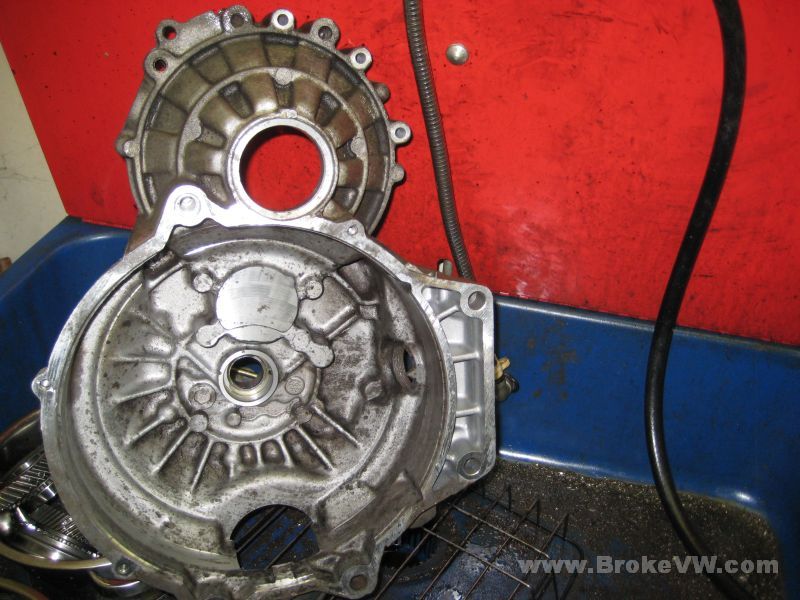
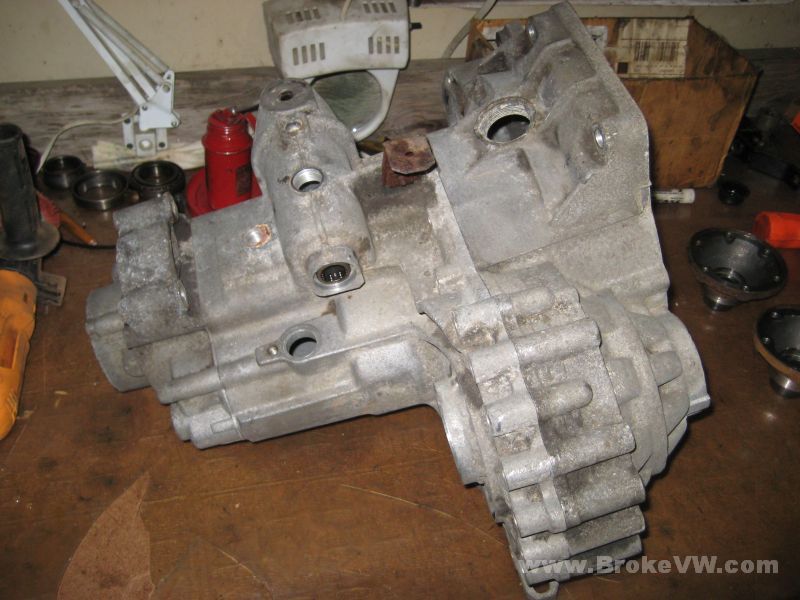
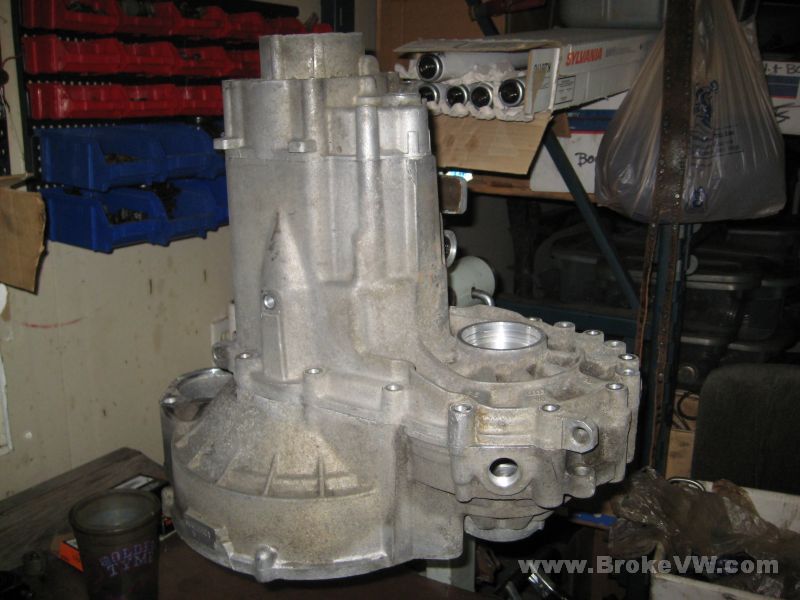
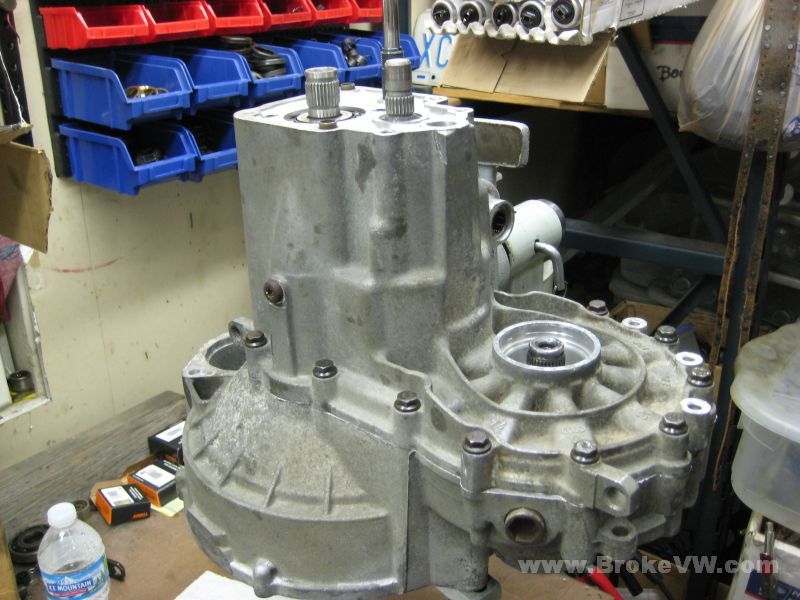
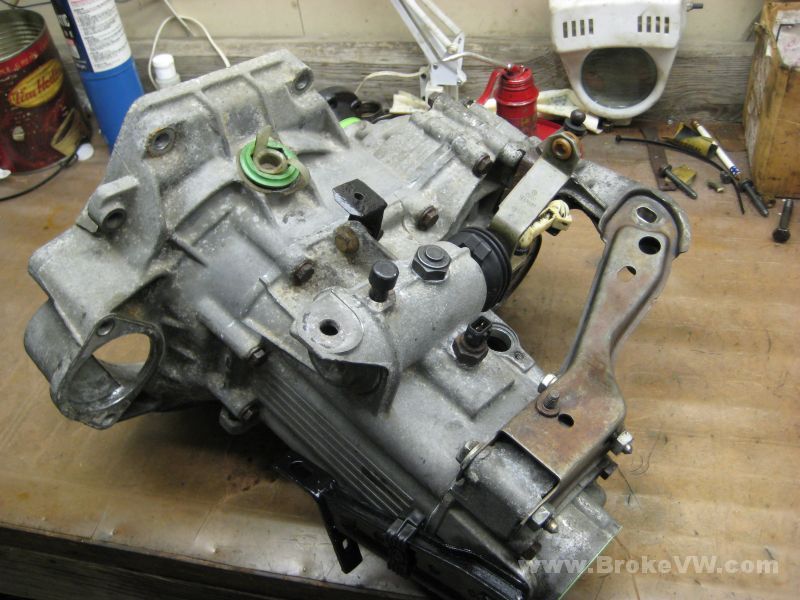
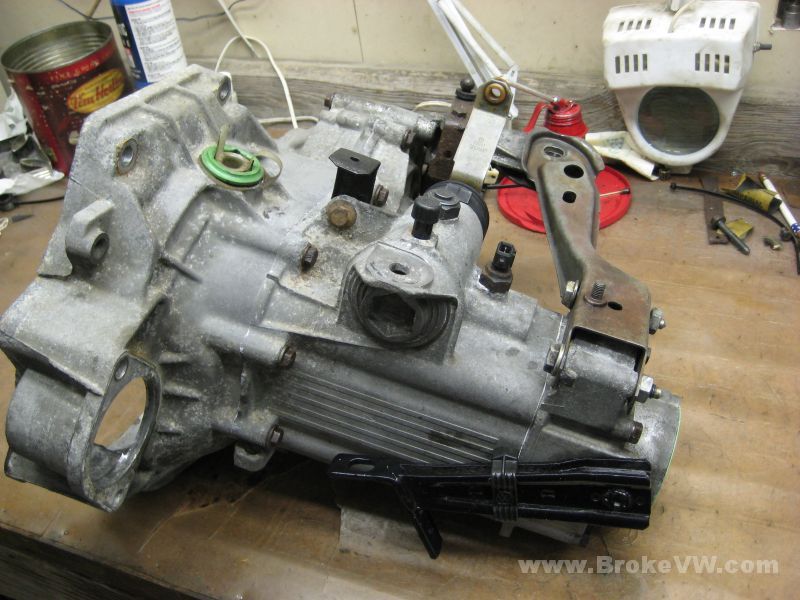
The trans as it arrived...
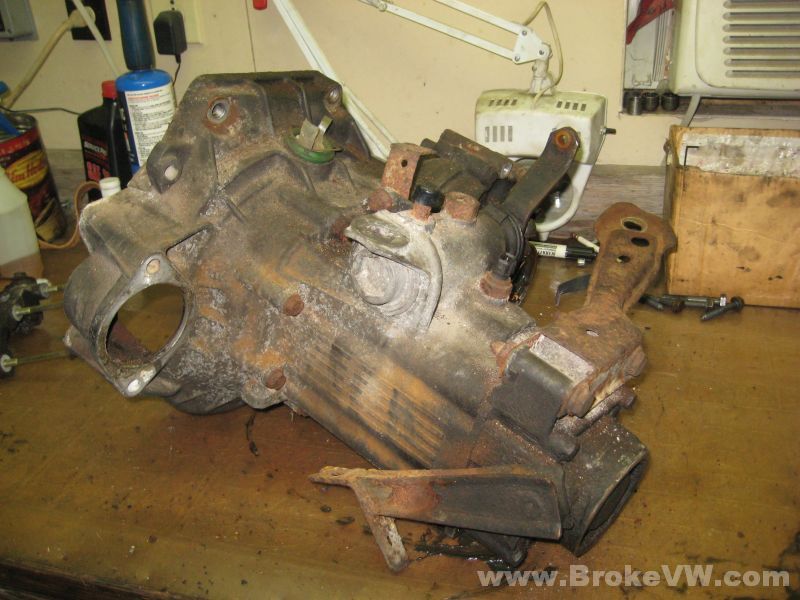
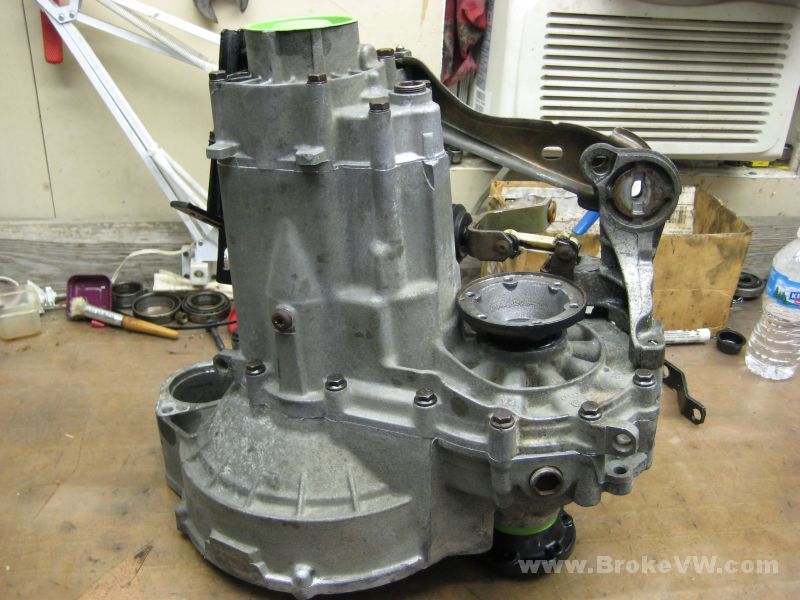
After removing the mount bracket....

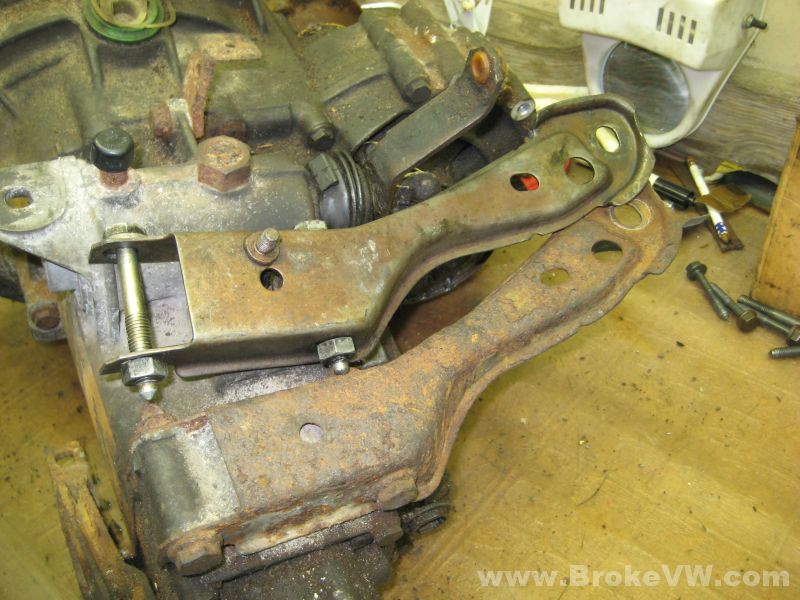
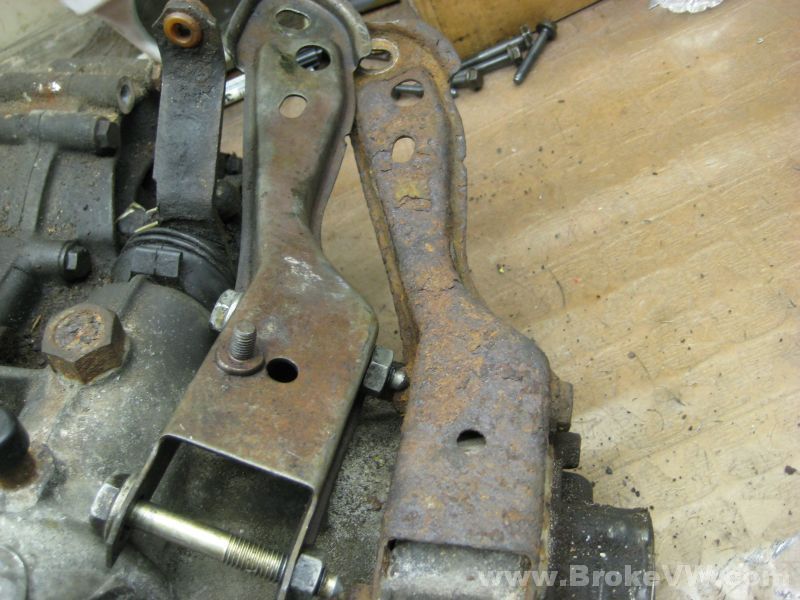
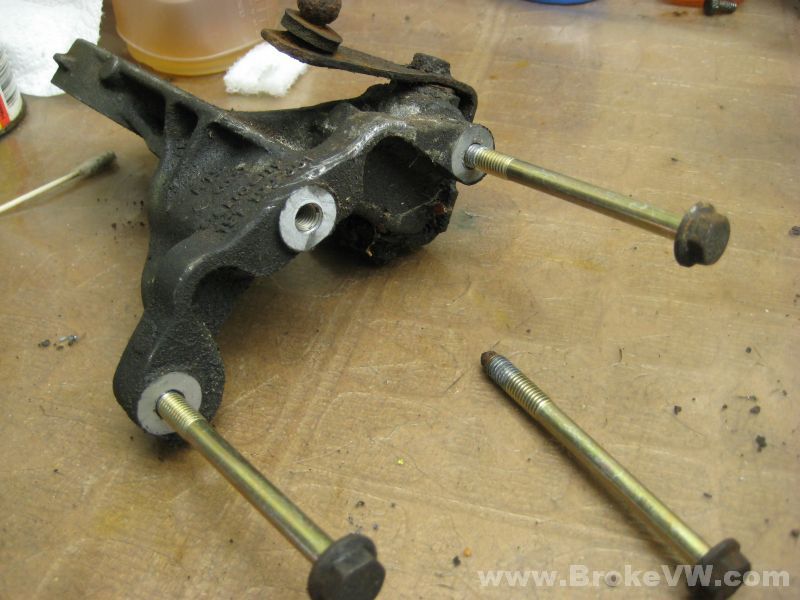
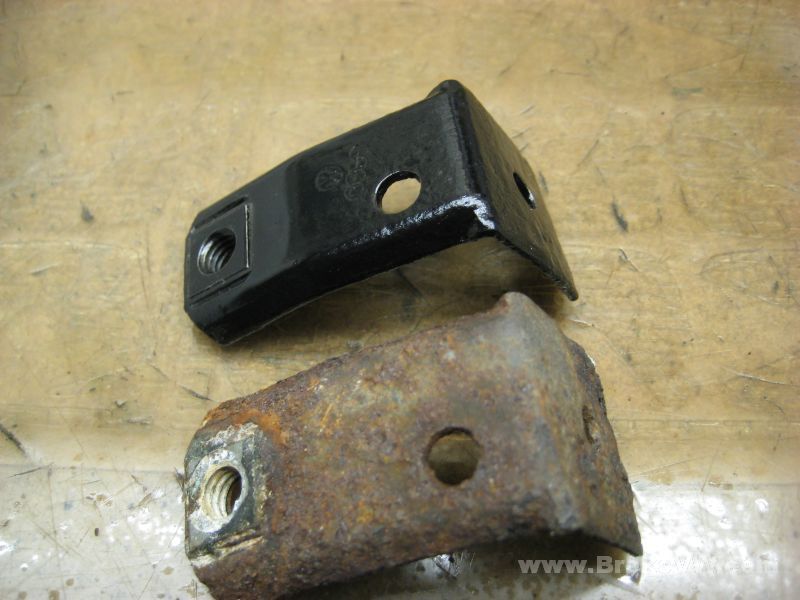
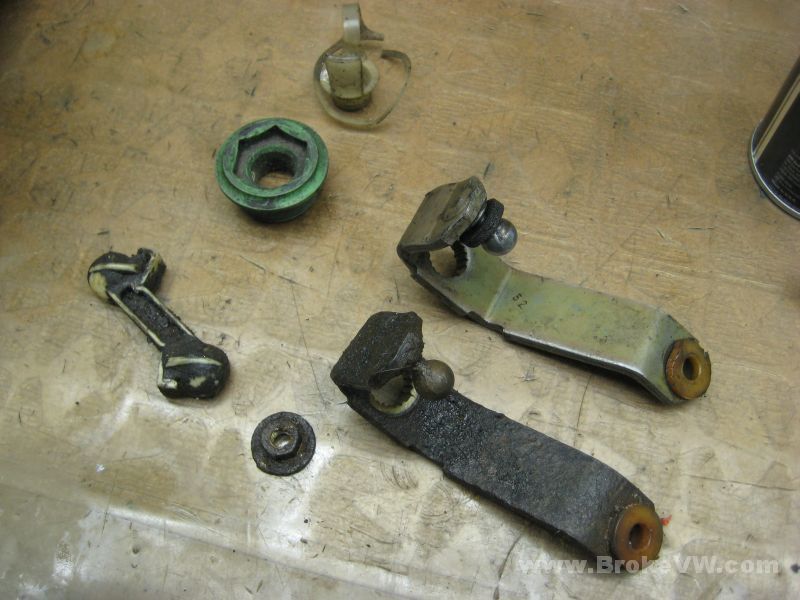
Here is the mount support arm I will swap out on your trans. The one I have is stained and used, but in much better shape than the one you have now, which is badly rusted...
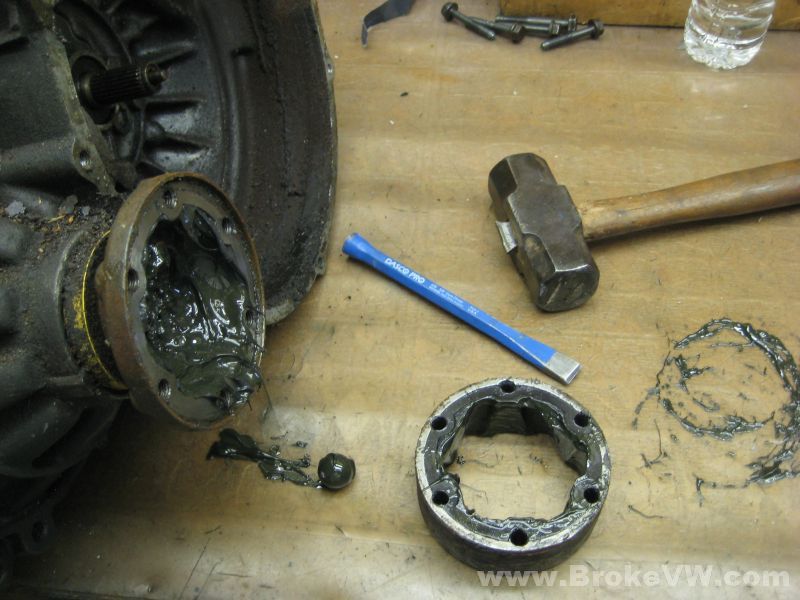
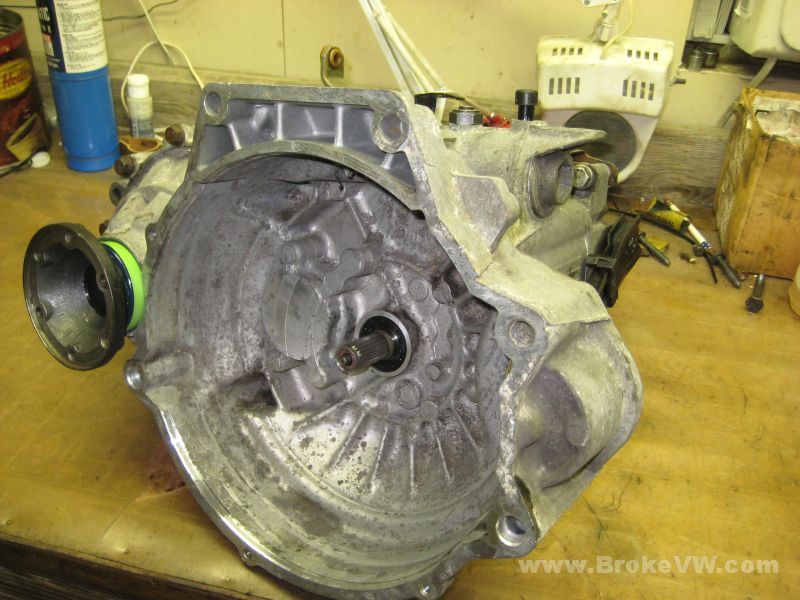
A chisel and hammer made quick work of the inner CV joint,
2 taps and it was off...
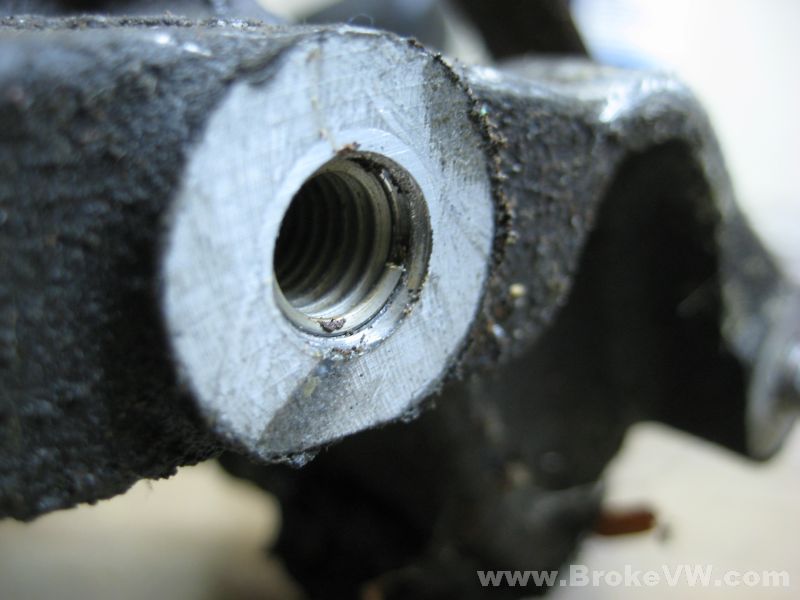
The mount has been stripped out in the past. I noticed all 3 bolt holes have had heli-coil thread inserts installed into them...
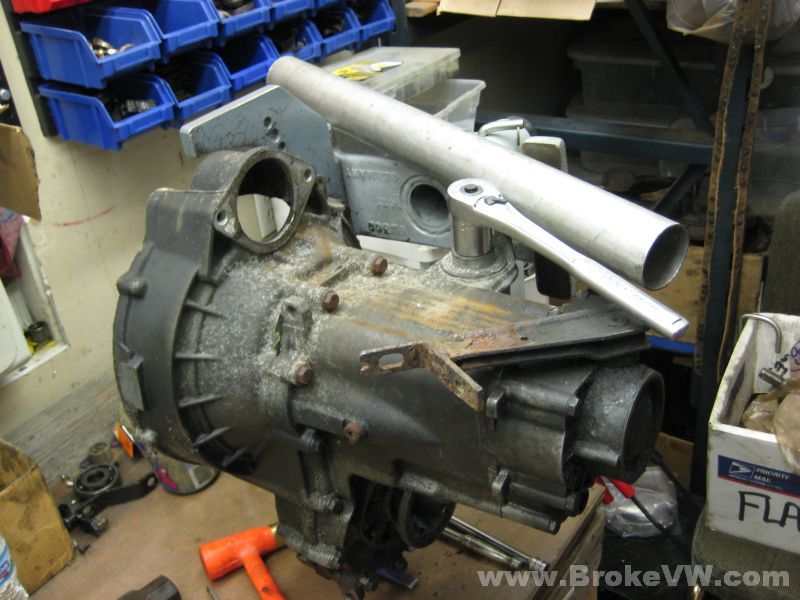
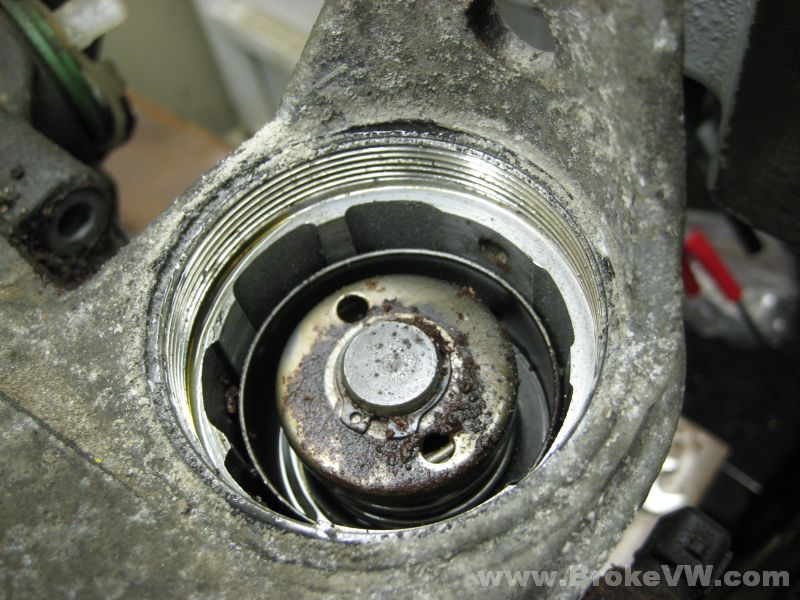
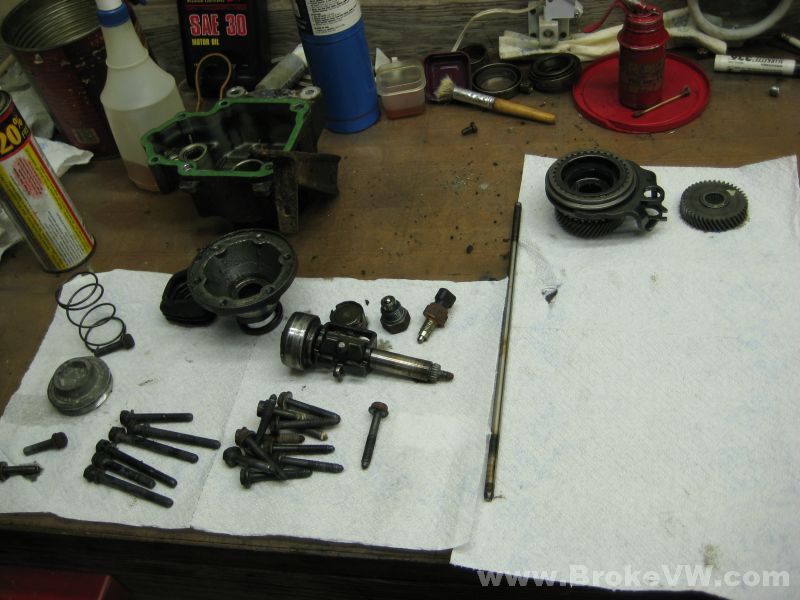
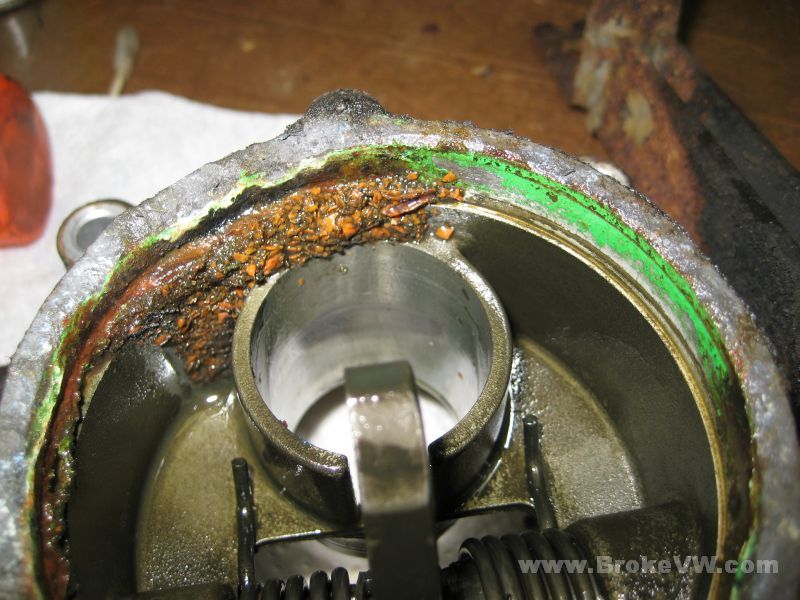
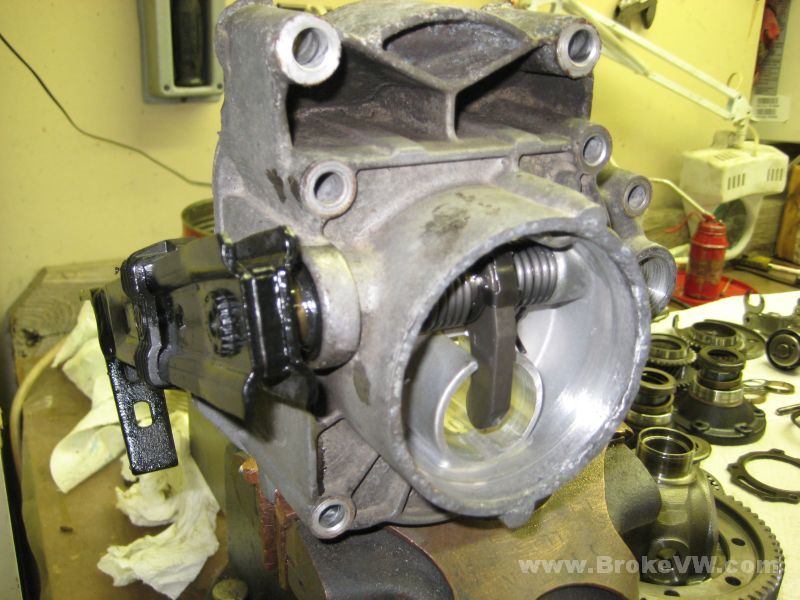
The 27mm selector cover was very tight, and seized into the casing, but a cheater pipe and it was removed...
The selector doesn't look like it has been oily in some time... there is rust forming on it, hopefully the rest of the trans won't have any rust inside....
This is strange... I rarely have to pull the flanges form trans, only on newer and lower mileage MK3 boxes do I need to pull them. This trans needed both flanges pulled... have they been replaced in the past? Normally the spring pops the flange off as soon as the circlip is removed, these flanges were both still tight on the output shafts. I would not have guessed them to have 200K+ miles on them!
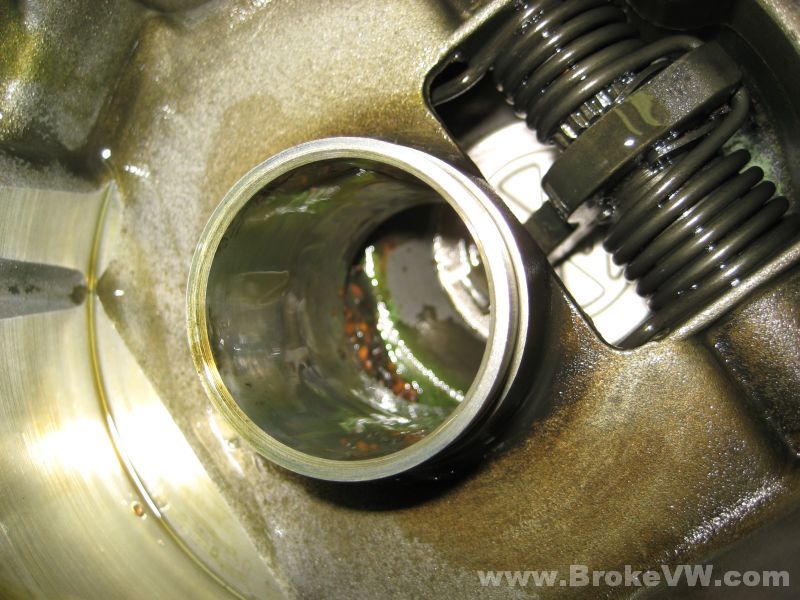
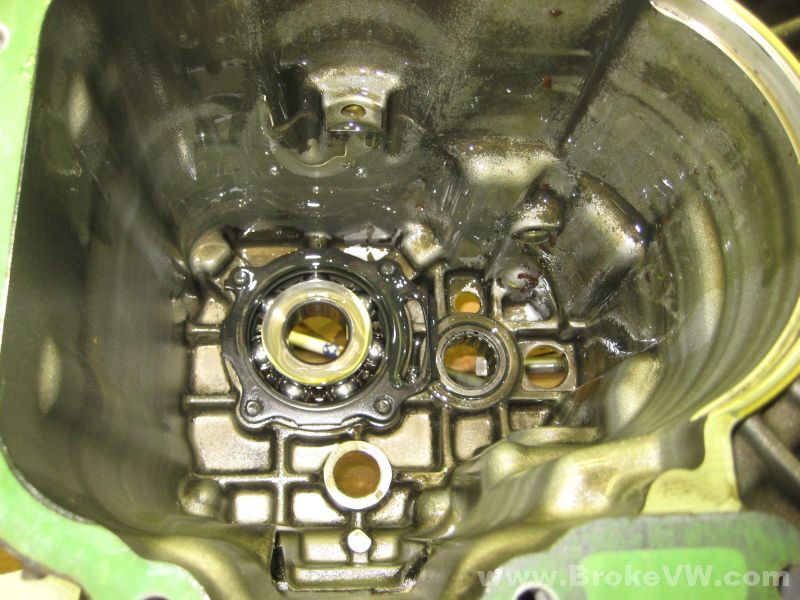
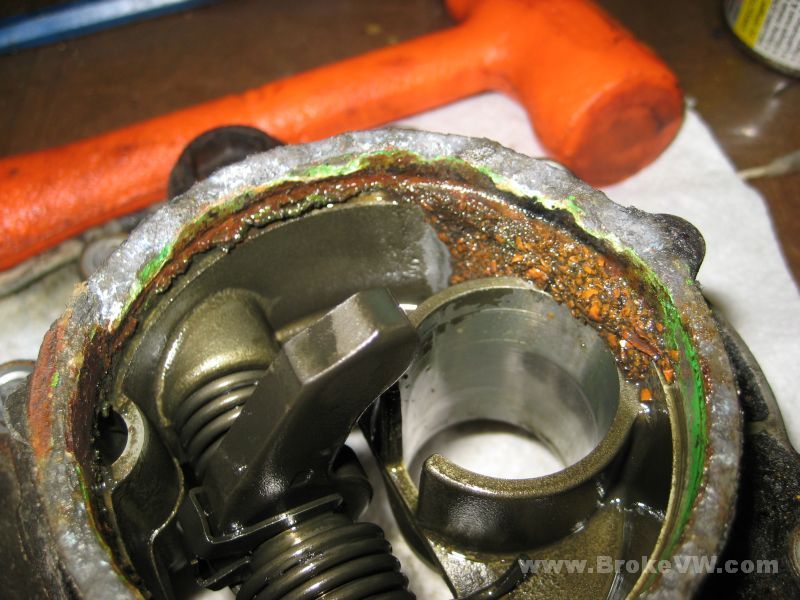
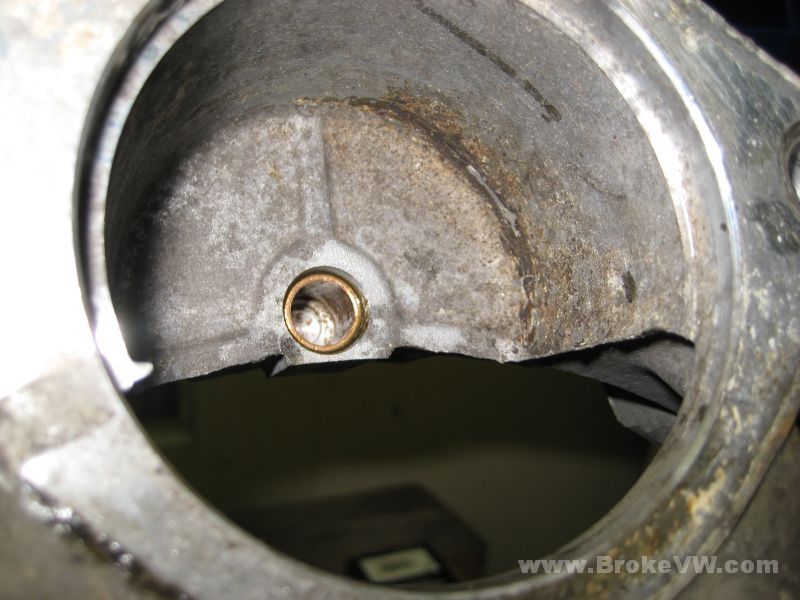
The inside of the 5th housing doesn't look too bad, but I can spot the remains of a speedo gear in there when looking through the TO bearing hole...

5th gears look nice and shiny, the rust on the selector may not be a problem inside, which is good...
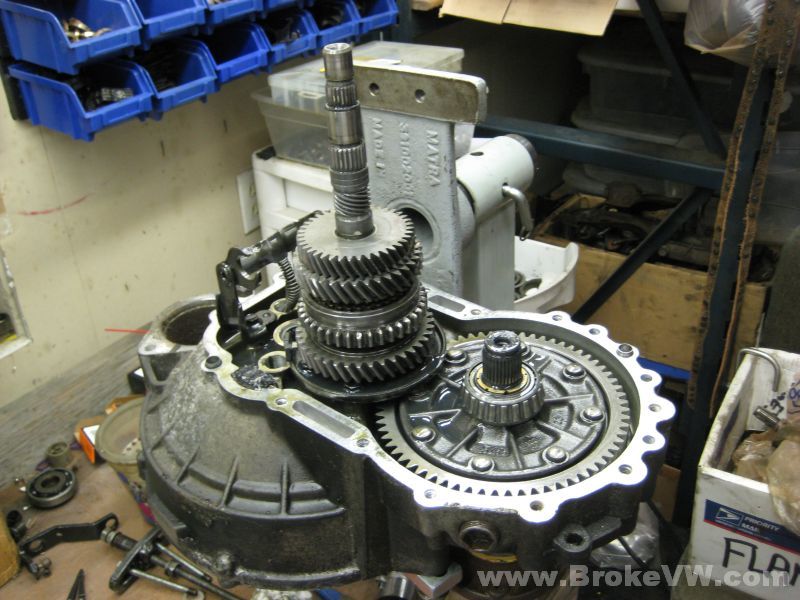
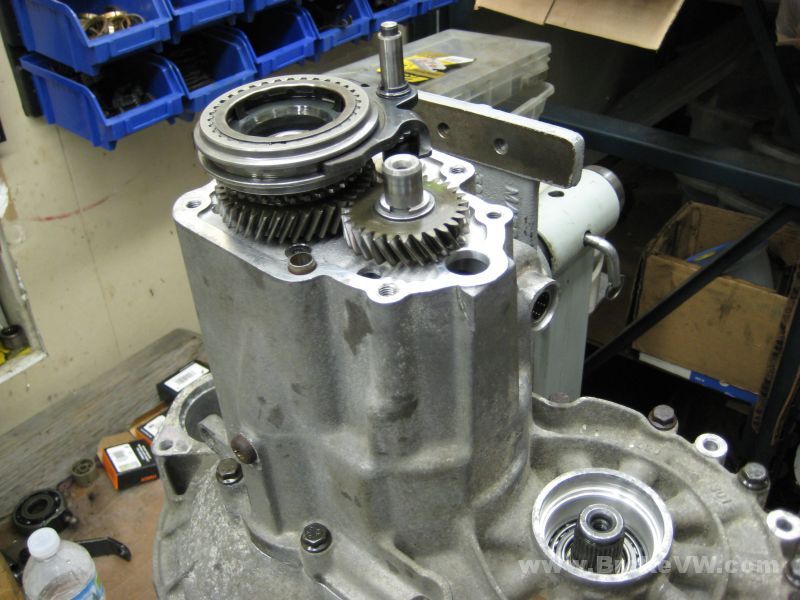
5th gears removed, ready to split the trans casing apart...
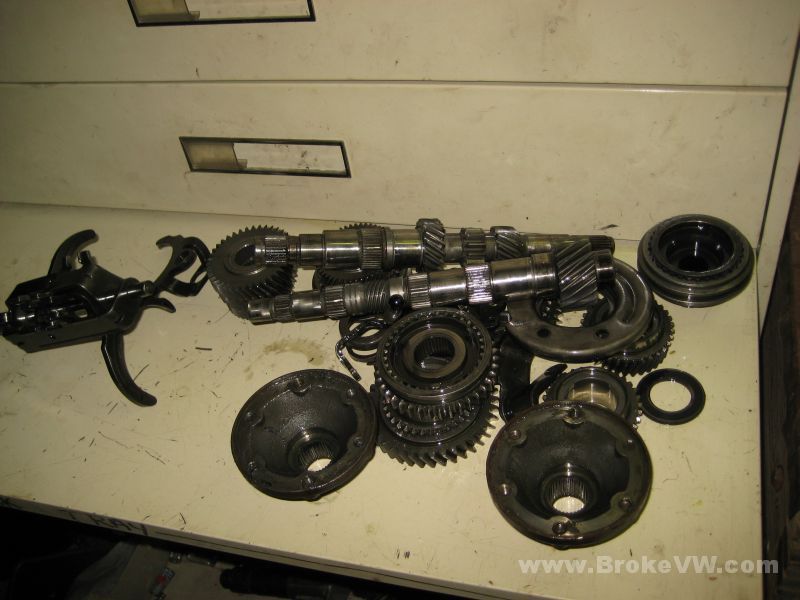
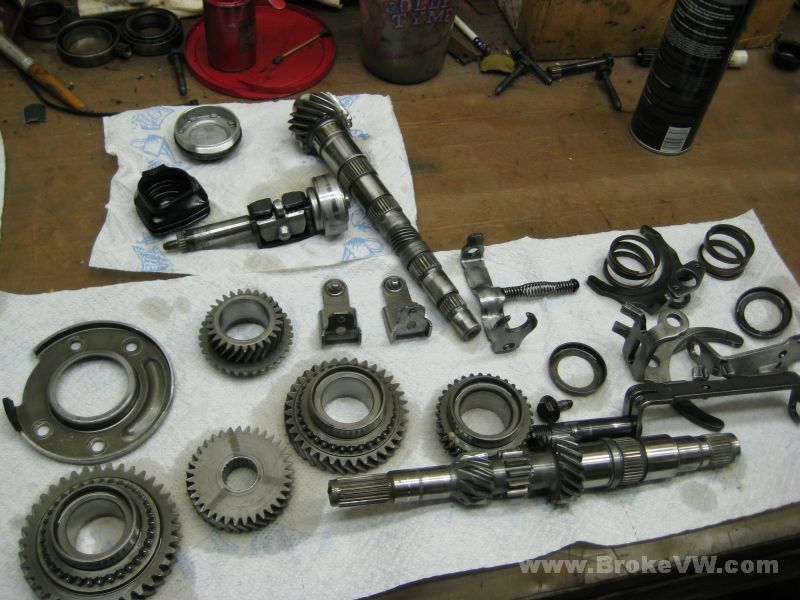
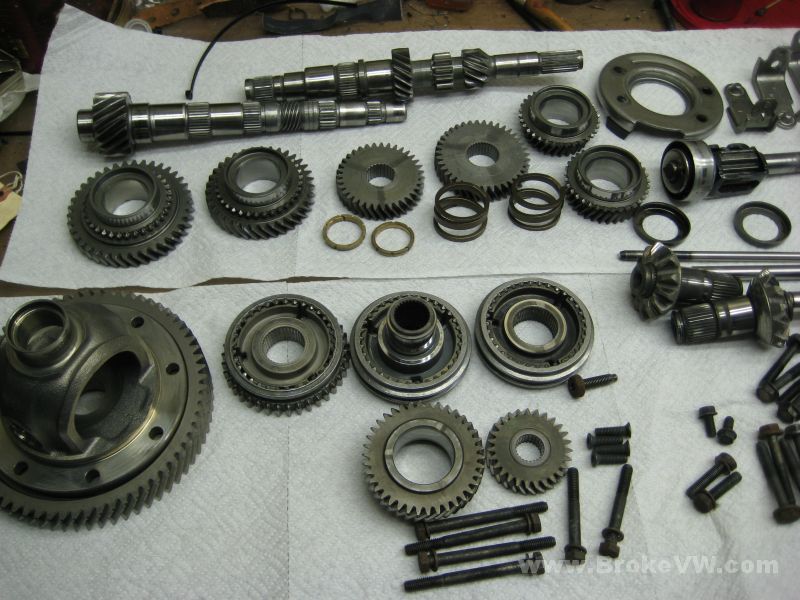
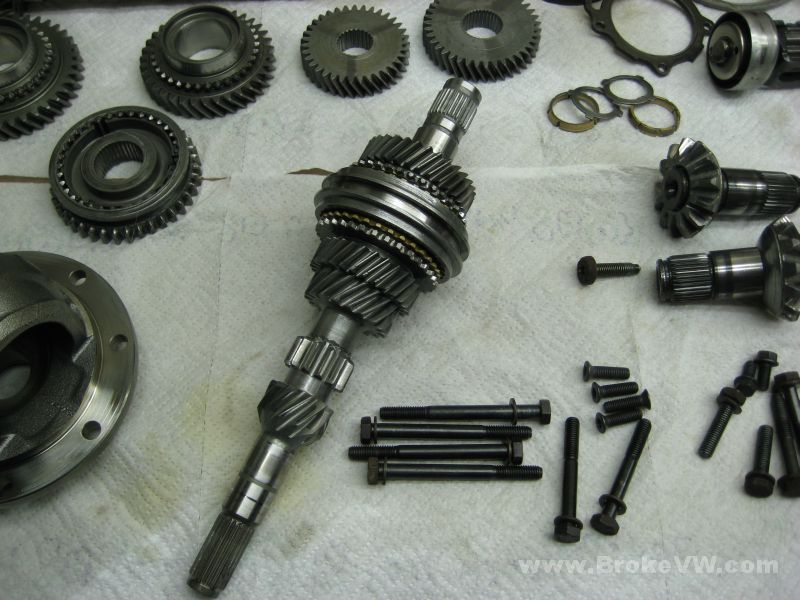
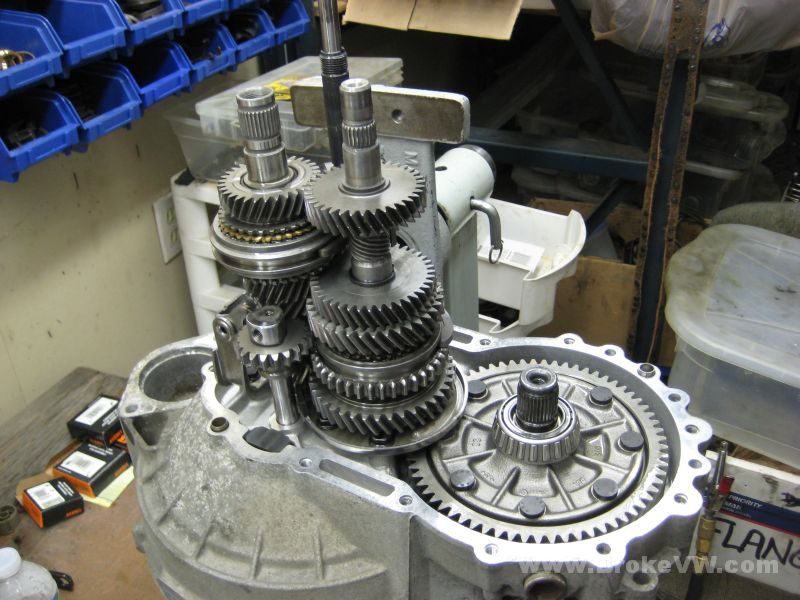
Parts are removed and sat to the side while the trans is coming apart....
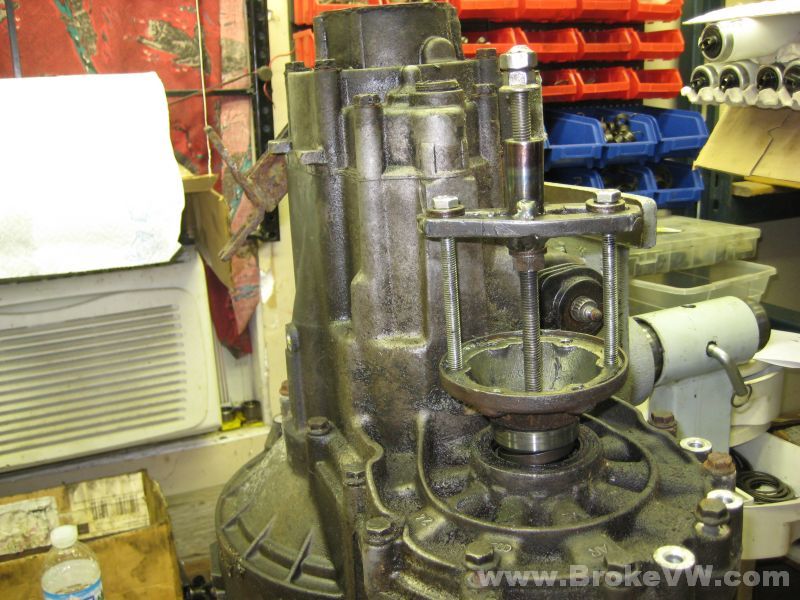
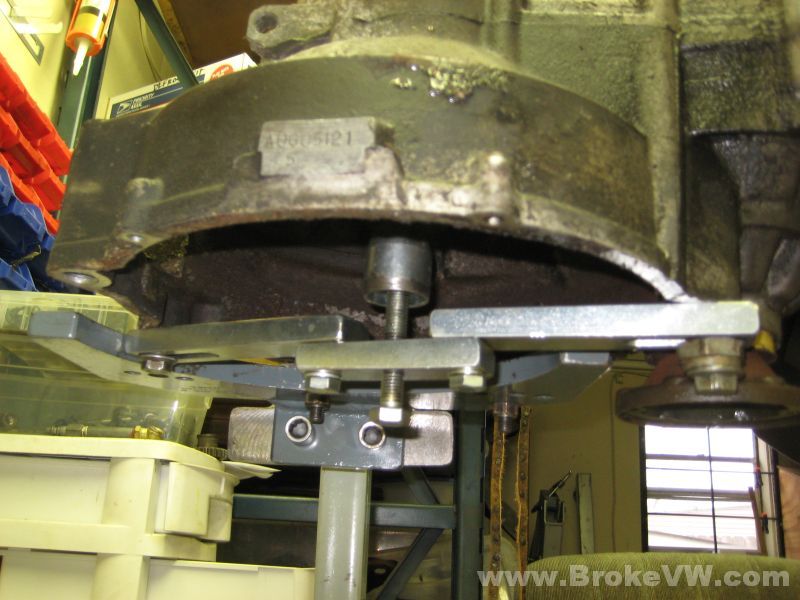
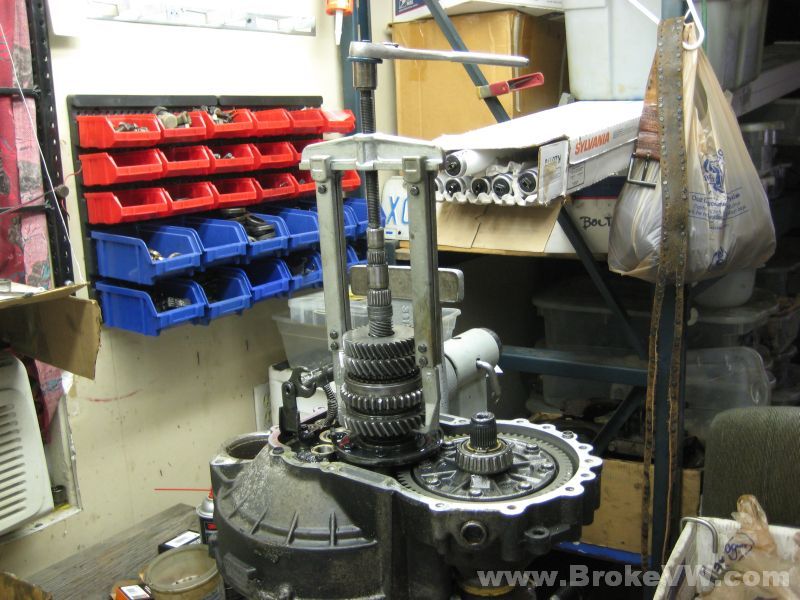
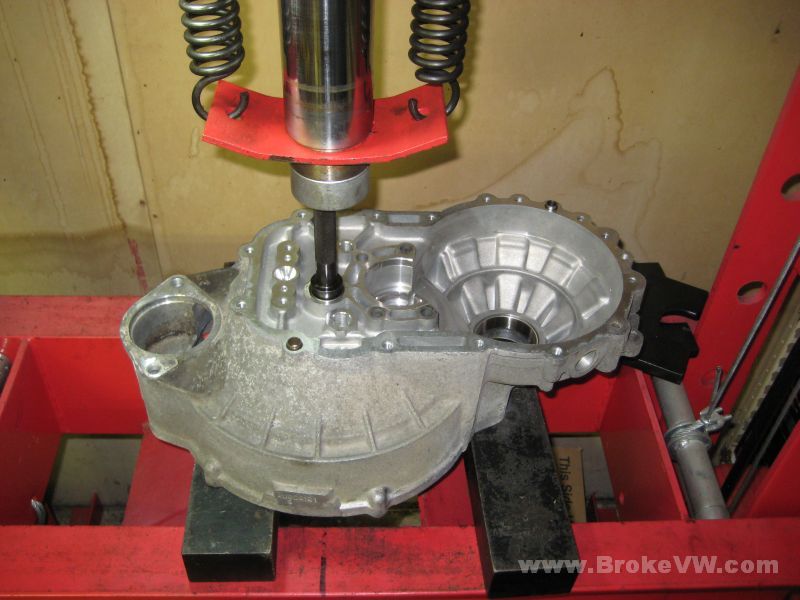
The input shaft is supported from below with a large support bar bolted to the bellhousing. This keeps the press forces needed to split the trans from going into any bearings or gears, and keeps it all into the case and heavy input shaft only...
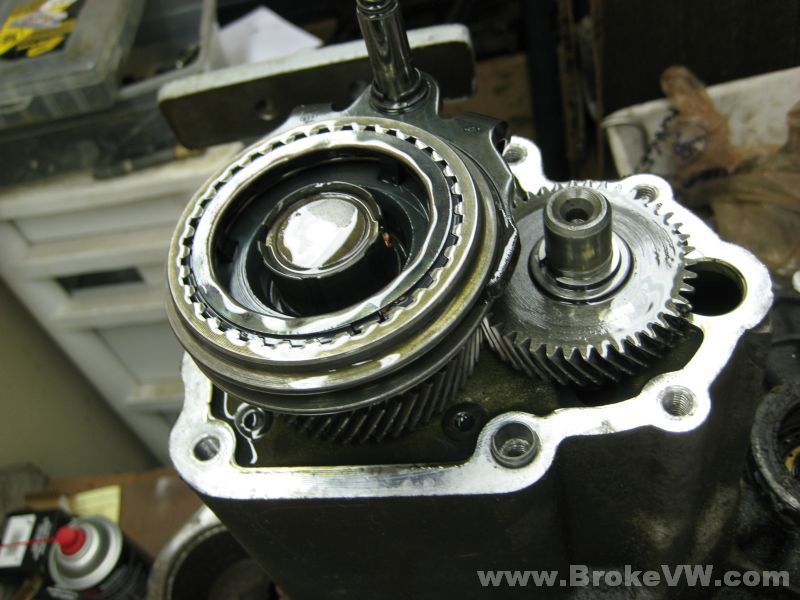
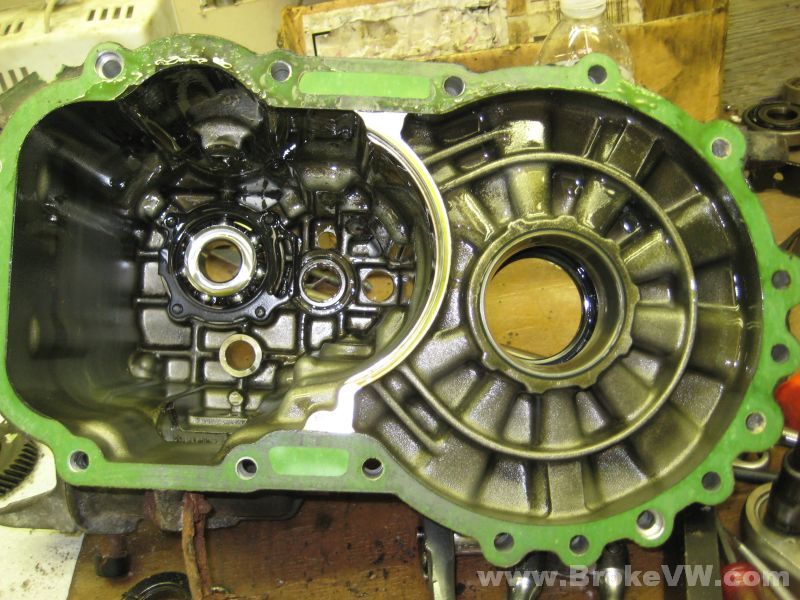
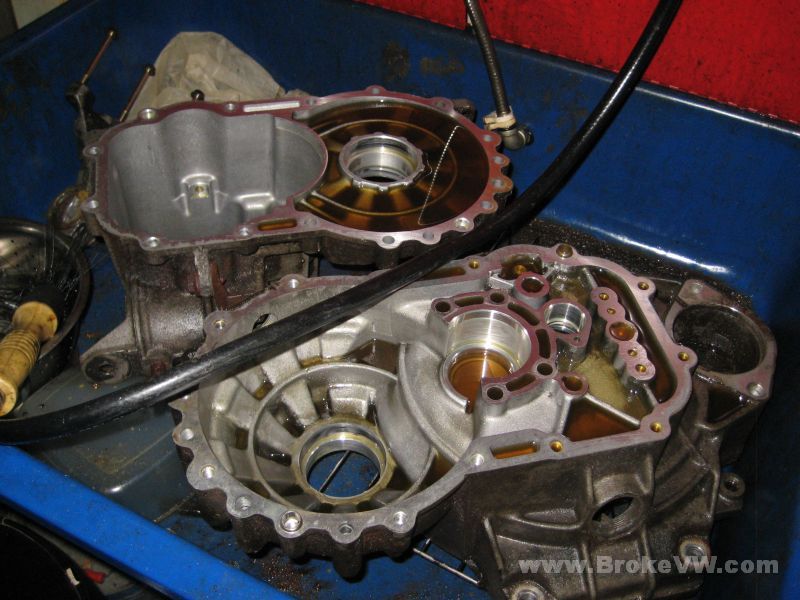
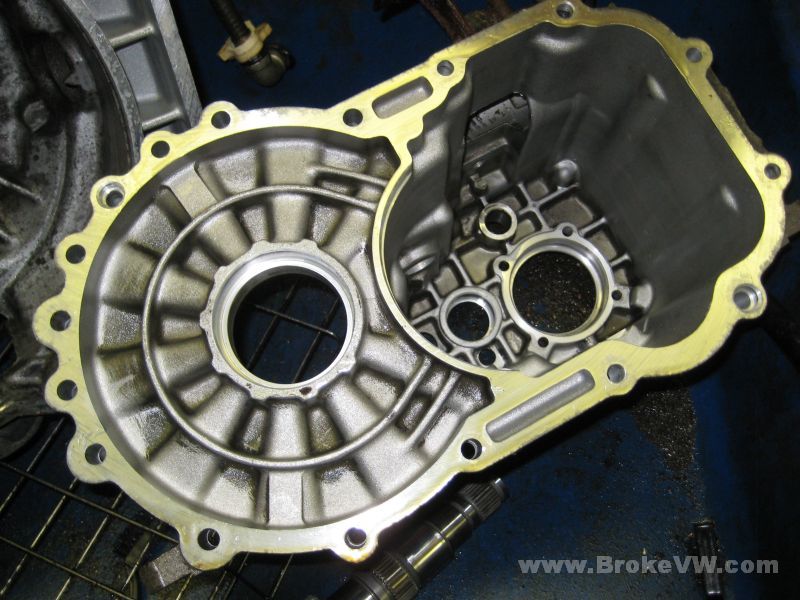
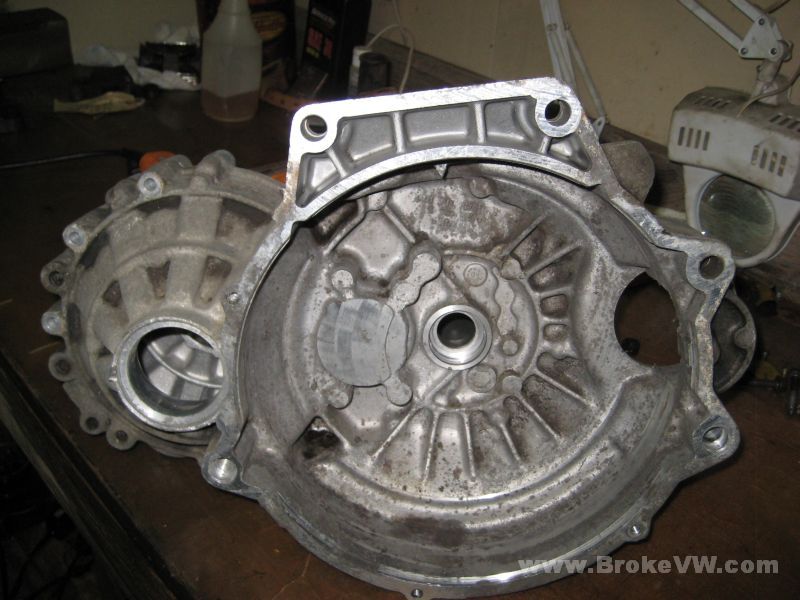
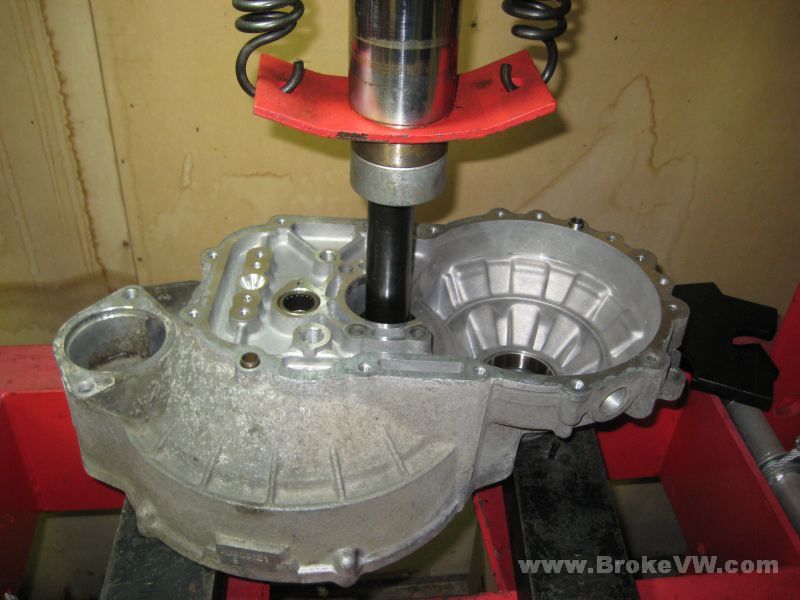
Split apart, and there is no rust, so you are safe there. In general, things don't look too bad and are fairly clean...

The inside of the casing is stained, but nothing too bad....
The magnet is full, mostly fine shavings, but I did find some chunks, which I believe are from the reverse gear...

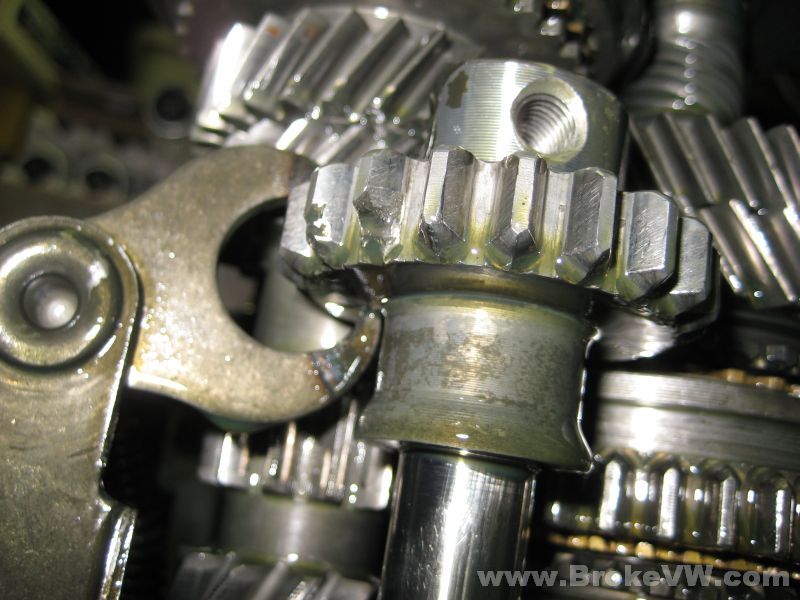
The damaged reverse idler gear... you'll probably want to replace that, or risk it getting worse and failing in the future...
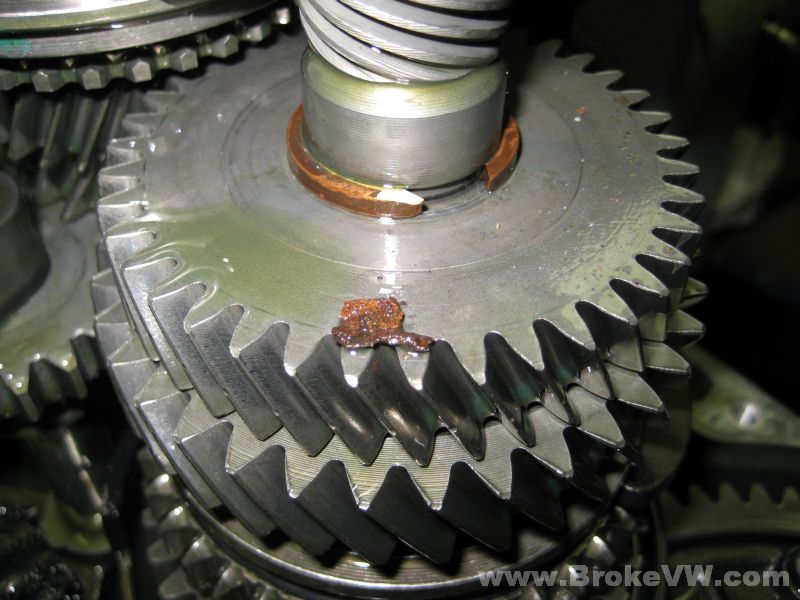
A chunk of the plastic speedo gear was found stuck to 3rd gear on the output shaft...
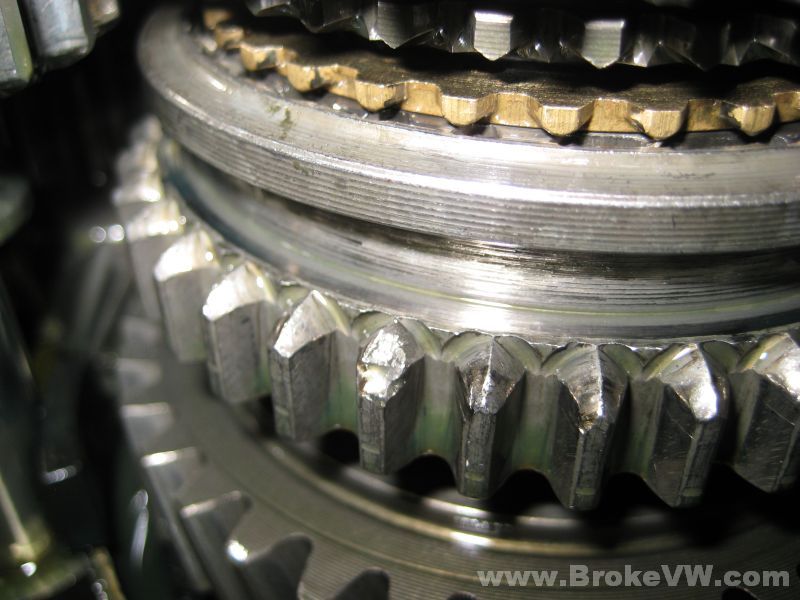
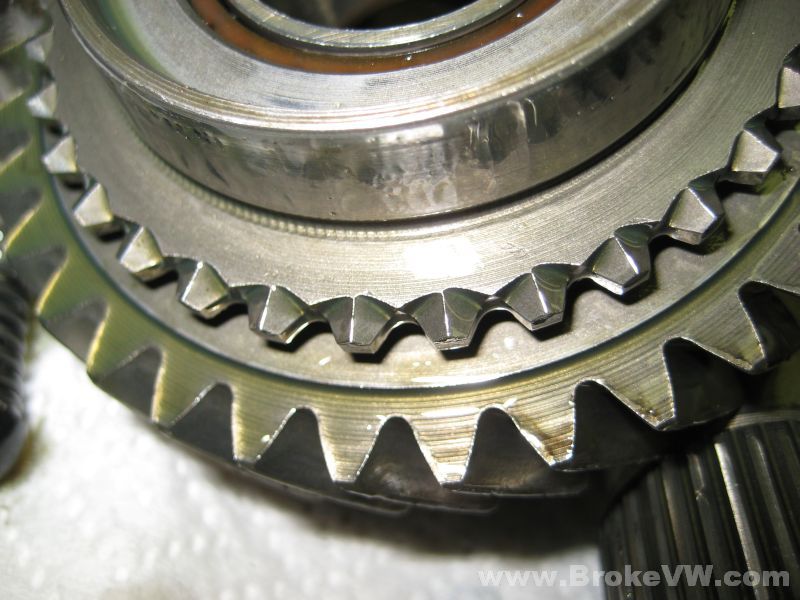
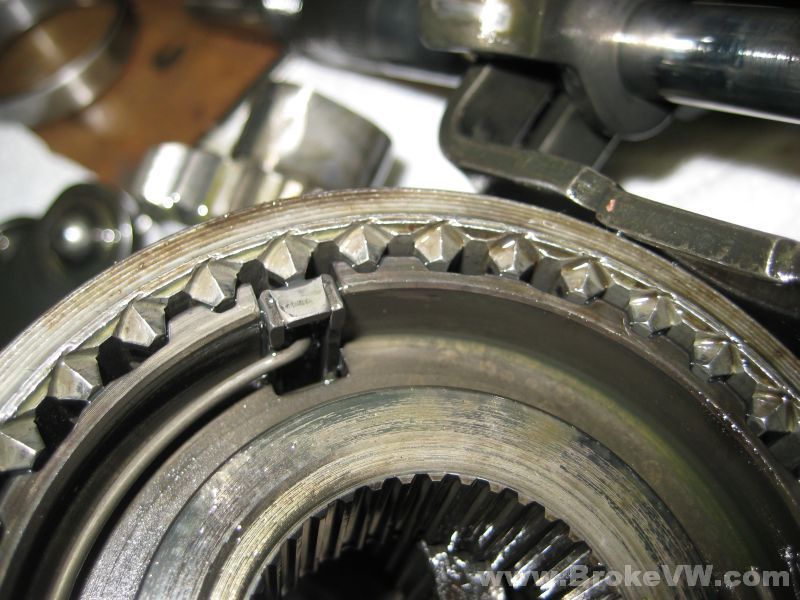
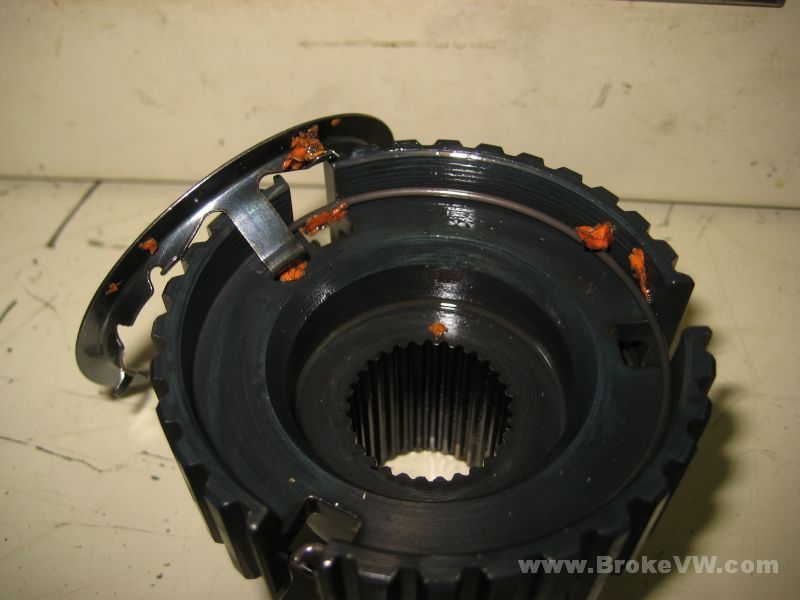
Here is a chunk missing from just one tooth of the 1st/2nd sync hub assembly, which is what mates to that chipped up reverse idler gear. I'll better know the extent of the damage when I strip the gear stacks apart....
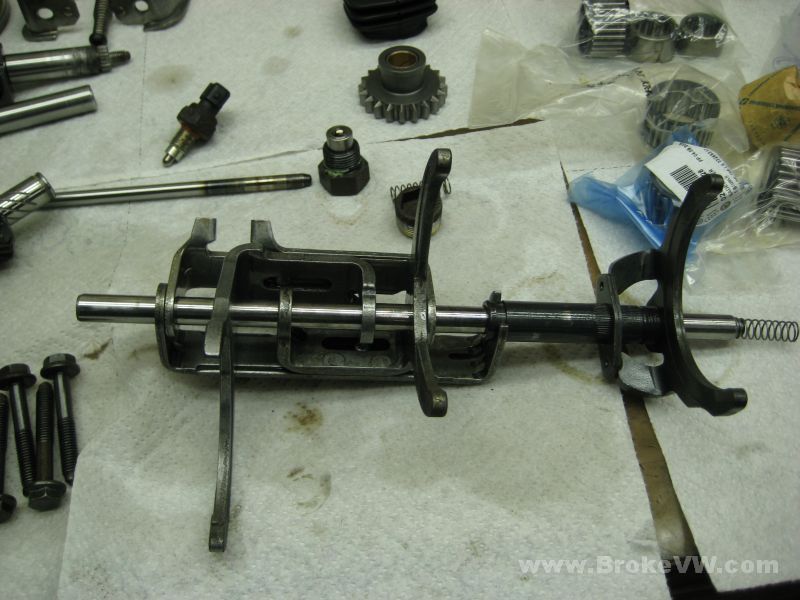
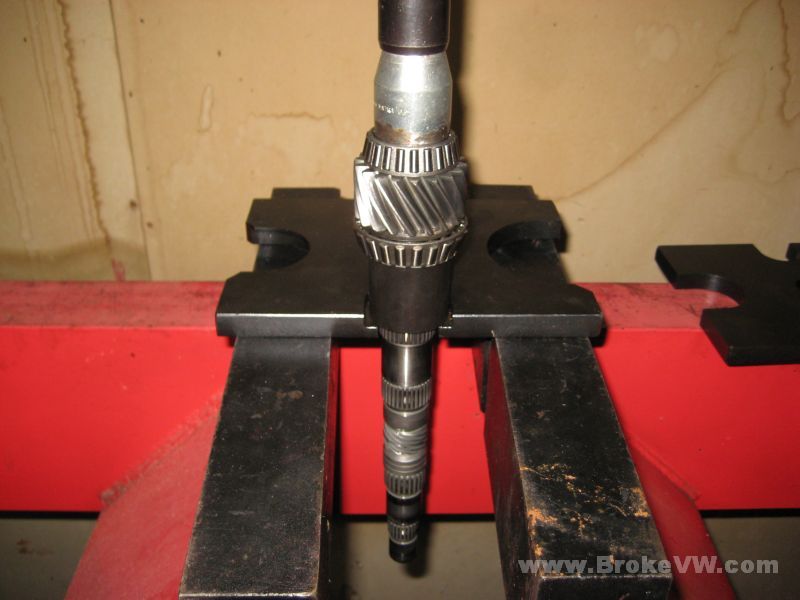
The input shaft and shift forks are removed, only the output shaft remains...
Pulling the gears from the output shaft....
I also have the diff out, and from what I can see of the parts so far, I think the trans can be rebuilt. The idler gear needs replaced, I would also do the bearings since there was contaminated oil in the trans, but they aren't destroyed by any means. I am actually surprised at the condition considering the miles on them... they look great for their age, but I would replace them while it is apart.
I'll email again when I update the page with more pics, but the next step is to finish stripping the parts down, and get them into the parts washer to get them cleaned up.
Update 11/22
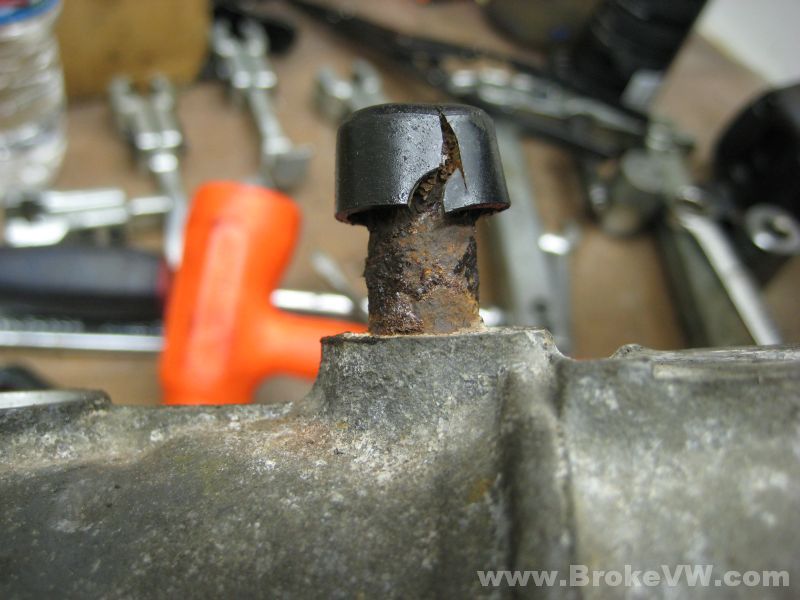
This trans has more rust than most I see... this is the first time I have seen a vent cap broken by the metal swelling with rust under it. Normally these caps fit fairly loose on the vent tube, this one was solid...
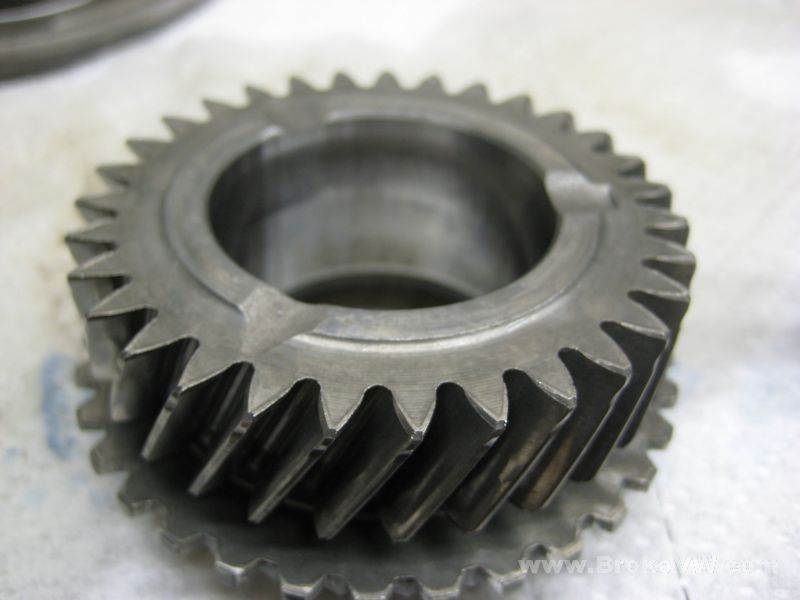
The teeth on 2nd gear are in great shape. For over 200K miles... astounding shape.
The teeth on 1st look to be in worse condition than 2nd, which is also strange, like the tight axle flanges....
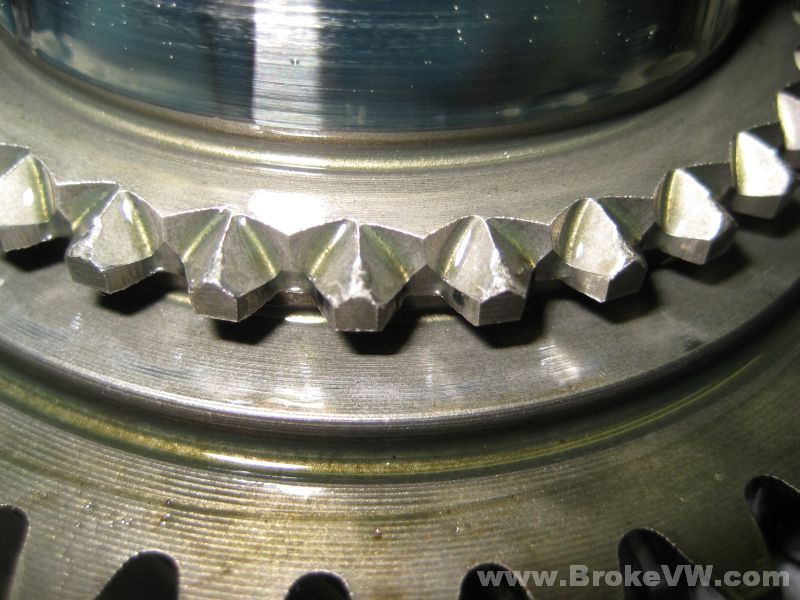
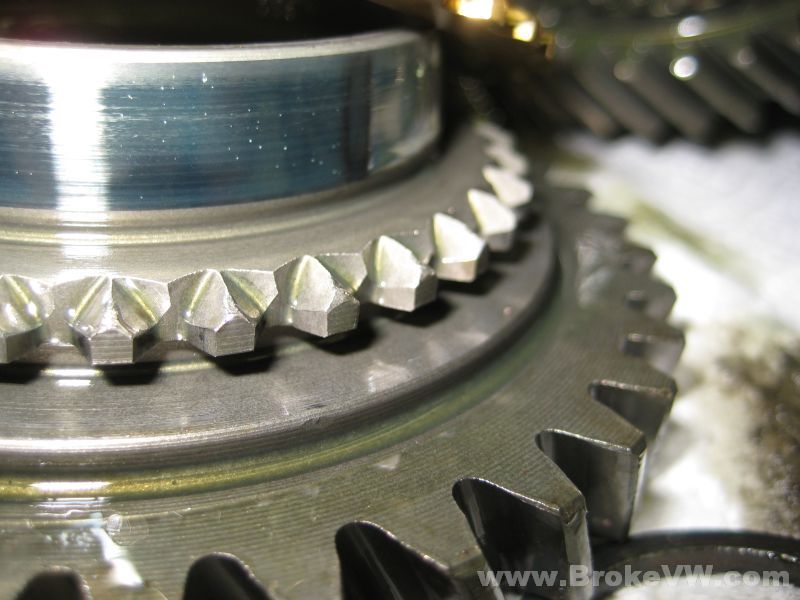
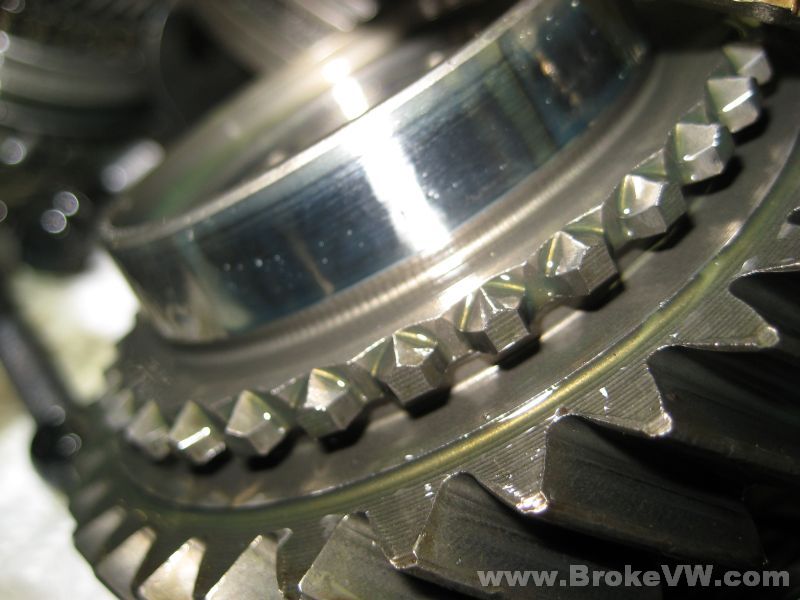
The sync teeth on the sync hub for 2nd look great as well. If the damage to the reverse teeth is minimal enough, I would suggest keeping this hub, or buying new. New would be the only way to get one with nicer sync teeth.
The bearings, while worn, don't look destroyed as I would expect to see with a trans with these miles on it. The output shaft bearings look the most worn, followed by the diff bearings. With the magnet being full, I would suggest changing all of the bearings in the trans while it is apart.
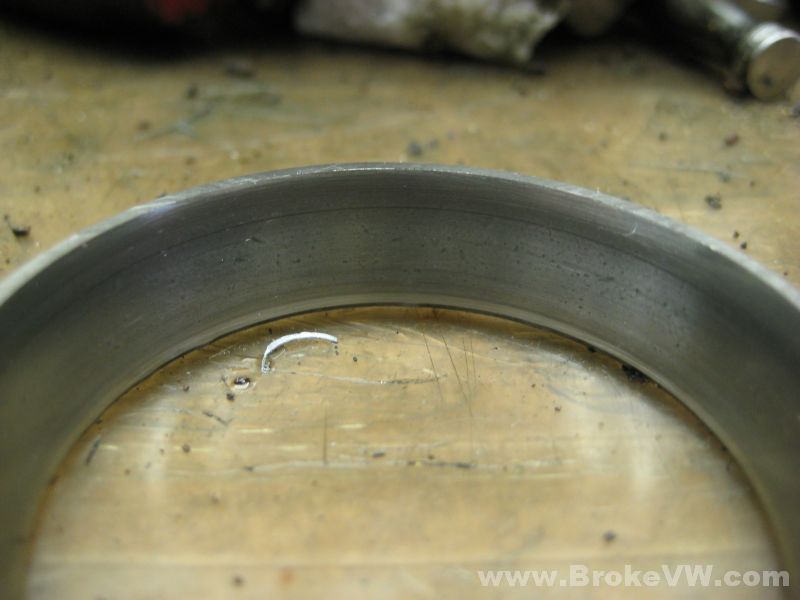
This is the small input shaft taper bearing race, it has some pitting on the surface...
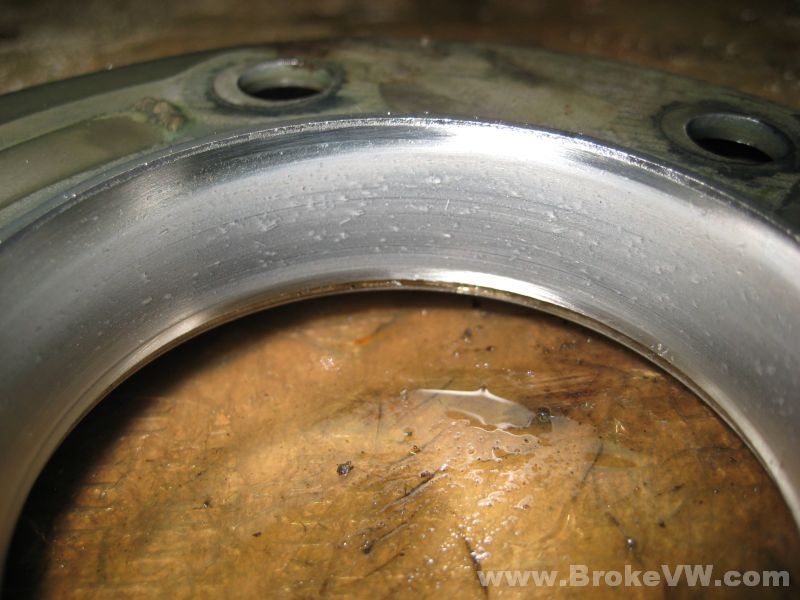
Here is one of the diff carrier bearing races... not as worn as the others, but still showing the start signs of pitting...
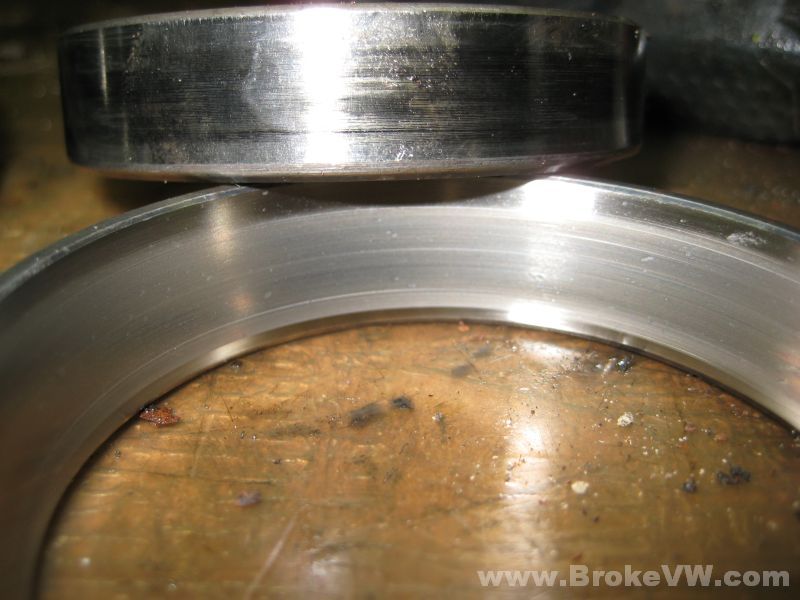
This is the large output shaft taper race...
Update 01/31/11
I have my PC problems worked out I believe, and have managed to upload the pics to the site now...
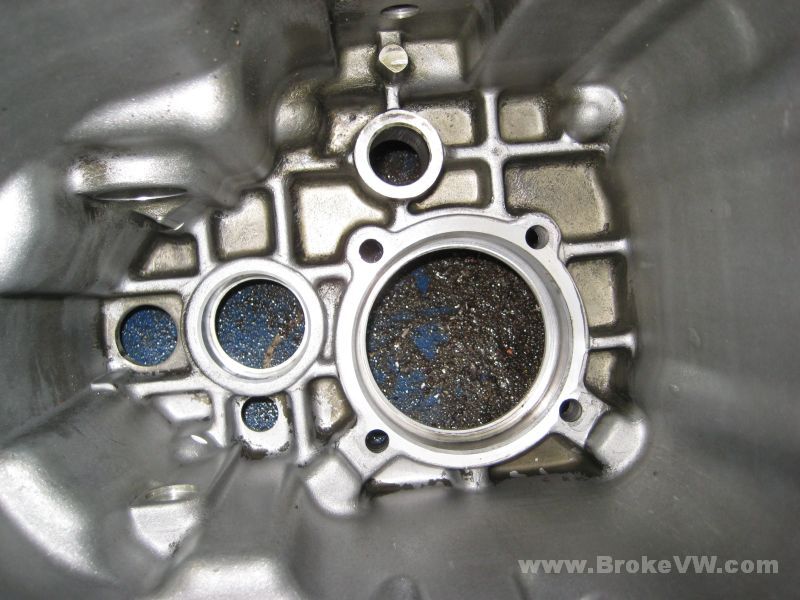
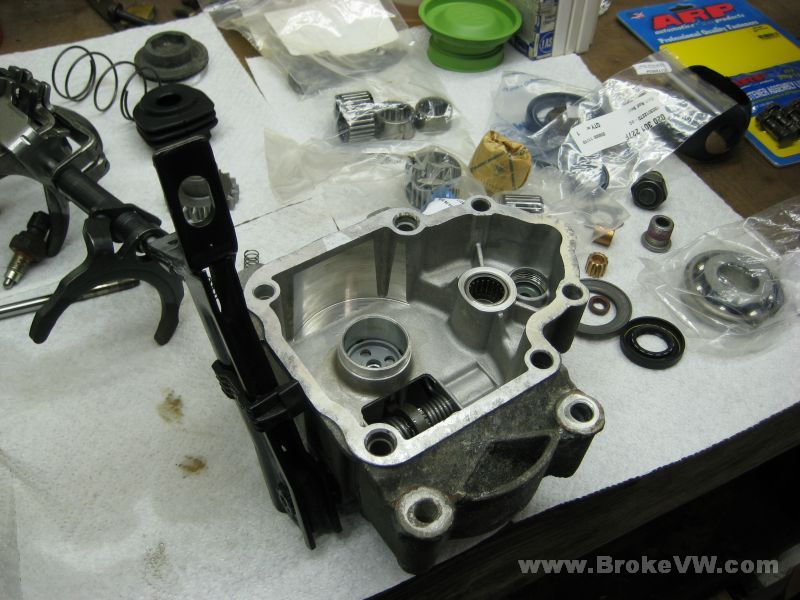
With the green end cap removed, the remains of an old speedo gear can be seen...
The selector seems to have rust only on the spring caps, and not on the rest of the assembly, so it will be easy to take care of by swapping the spring caps out with good units...
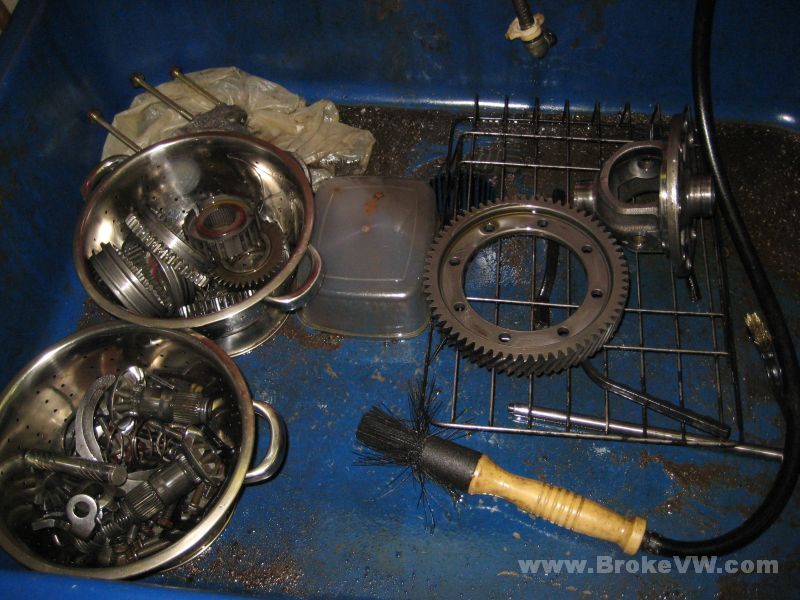
The internals prior to being put into the parts washer...
Cleaning the case pieces, allowing them to soak a bit...
Pulling the bearing from the diff...
The case after some cleaning...
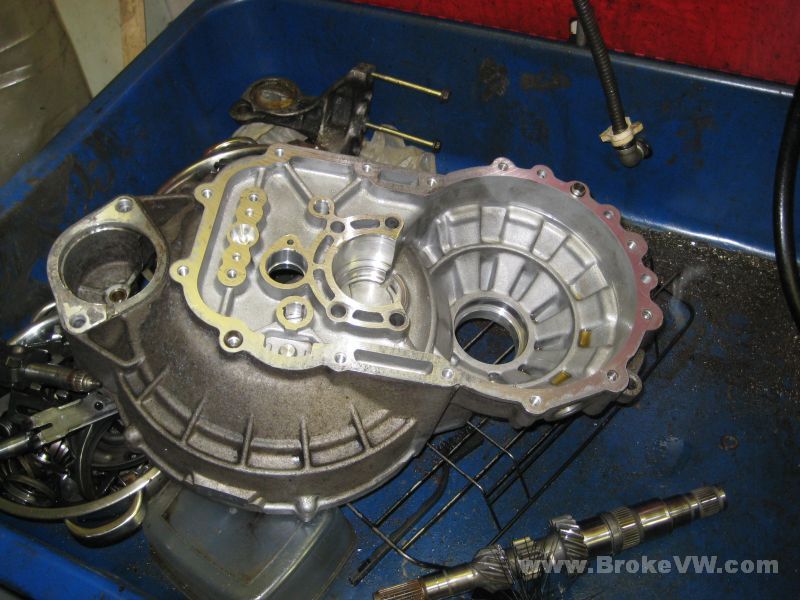
You can see the black film inside that has to be removed before rebuilding it. It is a PITA to get to sometimes, I use cotton swabs on long wooden sticks to reach into some of the areas to ensure it is cleaned out...
The gearbox half outside prior to cleaning. The gunk will be removed, but not the oxidation...

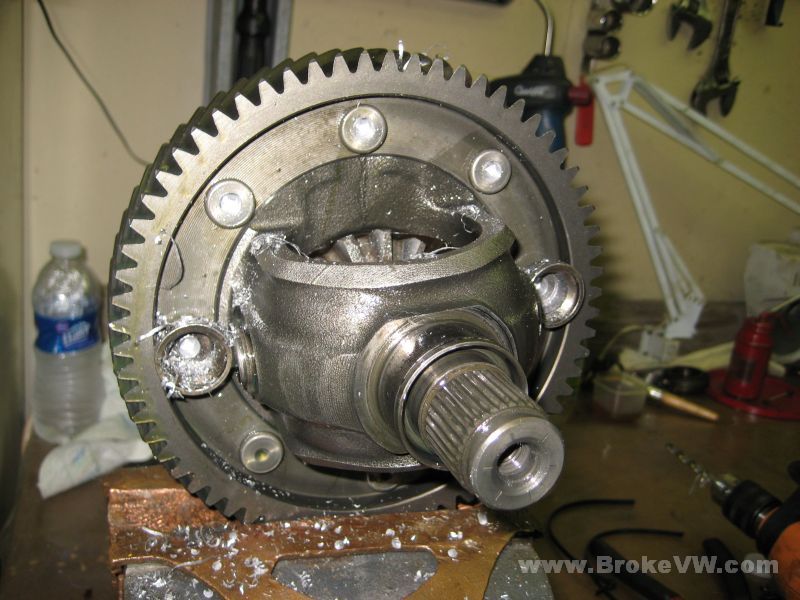
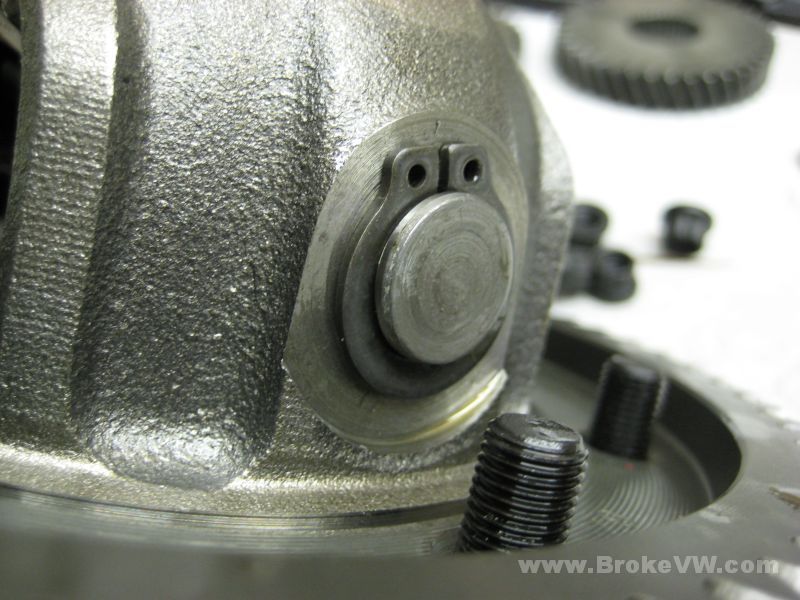
Drilling the rivets from the diff to pull the ring gear. You start with the 2 large head rivets to allow the shaft to slide out, so the spider gears can be removed...
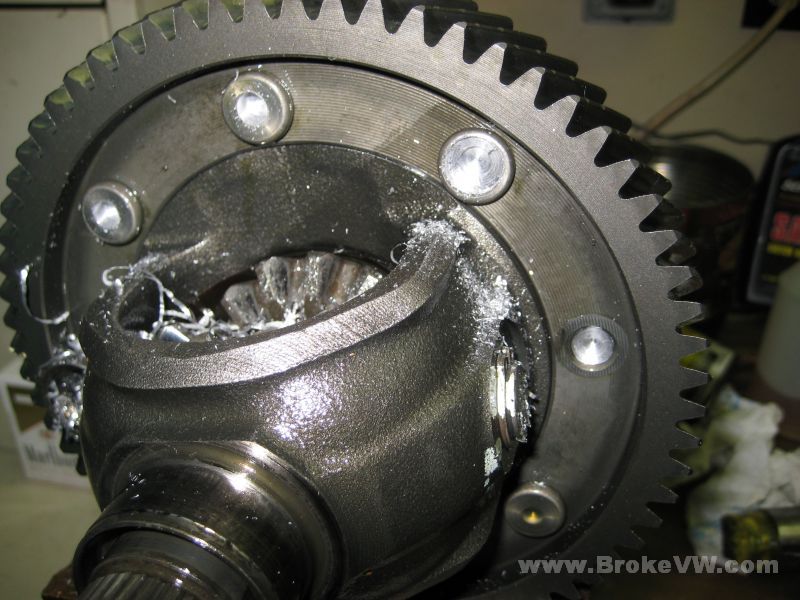
This pic shows the 3 stages of drilling the rivet head... start with a 6mm pilot hole 1/2 the way through the rivet, then follow with a 12mm bit to remove the majority of the head, then knock it free from the diff with a chisel to expose the rivet itself that needs punched out...
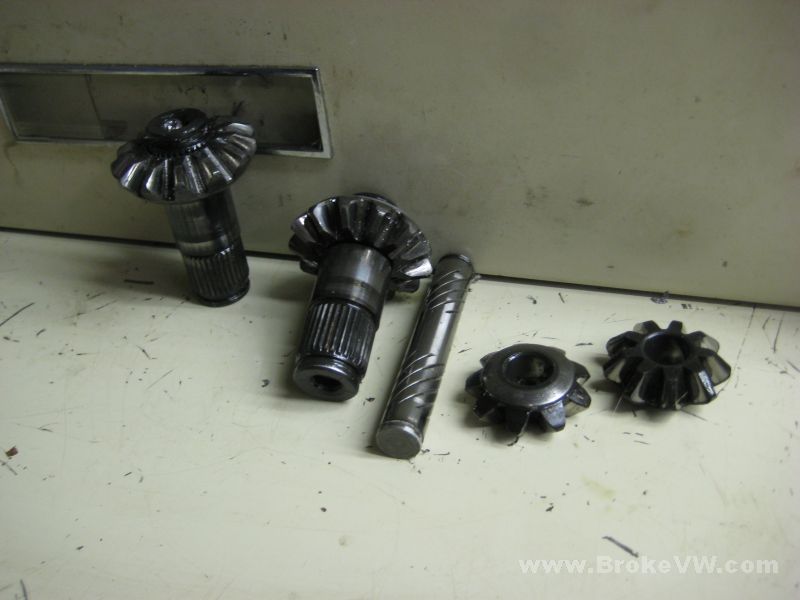
The spider gears and shafts removed form the diff...
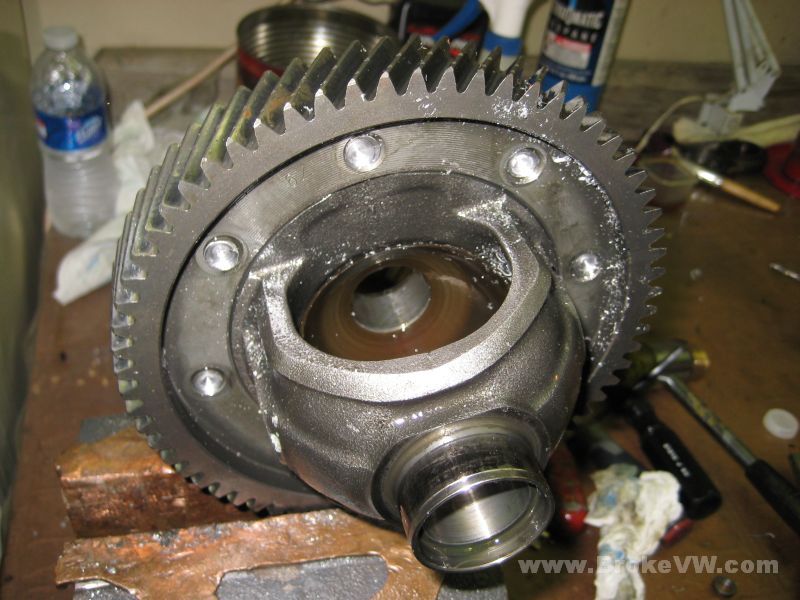
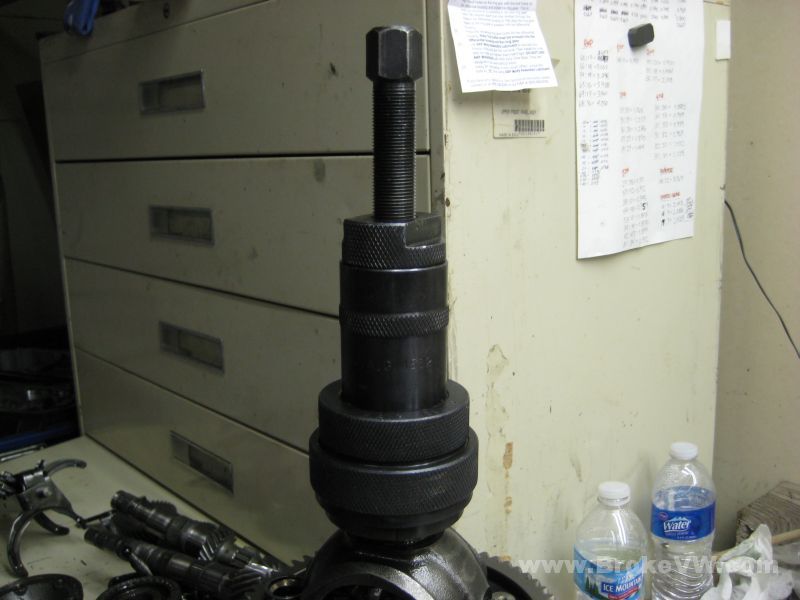
Punching the old rivets out of the carrier will allow the ring gear to be pressed off...
01/07/11
I have the case pieces cleaned and rinsed. The outside can get cleaner, but to be honest, I'm getting behind the 8-ball on time and had to focus on the inside where it counts with the time I had at the parts washer.
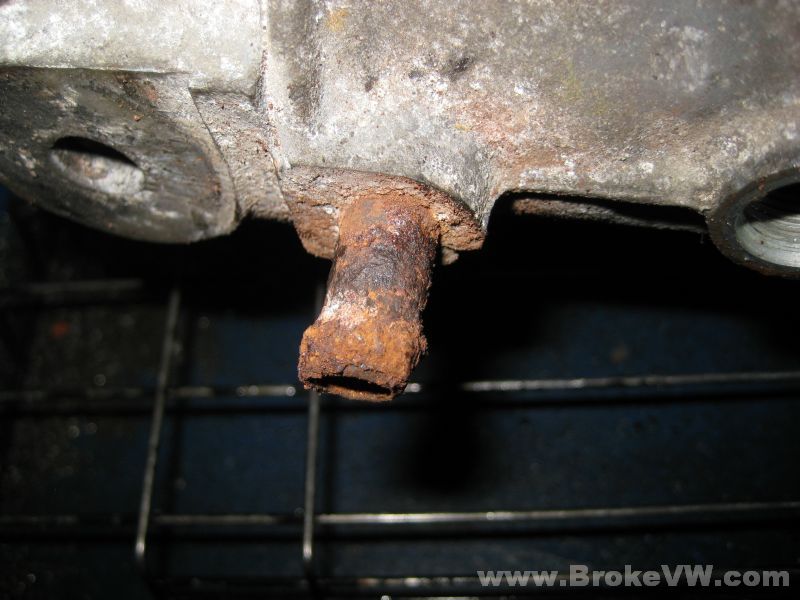
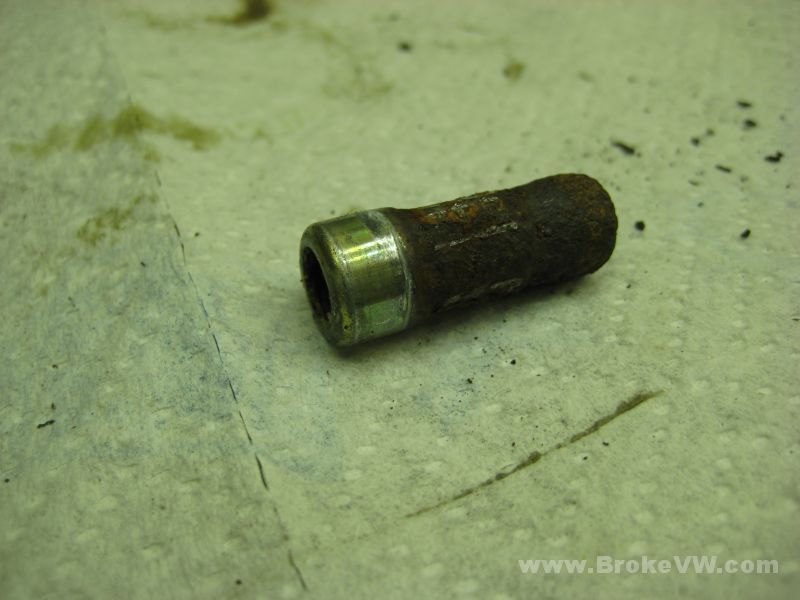
I've pulled the rusted vent tube from the casing, this pic shows what it used to look like, because the end that was pressed into the casing was clean and new looking...
The inside of the cases is clean and I am happy with how they have turned out. I would have liked to have more time to spend on the outside of the case, but the inside is where it counts...
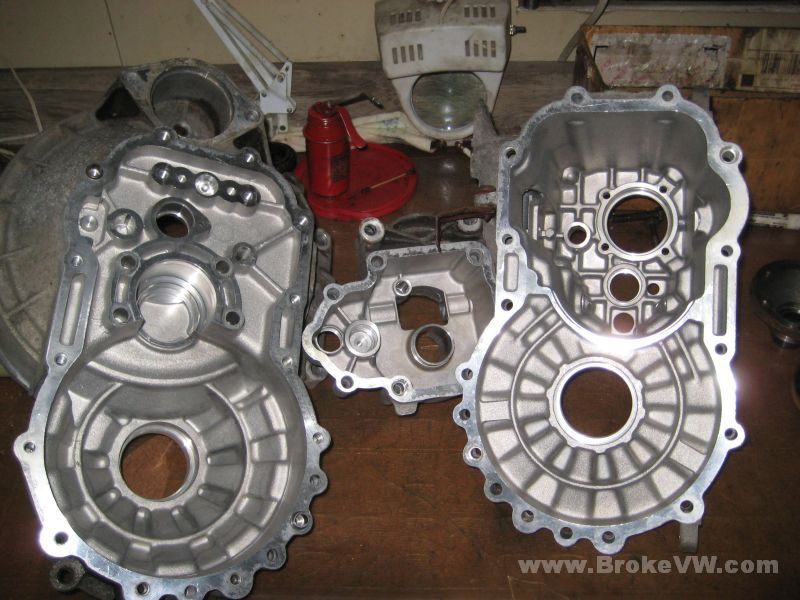
This is the outside, and while it is an improvement over what it was like when it arrived here, there are still places of grime to be found, and the corrosion on the aluminum can't be removed in the parts washer, only media blasting will remove that...
I've sourced a replacement vent tube and I've just quickly shot it with black spray paint. Nothing special, just something to cover the steel. It will rust again, but it looks OK for the time being. I've also sprayed the clutch release arm, as yours was quite rusted. Again, nothing special, just a few minutes with the abrasive wheel on a drill to knock the big rust chunks free, then I shot it in the same black spray paint. I will likely hit the flanges while it is apart. None of it will last any significant amount of time, but it will look better than leaving it rusted.
02/15/11
I have the parts cleaned now and the assembly of the trans can begin.
Here are some of the parts out of the kerosene parts washer, but prior to being put into the ultrasonic cleaner...
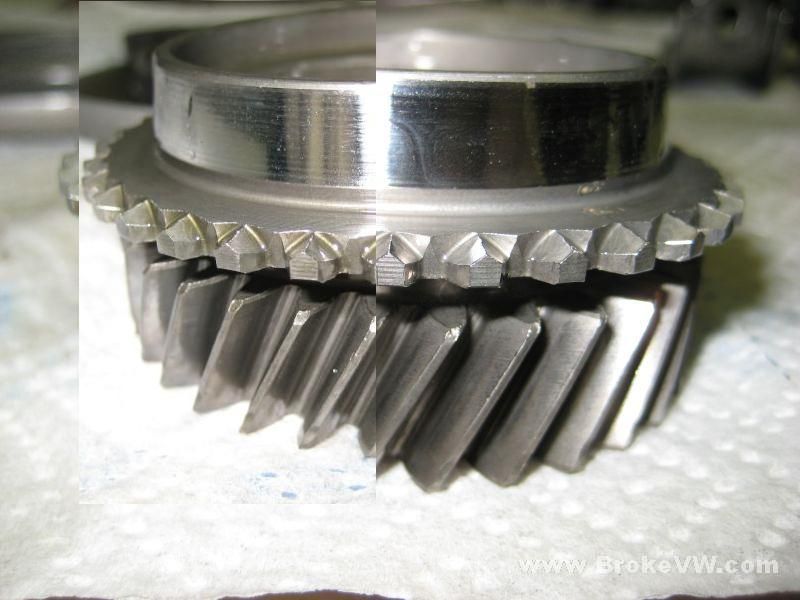
These 2 pics show a gear before the ultrasonic cleaning...
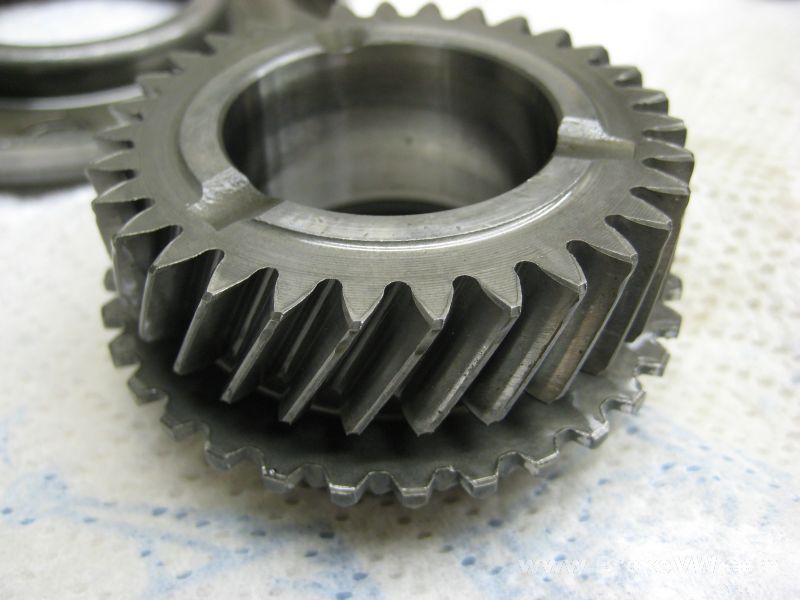
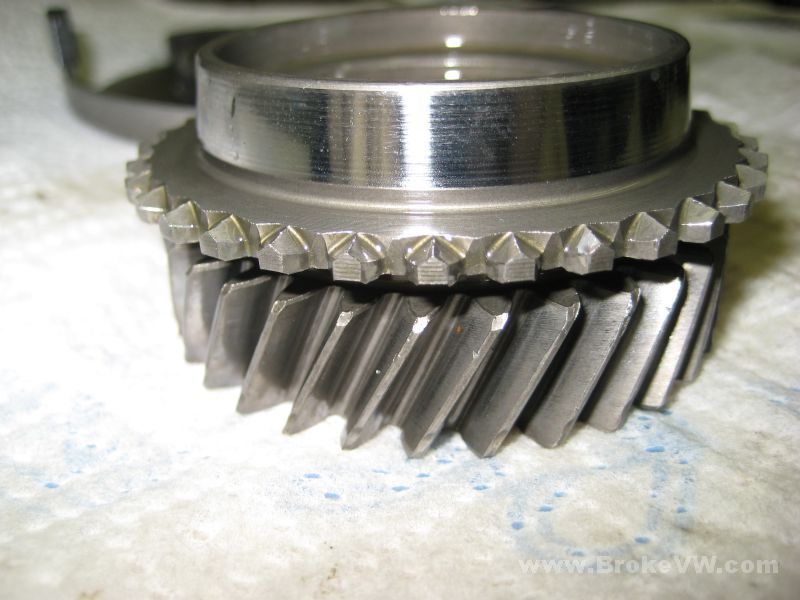
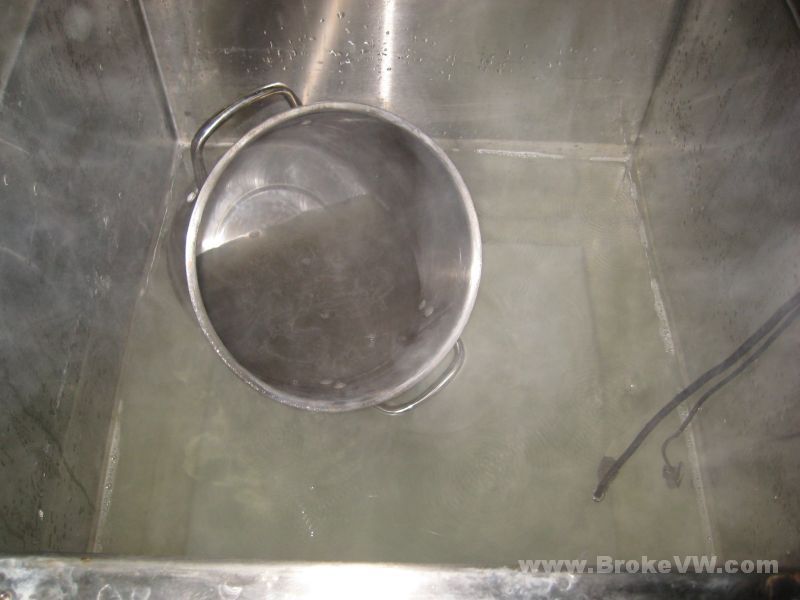
Dropped into the heated ultrasonic cleaner...
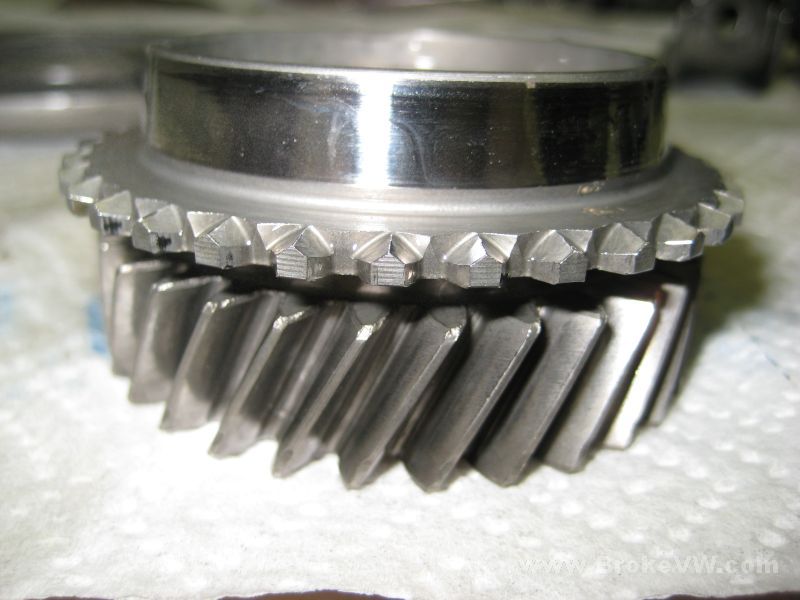
After cleaning in the ultrasonic cleaner...
The change isn't drastic as most of the cleaning is done in the kerosene parts washer manually, but this pic shows the same gear before and after cleaning. On the right side you can see the metal is cleaner between the teeth and brighter in general...
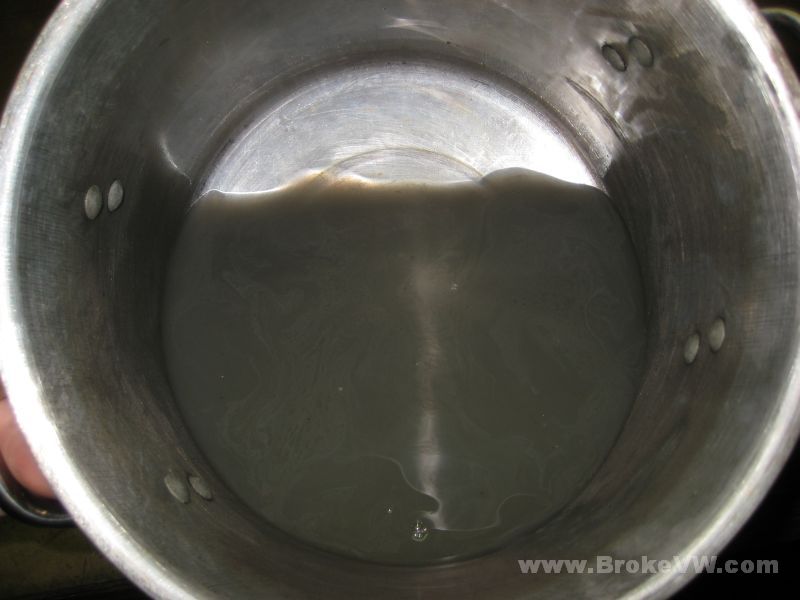
The bath solution gets funky pretty quickly, but it does the job...
 \
\
The parts out of the ultrasonic cleaner, they now need rinsed in clean water, then dried and oiled...

The parts still left in the parts washer...
When pulling the 5th gear sync hub apart, I found more of the plastic speedo gear that was caught in around the sync keys...
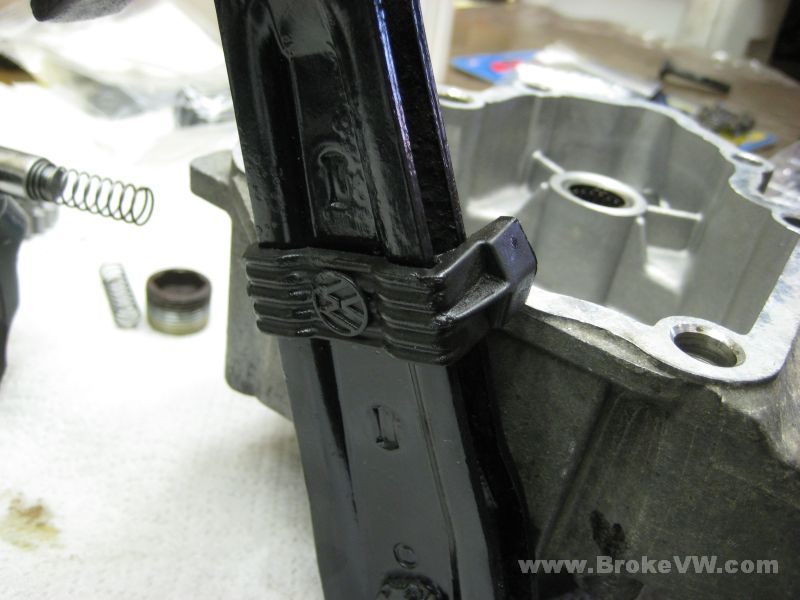
This bracket on the trans is where wiring conduit clips on for the wiring harness, your bracket looked a little rough so I wire-wheeled a spare bracket and shot it with some black paint to clean it up a little...
All of the parts cleaned, rinsed, and oiled, ready to be installed into the casing...

Next is to start assembling the parts into a working trans!
Update 2/23/11
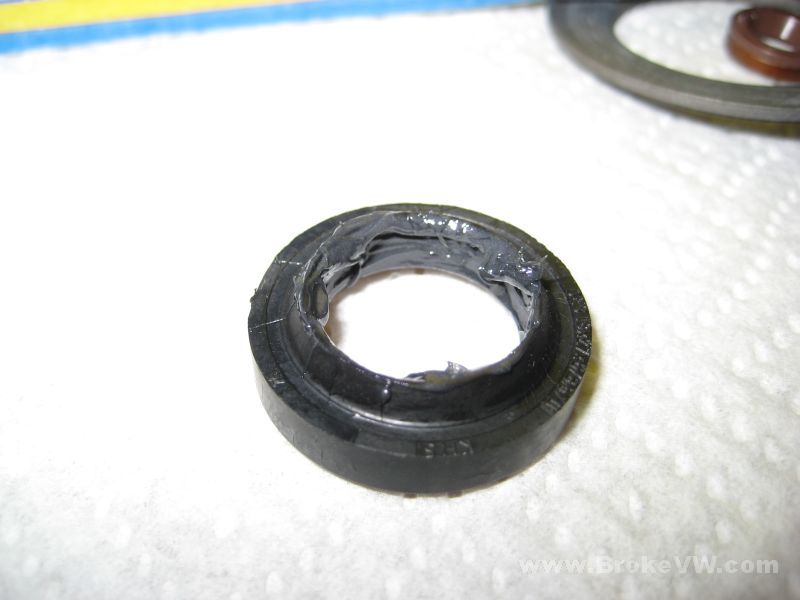
I've started assembling parts of the trans... this is the release arm seal, greased up inside and ready to be installed into the 5th housing...
The 5th housing built and ready to be installed when needed...
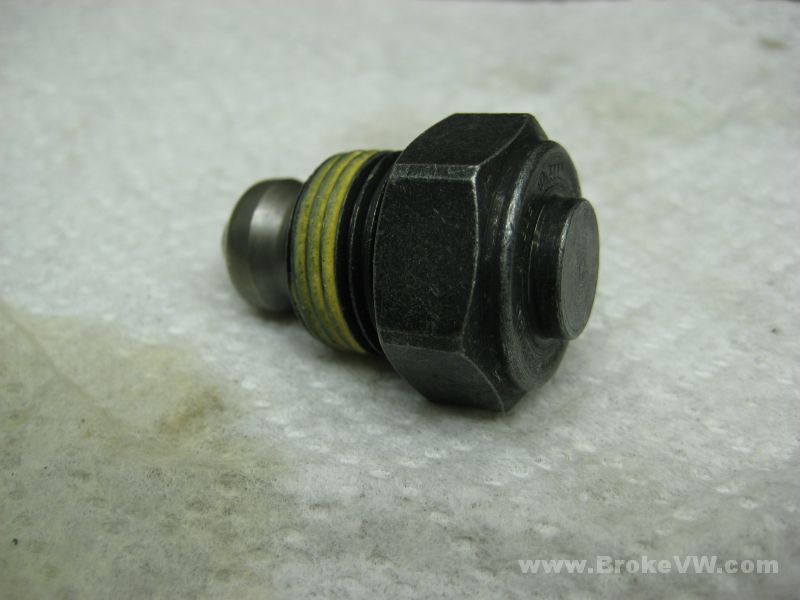
The black plastic stopper was missing from your arm, so I have replaced it. After checking the condition of your actuation finger again, it isn't worn enough to warrant replacement, so I have left it in place. I did decide that the detent bolt for the selector assembly is not to be trusted (it looks fine, but they can just fail out of the blue, and are a real PITA), so I will be replacing it with a new one from VW....
The new parts to be installed...
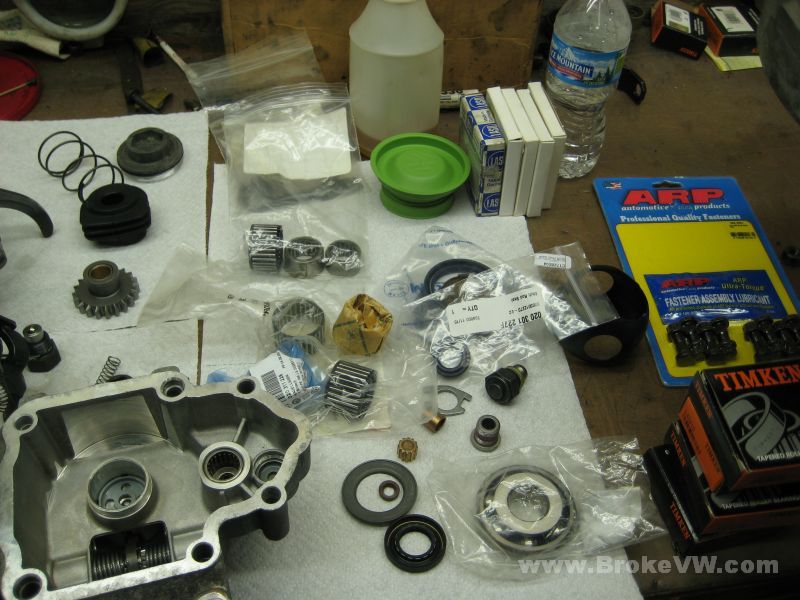
This pic is of the assembled shift forks... you can also see the new reverse idler gear, and the old detent bolt (standing up on it's end) which will be replaced...
The 5th gear assembly is built with a new needle bearing, sync keys, springs, and sync ring...
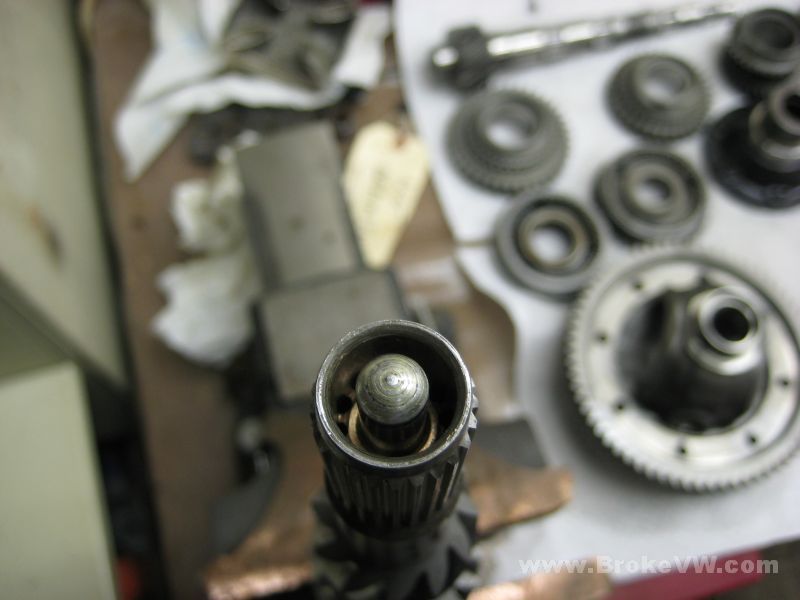
The pushrod bushing being installed into the end of the input shaft. I have made a tool out of an old pushrod... it allows the bushing to be supported fully inside while it is being driven into the input shaft...
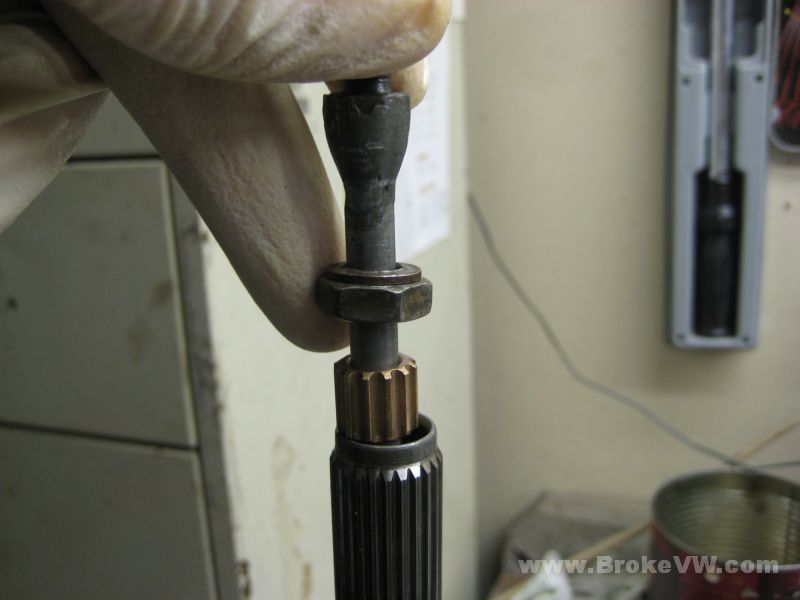
Once it is flush, the tool won't fit down into the input shaft with the bushing, so I turn the tool over, and insert it into the other end of the input shaft, so the pushrod pokes up through it, again supporting the inside of the bushing while it is pressed the rest of the way in. A Craftsman 10mm deep socket will press the bushing in, fit into the input shaft, and allow the pushrod to fit inside the socket so the bushing can be driven in fully....
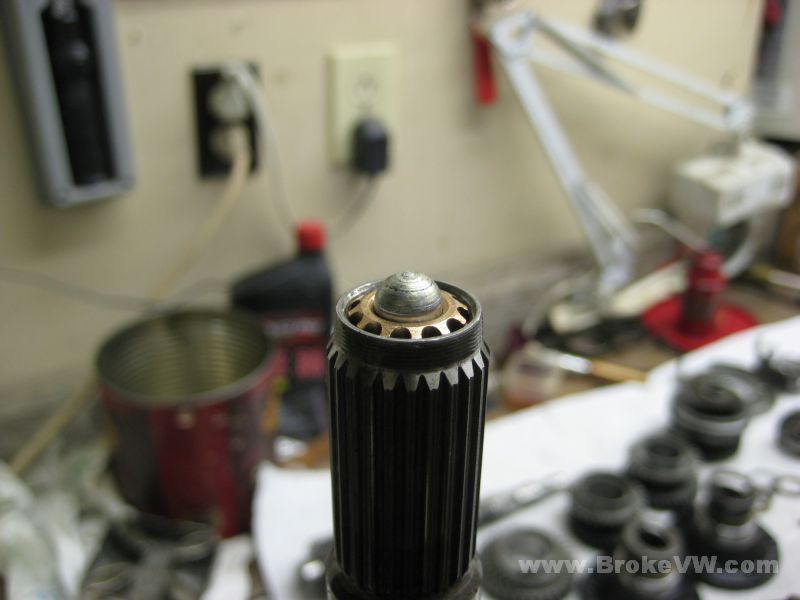
The bushing is soft and if you don't support the inside, it can go out of round and cause binding on the pushrod... once the bushing is fully seated, the pushrod is removed and the seal can be installed...
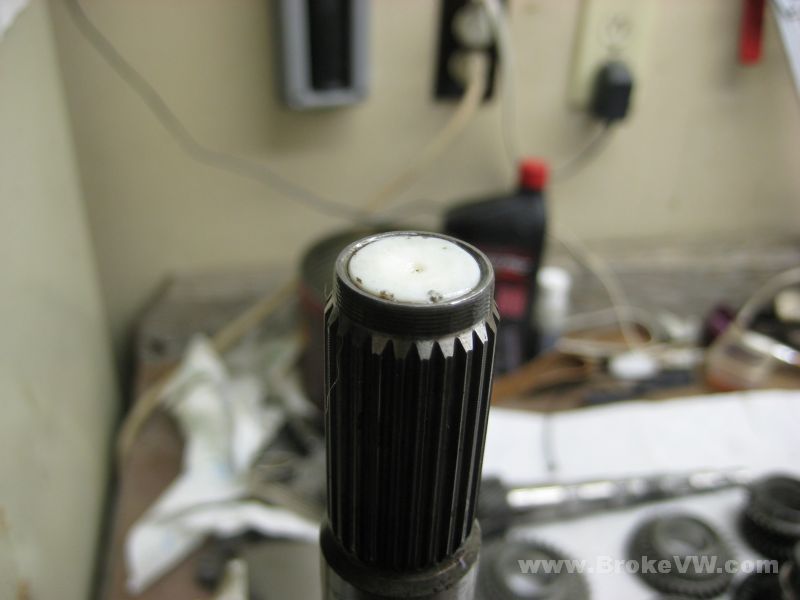
The seal being installed. The white plastic cap is an install tool to allow you to drive the seal in just a bit below flush. You drive the cap and seal in flush, pop the cap out, and the seal will be left properly installed just below the chamfer inside the input shaft bore...
I'll get back on the trans shortly, I've been slowed down a bit by a broken pinky toe... I never knew how much I used it until I broke it and have to put weight on it! Anyway, I'll finish up the input shaft with the install of 3rd and 4th gears, then get started on diff, then the case and preloads.
Update 2/28/11
I have the input shaft finished along with the diff, and the bearings are installed on the output shaft, and am working on the case now...
Pressing on the heated sync hub for 3rd and 4th gears...
The input shaft assembled with the new sync keys, springs, rings, bearings, and circlip...
Pressing in the input shaft, output shaft, and diff bearings and races...
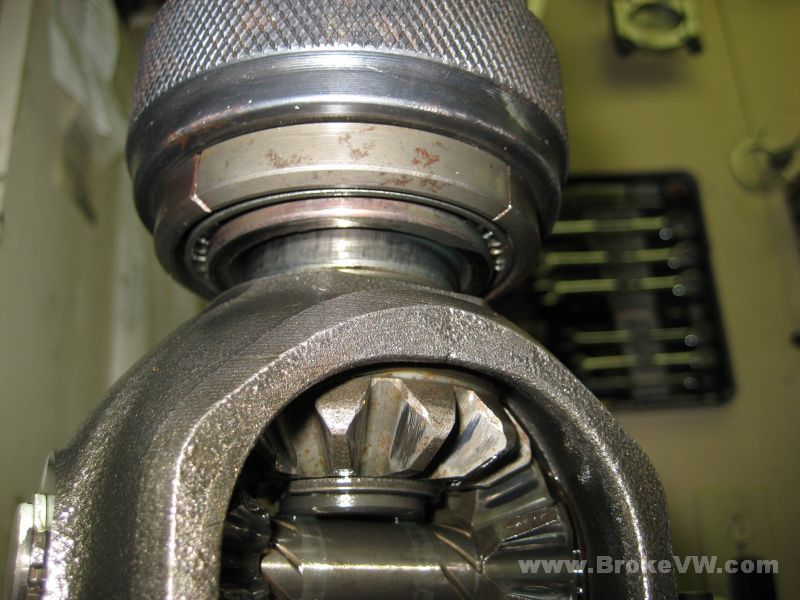
Installing the 2 heated taper bearings to the output shaft at the same time...
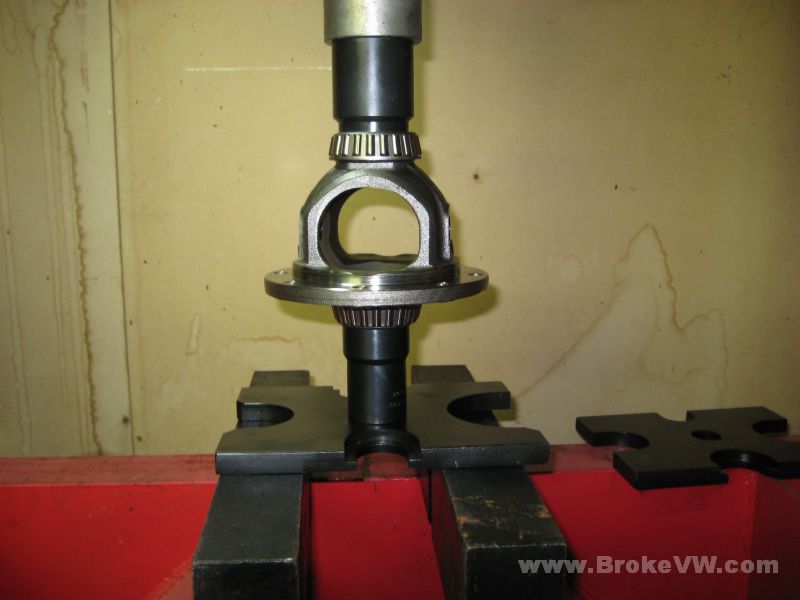
Pressing the 2 heated taper bearings to the diff carrier at the same time...
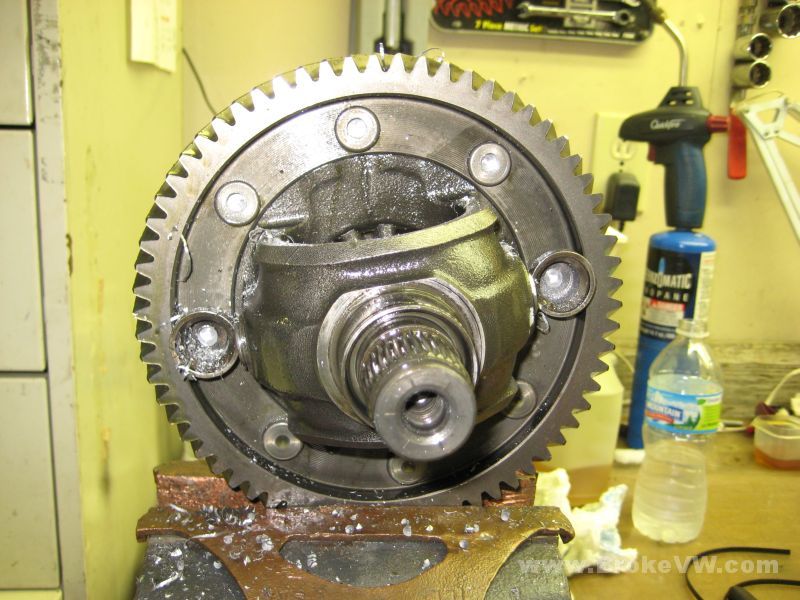
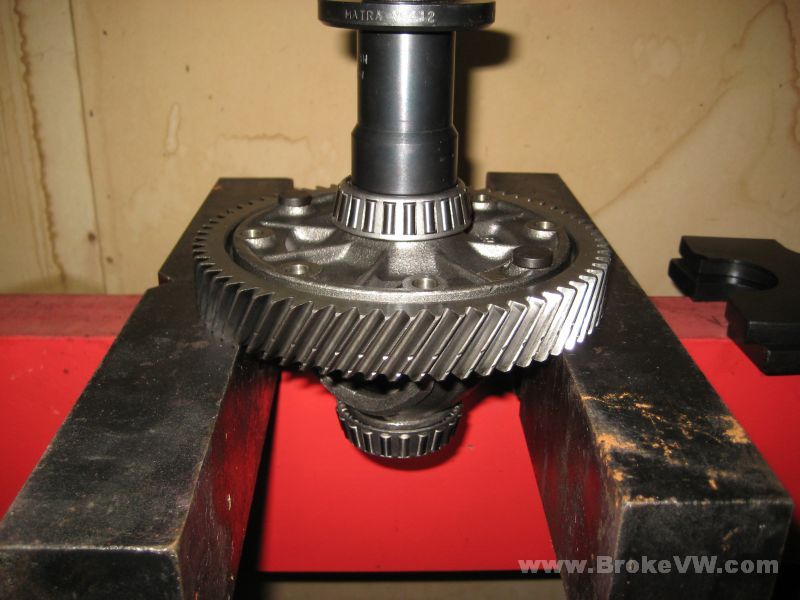
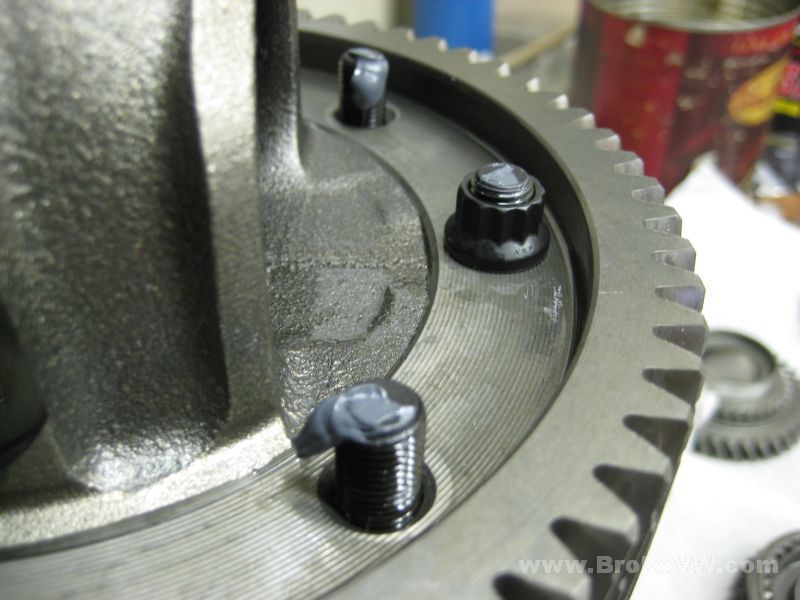
Installing the heated ring gear to the carrier with 2 bolts installed as guides...
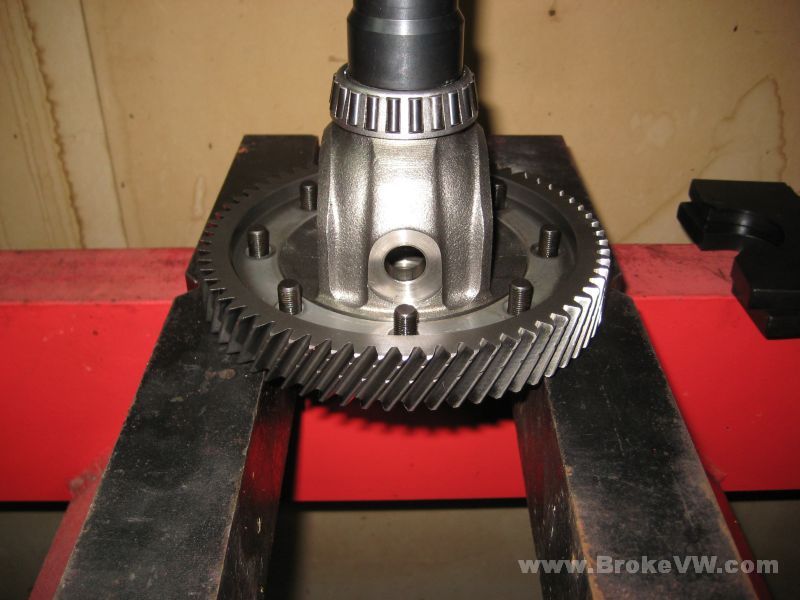
Pressing in the rest of the ARP bolt kit...
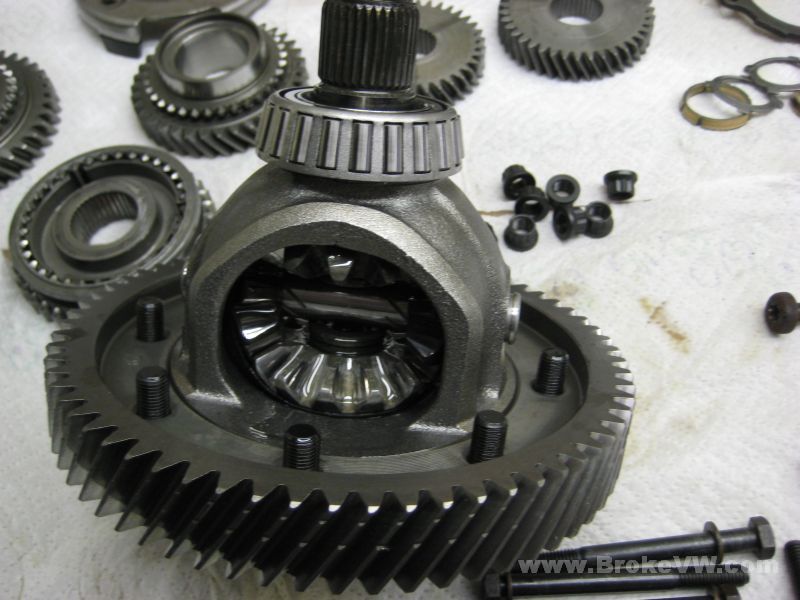
The diff gears installed with the new plastic thrust piece behind them...
New snap rings for the cross shaft...
The ARP thread lubricant applied to the bolts, the nuts will be installed to 40 ft-lbs once the ring gear has cooled fully...
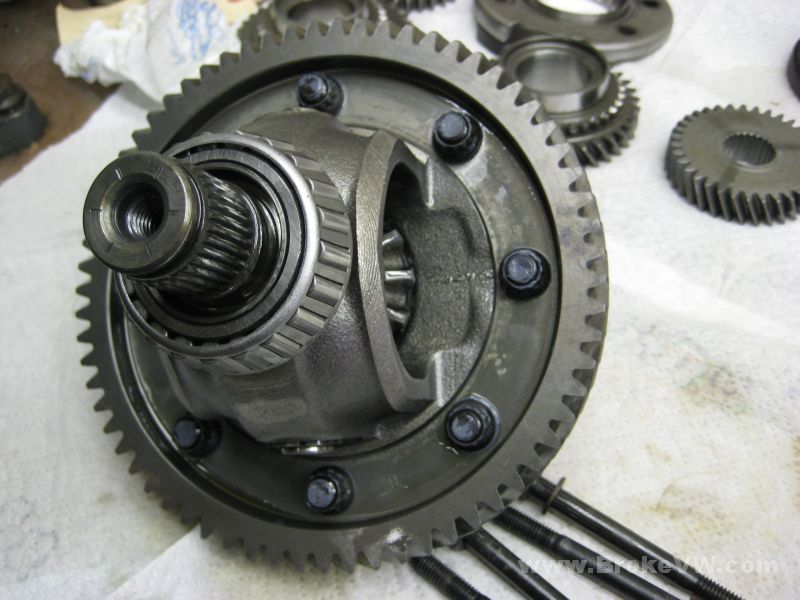
The completed diff assembly, with 2.3mm clips for the stub axles installed...
Update 03/01/11
I've got the bearing preloads done and have started assembling the trans.
Pressing in the diff bearing race along with the output shaft roller and the input shaft big ball bearing...

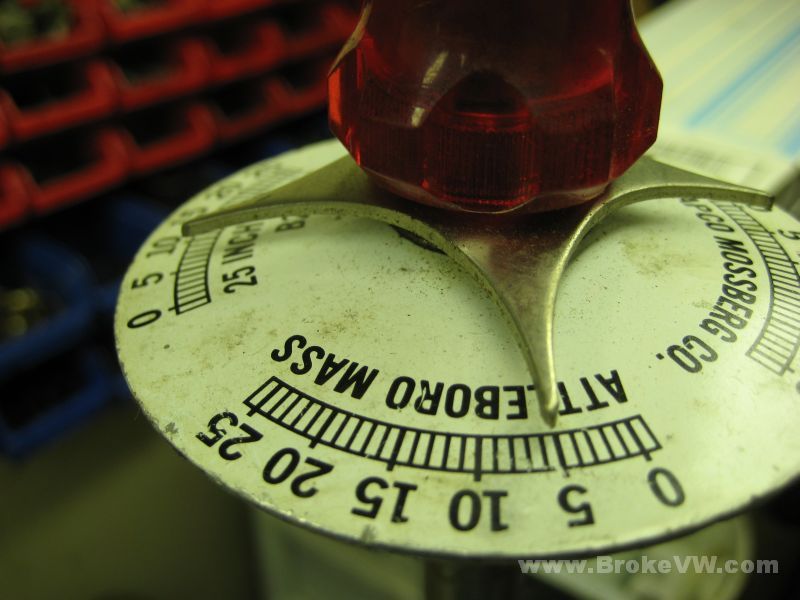
Checking the preload of the output shaft. Spec is 4.4 to 13.3 in-lbs, and your bearings show a preload of about 6 in-lbs, so they are in spec. It required the use of one 0.80mm shim...
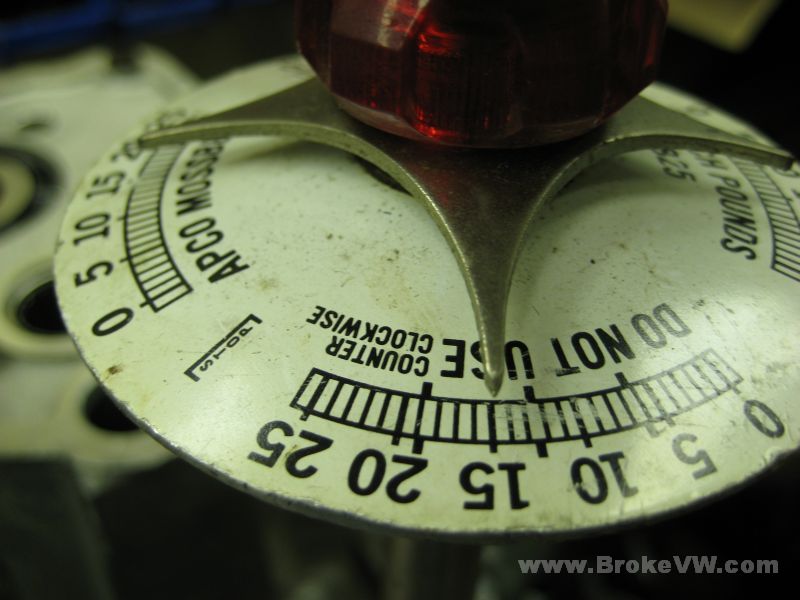
Once the output preload is done, the output shaft is removed and the preload of the diff bearings are checked...
Spec is 11 to 31 in-lbs, your bearings show about 15 so they are in spec...
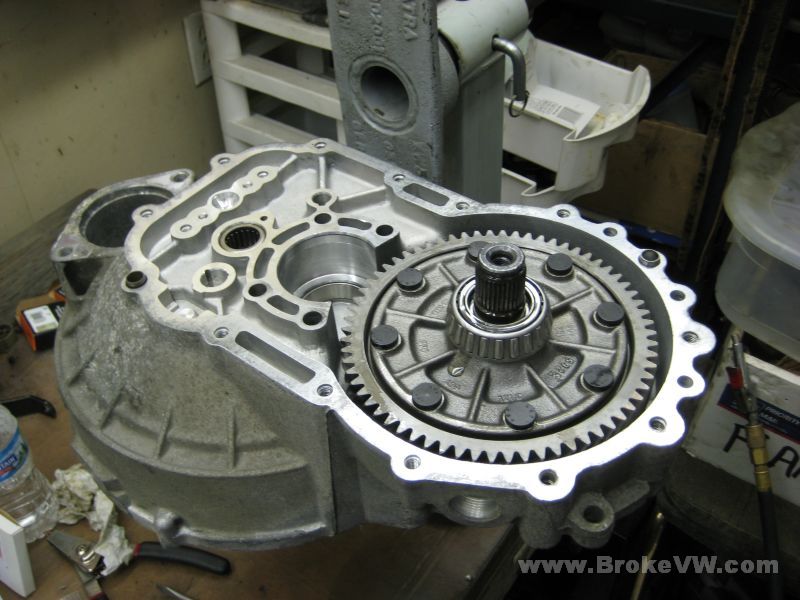
With the preloads complete, the parts can start going into the trans for the last time. The output shaft is bolted in place over the diff, and a blob of RTV silicone is applied to hold the magnet in place...
The new thrust washer, 1st gear needle bearing and sync ring are installed, as is the cleaned magnet...
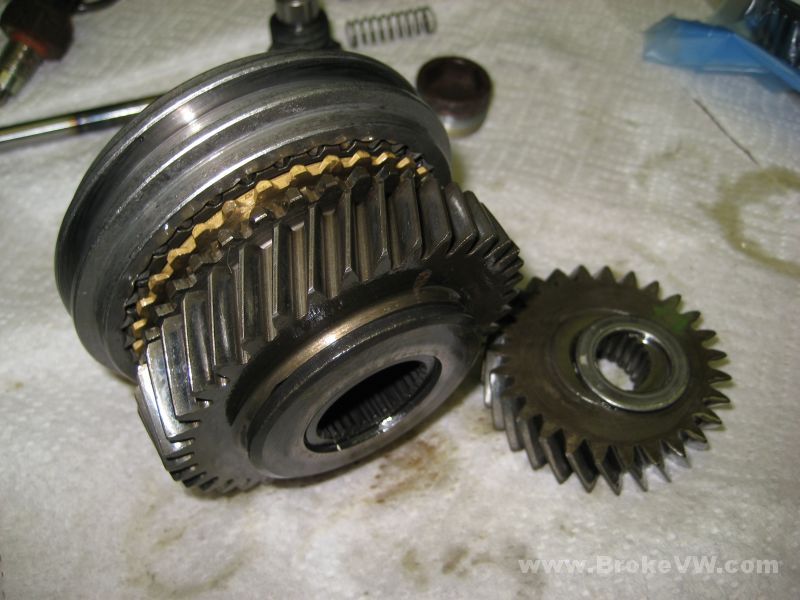
Next is the heated 1st/2nd sync hub assembly along with the heated bearing race for the 2nd gear needle bearing....
An out-of-focus pic showing the new german moly coated VW sync ring used for 2nd gear. The other gears use aftermarket plain brass rings...
2nd gear installed with the new sync keys and springs....
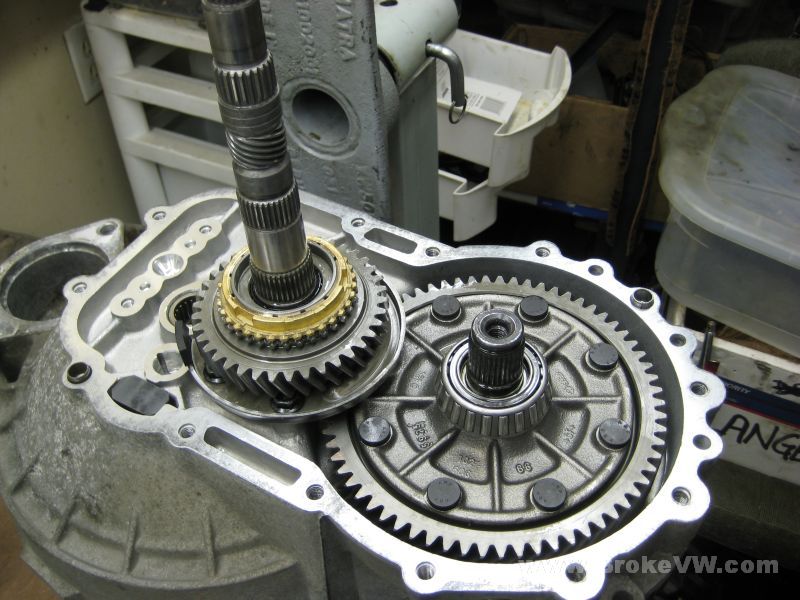
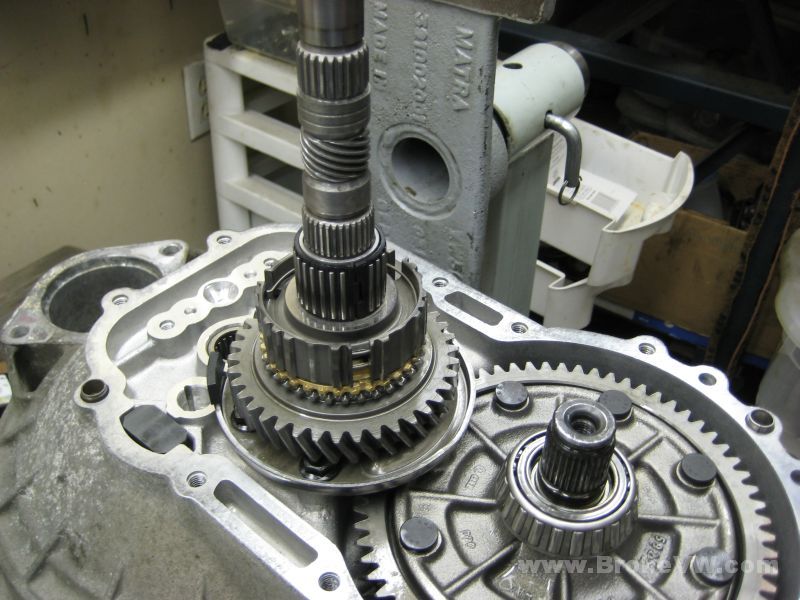
3rd and 4th are installed onto the output shaft as the completed input shaft is dropped into place. The 3rd gear is secured with a new 3.0mm circlip shaved to fit, as well as a new 4th gear circlip. The new reverse idler is installed along with the reverse relay bracket, and the completed shift fork assembly...
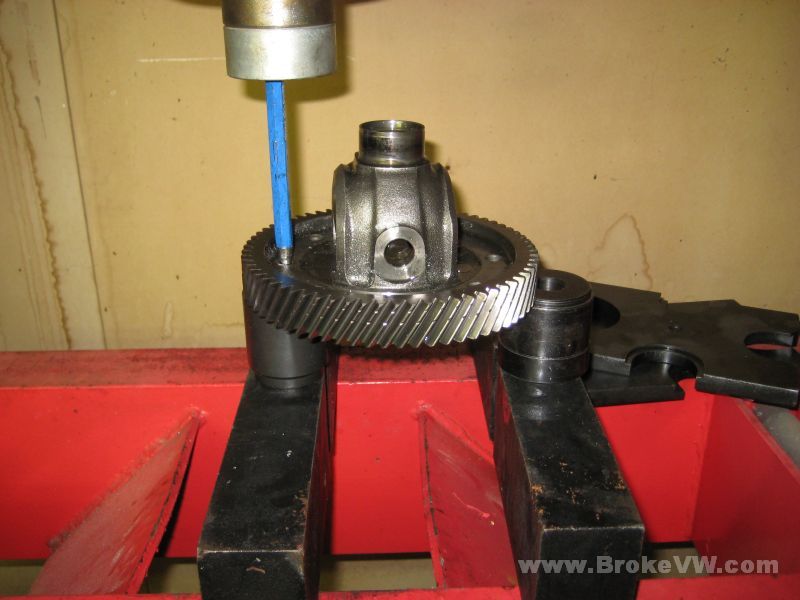
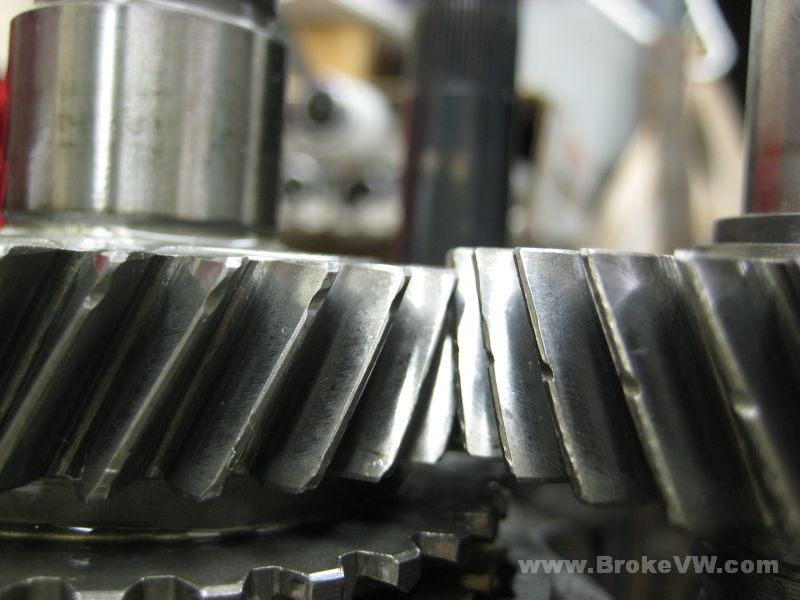
This is the alignment of 4th gears before adjustment...
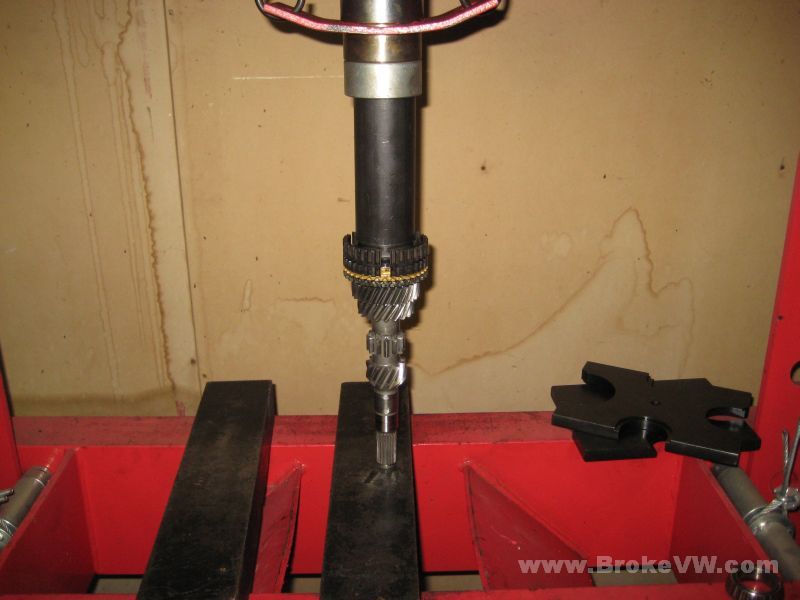
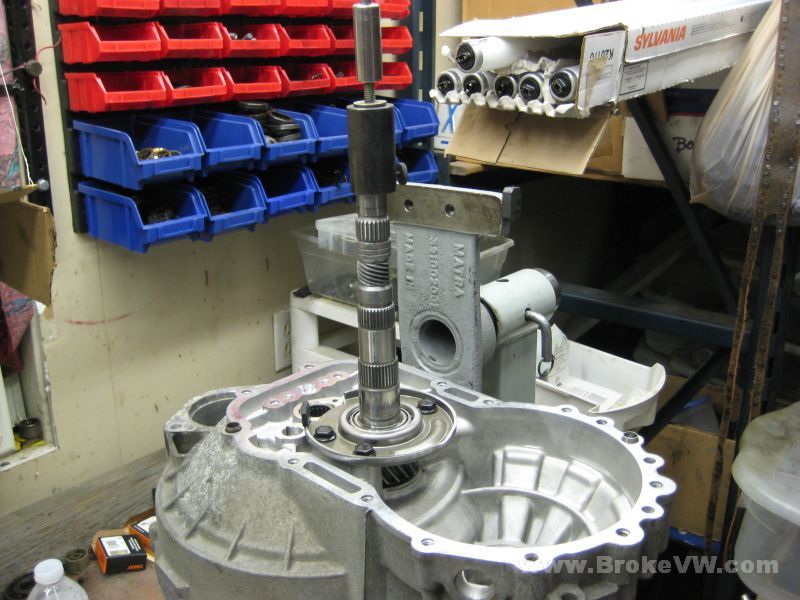
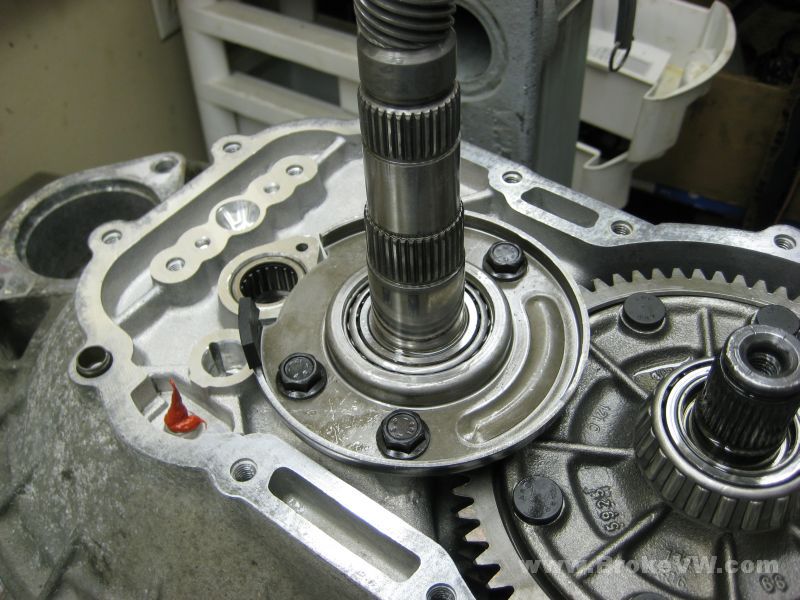
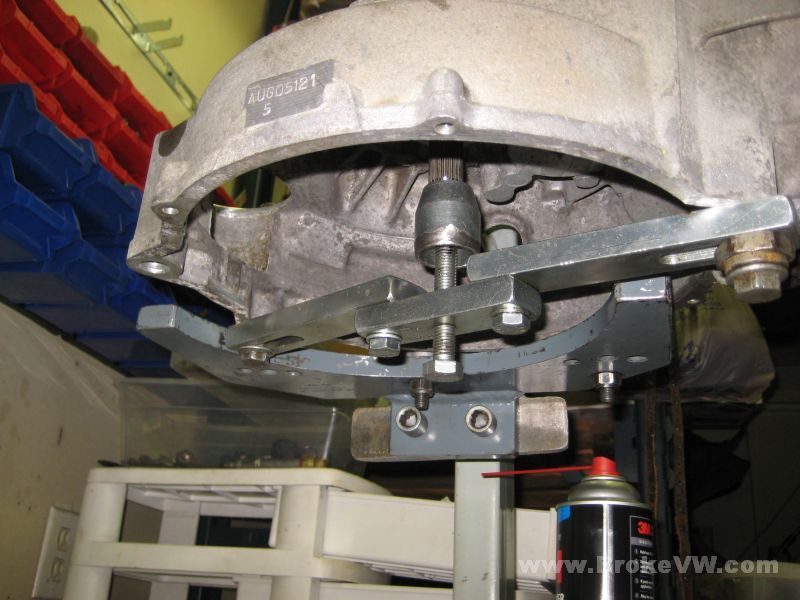
This support bar is bolted into place across the bellhousing, and it supports the input shaft from below during the pressing operation when the case is assembled. It also allows the adjustment of the input shaft to properly align the gears...
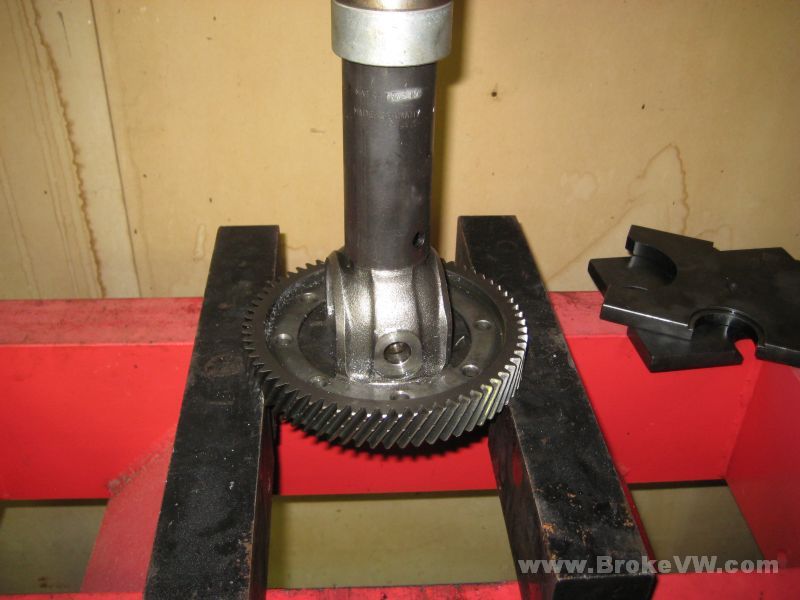
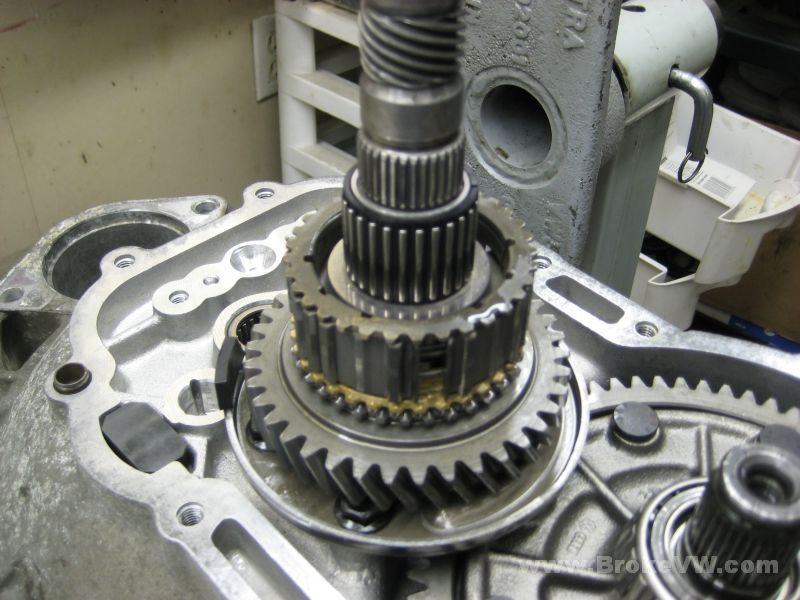
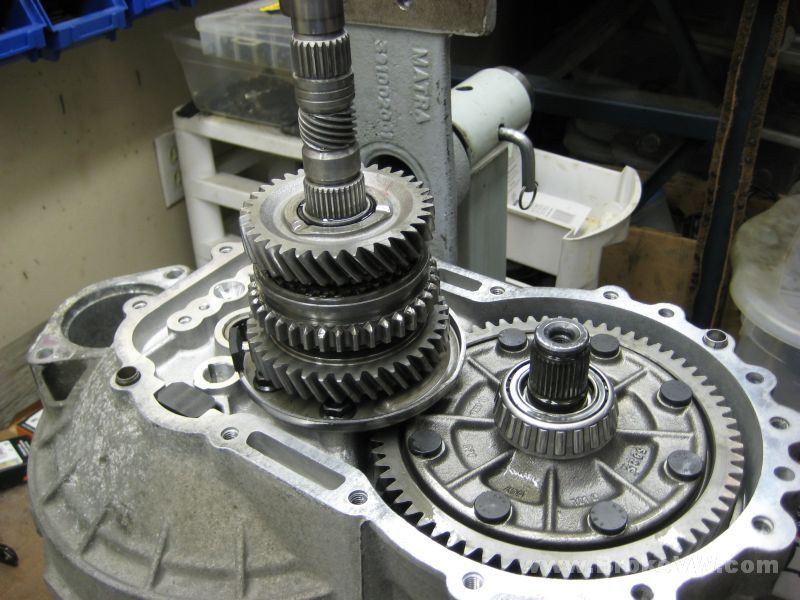
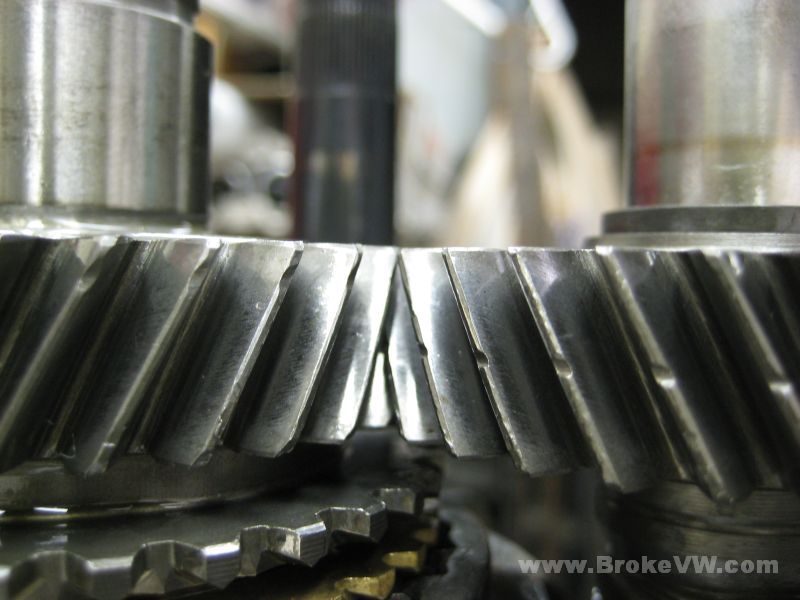
This is 4th gear alignment after adjustment, you can see they are properly aligned now with maximum tooth contact...
Next will be pressing the case together and then onto 5th gears, the flanges, the input shaft oil seal, starter bushing, etc., so the trans should be completed shortly.
Update 03/04/11
The trans is completed and ready.
The trans casing is pressed together and bolted up...
The tall 5th gears installed...
New selector seal...

The new selector detent bolt...
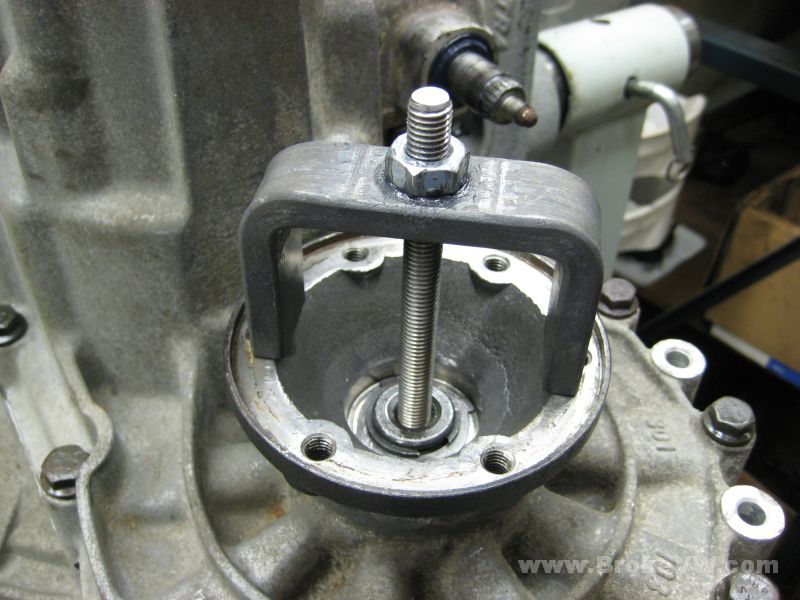
The new drivers flange seal and the flange being installed...
The 5th housing bolted on...

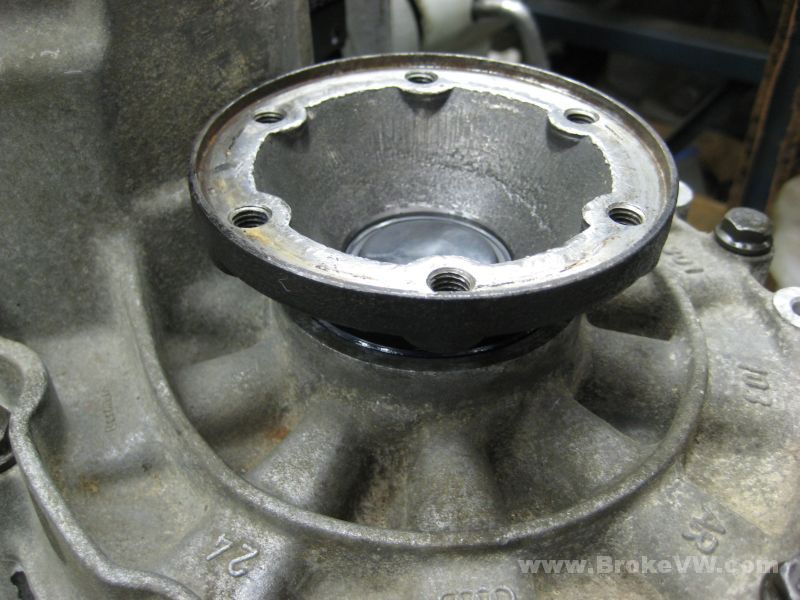
The drivers flange center cap installed...
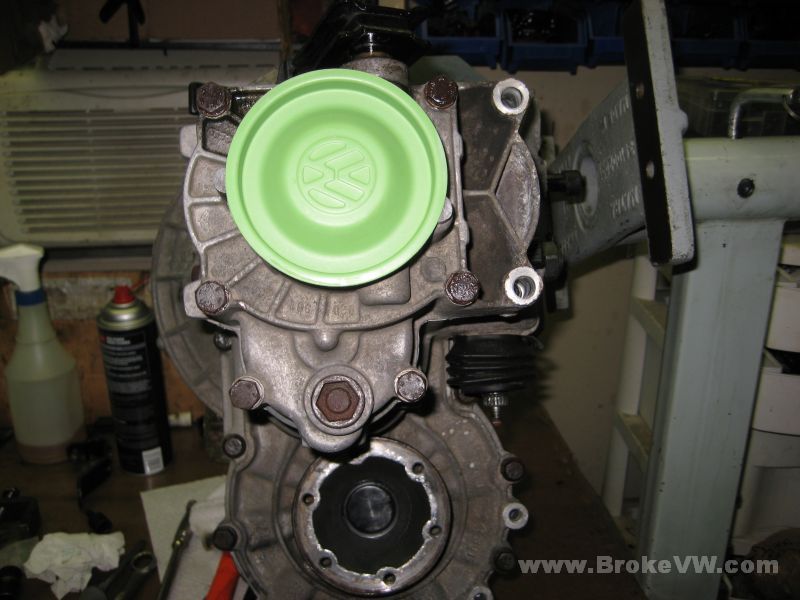
A new VW green end cap pressed into place. There was a good bit of corrosion inside the 5th housing, so I added sealant paste to the end cap to help prevent any leaks...
The passenger side seal sleeve and flange seal installed...
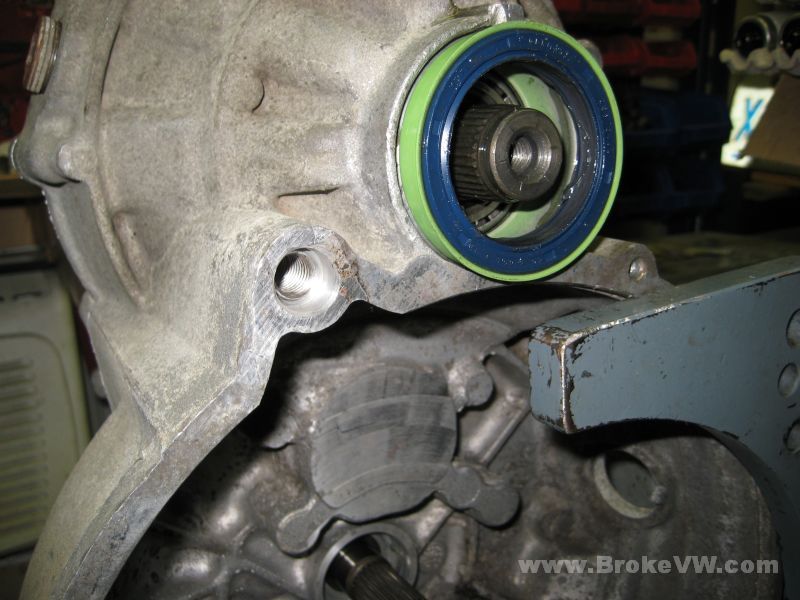
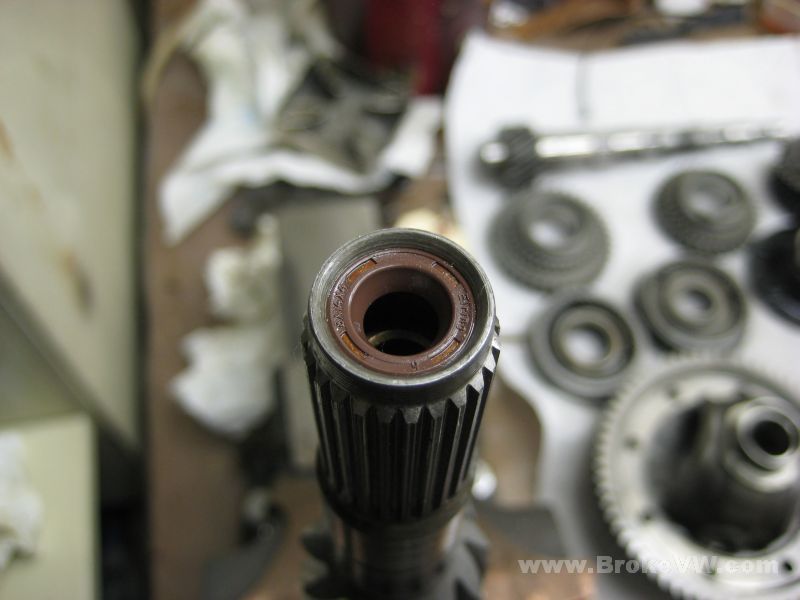
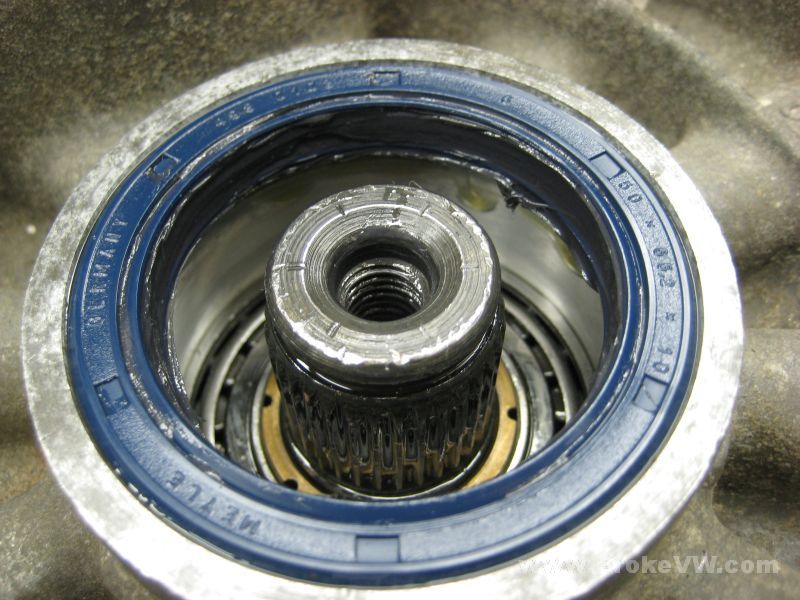
The new input shaft seal in place...
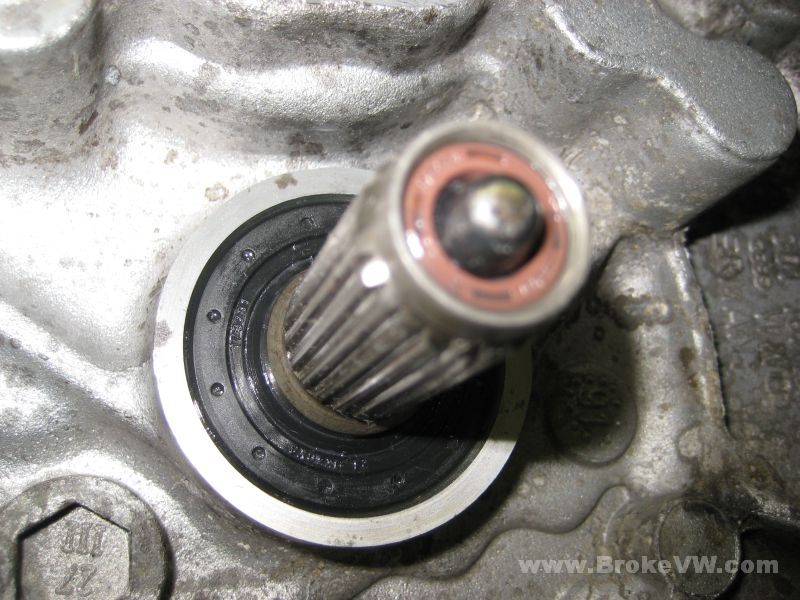
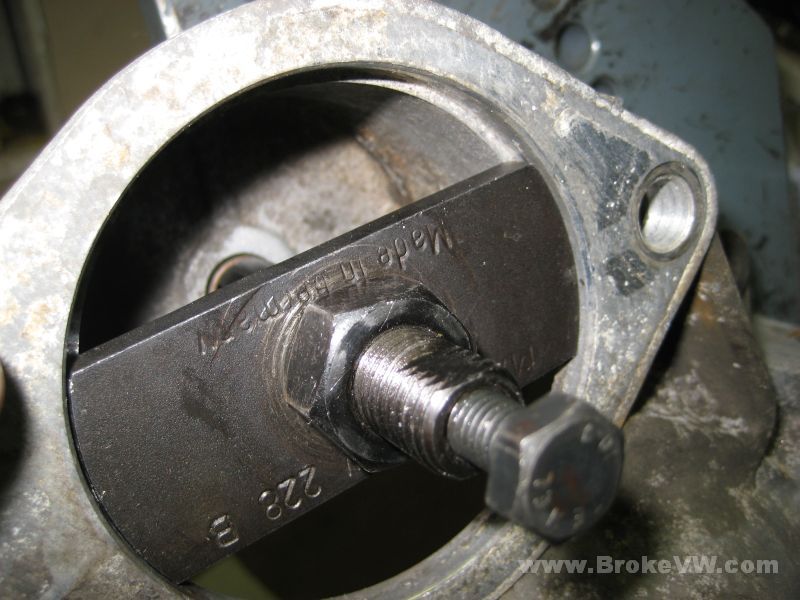
The last part to get installed is the new starter bushing. It is pulled with the VW tool and simply pressed into place...
Putting the associated parts back onto the trans I decided to swap out your trans linkage bracket with one in better shape...
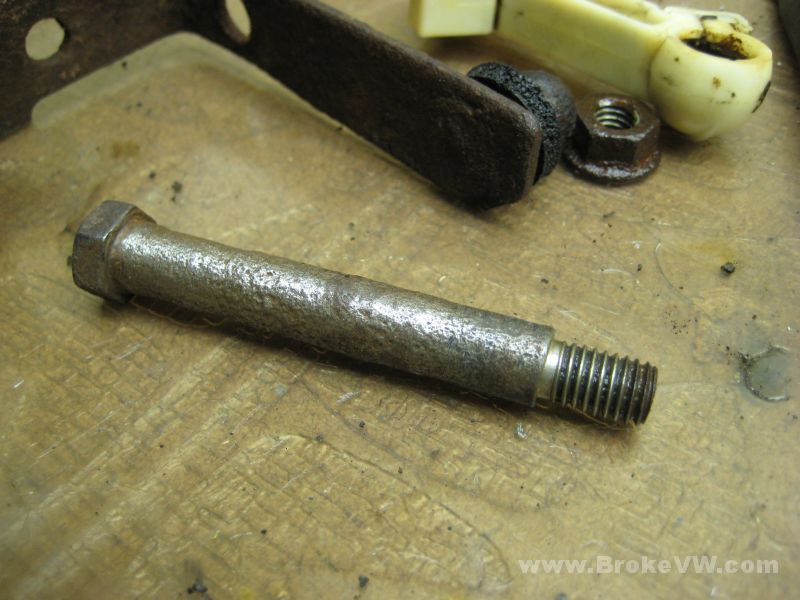
I've removed the rust with a wire wheel from your linkage bolt, but it is badly pitted. You need new shift linkage bushings, I would do a shift linkage rebuild kit while it is out of the car...
The completed trans. I have left the support arm and the linkage mount loose, they need tightened before going into the car, but it is sometimes easier to get the trans back in without the linkage mount attached to the diff...
Thanks and let me know if you have any questions!