Reverse Switch Swap Wiring
Here are pics you might find useful if you have swapped a trans into your car, and the reverse light wiring plugs no longer match.
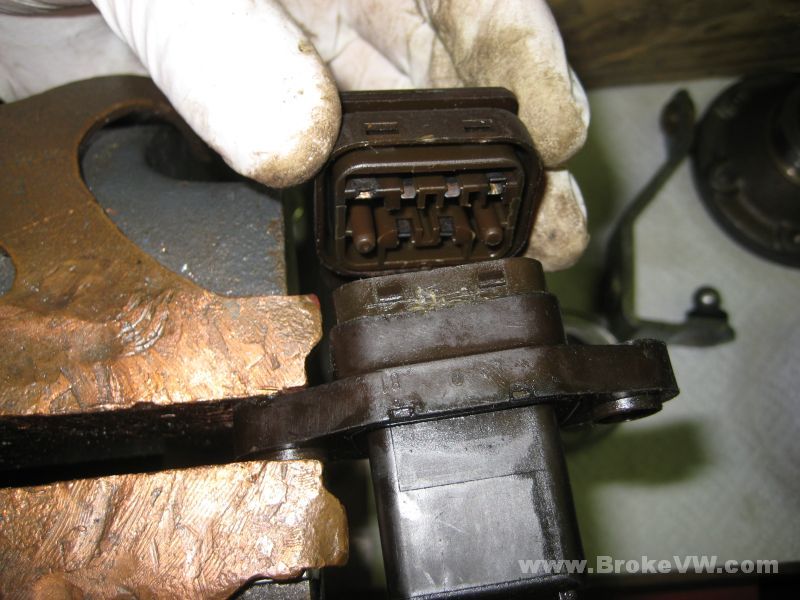
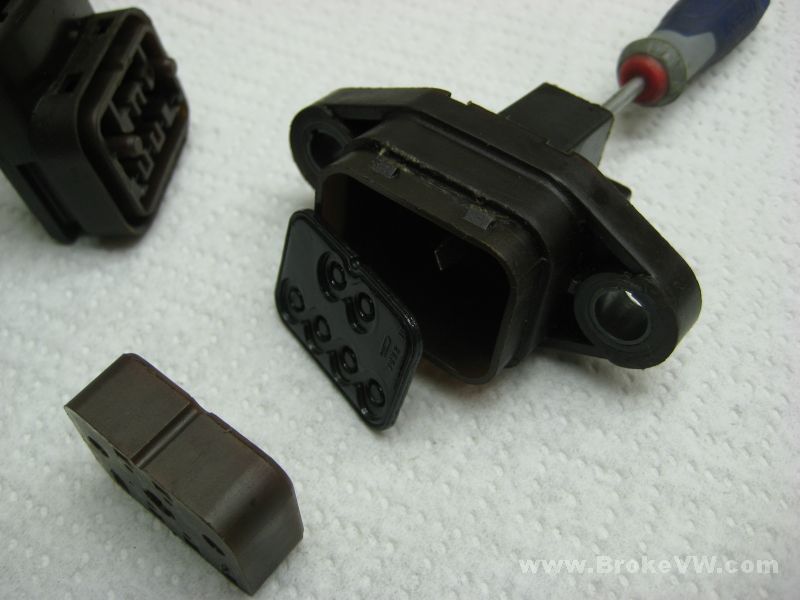
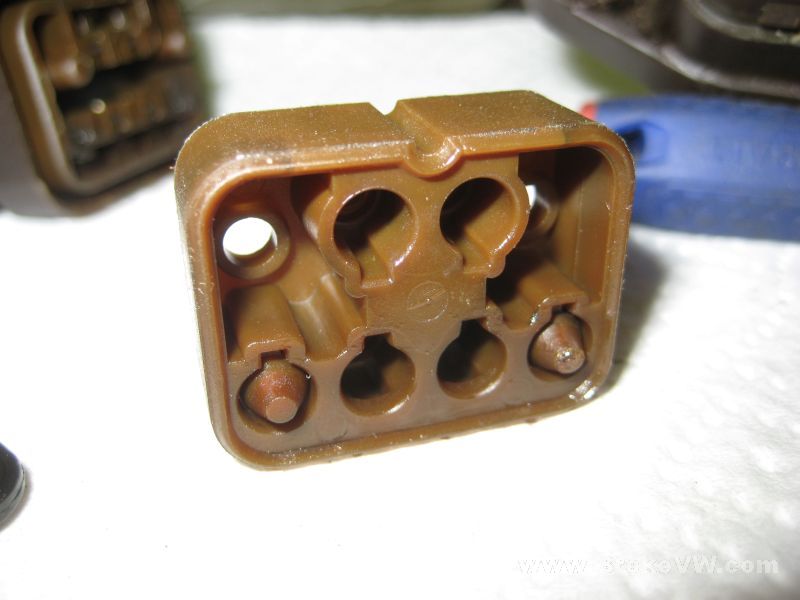
If your car originally used a trans with a 2-terminal reverse switch, and you stuck in a trans with a big switch with a bunch of blade terminals on it, you'll need to use the terminals shown here, terminals # 2 and #8. Which wire to which terminal isn't important, it just completes the circuit for the lights between #2 and #8...
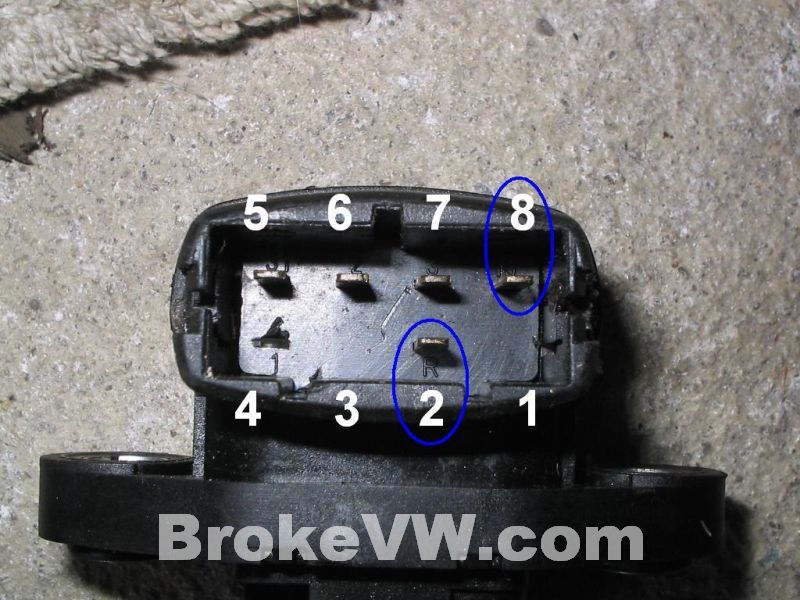
If you have a large switch like shown above, but it doesn't have a terminal #2, and just has terminals 1, 4, 5, and 8 (in the 4 corners)....then you should use terminals #1 and #8.
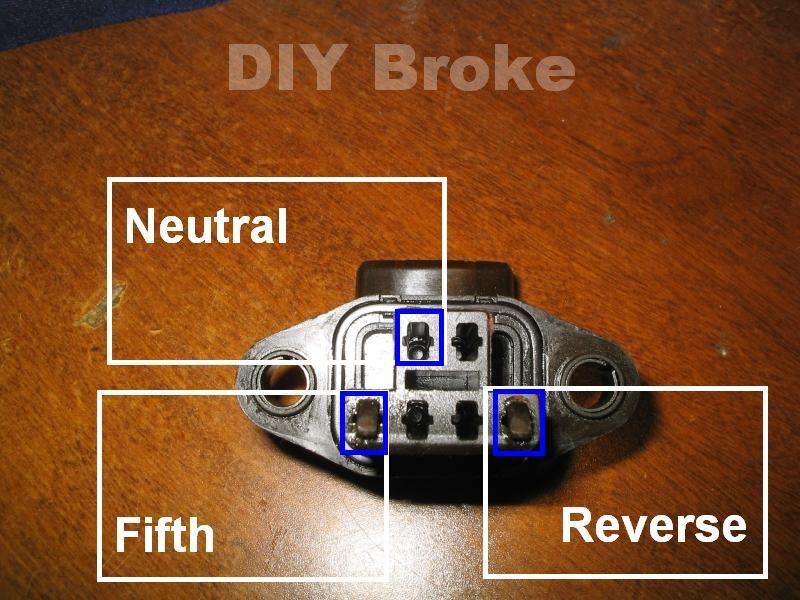
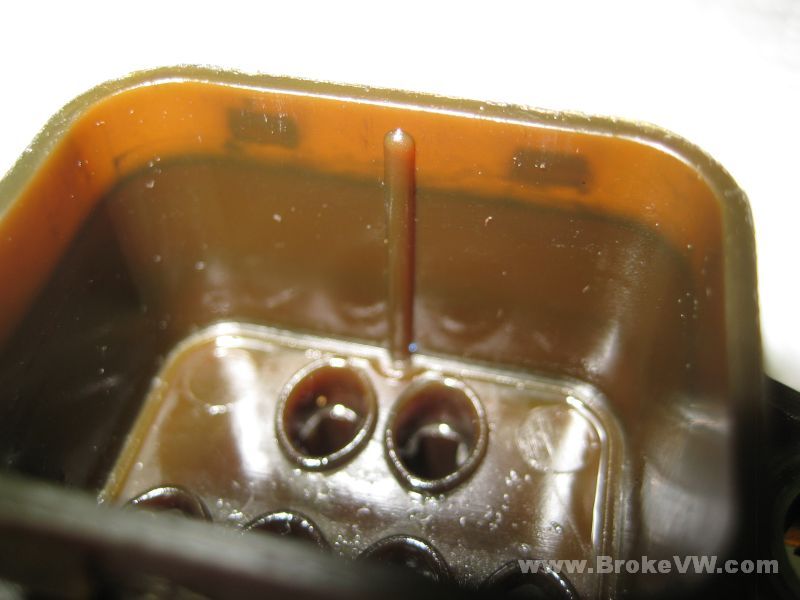
These pins are pushed in by a small bump on the selector assembly. There is continuity between the terminals when the pin is pressed in.
The pins in the pic are labeled for the gear lever position that results in that pin being pressed in.
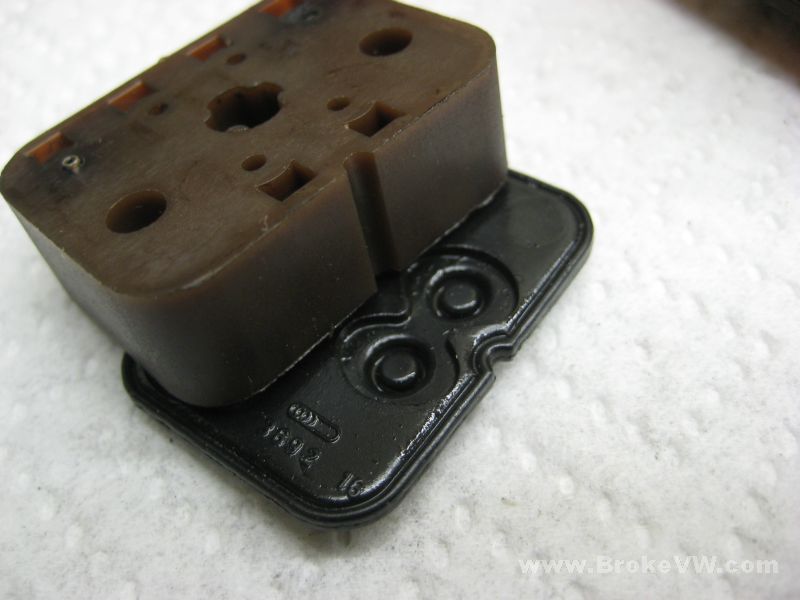
If your car originally had one of these big switch trans (and that means you have an upshift light in the instrument cluster) and you swapped in a trans with the smaller 2-terminal switch in it, then peel the rubber back on the wiring harness on the car, and look at the numbers on the top of the plastic under the rubber covering....look for the ones labeled #2 and #8, and use those on the trans switch.
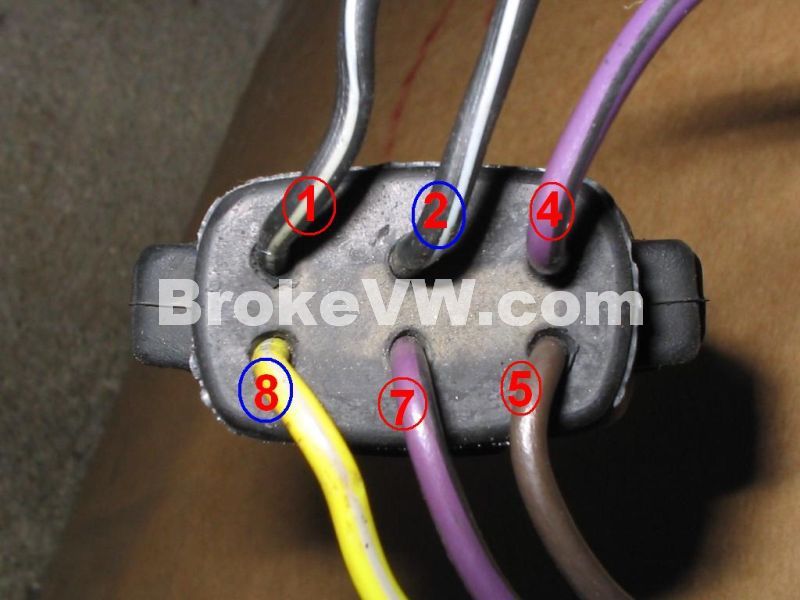
In this pic, this particular plug used these wire colors, but your harness might have different color wires, a different number of wires, or the #2 and #8 wires might not be in the same place as shown here, so peel the rubber to double check.
In the case that you don't have a #2 wire, then use wires #1 and #8.
------------------------------------------------------------------------------------------------------
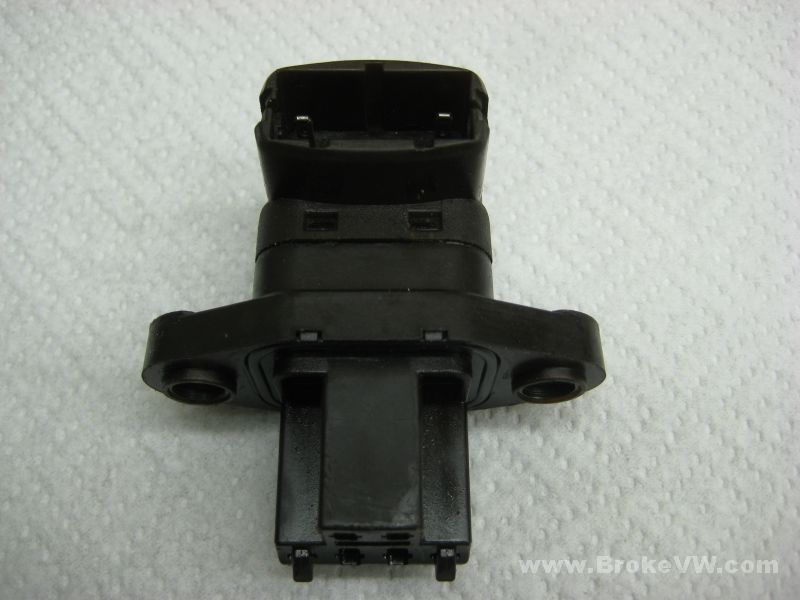
Here are some pics showing an older switch being opened and showing why they fail, and then a couple pics showing the different types of "large" reverse switches.
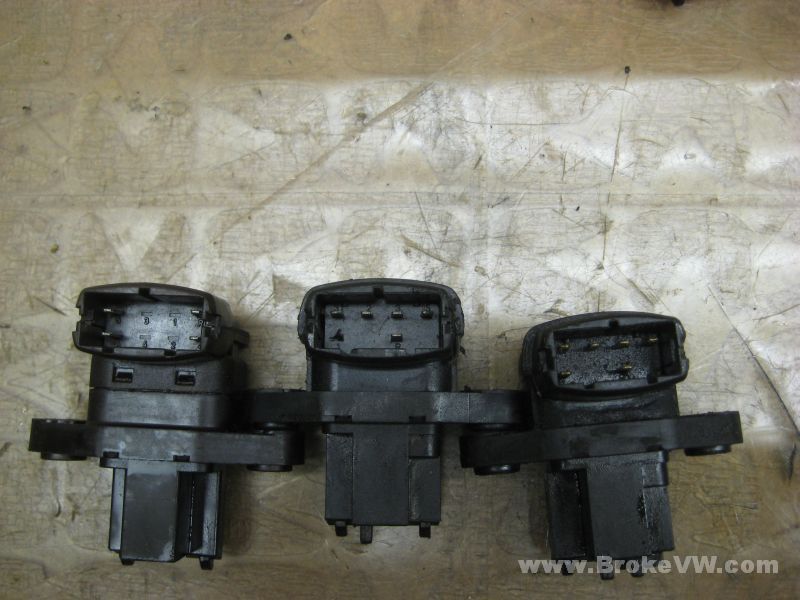
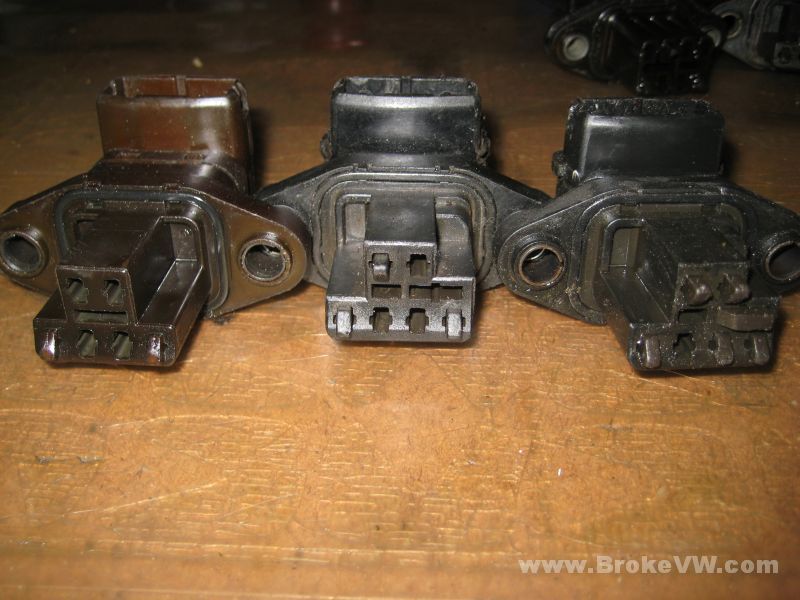
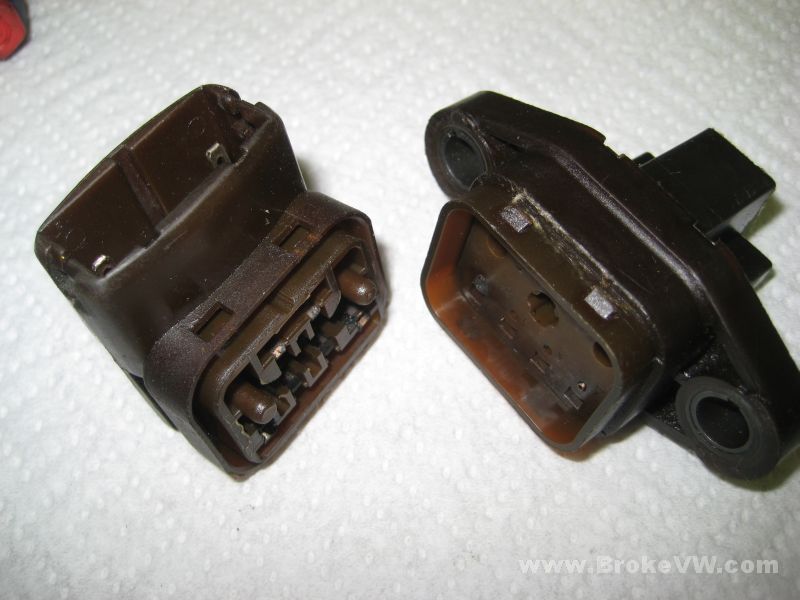
This pic shows 3 different styles. The one on the far left is a 4-pin switch, it is on the older MK1 cars usually. The one in the middle is the most common and it is the 5-pin switch found on most MK2 cars with the upshift light. The one on the right I have no clue about! It is a 6-pin switch, and it came from one of these many trans that I have collected or rebuilt over the years. I could dig around with the part number and see what model cars used it, but it isn't as common, I only have one of them out of a box of switches. The 5-pin switch is the most common one you'll find.
Here are the backs of the switches shown above. The left one is the older 4-pin switch, it has just 2 contacts, one for the reverse lights, one to shut off the upshift light when in 5th gear. The one in the middle has 3 contacts, the top contact being for neutral. The switch on the right is the 6-pin switch, and it has 6 contacts. You can see the switch will support up to 7 contacts, as there is still 1 hole left open in that switch on the left (the 2nd hole I think isn't for a contact, the holes with contacts seem to have guide grooves in them).
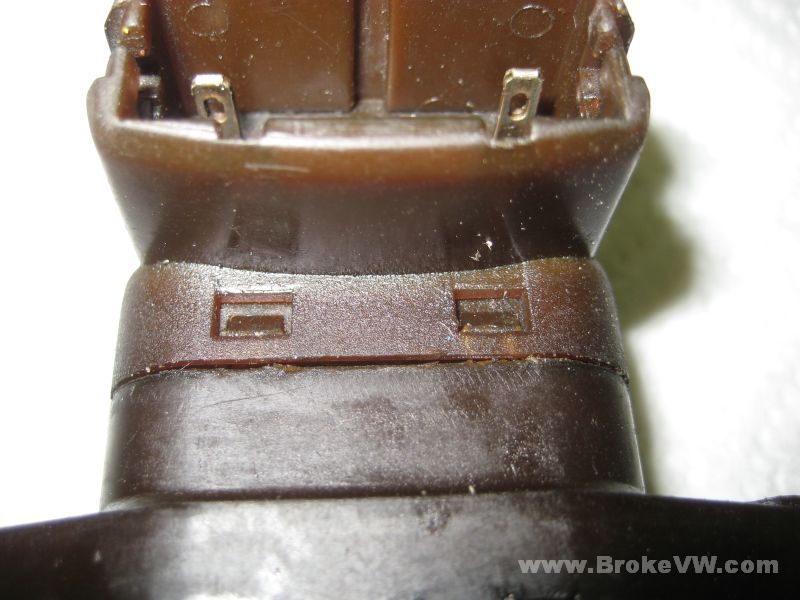
Right, let's open an older switch up and see what makes it work. The newer switches don't come apart like this, they're glued/welded/sealed etc. at the seams, even though they tend to fall apart, as I have several here that people have repaired by sealing it back up again. This is the older 4-pin switch the MK1 folks will have...
The older switches have little locks you need to release to get the part split open...
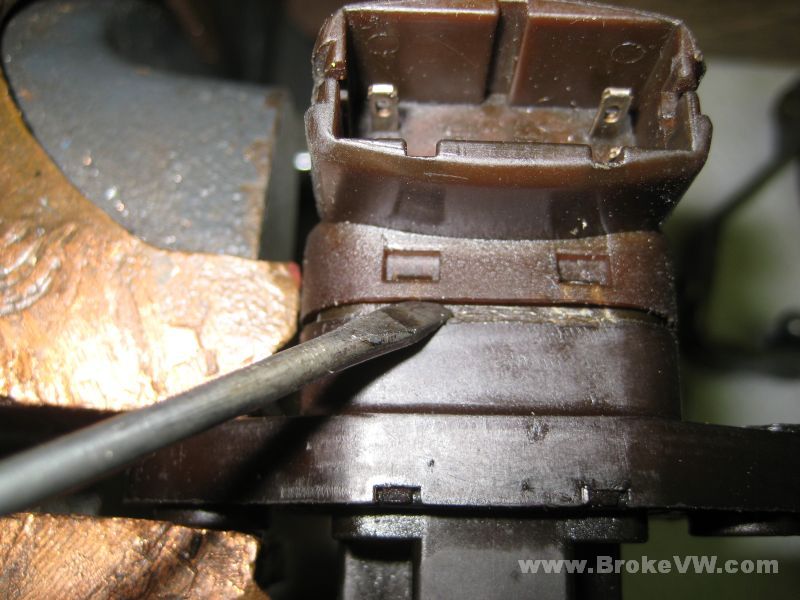
Slide a thin screwdriver under the edge and lift it up over the locks...
Flip it over, release the 2 locks on the other side, and pull the switch apart...
The parts of the switch once split open...
Push the internal parts out of the switch by using an empty contact hole in the switch...
The parts of the switch are the actual metal pins where you plug the wires into (in the background), the rectangle block in the foreground is where the small pins are that complete the circuit, they are spring loaded plungers with metal pins on the ends. The black rubber piece is a seal to prevent trans fluid from reaching the spring loaded pins, or the metal pins on the piece in the background. The portion of the switch that sticks into the trans with the contacts that are pushed by the selector assembly inside is shown on the right, partially out of frame...

The internal spring loaded pins in the block and the rubber seal are notched so they only go in one way. The rubber seal allows the movement of the contacts and the spring loaded parts to pass back and forth without allowing oil to pass. It reminds me of those rubber layers you find when you open a TV remote control or a pocket calculator....
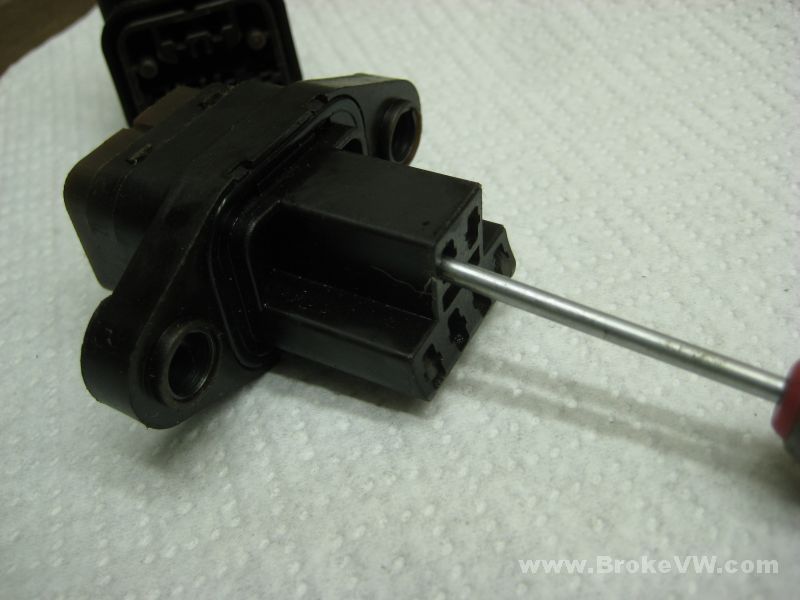
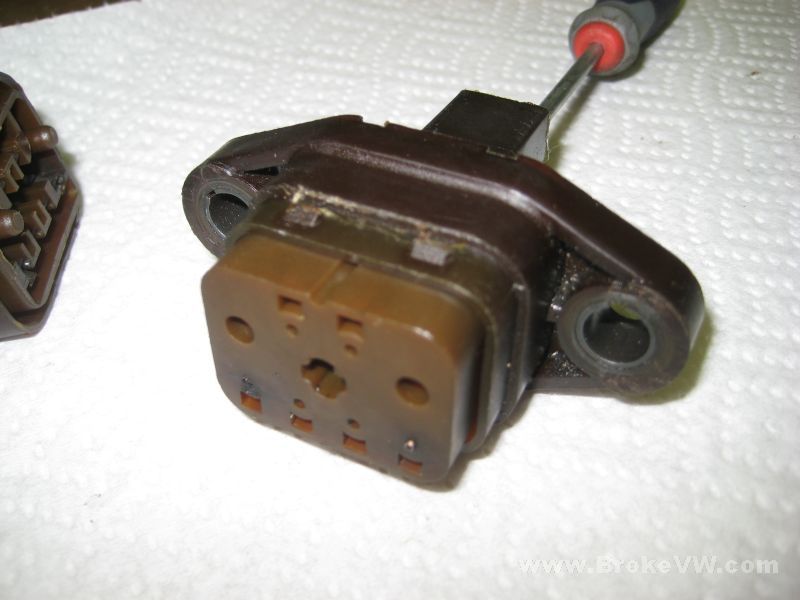
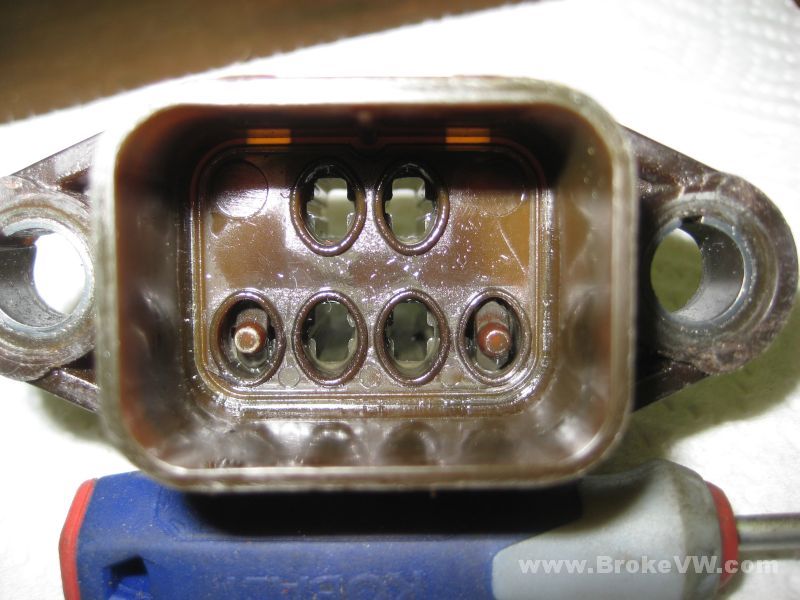
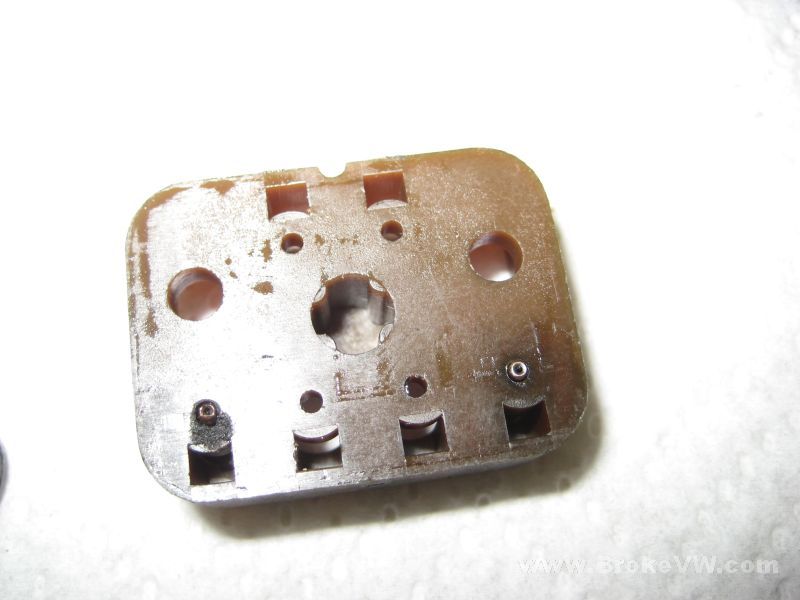
Here is looking into the body of the switch that is put into the trans itself... the contacts are what can sometimes wear out and wear down from the steel selector rubbing the plastic contacts over the years, making them too short. That is one way for the switch to not work. If you have a bad switch in the trans, but pulling it out and pressing the contacts with your fingers makes it work, the plastic contacts might be bad.
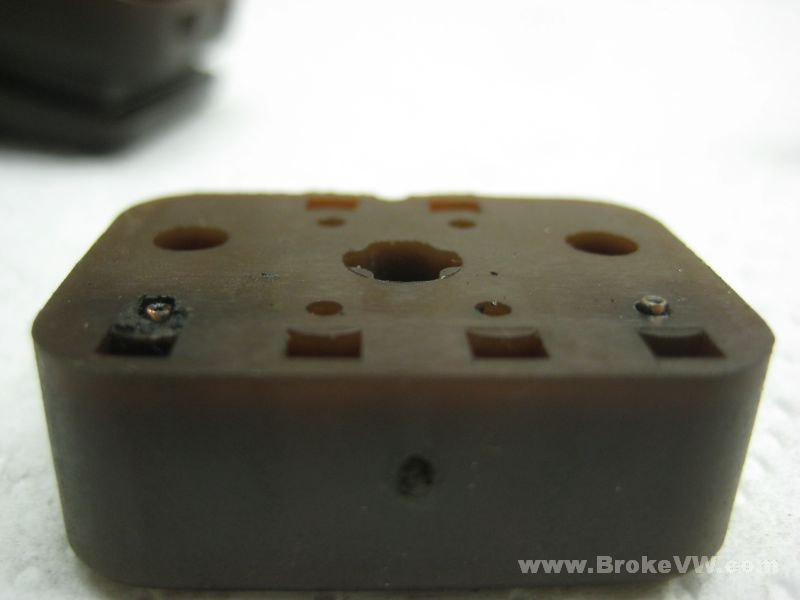
Here is the spring loaded block.. the contacts in here are plastic, spring loaded, and the ends have metal pins in them to complete the circuit. The metal pins are pushed in between 2 spring bars to complete the circuit...
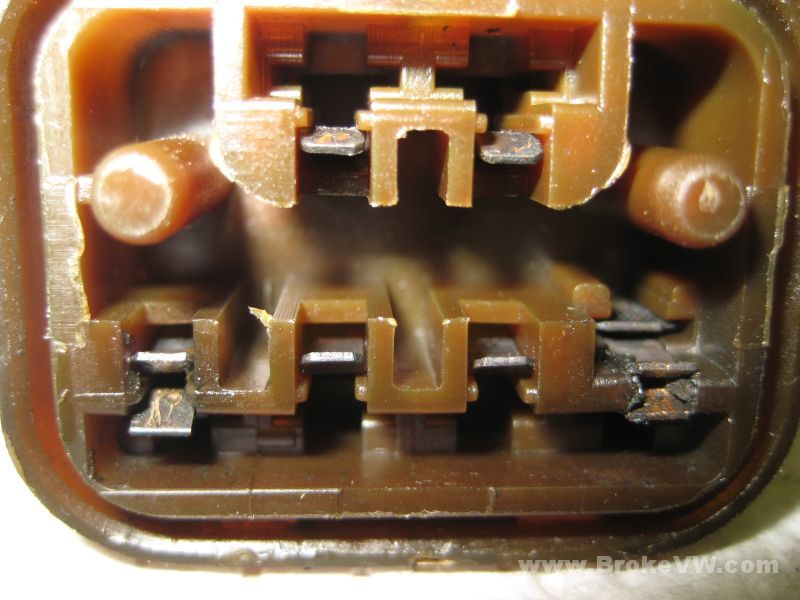
This is the portion of the switch housing that you plug the wires into... the pins are molded in and bend to form these spring bars. You can see that there are 8 bars... with 4 of them just single bars. Those are the 4 missing pins where you plug the wires in. The pins just aren't extended. The 2 sets of 2 bars which make a pair of spring bars in each corner on the bottom row are the 4 pins you plug the wires into.
The set on the right in the pic are for the reverse lights, the set on the left are for the 5th gear and upshift system. Notice the burn damage around the reverse light bars, and this is after I picked at them to clean them up again...
This is the other side of the spring loaded block, this is the side with the metal pins that are shoved into the spring bars shown above, they complete the circuit. The one on the left is reverse, the other 5th. Notice the burn damage around the reverse pin, and how the end of the pin looks different than the 5th pin. I've cleaned it up, but you can still see damage, it was covered in a crusty build-up of carbon. This is what makes the switch fail... the amps needed for the lights is just too much for these wee pins over time with corroded connectors. Each time it is activated, it burns a little of the pin away. The bars are thick and can take it, the thin hollow pins just melt away.
From this angle you can really see how the reverse pin is melted and much shorter than the 5th pin. This switch wouldn't work at all. Sometimes the switch will work on the bench being worked by hand, but not in the trans. That could be worn plastic contacts, as mentioned earlier, but it could also be a pin melted away just enough to still work when you shove the contact in all the way, but not enough to work when the selector moves it in, maybe not quite as far. Normally, it would be enough, when the pin was new, but it might be just burned enough to not work in the trans, but work on the bench.
There you have it... if you're very handy, you can fix this with a home made pin, or by swapping pins and getting rid of the 5th switch by jumping the wires and killing the upshift system, or you could solder a bit on the end of the bad pin then shape it to extend the pin again... it can be made to work again, and could be rebuilt. That's the cool part about old things... the way they're built usually allows you to rebuild them. With the new sealed switches, it can be done, but it is less simple as it is probably vibration or ultrasonically welded, and splitting it might break it. The old switch is easily taken apart and put back together.
If you want to make the switch last a long time, relay the reverse lights. Just like you do with the headlights, use a small relay to power the reverse lights, and don't send the full amp draw through the actual reverse switch. Someone said they checked on a 4-pin switch recently and found it for $50 new, so it might be the way to go if you want to make it last. The other option is to move the wires around in the connector plug on the wiring harness, and use a 5-pin switch which is cheaper at $35, but it's likely to burn up as well. A relay would take care of the switch burning up. If you like to tinker, it might be worth it.
Click HERE to go to the Start Page