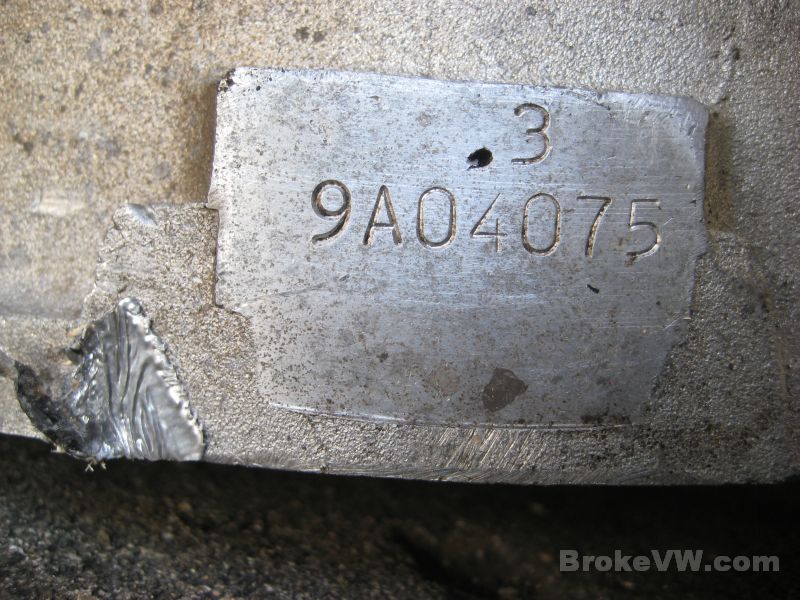
Tim 9A
Arrived - 08/30/11
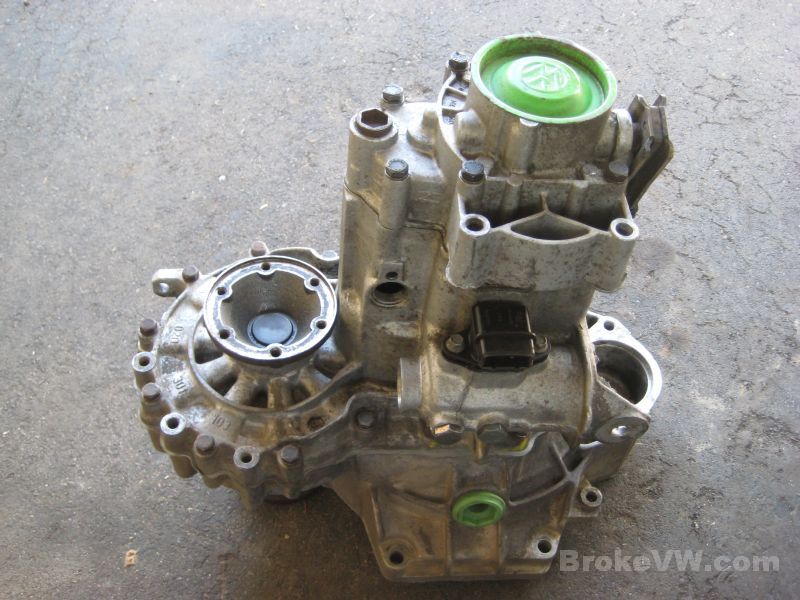
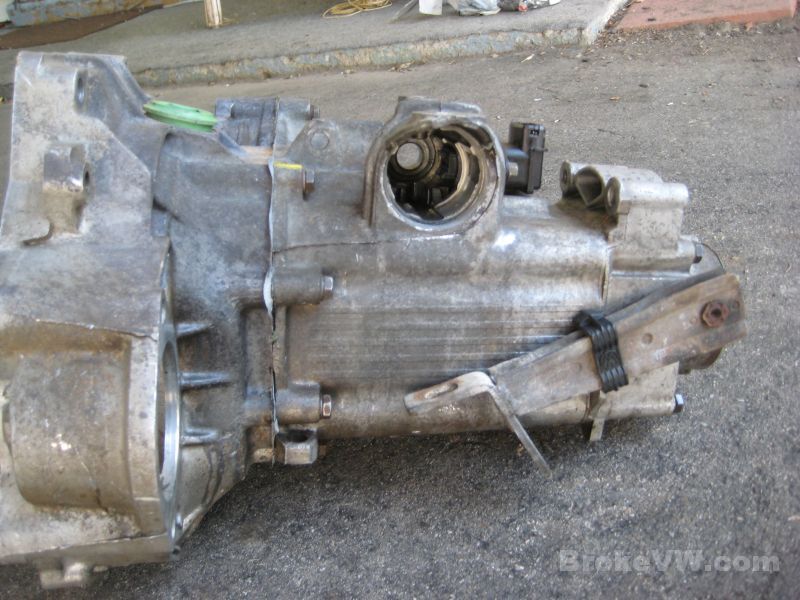
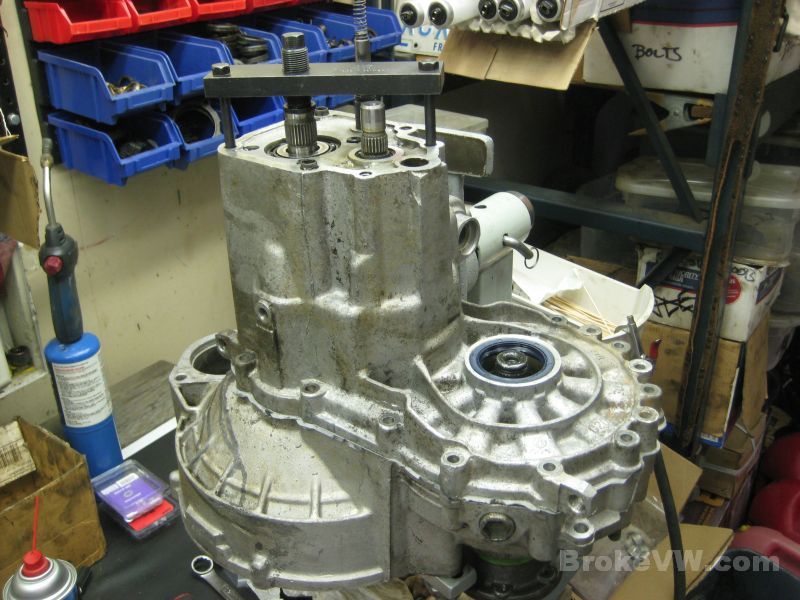
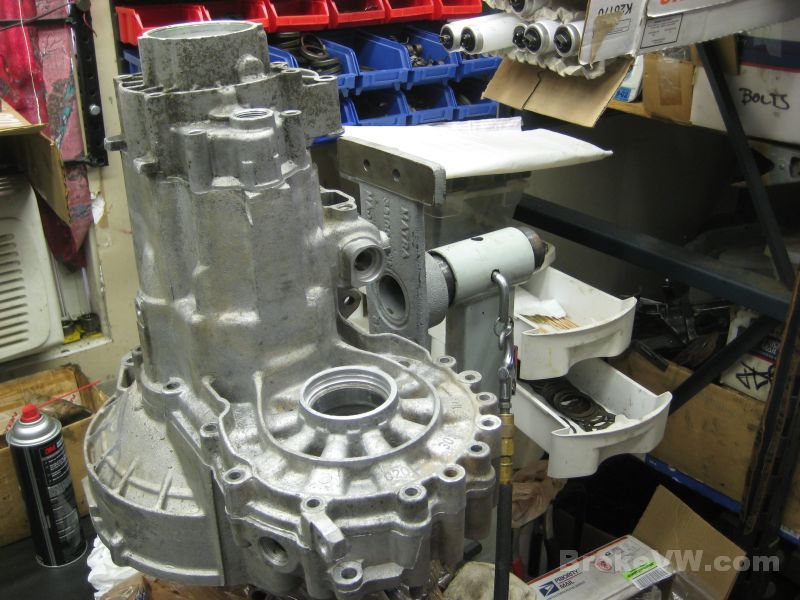
The trans as it arrived. It was loose from the pallet but didn't appear to have any damage from handling...
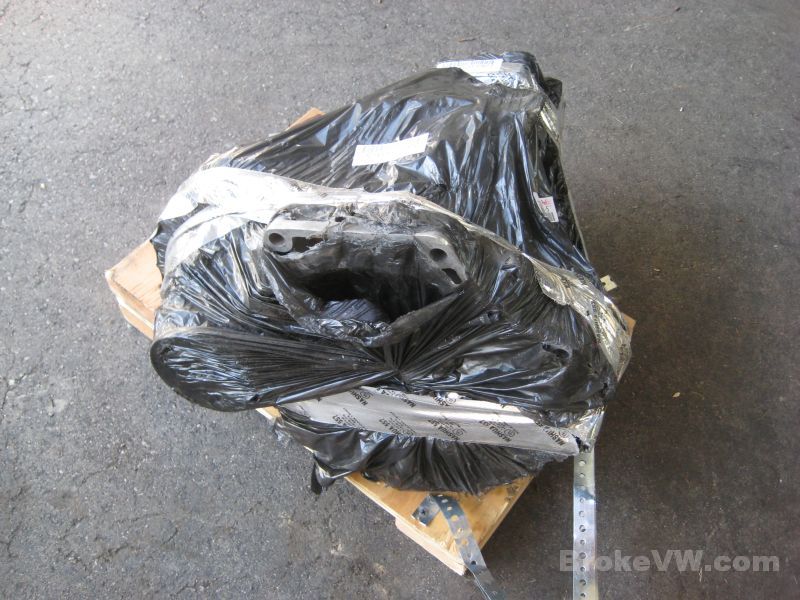
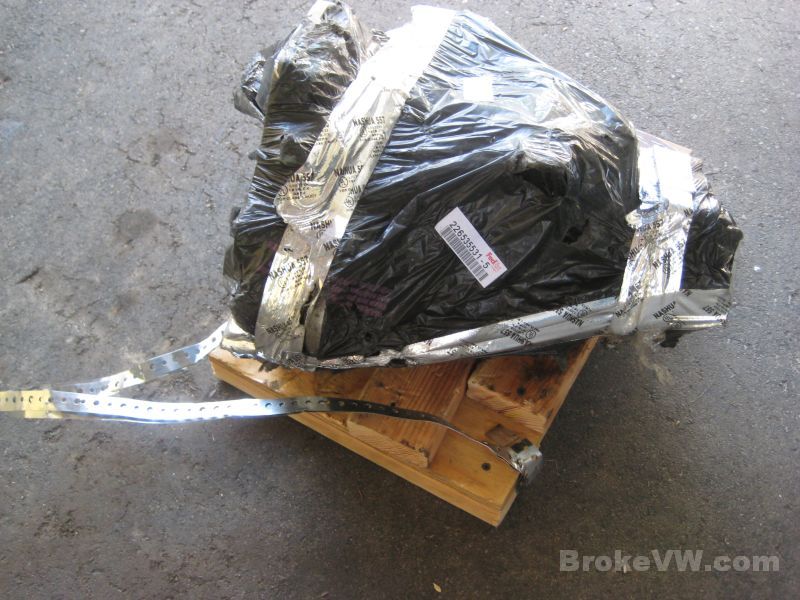
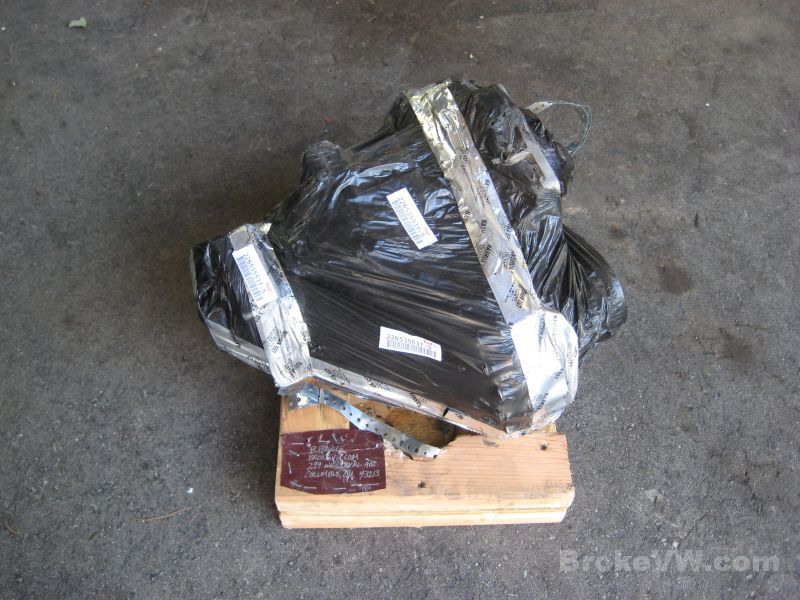
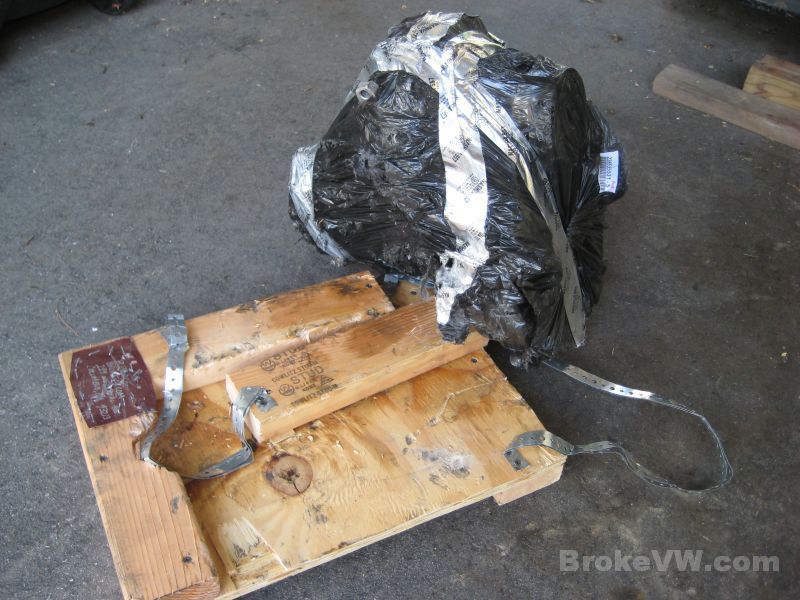
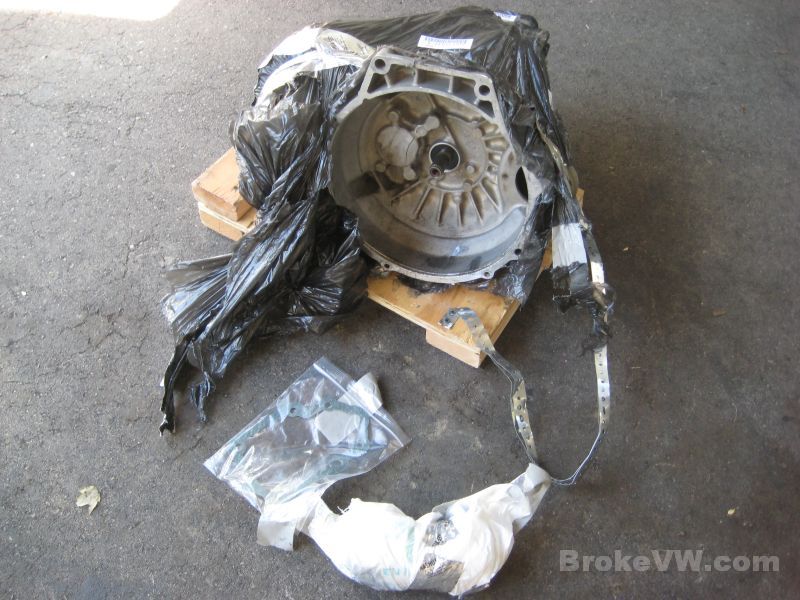
The parts were still secure in the bellhousing...
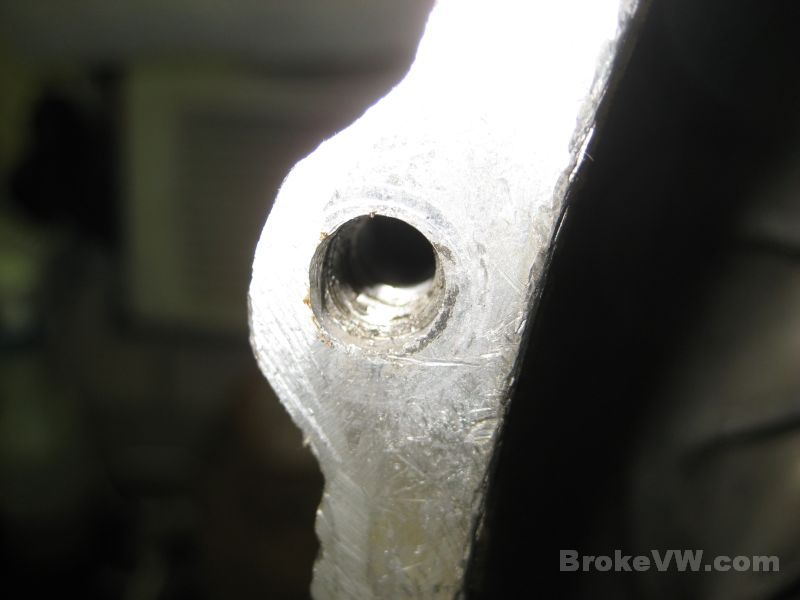
The only damage I saw was this flattened bolt hole, but it looks like it might have been previously stripped out....

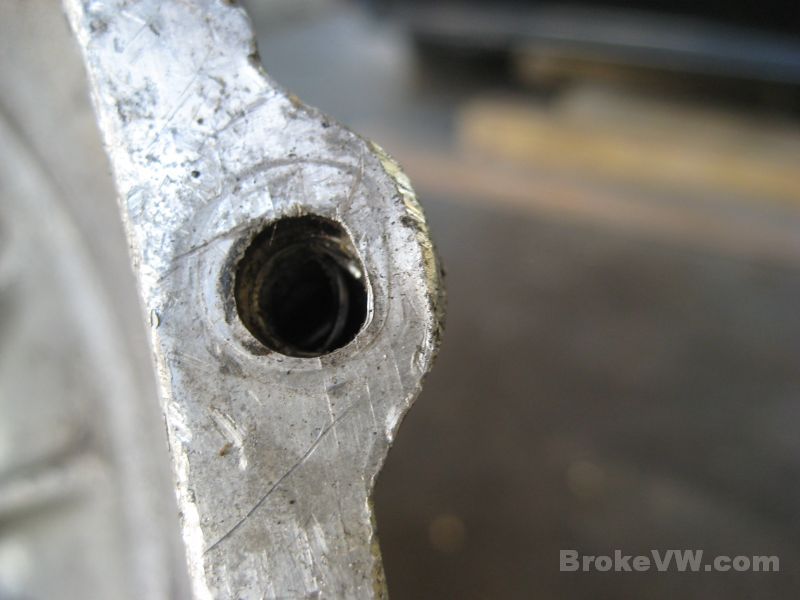
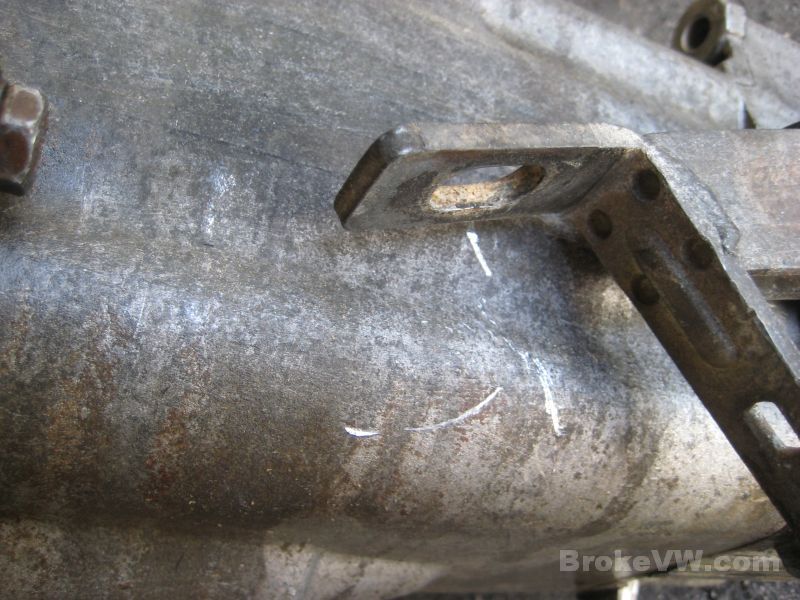
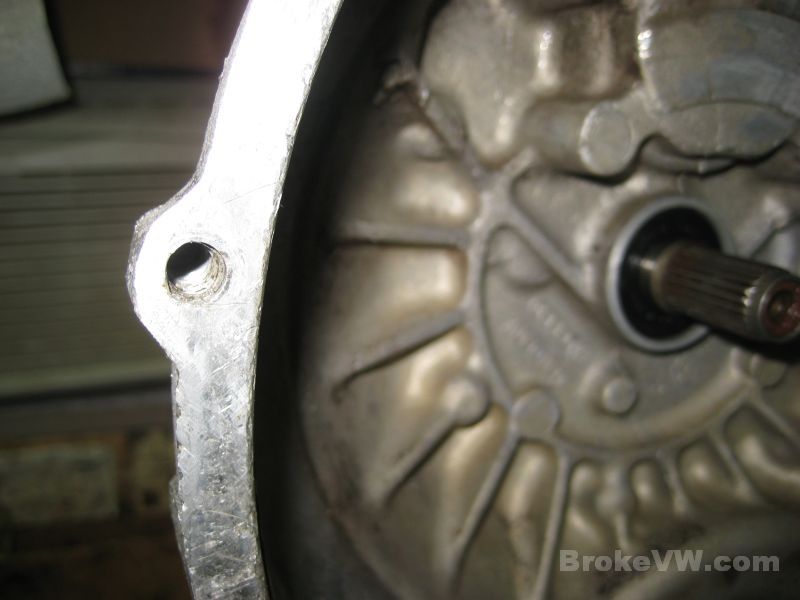
These scratches are fresh but I'm guessing were done during the removal of the trans and clutch cable?
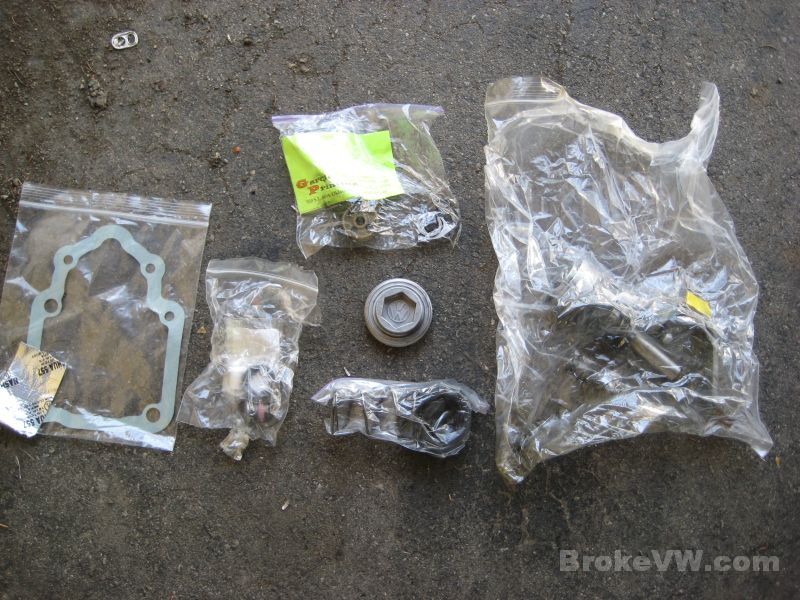
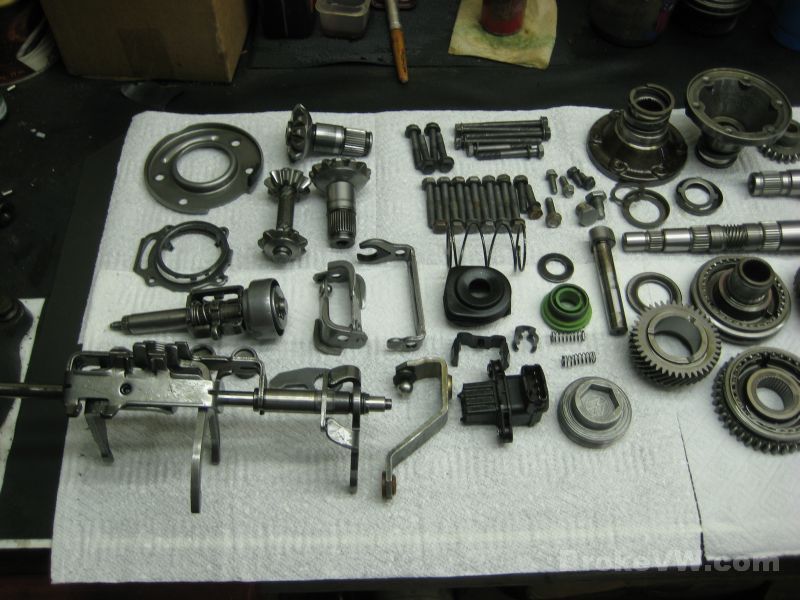
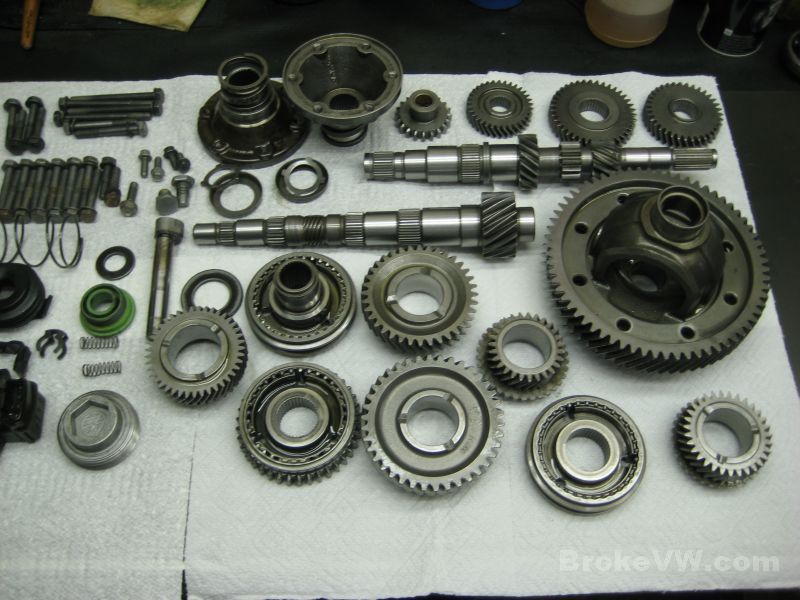
The parts sent along include the selector and cover, a 5th install kit of new parts, the old 5th parts, and the shift linkage...
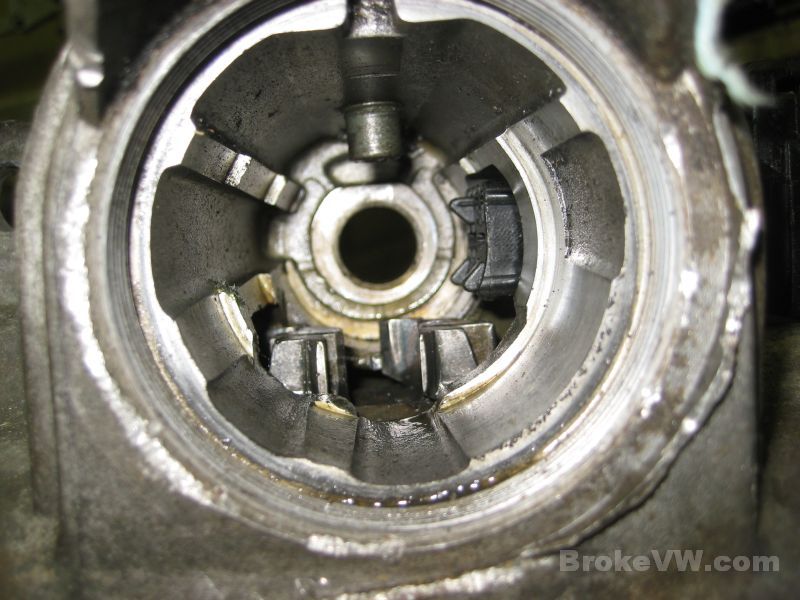
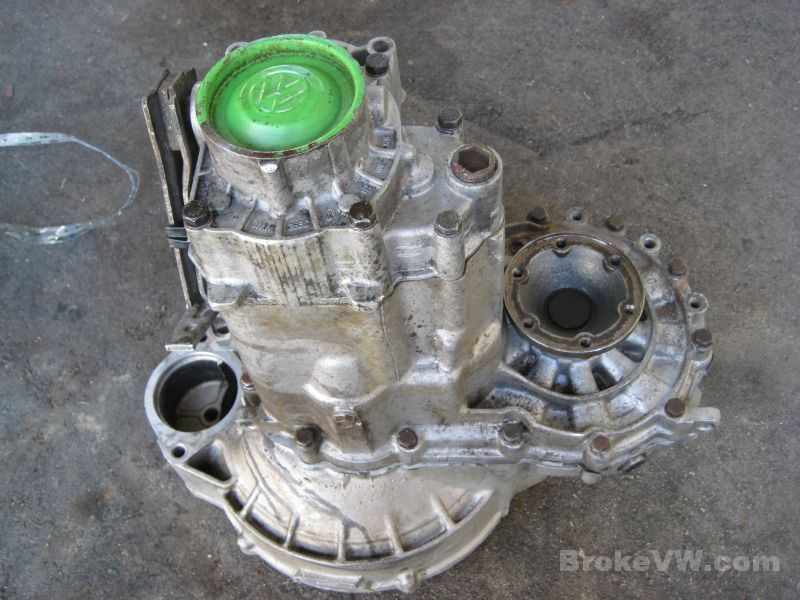
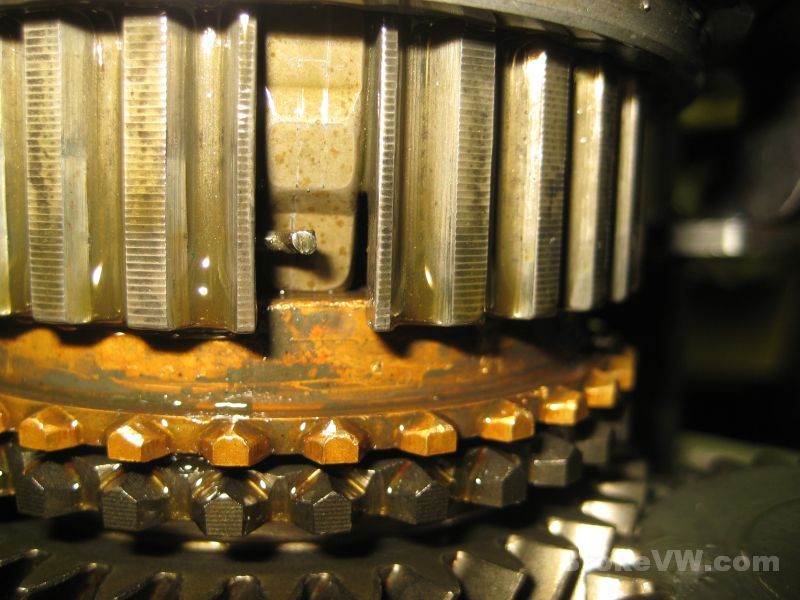
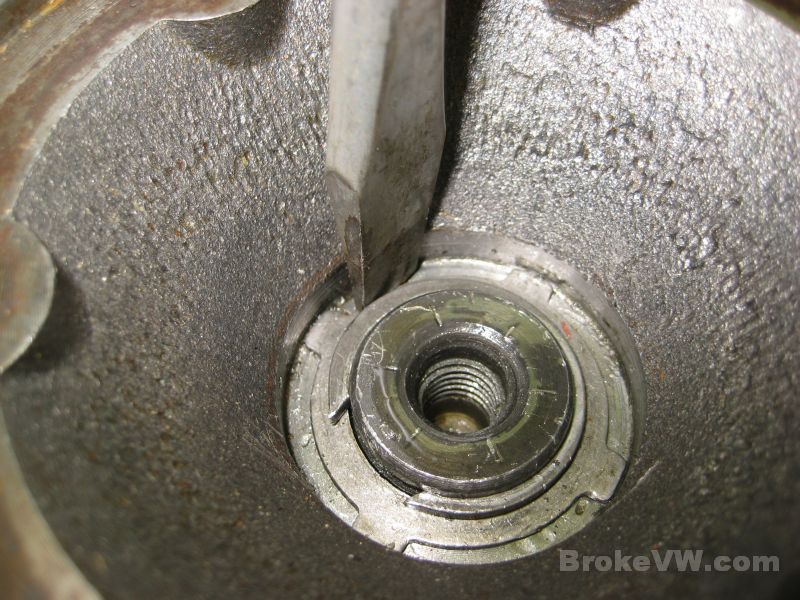
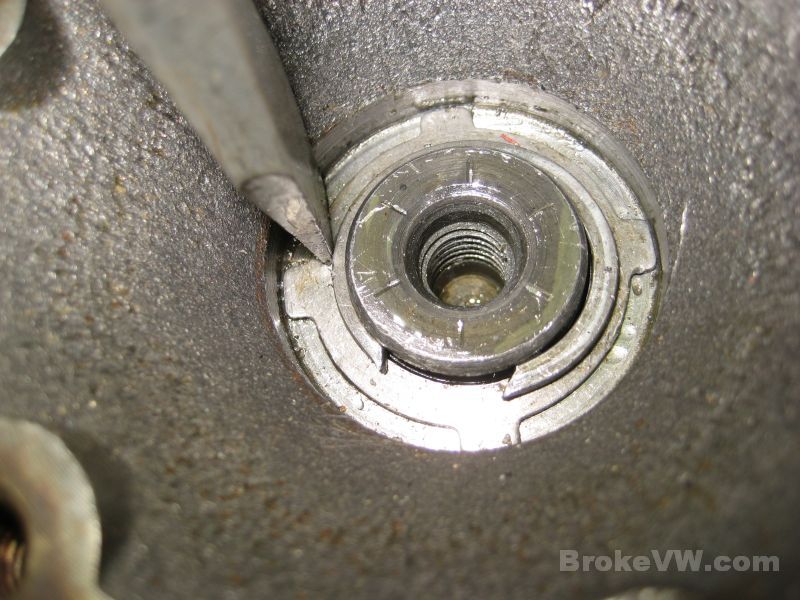
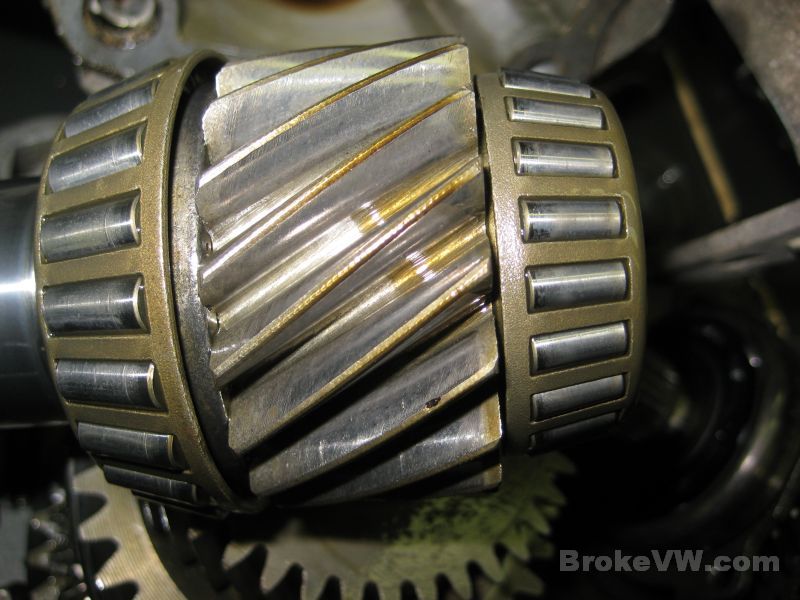
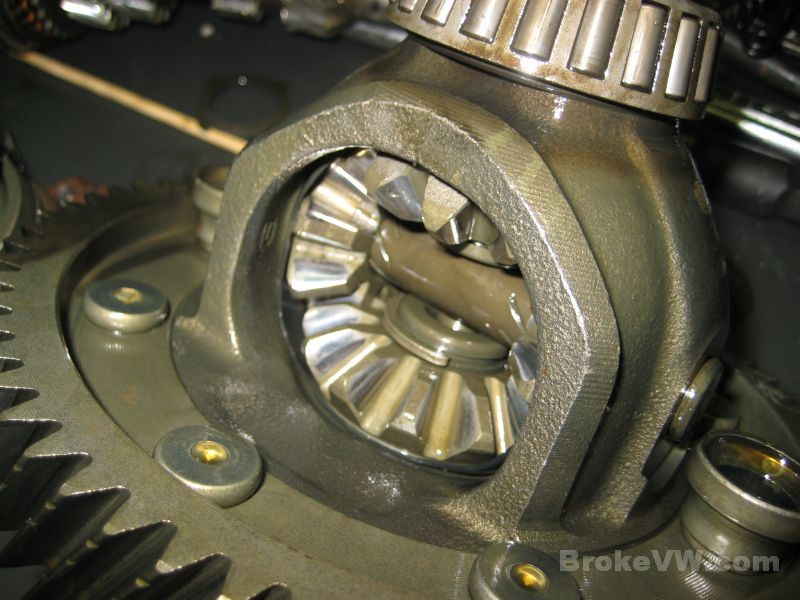
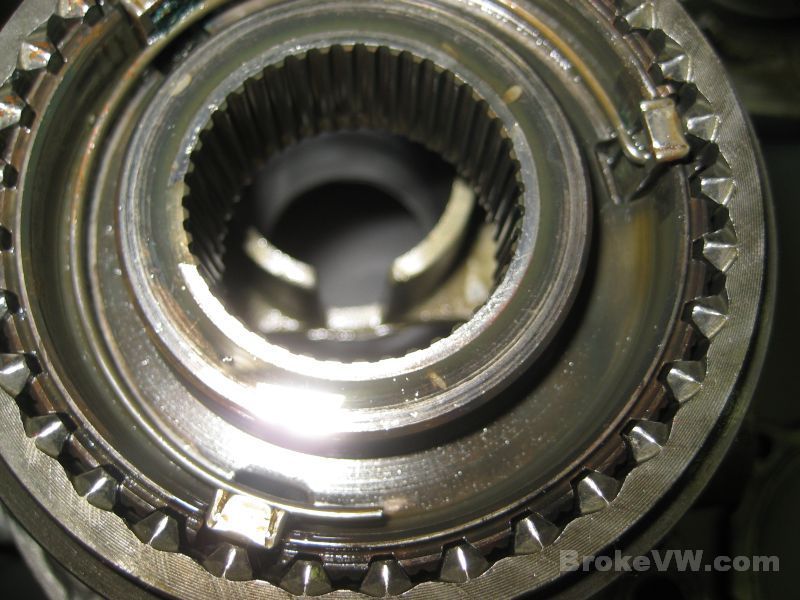
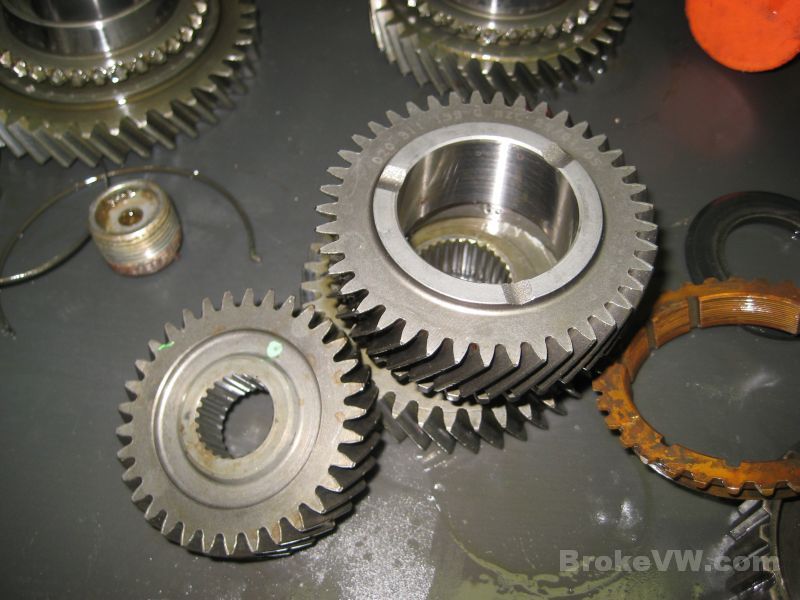
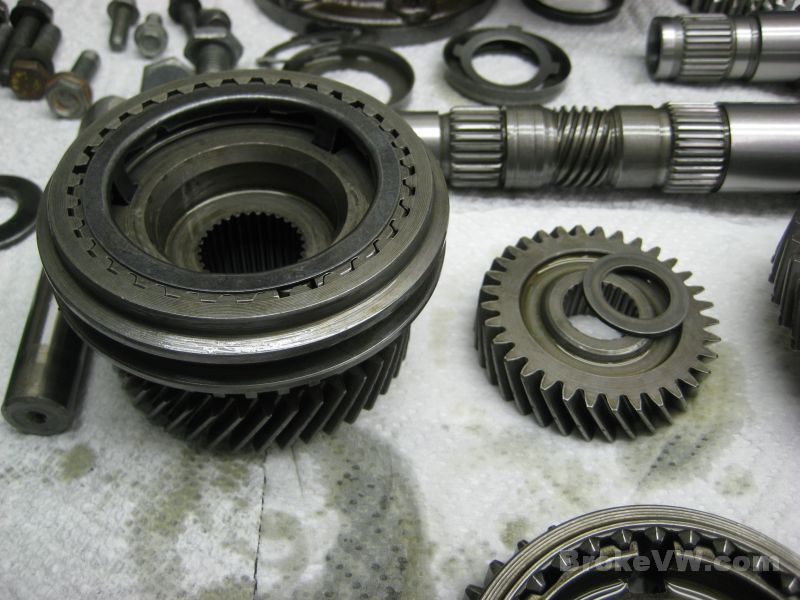
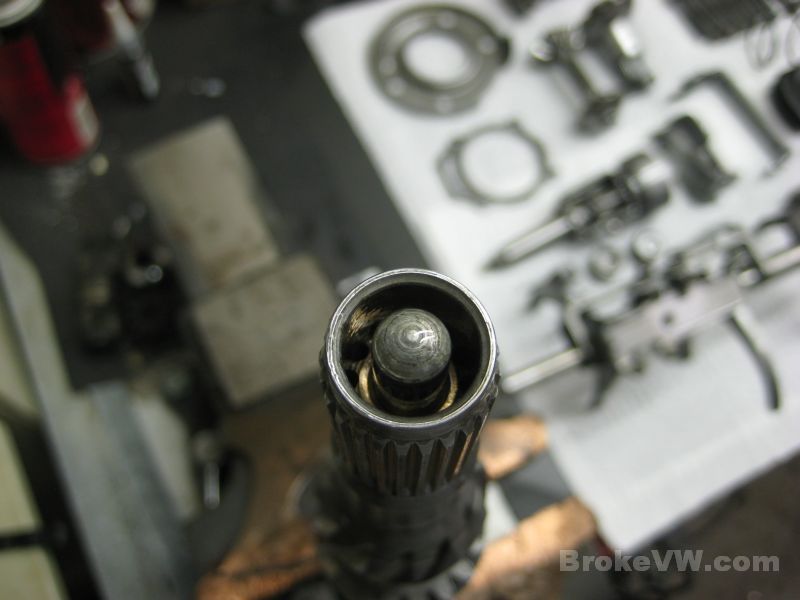
The trans didn't want to spin because of the assembly of the 5th gear... I'm not sure if there are additional issues inside the trans, but 5th was staying engaged...
The sync slot should be aligned with the notch in the hub for the key and the spring was on the wrong side of the keys...
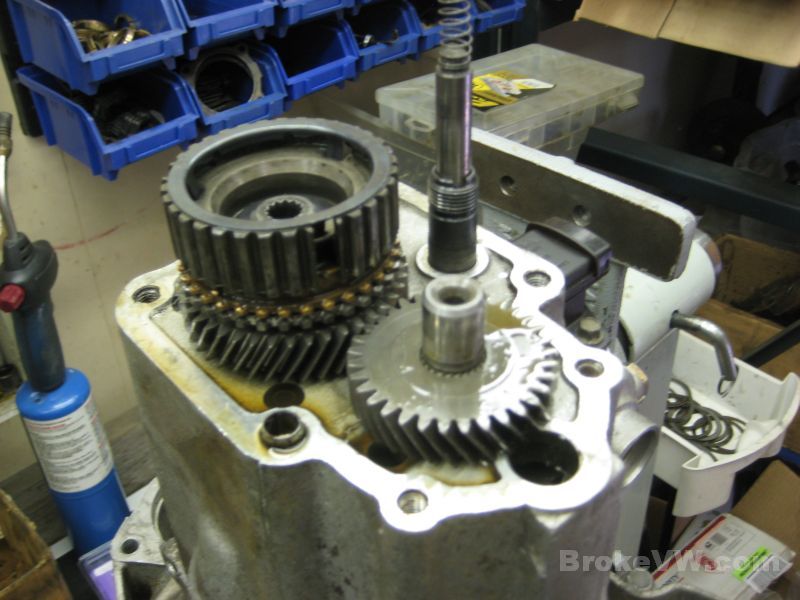
With 5th removed, the shafts starting spinning again....
Update 09/02/11
I've carried on tearing the trans down and have found a few problems along the way.
I've repaired the damaged hole in the bellhousing, opening the hole up again and chasing the threads to clean them up. I then filed the high spot down so the bolt will sit flat again, so the hole is repaired...
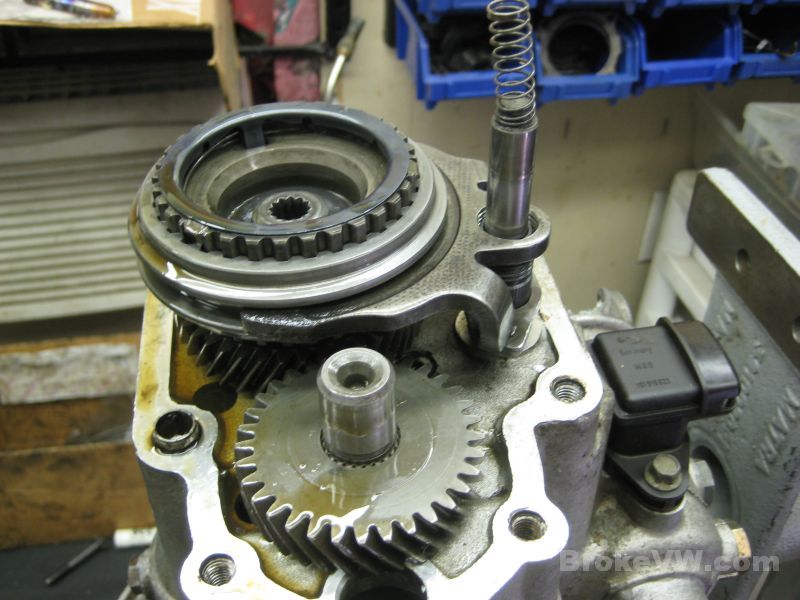
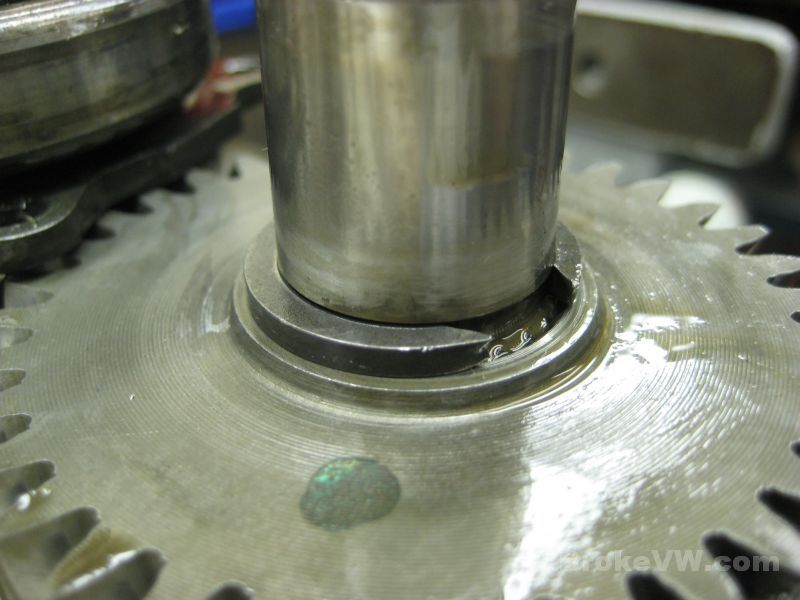
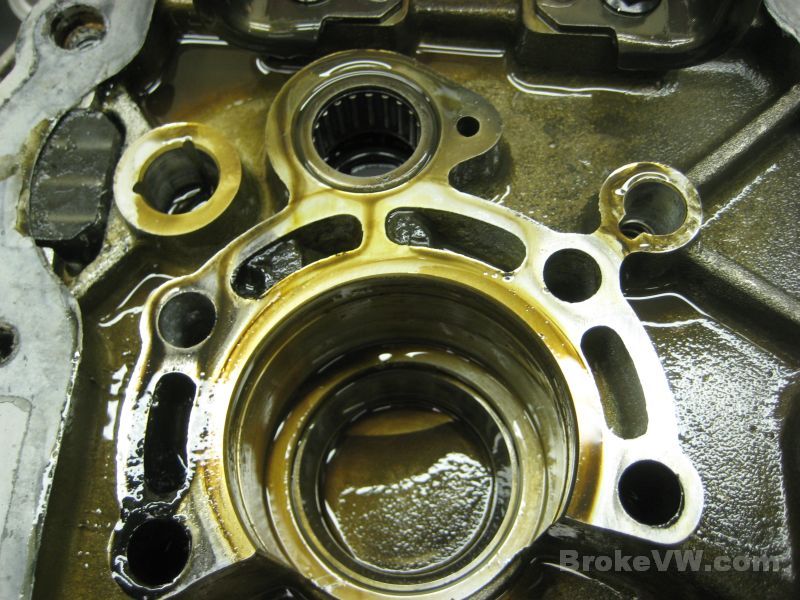
With 5th gears off, the shafts spun again, but there was a tight spot in the rotation. It didn't spin as smoothly as it should have for the full revolution. While opening it up I found that the circlip for the drivers flange was sprung and loose...

You can see on the left side the circlip is not in the groove of the shaft...

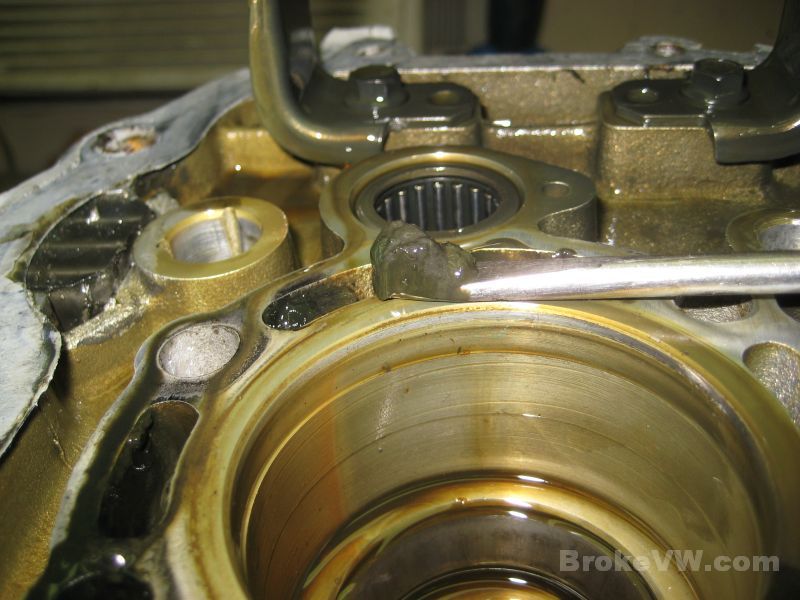
When installing a new circlip (a new circlip should be used each time), it is a good idea to use a screwdriver to walk around and fully seat the circlip in the groove. It is also important not to over-expand the circlip on install, or it will spring the steel and it won't close back up again. This circlip is sprung, I think it was re-used and expanded too much, when you shove one side into the groove the other side pops out....
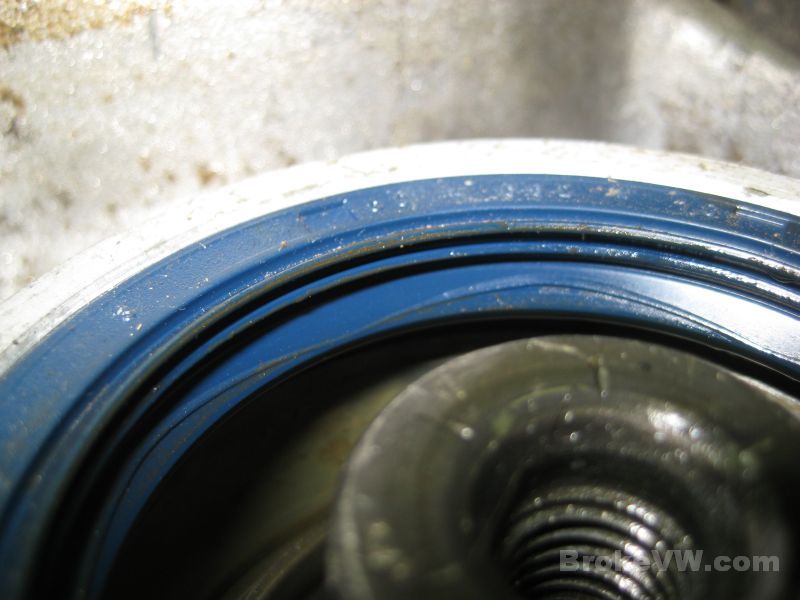
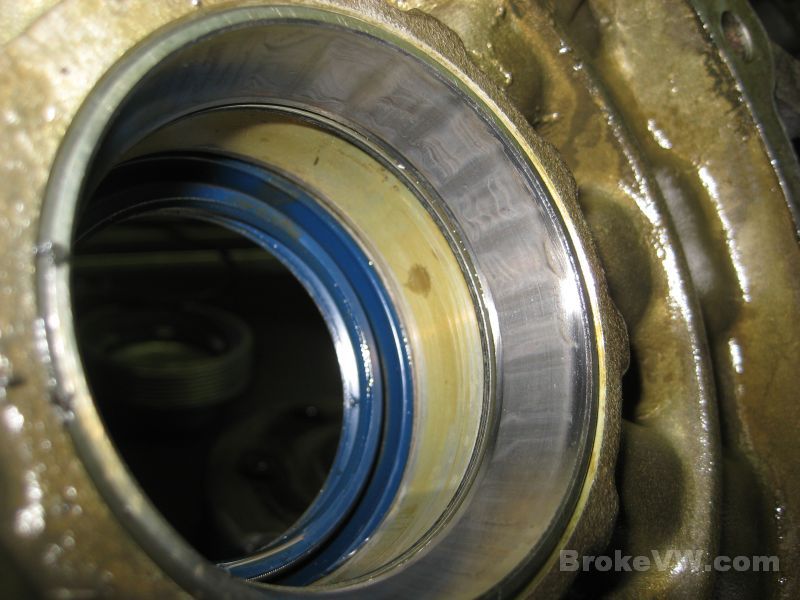
The flange seals look good, but they should be packed with grease between the seal lips. All of that wavy line should be filled with grease, I use moly grease. It helps catch any dust that gets past the outer dust lip before it reaches the sealing lip...
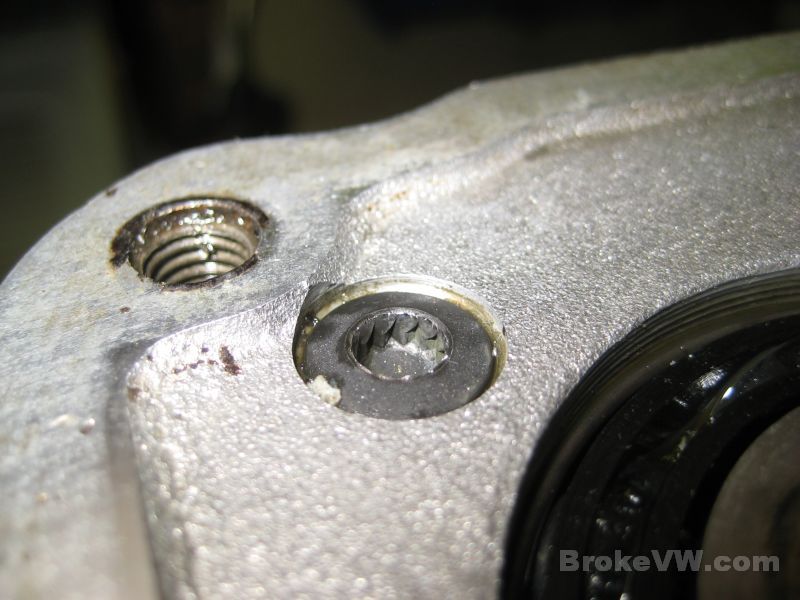
The last person to close the trans up also damaged the 6mm XZN bolts holding the clamping plate for the main input ball bearing. I had to drive the tool in to remove the bolt, I'll replace the set of bolts with good bolts when I rebuild it...
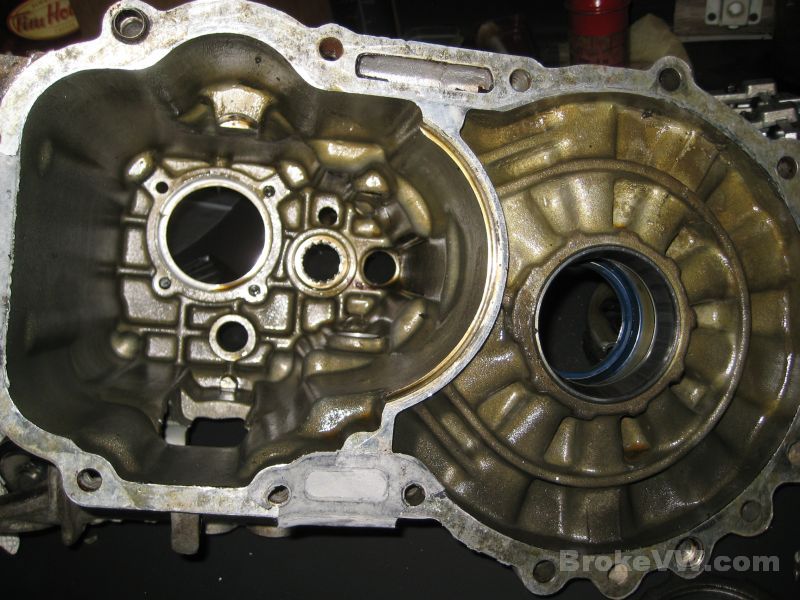
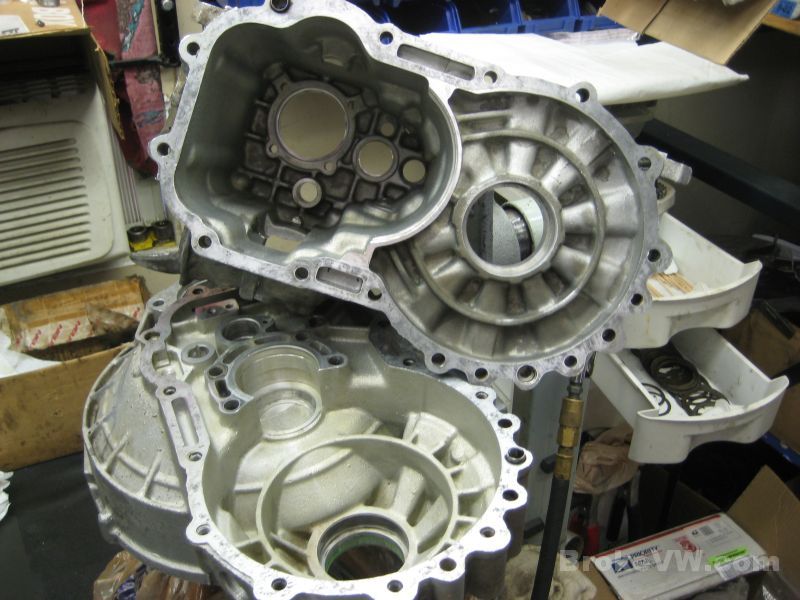
Splitting the case....
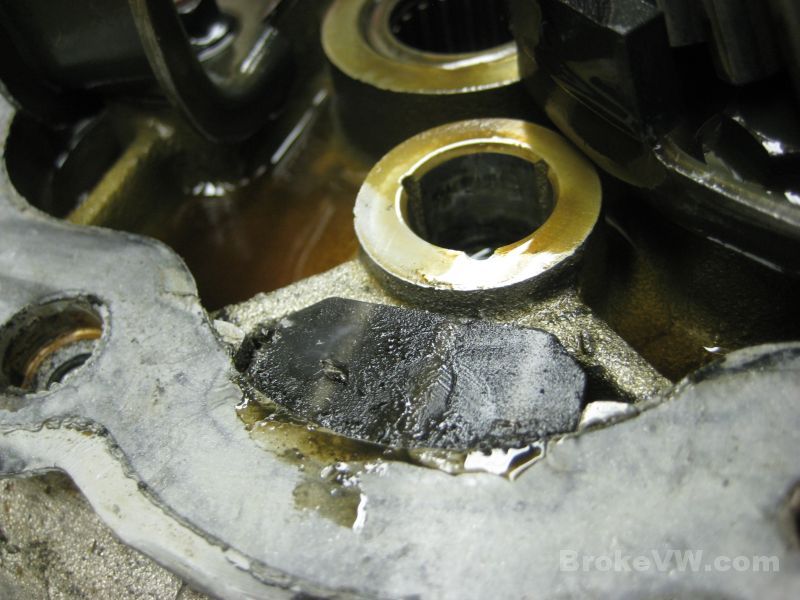
Bingo. That is why it is binding up. There is something in the gear teeth, on the 3rd gear set...
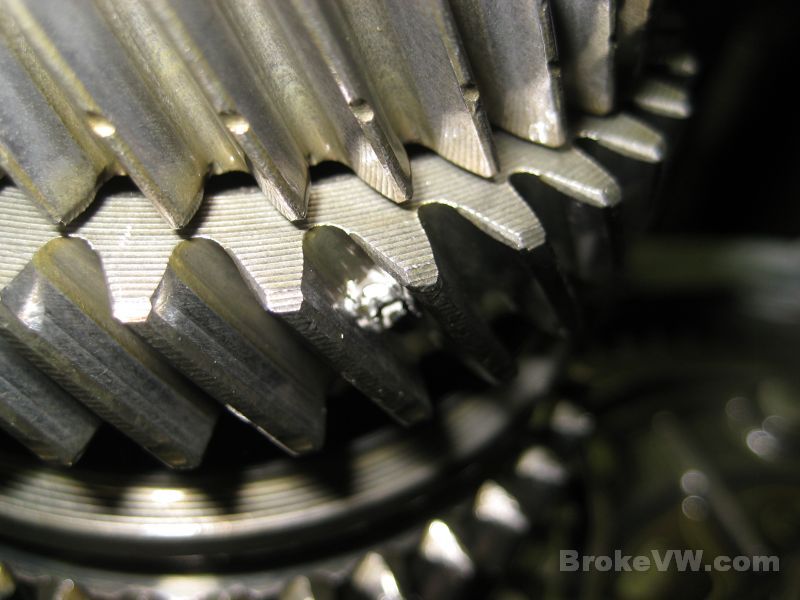
After digging it out it was clear it was metal. A quick magnet test told me it was aluminum. It has to be from the casing somewhere. I looked but didn't spot anything in the bellhousing that would indicate a chunk of casing was missing...
The circlip for 4th gear was also sprung and loose...
Inside the 5th housing there was debris around the drain plug, I haven't gone through it yet but I suspect it is powdered aluminum...
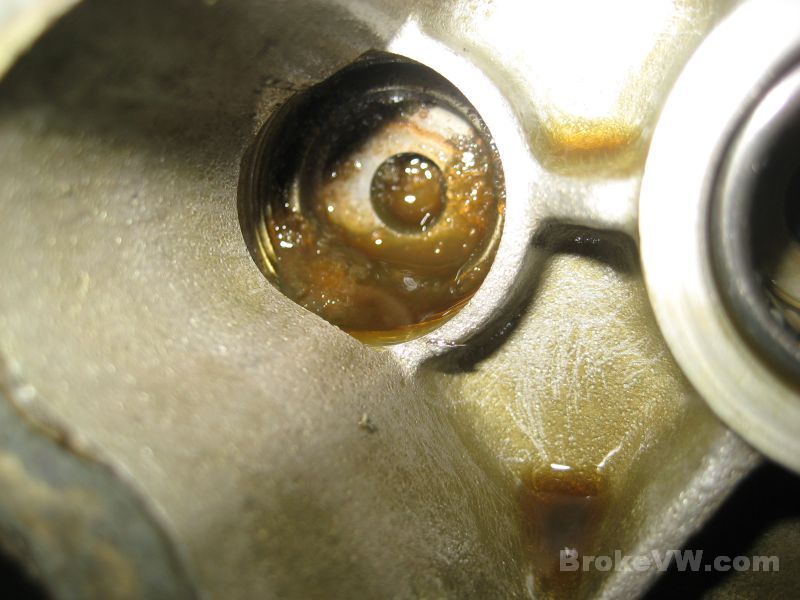
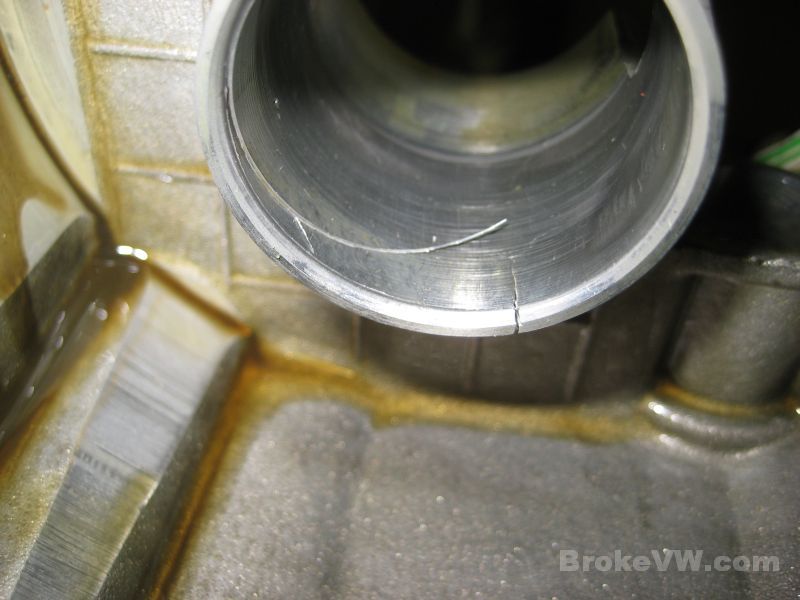
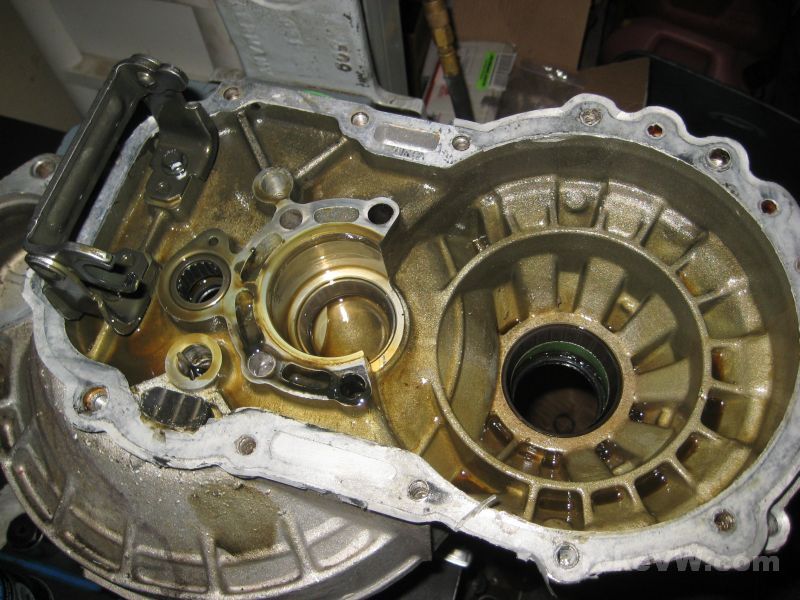
And this is where the aluminum came from it seems... there is a chip and cracking along the TO bearing bore in the 5th housing...
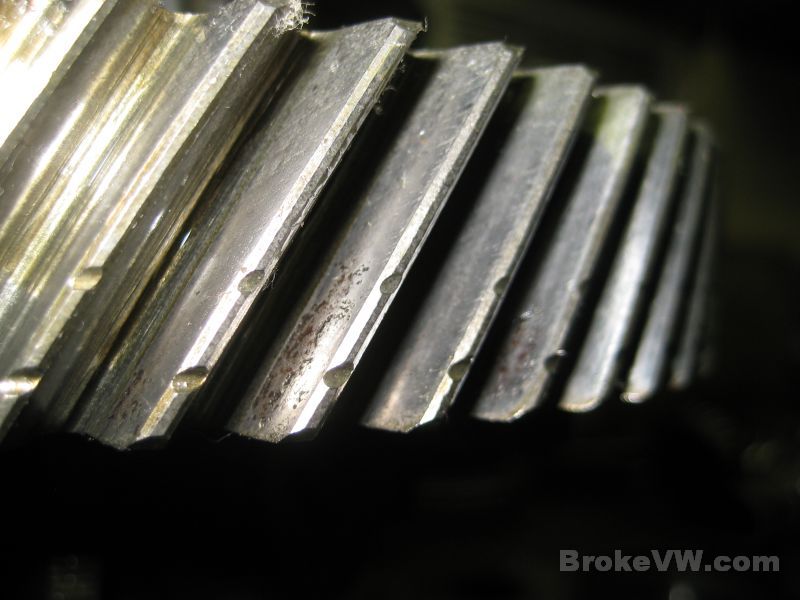
More powdered aluminum down on the reverse teeth on the input shaft...
The magnet is fairly clean, just one chunk of steel stuck to it, and I think it is a piece of one of the teeth from the reverse idler gear...
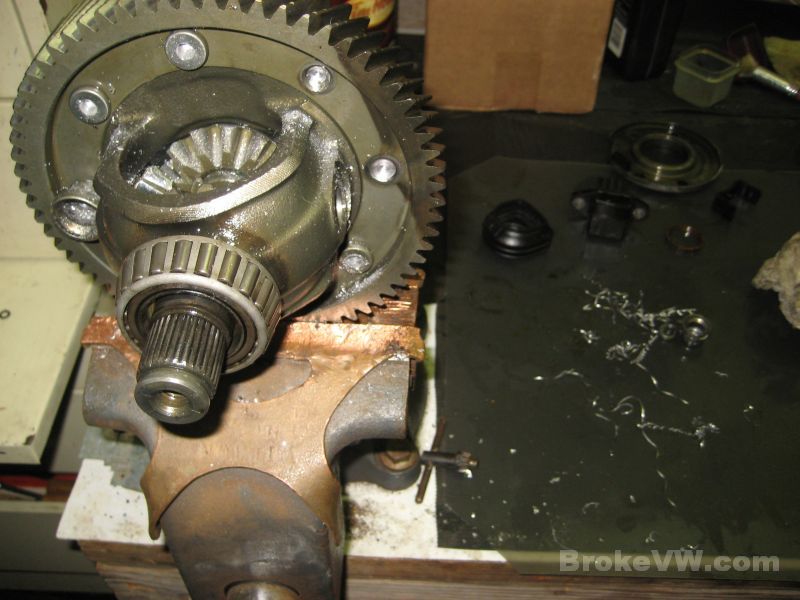
Casing off, ready to pull the gears from the input shaft....
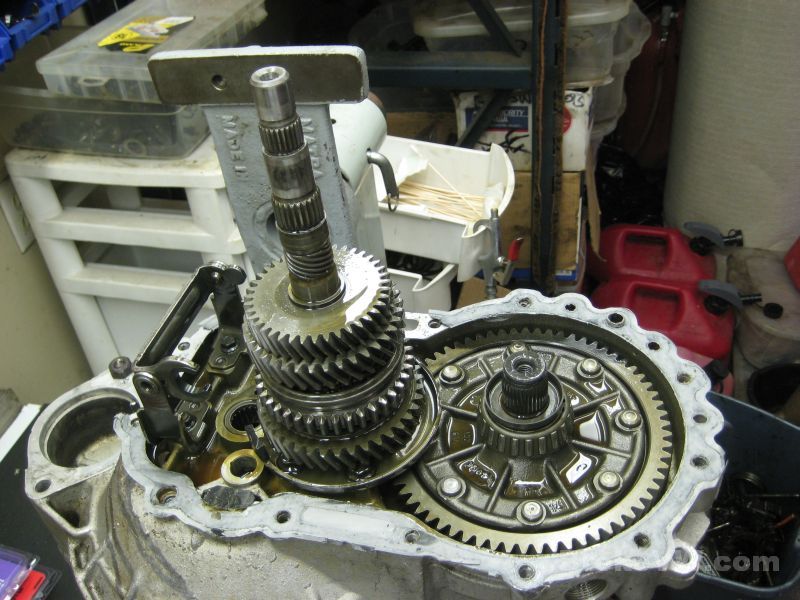
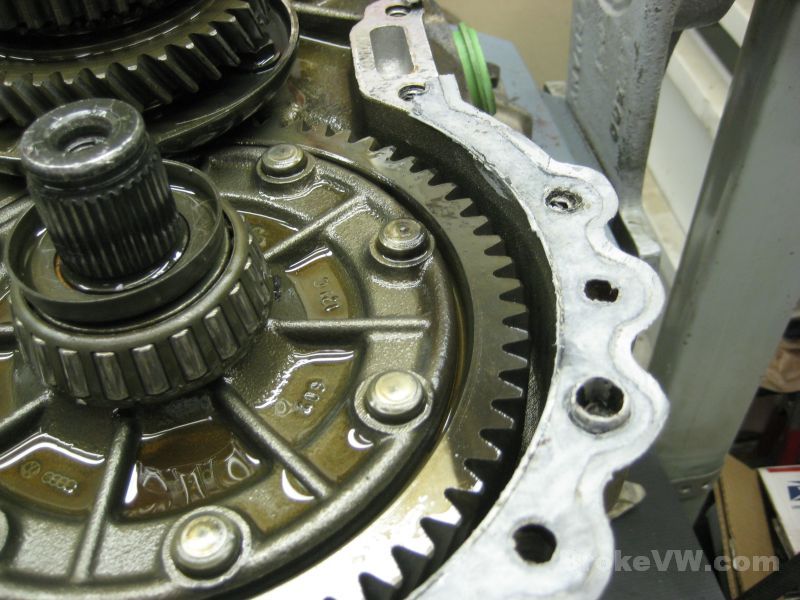
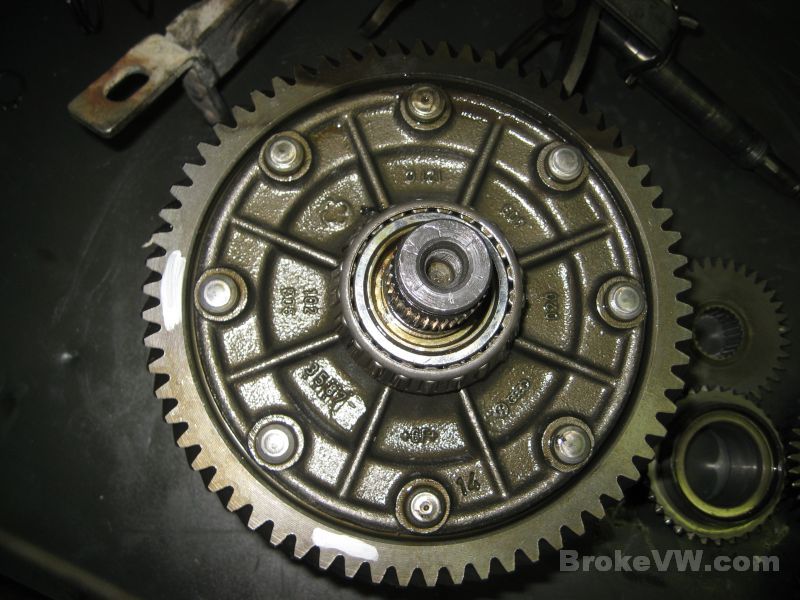
I think this dark stain along the ring gear, rivets, and diff carrier are from old oil sitting in one spot on the parts, staining them, but that is just a theory at this point...
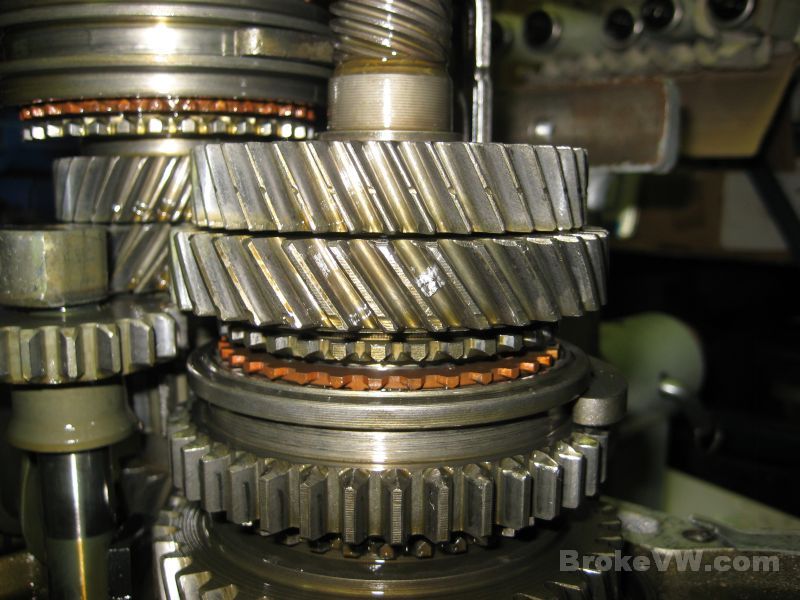
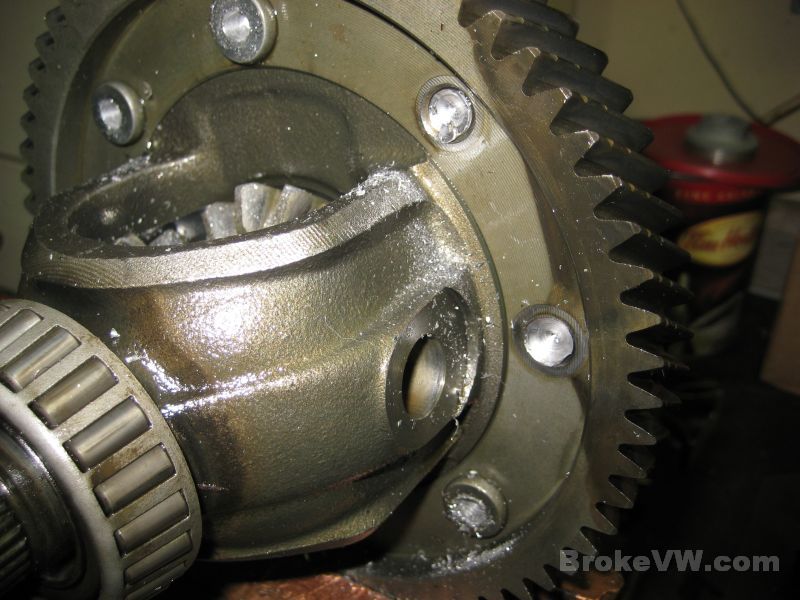
Pulling the gear stack...

I'll have more pics later this evening or tomorrow...
Update 09/03/11
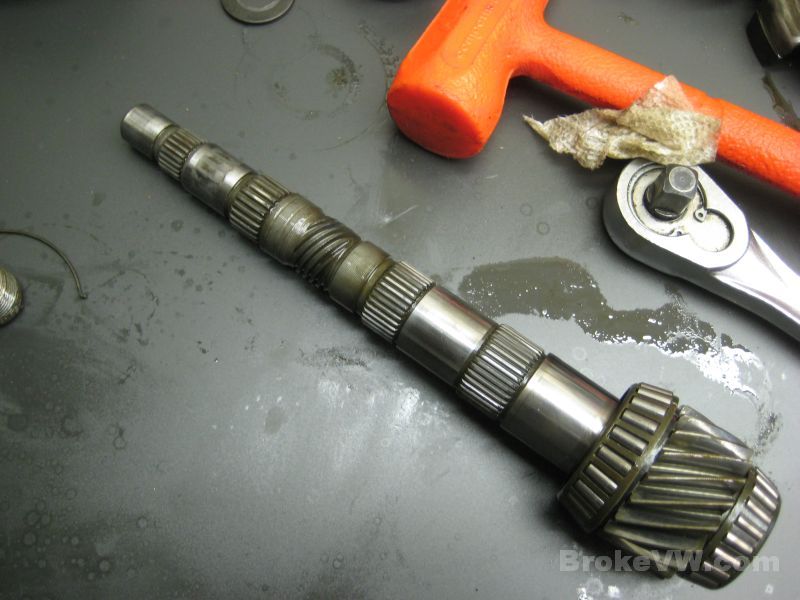
I've got the trans mostly torn down now. The output shaft bearing clamping plate felt like it had never been removed before. I've opened quite a few of these, and my guess would be that the trans had not been stripped fully. It seems the drivers flange has been removed, the 5th gears, and the casing split, but I don't think the output shaft had been removed. The bolts cracked like original, they had a certain noise they make when they come out of the holes, and a certain smell, all of which are found when opening a trans that hadn't been stripped previously.
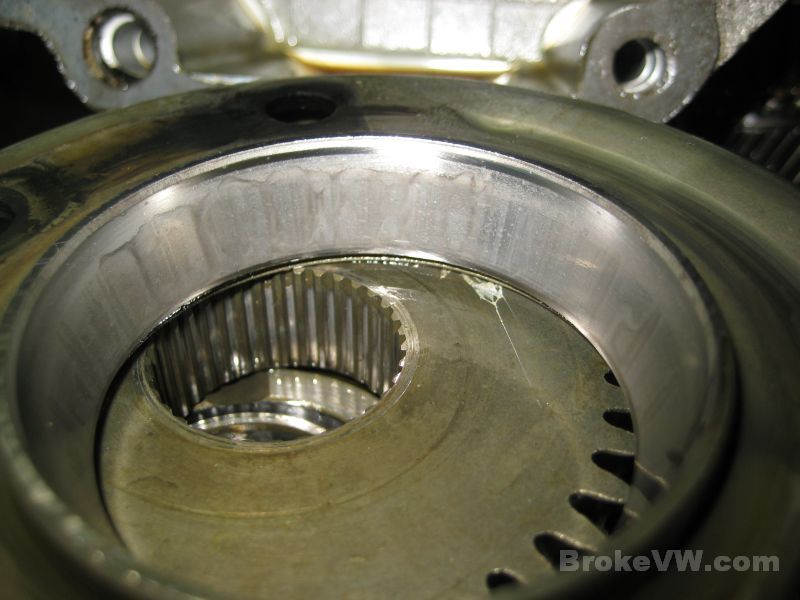
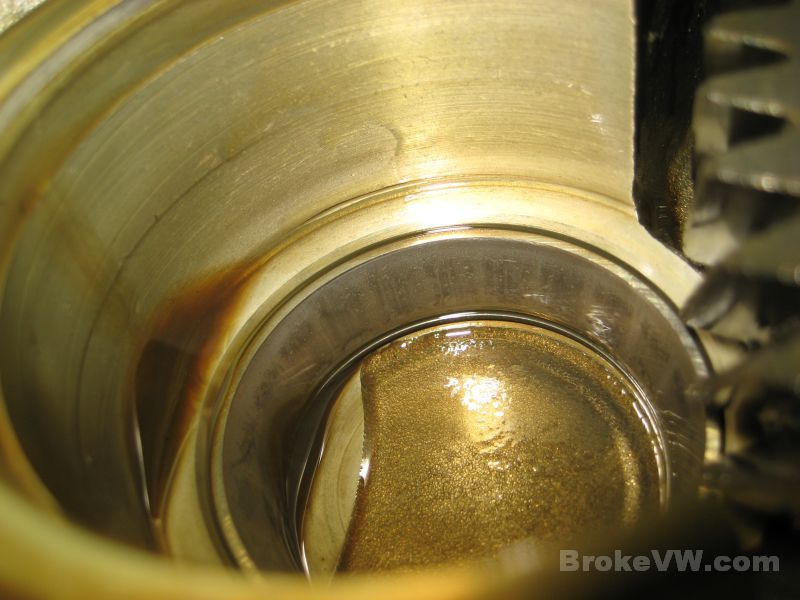
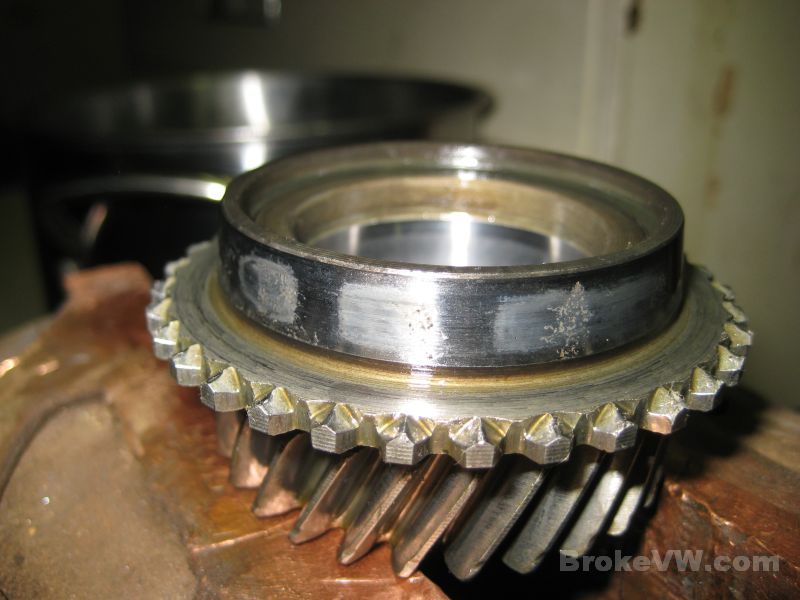
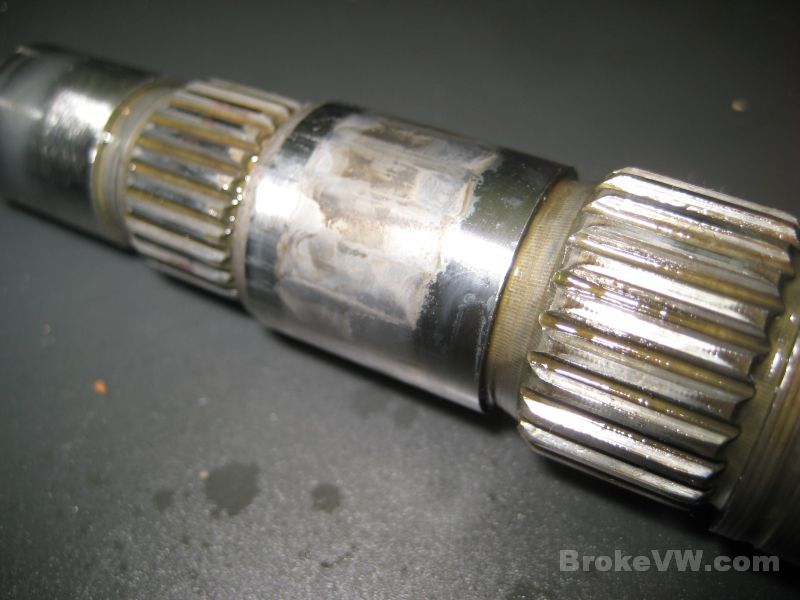
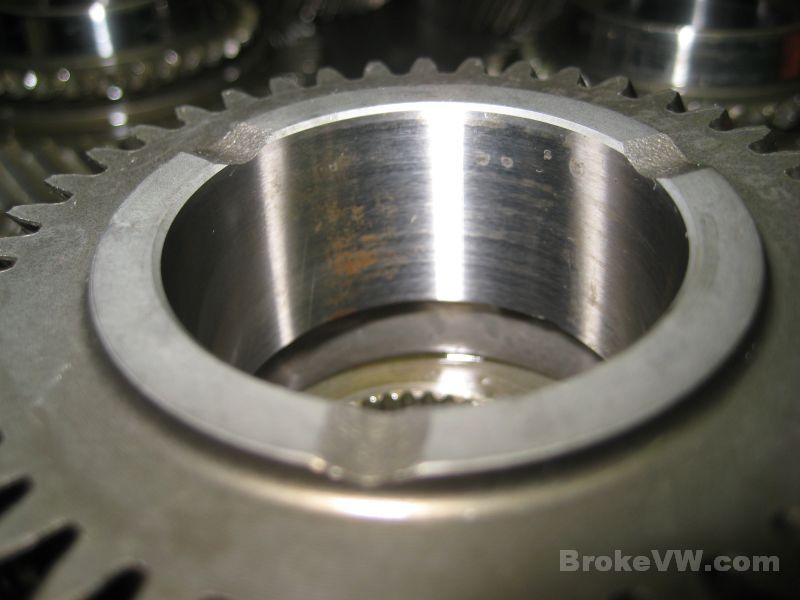
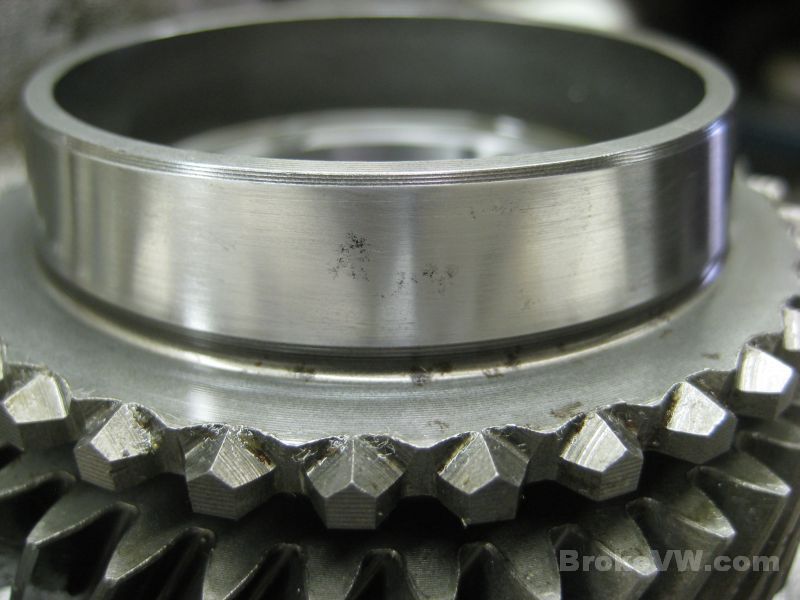
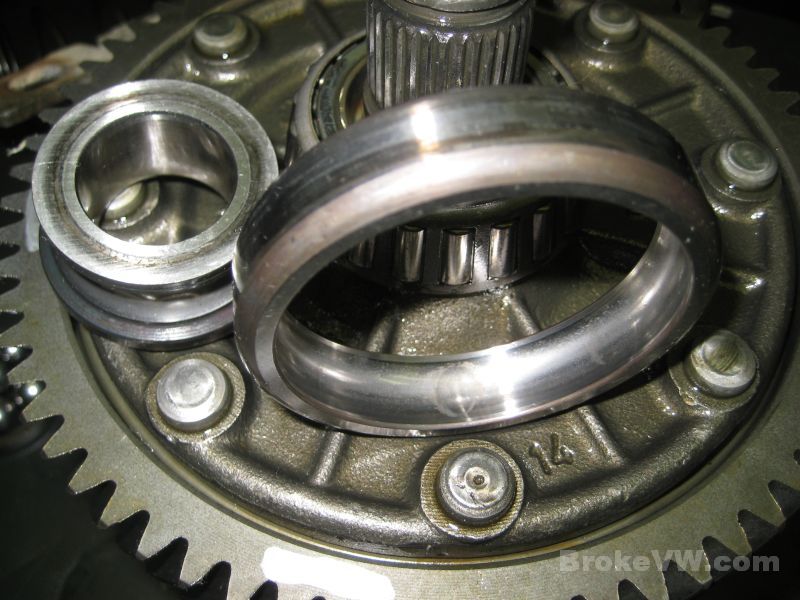
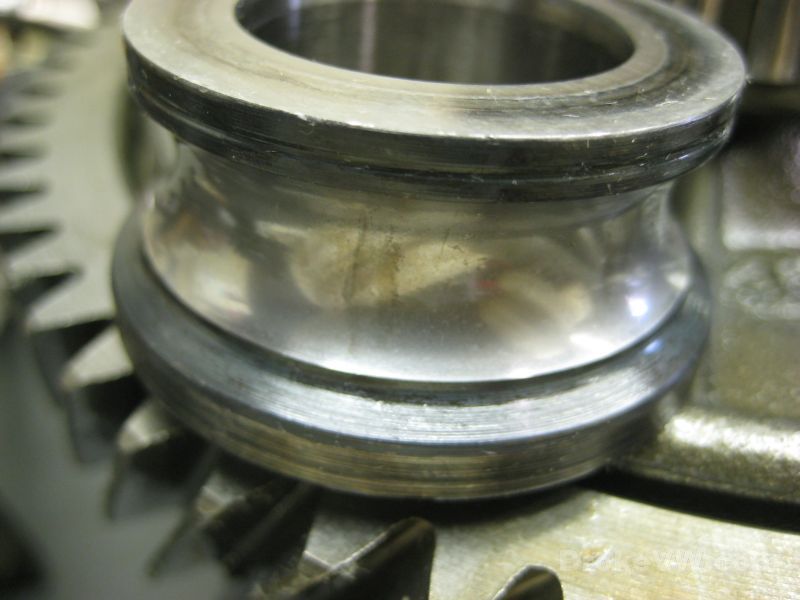
This is the large output bearing race... what looks like stain is actually wear on the race...
The gears themselves look OK so far. The dark spot you see on the edge of the tooth is grease which was found inside the trans...
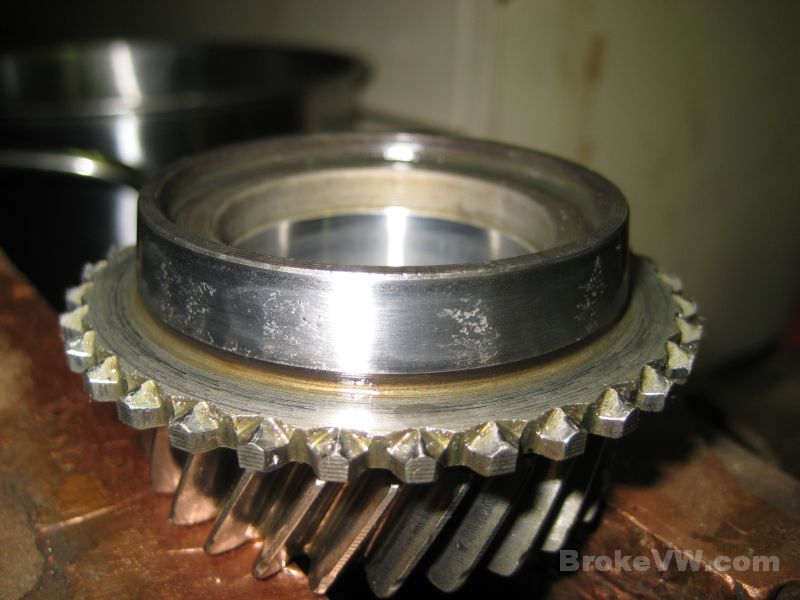
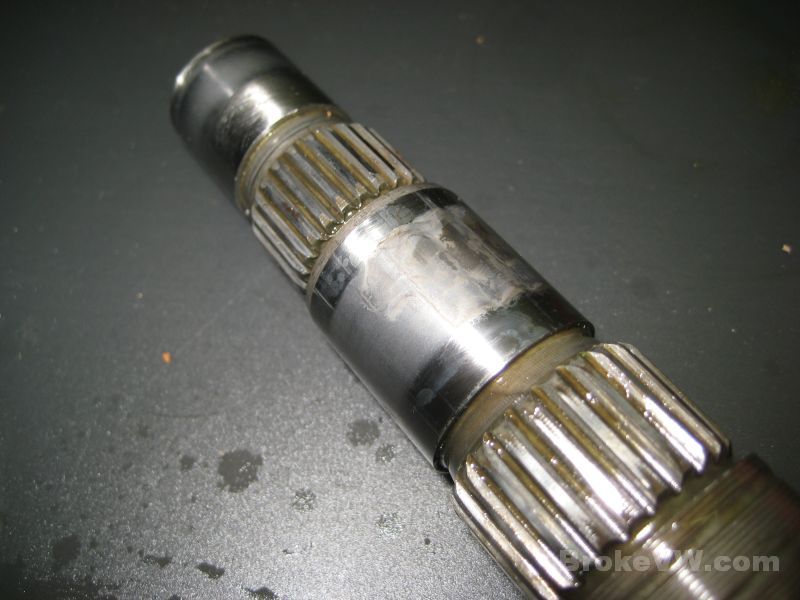
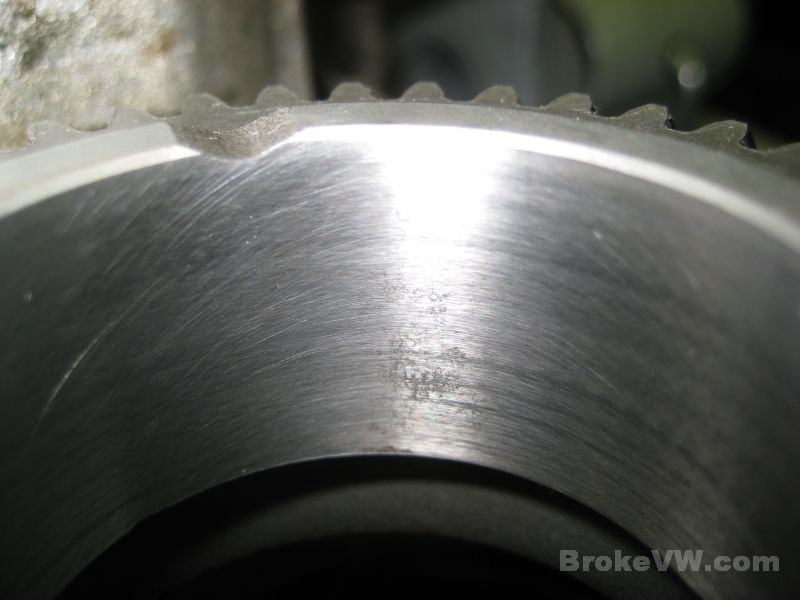
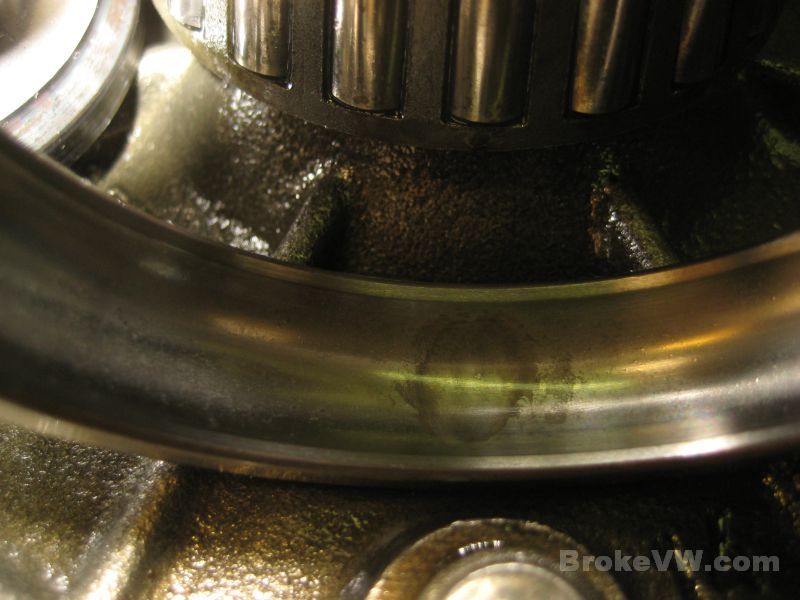
You can see the repeating wear pattern on the small output bearing race as well....
The passenger flange circlip was not sprung, and it didn't look like it was reused. The flange was also tight on the shaft and it needed pulled off while the drivers flange popped off and didn't need any pulling at all...
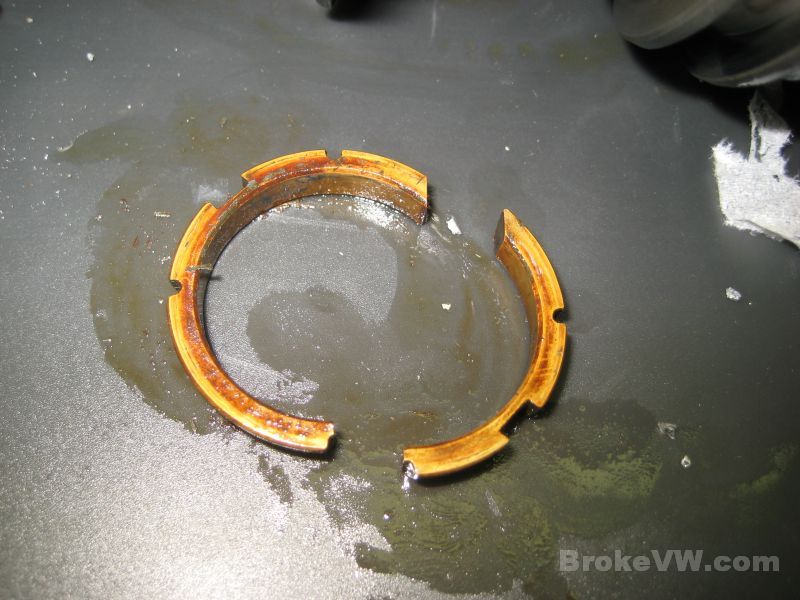
The drivers flange had a broken thrust ring, the passenger flange did not. This ring can still be used as it is in 2 big pieces and will not go anywhere once everything is assembled...
There is a good bit of grease and contamination caught in the holes in the casing, I think it is where some of the aluminum has ended up...
The diff bearing races also show wear, the passenger side shows deeper, more defined wear lines...
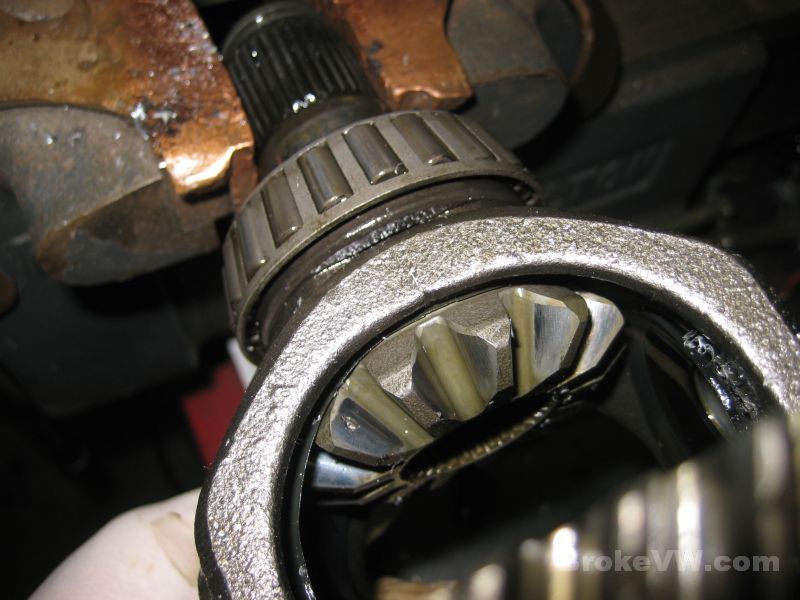
The spider gears look OK so far, as does the ring gear....
The reverse idler has some chipping on the tips of the teeth, but it would probably be OK to retain...
The 5th housing after being stripped. What I thought was a crack was actually a sliver of aluminum from the bearing bore. There is also a big crack and a chunk missing, but I thought there were multiple cracks originally....
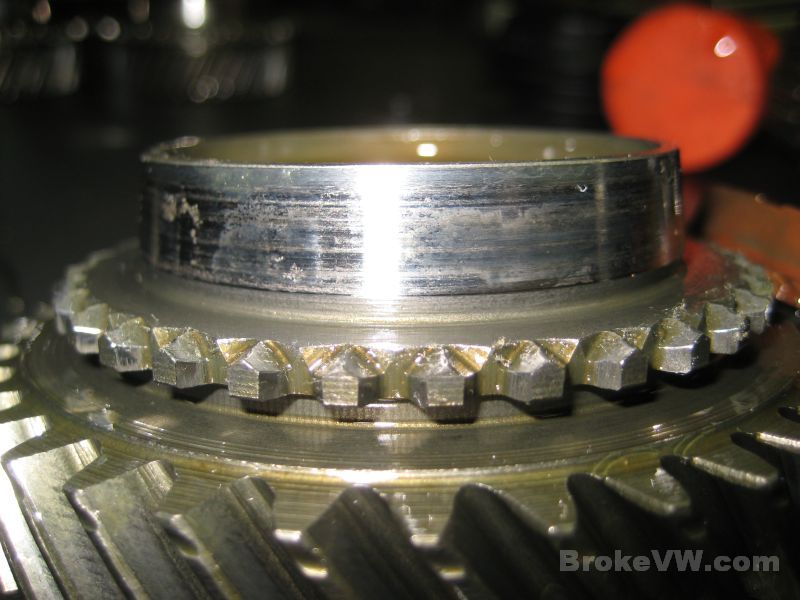
Stripping the input shaft, the bearing may be OK enough to tear apart, clean, and re-assemble and retain. The 3rd/4th sync hub assembly is the old style, with the square holes for the sync keys. This older style is prone to cracking on the corners. I believe I see cracking on your hub, but I haven't cleaned it up yet. I just lifted 4th up to see if it is the old or new style and it is the old style, and I think I can see cracking in the hub...
A couple pics of the casing insides...
Update 09/06/11
Bad news I'm afraid. The 3rd/4th sync hub is cracked, but as I
carried on, the news just got worse.
There is extensive damage to all 5 gears, but I'm not positive why.
It would seem a lubrication issue, based on the damage to the gears where the sync rings ride, and the galling between the gears and sync rings, but not all bearing surfaces show the same damage.
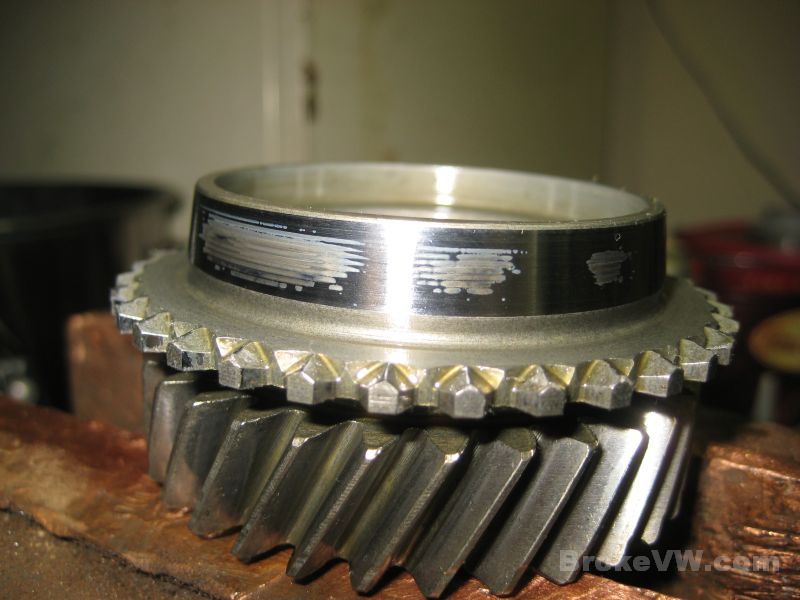
The output shaft roller bearing race shows the same strange wear
pattern that the tapered bearings displayed. There is clear staining of the
reverse gear shaft where the idler gear had sat stationary for a long period of
time.
One flange is dark, the other is not.... part of the ring gear is stained black,
like it had sat for a long time not used.
There are a few other strange things like the one flange being
tight enough to need pulled, the other popped off when the circlip was released,
it was not tight at all.
The box has been opened to a point, but then other parts of it have not been
touched since VW built it.
The 5th gears are new but rusted, but I know why that is.
Another odd thing is that the needle bearings for the gears themselves, and the races, are fine. The sync ring wear area on the gears are all shot, some of the worst wear I have seen honestly, but the insides where the needles ride are fine. Some of the races, like the needle bearing races on the input shaft for 3rd and 4th, those are still nice enough that I can still just make out the factory cross-hatch pattern when the shafts were made.
Some of the box is in good shape, some is normal as expected, and some of it is surprisingly worn or damaged.
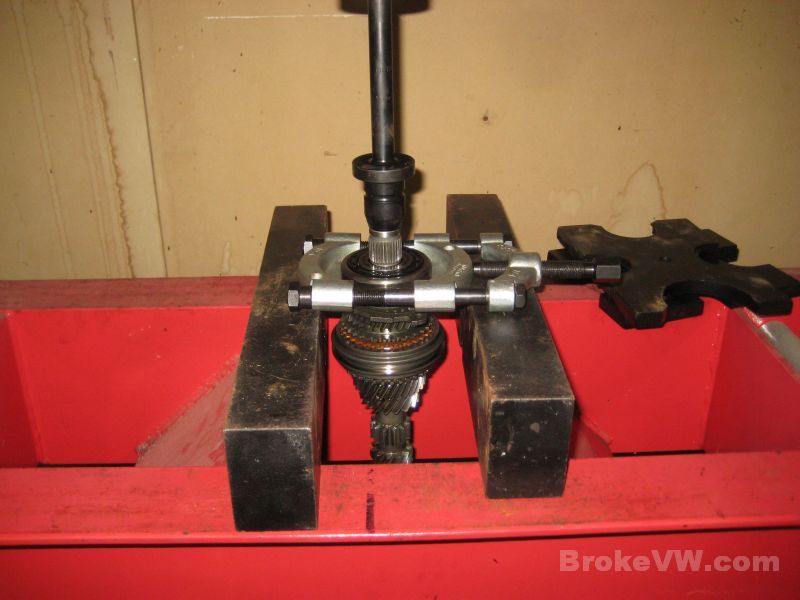
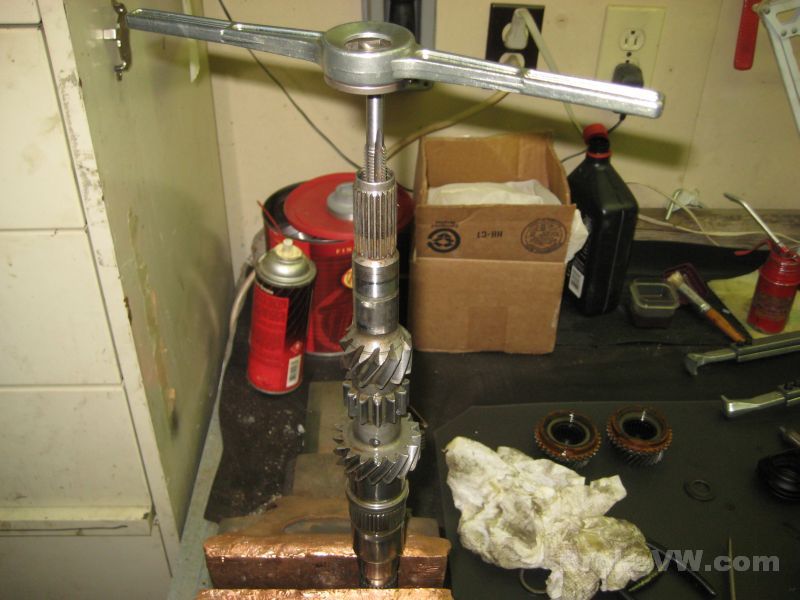
Pressing the 3rd/4th sync hub from the shaft...
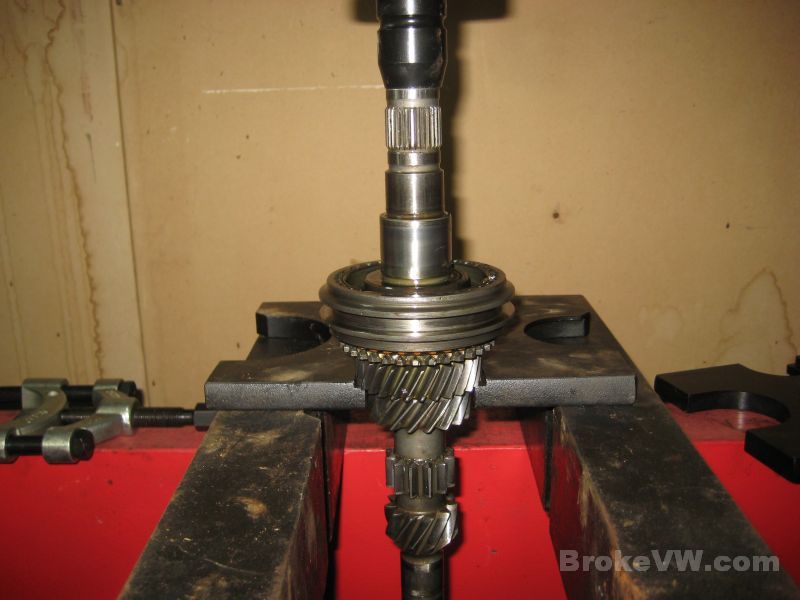
With the shaft stripped, the pushrod bushing can be tapped and removed...
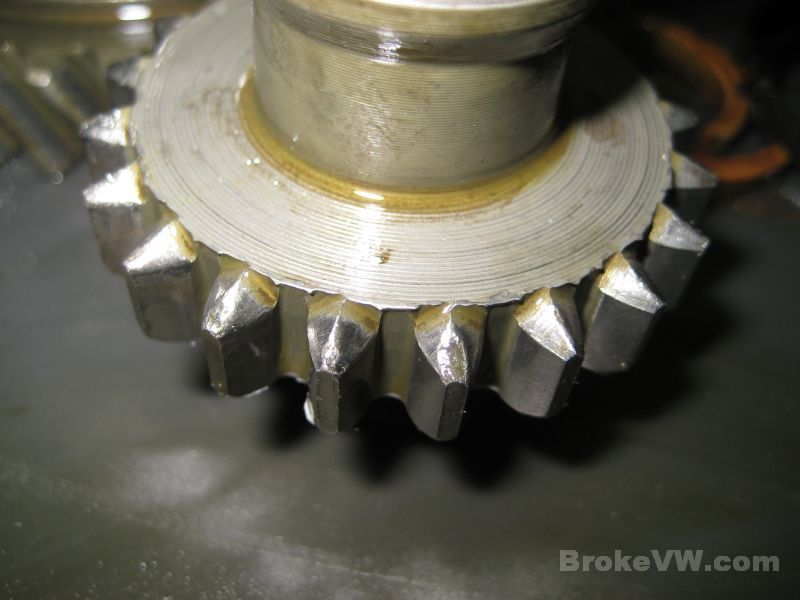
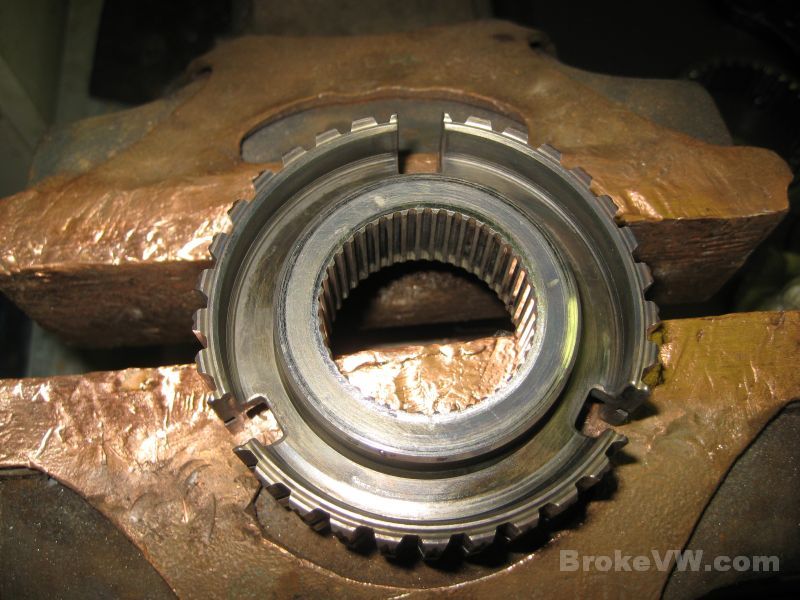
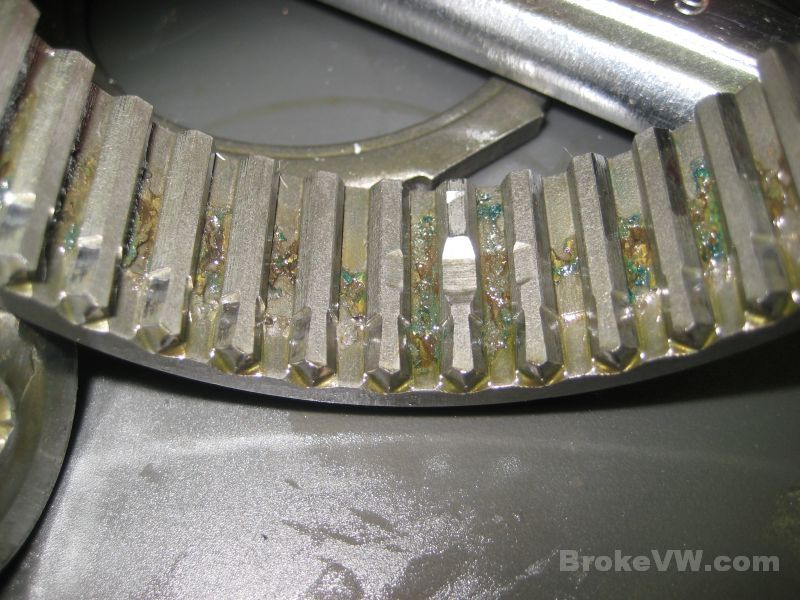
Here is the 3rd/4th sync hub, it has the square cuts for the sync keys, and this design causes stress cracks to form in the corners of the cuts. VW later solved this by making the cuts rounded and this radius doesn't allow the stress to form cracks at the corners, the round profile spreads the force out instead of letting it gather in the corner and crack...
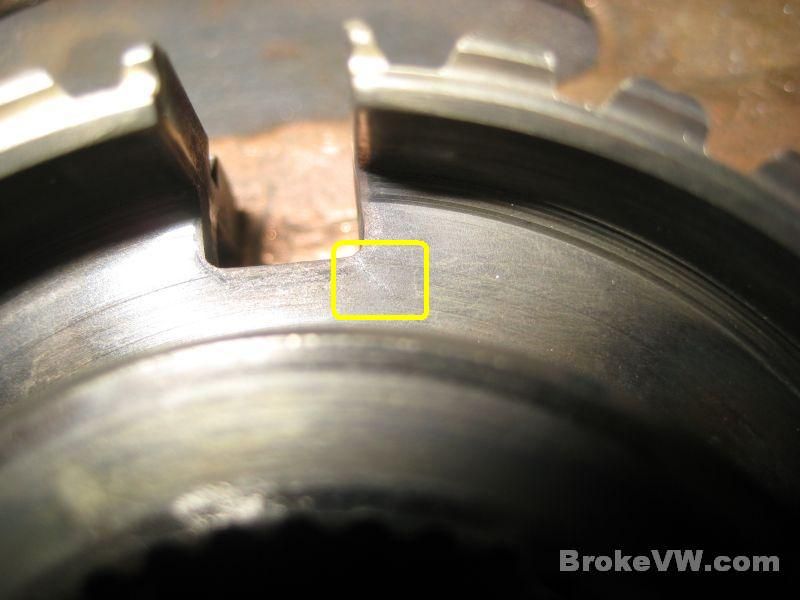
The hub hasn't been cleaned so it is hard to see, but in the middle of the yellow box is a crack leaving the corner of that hole at a 45* angle, heading almost straight down to the middle of the picture and box...

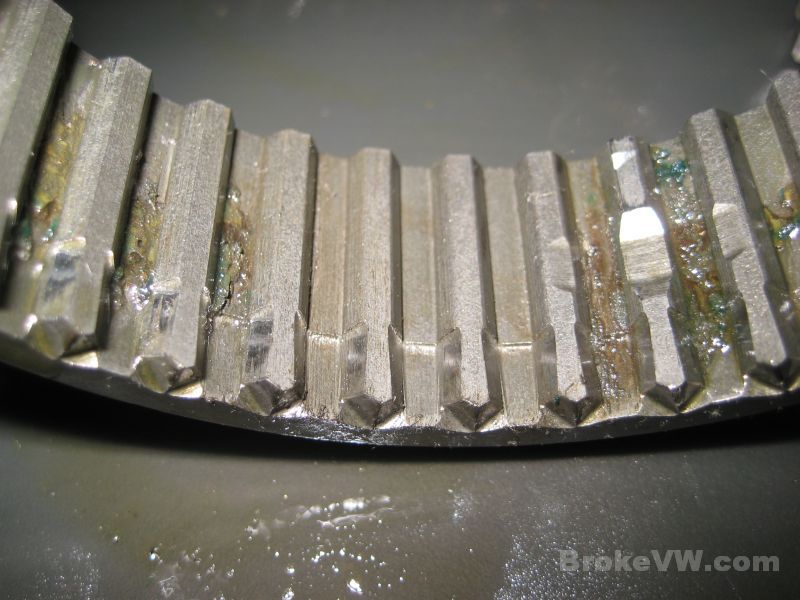
This is the same hub after quickly cleaning the area around the sync key cuts, and then rinsing and drying it off. This allows the cracks to be spotted more easily...
In this pic you can more clearly see the crack, leaving at a 45* angle from the corner of the sync key slot...
While that is bad, I have new style hubs I can swap it out with. I carried on tearing the parts down, and while giving 3rd gear a quick inspection before cleaning I found considerable wear and damage to the face of the gear that the sync ring contacts...
This is another pic of the same 3rd gear, after I attempted to clean it up a bit by polishing the surface with some 1500 grit paper wet with light oil. Normally this will remove very slight blemishes on bearing races and so on, but it really did nothing to the gear. Careful inspection shows there are pits or cavities in the surface of the gear, like old rust damage might leave...
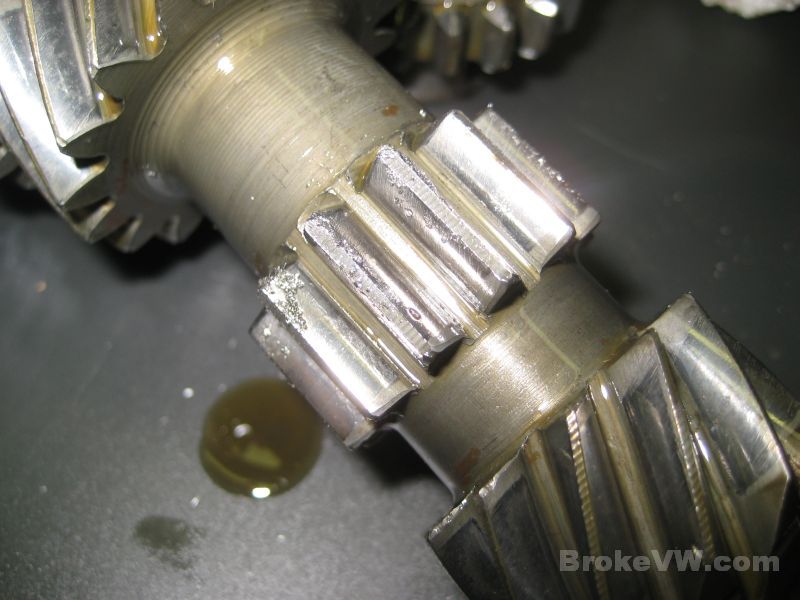
Moving onto 4th gear and it is even worse. I've not seen this much damage to the surface of the gears, at least not to this extent. It was mostly damaged, with just a few spots of original steel left. Normally I find this damage in spots, but this was around most of the gear...
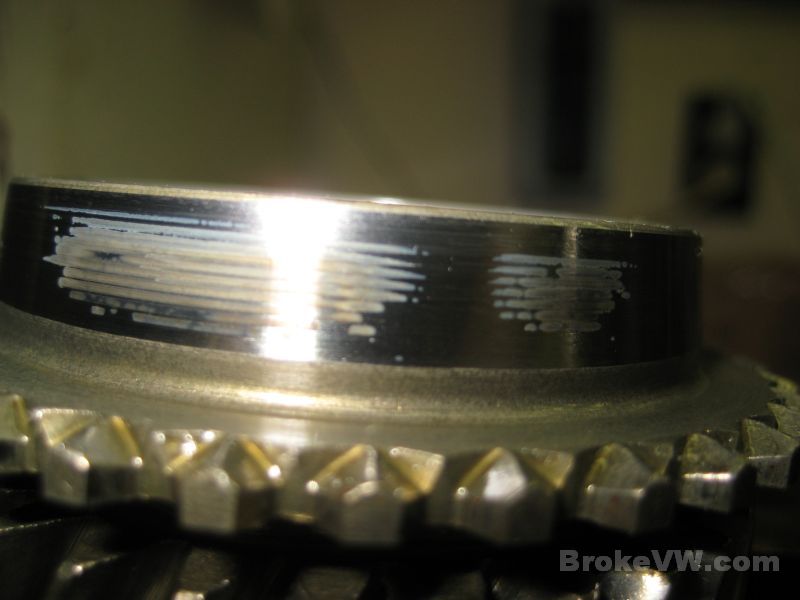
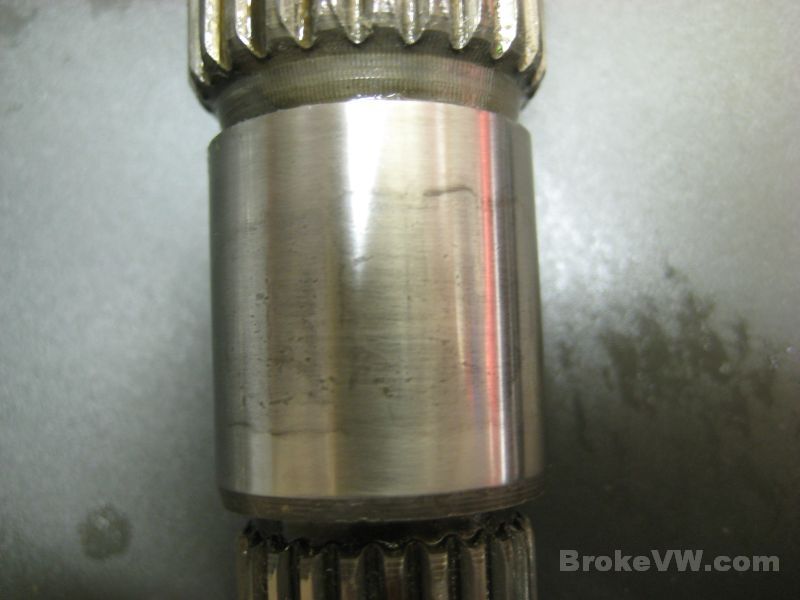
Once finding that damage, I started looking at the bearing races and running surfaces more closely. The input shaft shows damage around the race for the roller bearing, just under the small 5th gear...
This is after cleaning with the 1500 paper, it removed the light staining, but small pitting remains...
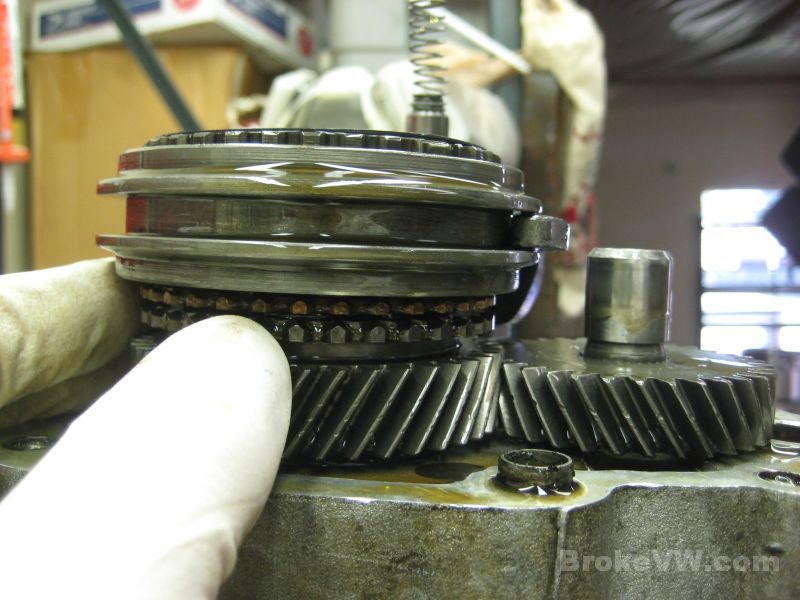
I had not torn 1st and 2nd apart after lifting them from the shaft as a unit, so I started looking at them and found the same thing... bad sync engagement areas, but the bearing races were OK. This is 2nd gear and the sync ring for it...
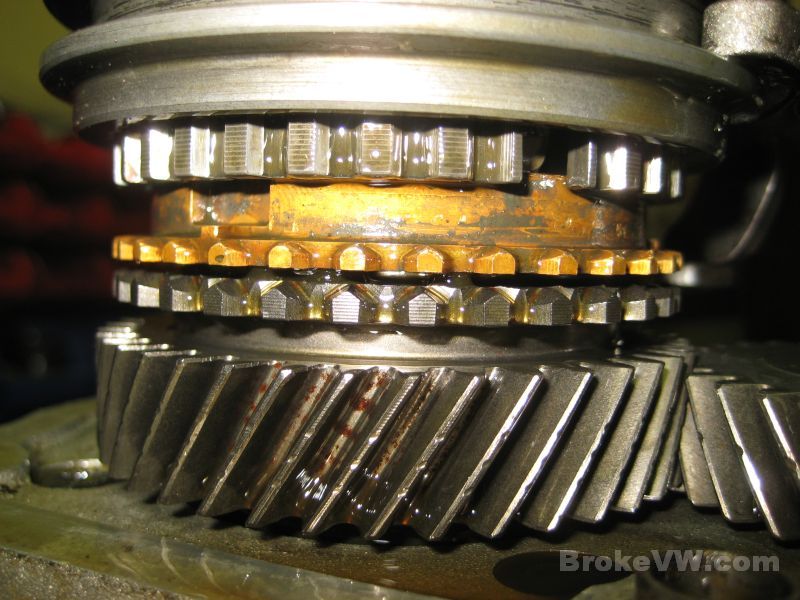
Here is 1st gear, it has been subject to grinding during selection at some point, and shows wear on the small sync engagement teeth around the top of the gear. The fibers are from a rag that were caught by the sharp edges of the rolled-over teeth, due to the grinding. No matter, really... the sync ring area is shot just like the other gears....
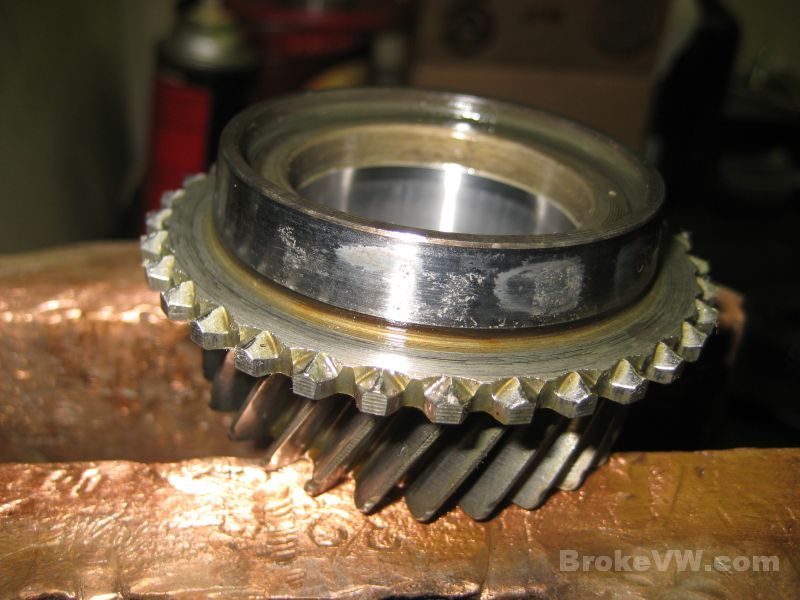
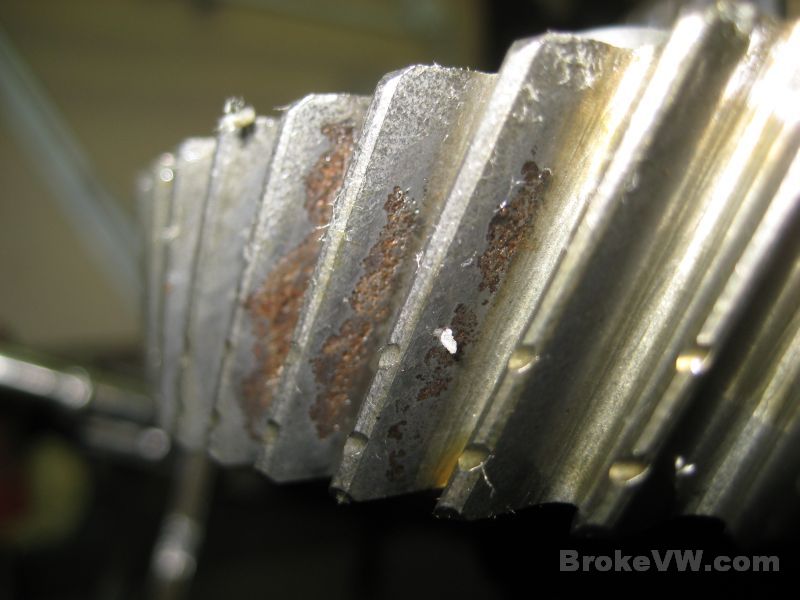
Last would be 5th, so I decided to inspect it... right away I
could tell the gear was a different set, the color of the steel was different,
and the gears looked new. Once wiped off, I could see they were indeed new, very
low miles, and they were rusted in spots, from storage before installation.
Because they are grooved for the lock clip in the MK3 and MK2 16V trans, I know
this must be a 5th swap set from Autotech, as it wouldn't be the first time I
have ran into the same storage rust from them on their 5th gear sets....
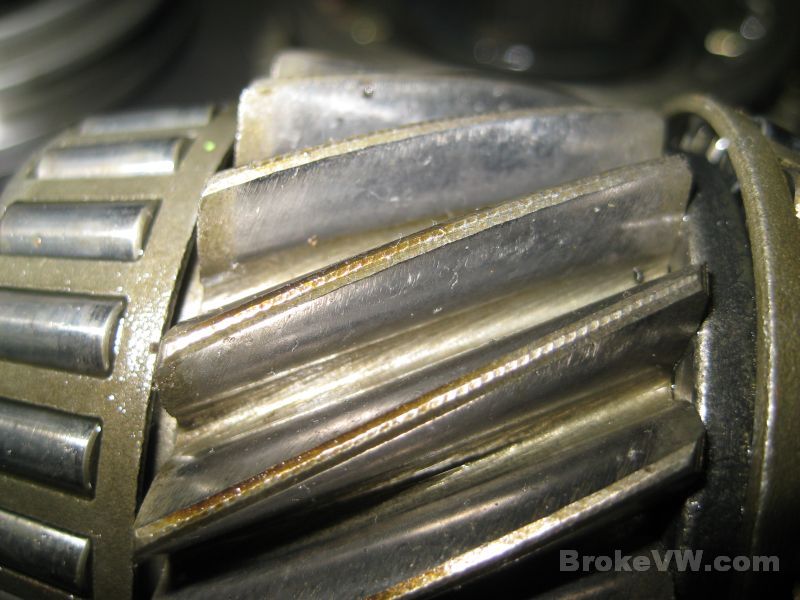
This is the rust inside the needle bearing race, it is the only gear with damage to this area...
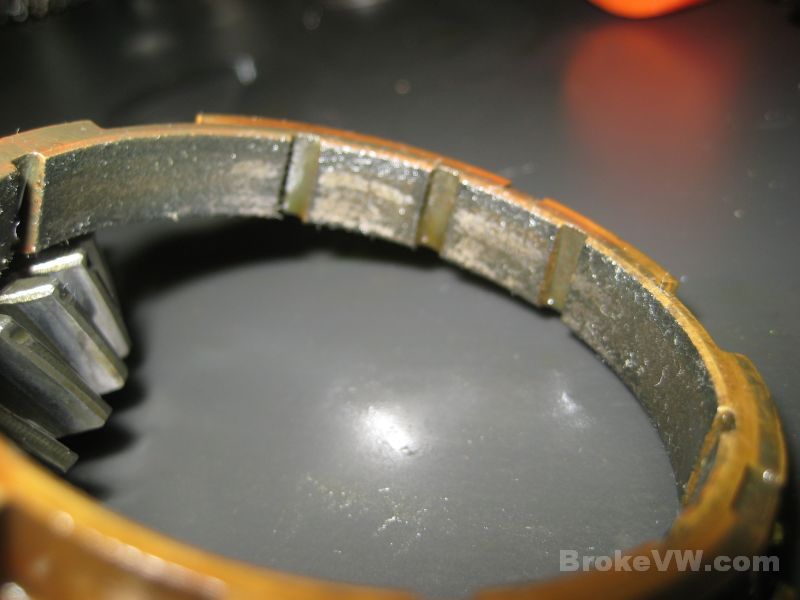
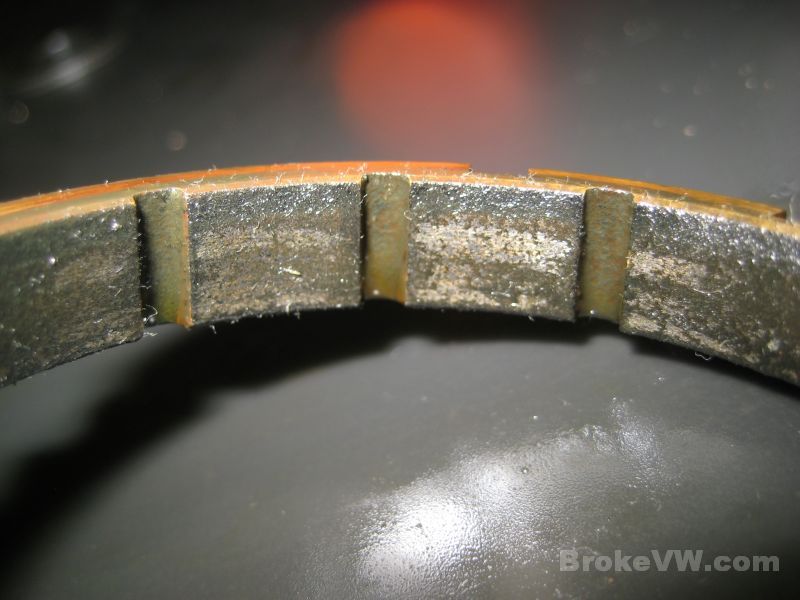
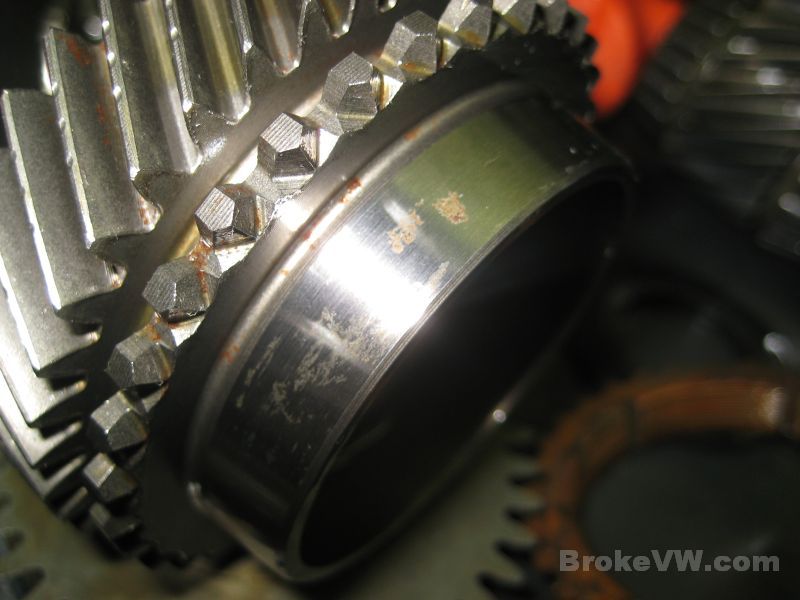
The same rust on the sync ring area of the gear... this is different damage than the other gears, but it is still damaged. Not as badly though. I normally clean these up best I can when customers send me the rusted Autotech gears to install, removing any rust prior to install so only the clean (but pitted) steel remains....
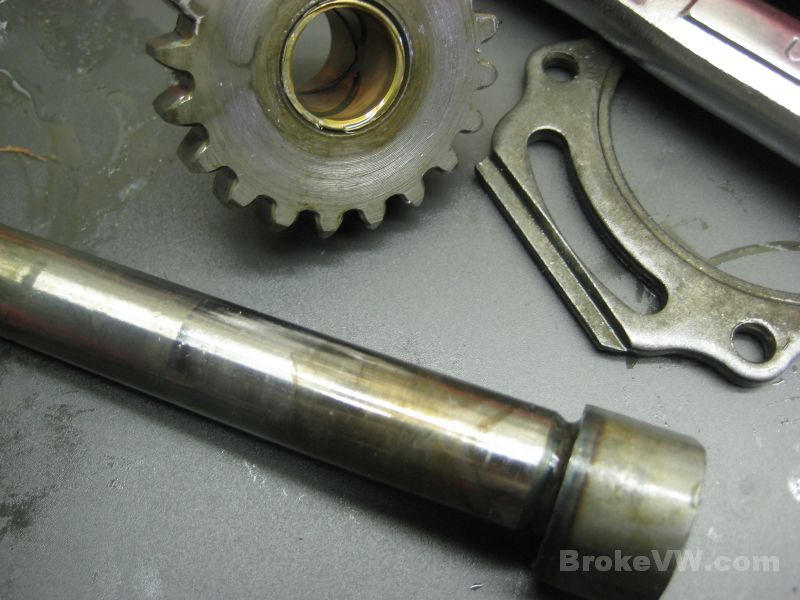
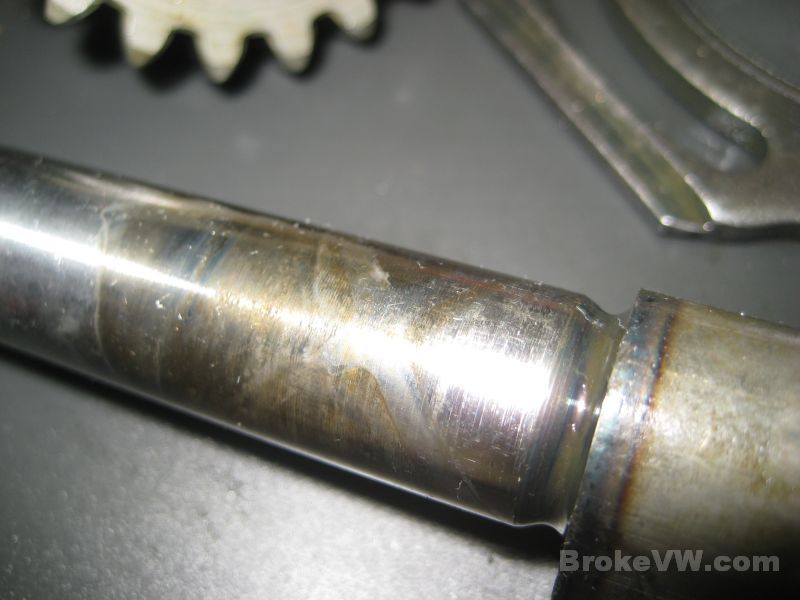
Here is the reverse shaft, I normally never see any issues with these, but this one is stained from having sat for an extended time. The X-pattern is from the inside of the gear, the bushing has oil channels cut into it in an X-pattern...
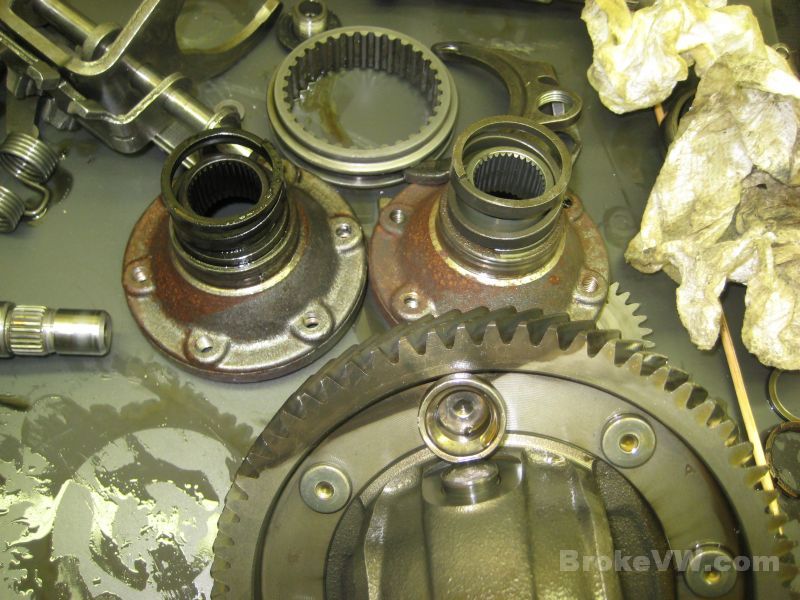
Here is a pic of the 2 differently colored flanges and the stained ring gear which indicates it has sat for an extended time with old oil in it...
This is the 5th gear sync sleeve, it had debris inside the splines, which isn't totally uncommon but it isn't good. What is strange is that this sleeve has a line cut into the low spots in the splines, and they normally do not. I wonder if this is one of the S. African or Chinese 5th sleeves that are/were available for the 020. I checked several of the old German sleeves I have, and they don't have this line. It is like the machine that cuts the side of the splines to a point went too deep between the splines, leaving that line...
I don't know that it affects anything, just something I noticed while wiping the debris away...
I'll email again when I have more info or pics...
Update 09/12/11
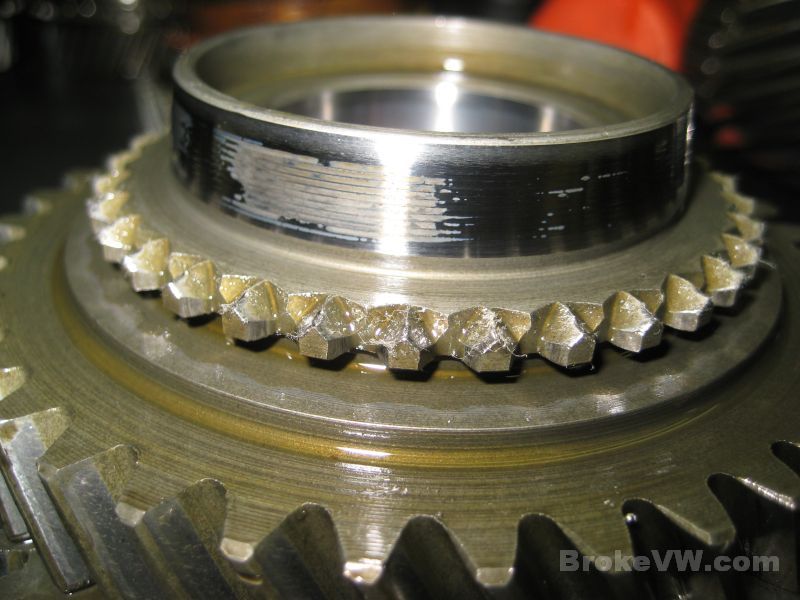
I've cleaned up that Autotech 5th gear a little. The outside where the sync ring contacts still has some very light pitting, but I think it will be OK. The inside where the needle bearing rides cleaned up a little better, but there is still some light pitting showing. Not enough to replace the gear set, so your 5th is OK....
There is some rust and light pitting on a few of the ring gear teeth. Just in the 2 spots marked in silver paint below, at about 6:00 and 9:00 roughly...
This is about the worse I saw, but I suspect I can get a good bit of that removed in the vibratory cleaner... with the few teeth being affected and the fact that this box performed satisfactorily I think you can get away with using it again. If it weren't for the fact you've told me it runs quiet, I wouldn't have used these normally.
The pinion gear doesn't show any of the same signs of being rusted or pitted...
This is the large input shaft ball bearing, I've torn it apart to inspect the balls and races. There are some signs of corrosion or staining or something present on both the balls and races, with the outer race having one bad spot, and the inner race has evenly spaced marks...
Right... so at this point it is looking like you need an input shaft and matching 1st and 2nd gears to that shaft, you need 3rd and 4th gear sets, and you need a 3rd/4th sync hub assembly. You'd also need the usual rebuild parts like the seals, gaskets, syncs, bearings, bolt kit, circlips, etc... I'll send an email with more info.
Update 09/17/11
I've got the trans stripped and have began cleaning on the internal parts tonight...
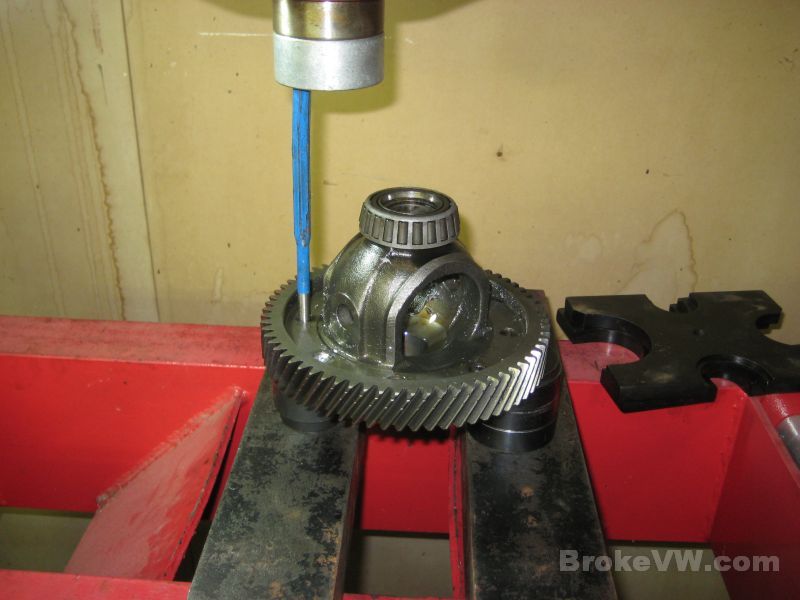
Drilling the rivets out of the diff...
With the large head rivet removed, the cross shaft is driven out and the spider gears can be removed...
Punching the rivets out of the diff...
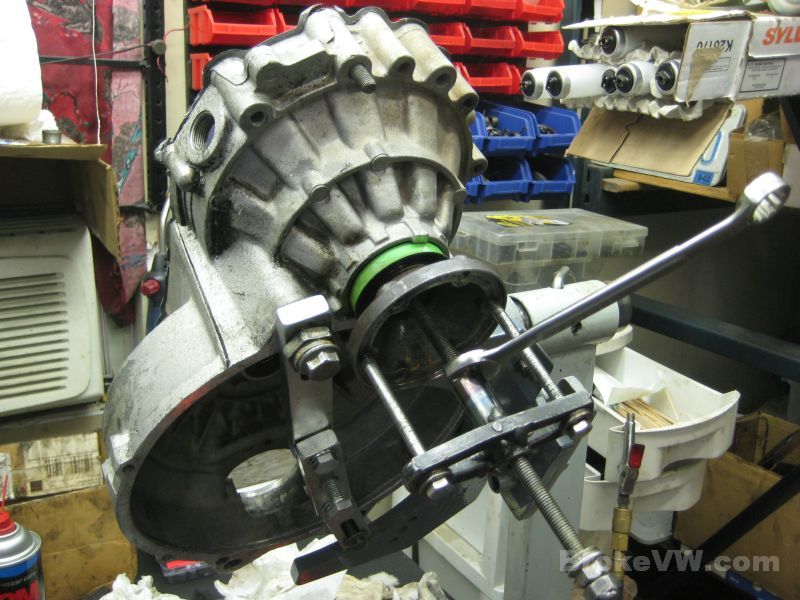
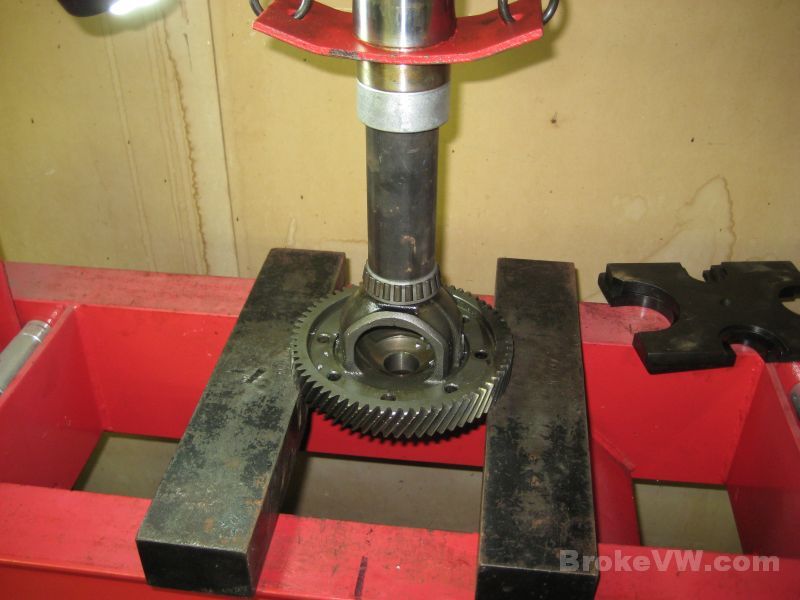
Pressing the ring gear free...
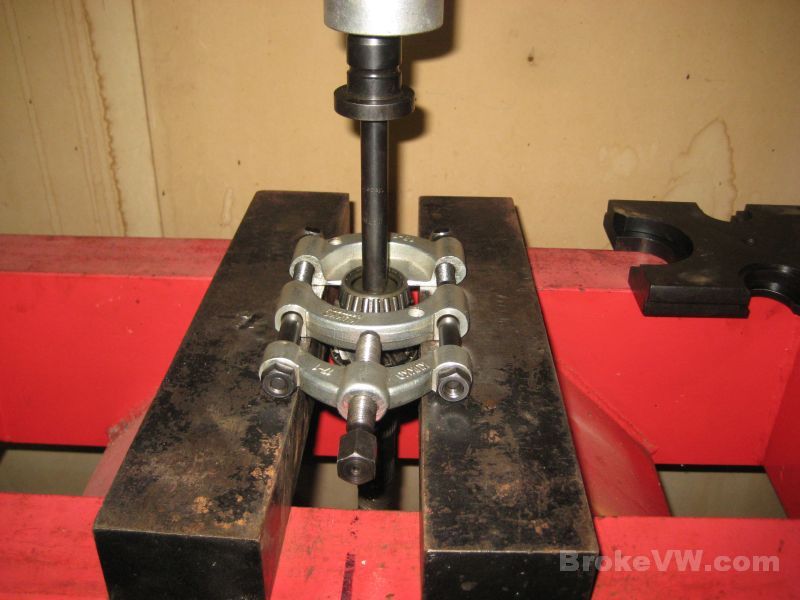
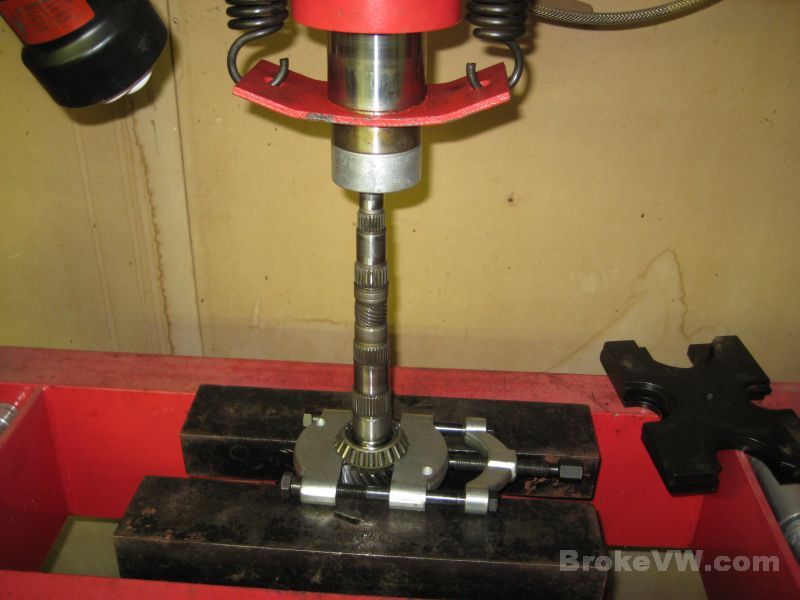
Splitting the bearings from the output shaft...
The dirty parts loaded into the vibratory cleaner to be cleaned for a couple hours...
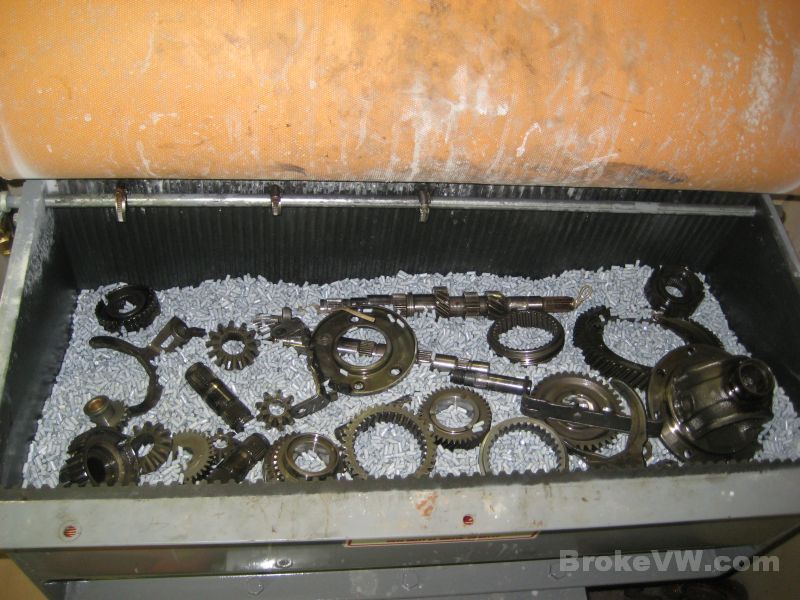
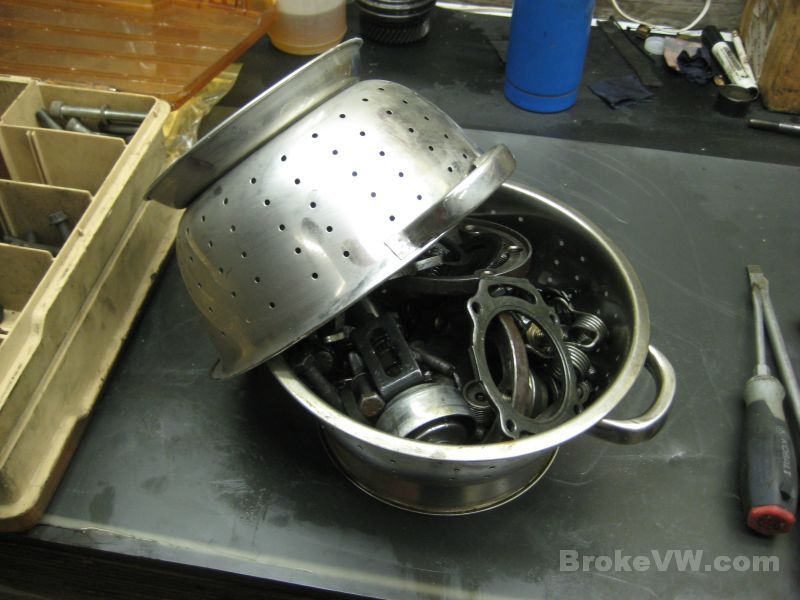
I'm trying something new, I'm going to make a capsule to hold the small parts so they can be cleaned as well without being lost in the hundreds of pounds of cleaning media. If it works, great, if it comes apart, I'll be fishing the small bolts and washers out of the cleaner for hours...
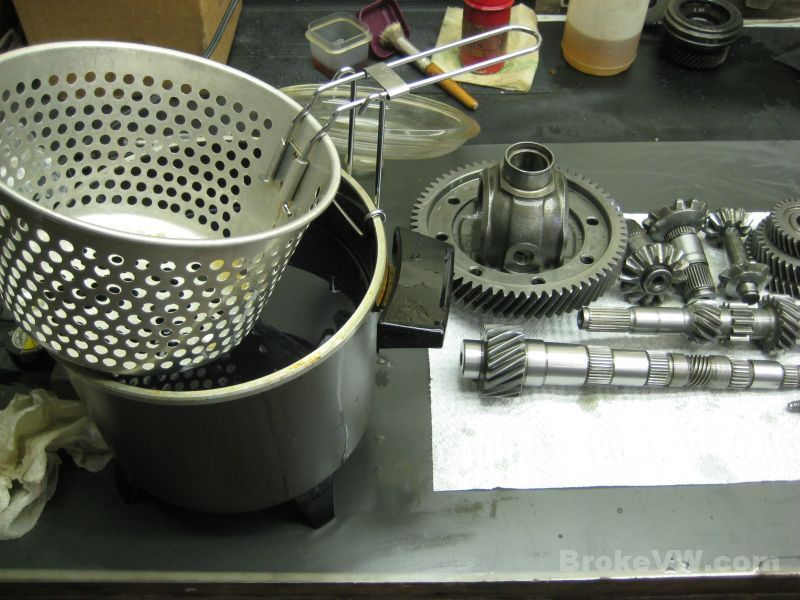
The large parts out of the cleaner, back into the parts washer to be rinsed. Next they'll be rinsed in hot running water, immediately dried with compressed air, then oiled and bagged for later...
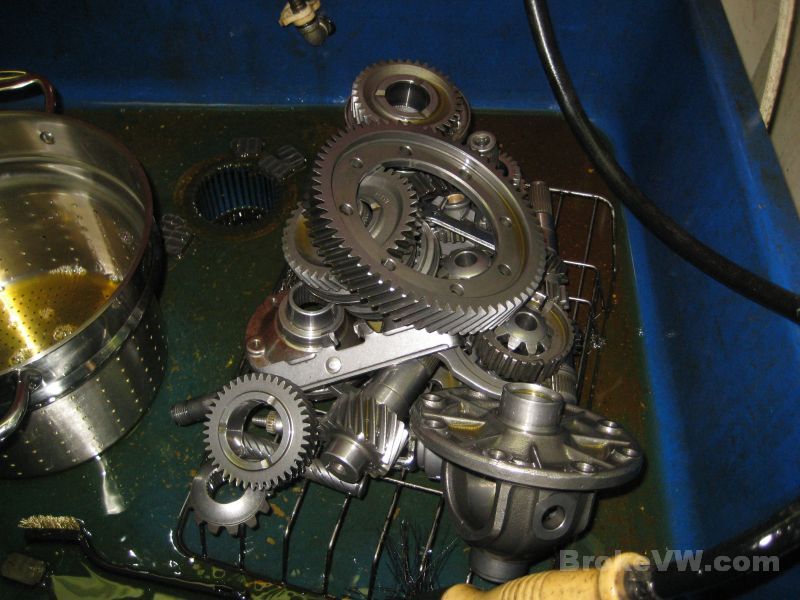
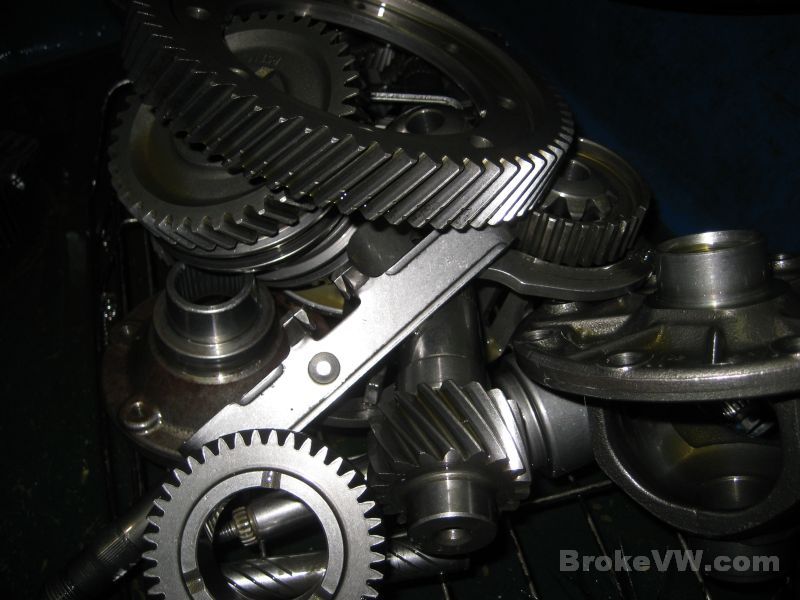
I've got the small parts in the cleaner running now, and will begin rinsing the big parts above and getting them oiled. Next will be cleaning the case inside in the parts washer, it won't fit into the vibratory cleaner and the next model up would have cost me another $3K just to fit the cases, so I got the smaller model.
Update 09/18/11
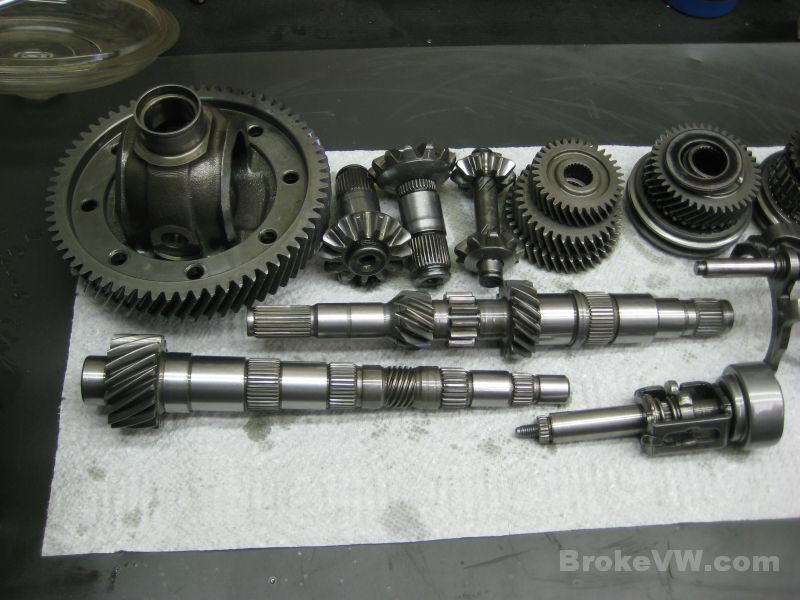
Just a few more pics showing the parts now dried...
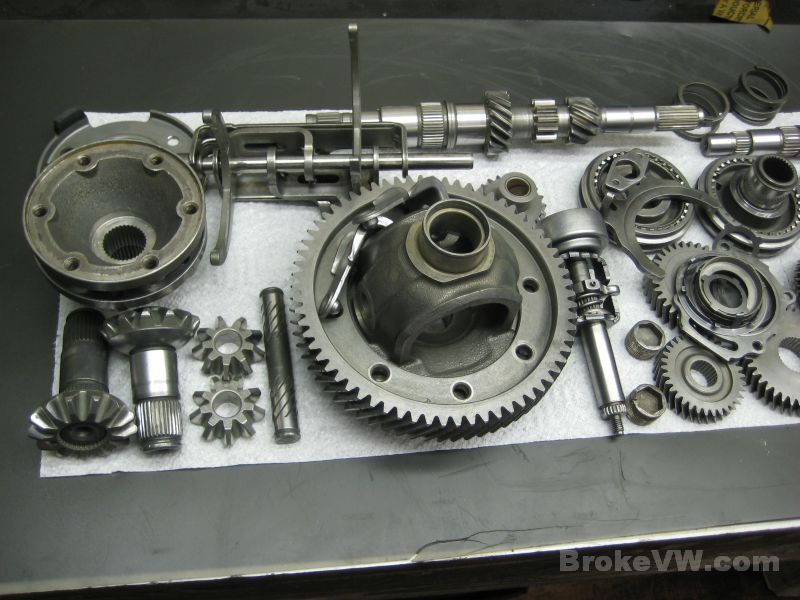
And then oiled and ready to be bagged up...

Oiling them is done in a basic kitchen fryer, just heat the oil up to 300F or so and dip the parts, letting them drain.
Update 10/04/11
The trans is done, unfortunately my camera battery packs died and I was unable to get many pics...
The casing is cleaned on the inside, even with some staining that wouldn't come out with normal scrubbing in kerosene, which removes most things from the casing. If kerosene and a brass bristle brush doesn't get it, the only thing that will is media blasting, but the inside is clean and ready for a rebuild...
The 5th housing doesn't match, but it is hard to match 2-3 decades of corrosion from one casing to the other...
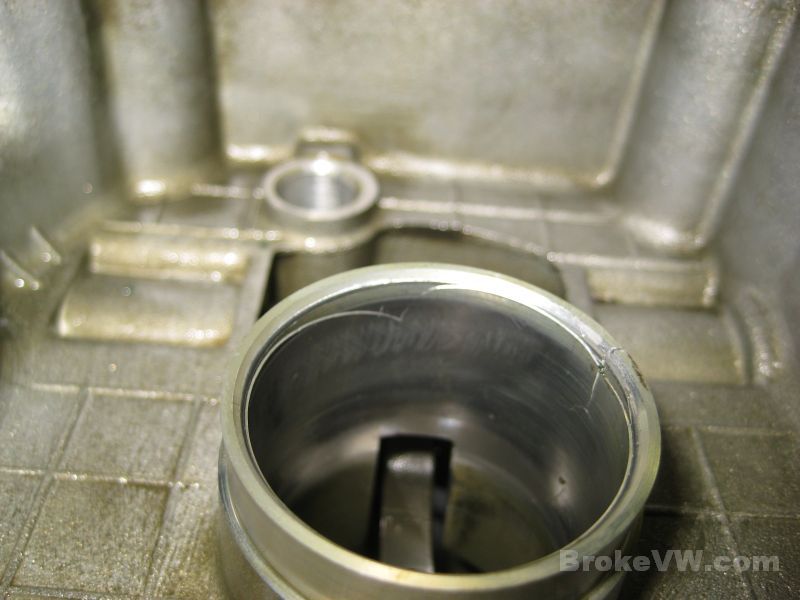
The inside is cleaned up which is what really matters...

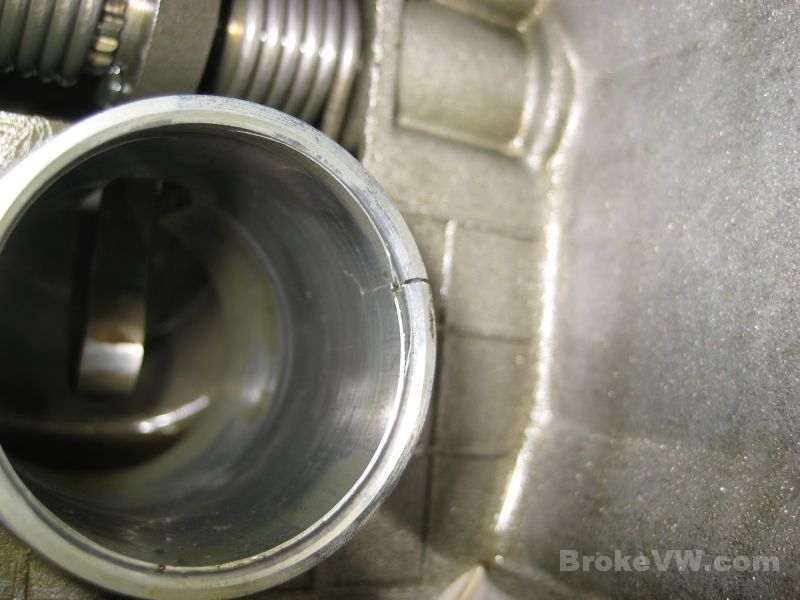
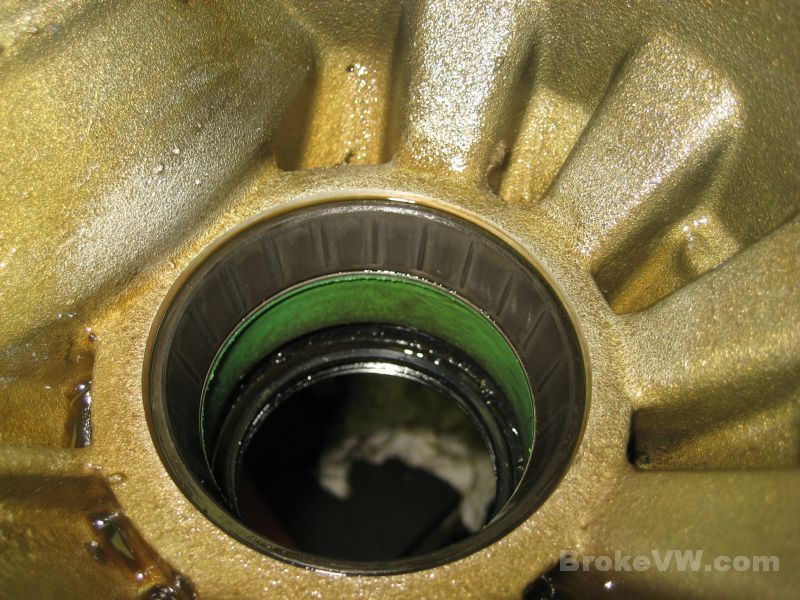
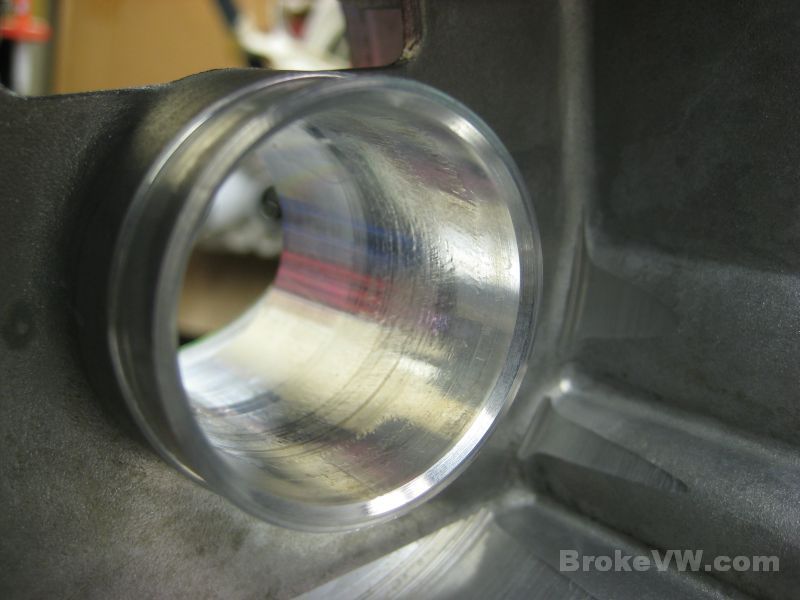
This shows the rough texture of a trans that has failed and was driven and operated with debris in the 5th housing, or the TO bearing failed and caused the marks. They are basically cosmetic though, the TO bearing slides just fine through the bore, and it isn't cracked like your old 5th housing so there isn't any chance of the bearing getting caught...
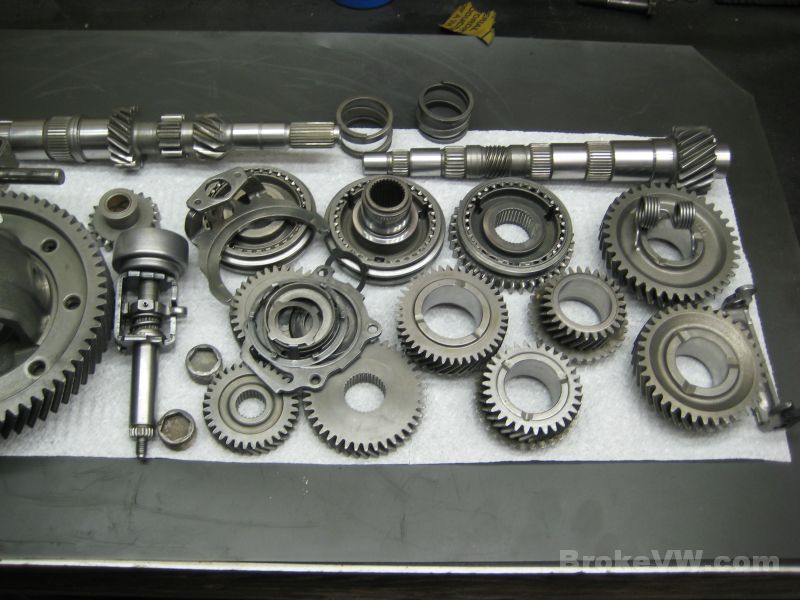
The parts cleaned and oiled and ready to be built...
This is how they are when I'm not working on them, this keeps dust from getting on the parts....
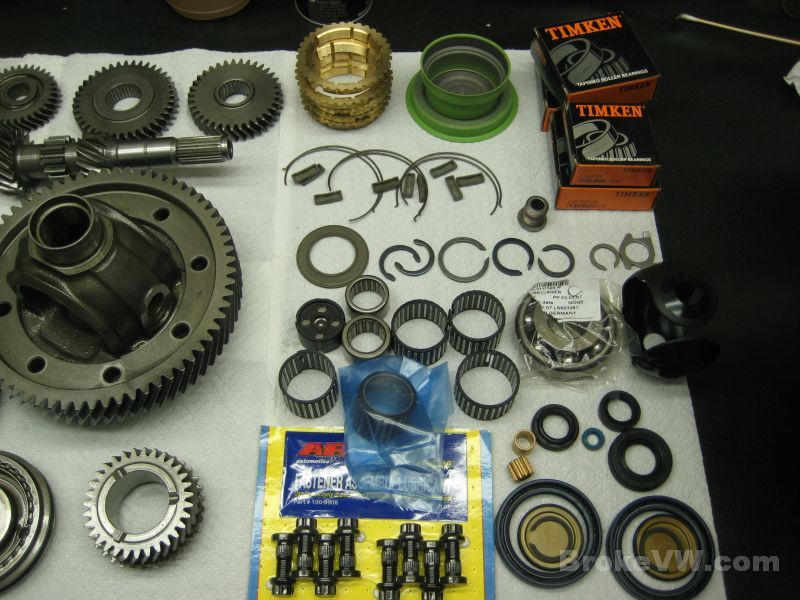
The new parts...sync rings, keys, springs, green end cap and sleeve, 4 taper bearing sets, thrust washer, circlip set, 5th bolt,5th fork lock, TO bearing, 2 shaft roller, 5 gear needles, the input ball, diff plastic thrust piece, ARP bolt kit, starter and pushrod bushings, input, selector, input shaft, pushrod, and flange seals, all ready for the rebuild...
A pic of the completed 5th assembly...
On the bench and out of focus are the completed shift fork assembly, and in the vise is the input shaft, the pushrod bushing is being installed. There is an old pushrod being used to support the inside of the bushing as it is driven in, so it doesn't distort as it is soft bronze...
And that is it unfortunately. This is the 1st time I have ever
built a trans without the usual accompanying pictures of the build.
Both packs died on me and I have no other camera, so I had to finish building
without further pictures.
The drain plugs are hand tight because it needs filled with oil. Run it easy shifting slowly and at lower RPMs than usual to allow the new sync rings to seat properly. Drain the oil after 500 to 1000 miles and replace with fresh oil. Gold sparkles are normal from the new parts bedding in. Silver is bad. Chunks of any color are also bad :)
Thanks!